
Before this: What is Session Settings, How to Use General (Main) Tab?
The Survey tab in the session settings allows you to display a short survey / data collection form to guests during the event session and collect feedback by name, email, phone, free text and optional questions. You open the survey, enter the title and subheading, choose when the form will appear (on the start screen or after capture), and set up your form from 6 field types; All changes are automatically saved without a separate save button.
- An event must be created and selected
- Settings → Session page must be open (General, Survey, Disclaimer, Payments tabs appear at the top)
step by step
Step 1 · Open Survey tab
Session → Survey
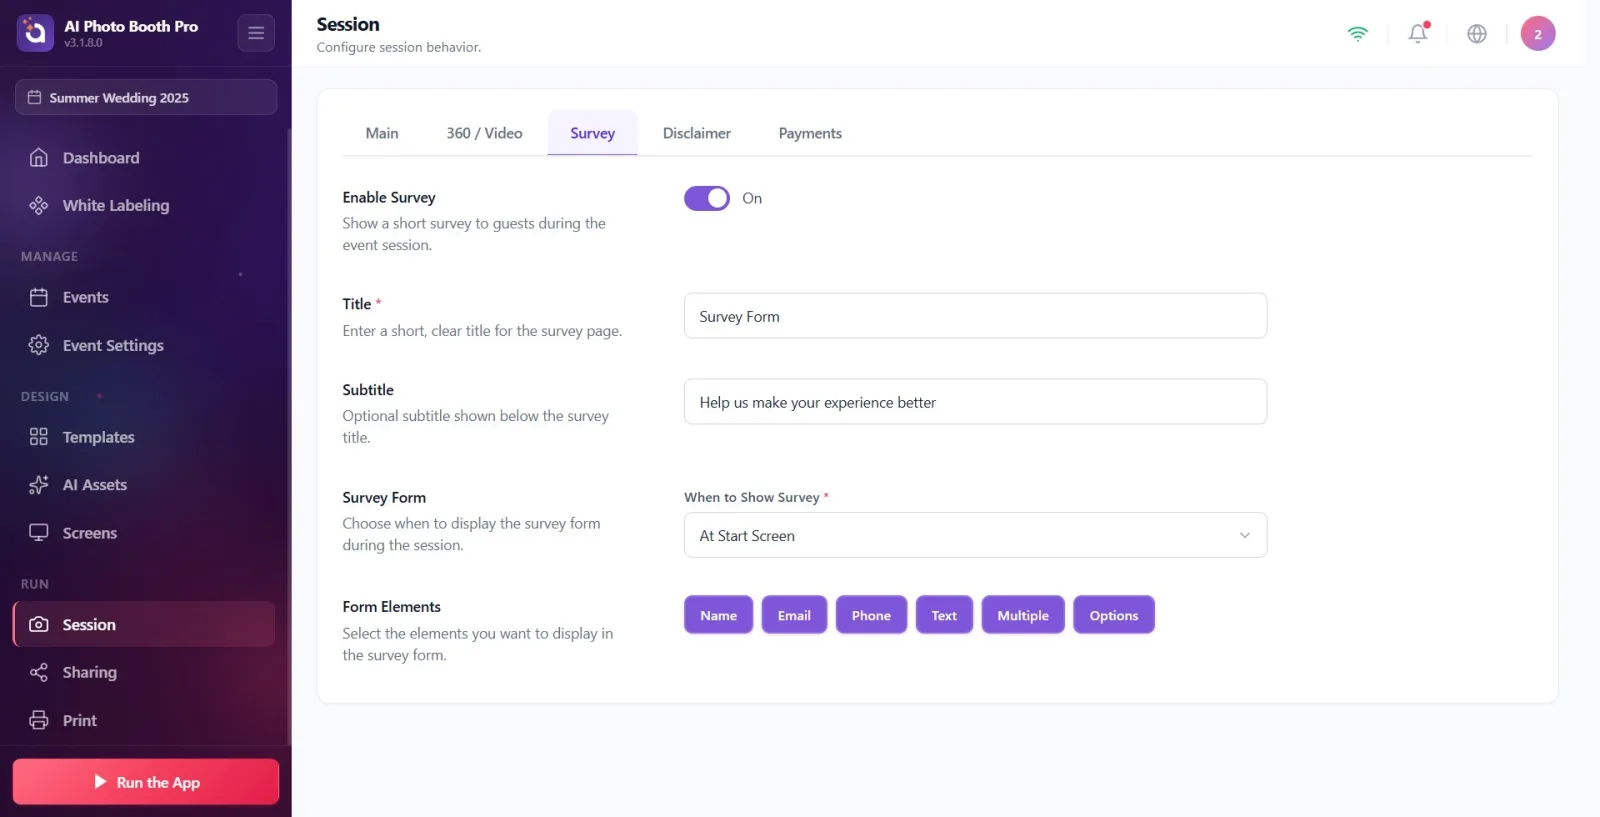
Open the Session page from the settings menu. The tab strip at the top of the card contains tabs General, Survey, Disclaimer, and Payments. Click the Survey tab — the survey configuration screen opens.
🔎 Items on the screen: Tab strip: General / Survey / Disclaimer / Payments. Page title Session, subtitle Configure session behavior.
Step 2 · Activate survey
Session → Survey
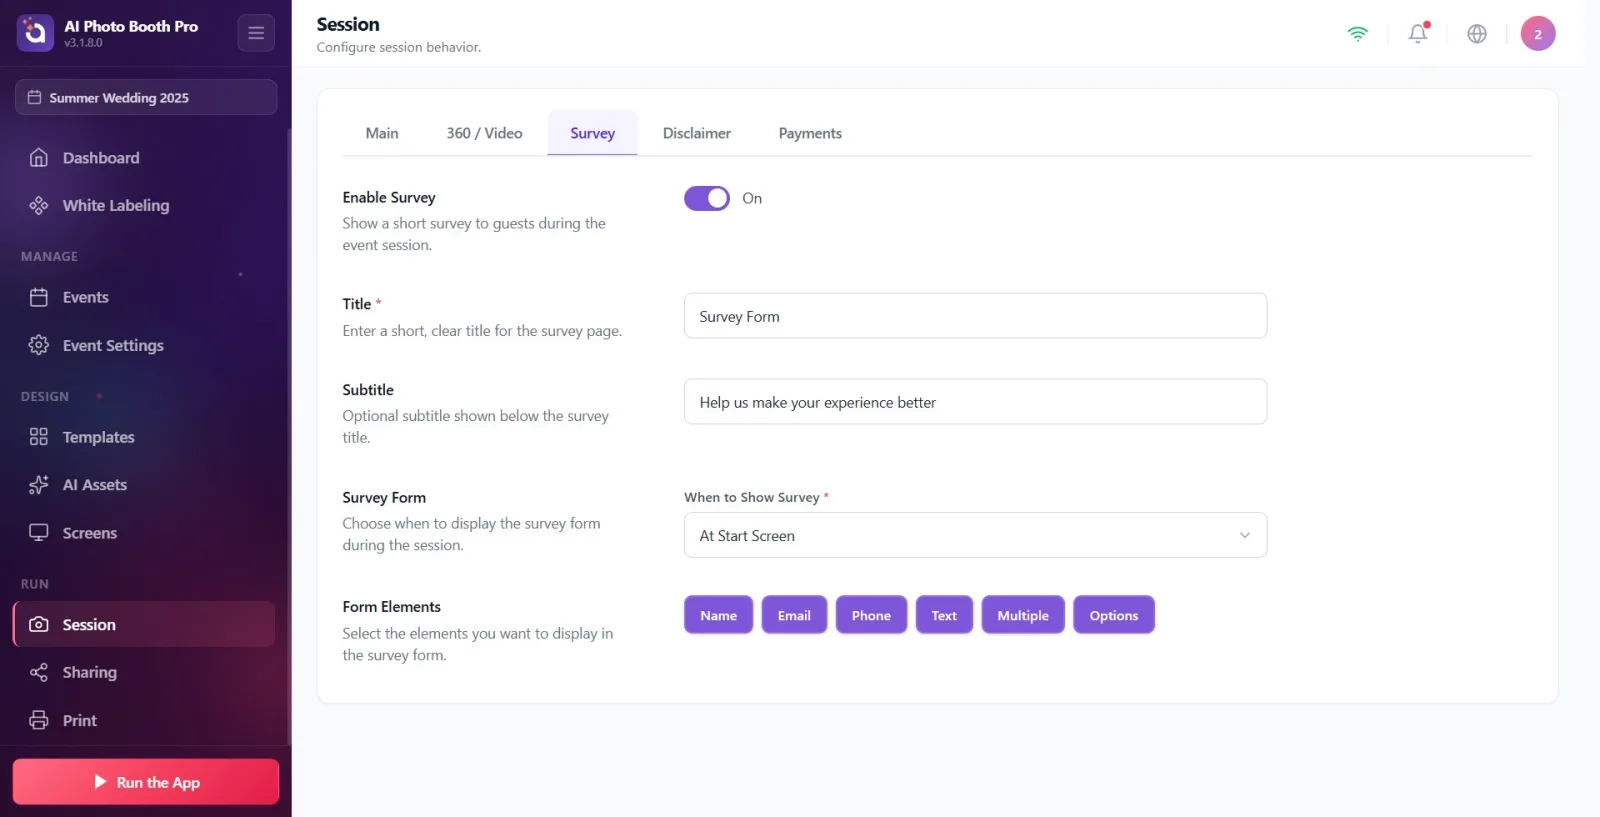
Move the on/off switch in the top Enable Survey section to the On position. When the key is Off, no other settings appear in the tab; When you do On, the Title, Sub-Title, showtime (Survey Form) and Form Elements sections appear immediately.
🔎 On-screen items: Enable Survey title + description 'Show guests a short survey during the event session.'; On/Off switch.
Step 3 · Enter title (required)
Session → Survey
In the Title field, write a short and clear title for the survey page (e.g. a question or invitation text). This field is marked mandatory with a red asterisk (*). If you leave it blank, the guest will be shown Survey Form by default, although it is recommended that you fill it in. The tooltip (placeholder) in the text box is Survey Form.
🔎 Elements on the screen: Title label + red '*'; description Enter a short, clear title for the survey page.; hint text Survey Form.
Step 4 · Enter subheading (optional)
Session → Survey
In the Subtitle field, write a descriptive line that will appear below the title. This field is optional (not required). The tooltip text is Help us make your experience better; You can leave it blank or enter your own text.
🔎 Elements on the screen: Subtitle label; description Optional subtitle shown below the survey title.; hint text Help us make your experience better.
Step 5 · Choose when to show the poll
Session → Survey
Use the When to Show Survey drop-down menu (mandatory, red *) in the Survey Form section to choose one of two options: At Start Screen → the survey will be shown on the splash screen before shooting starts; After Capture → the poll is shown on the sharing screen after the photo is taken. The default is At Start Screen.
🔎 Items on the screen: Survey Form section + description 'Choose when to show the survey form during the session.'; 'When to Show Poll' drop-down menu; options are 'On Start Screen' and 'After Capture'.
Step 6 · Add form elements (field types)
Session → Survey
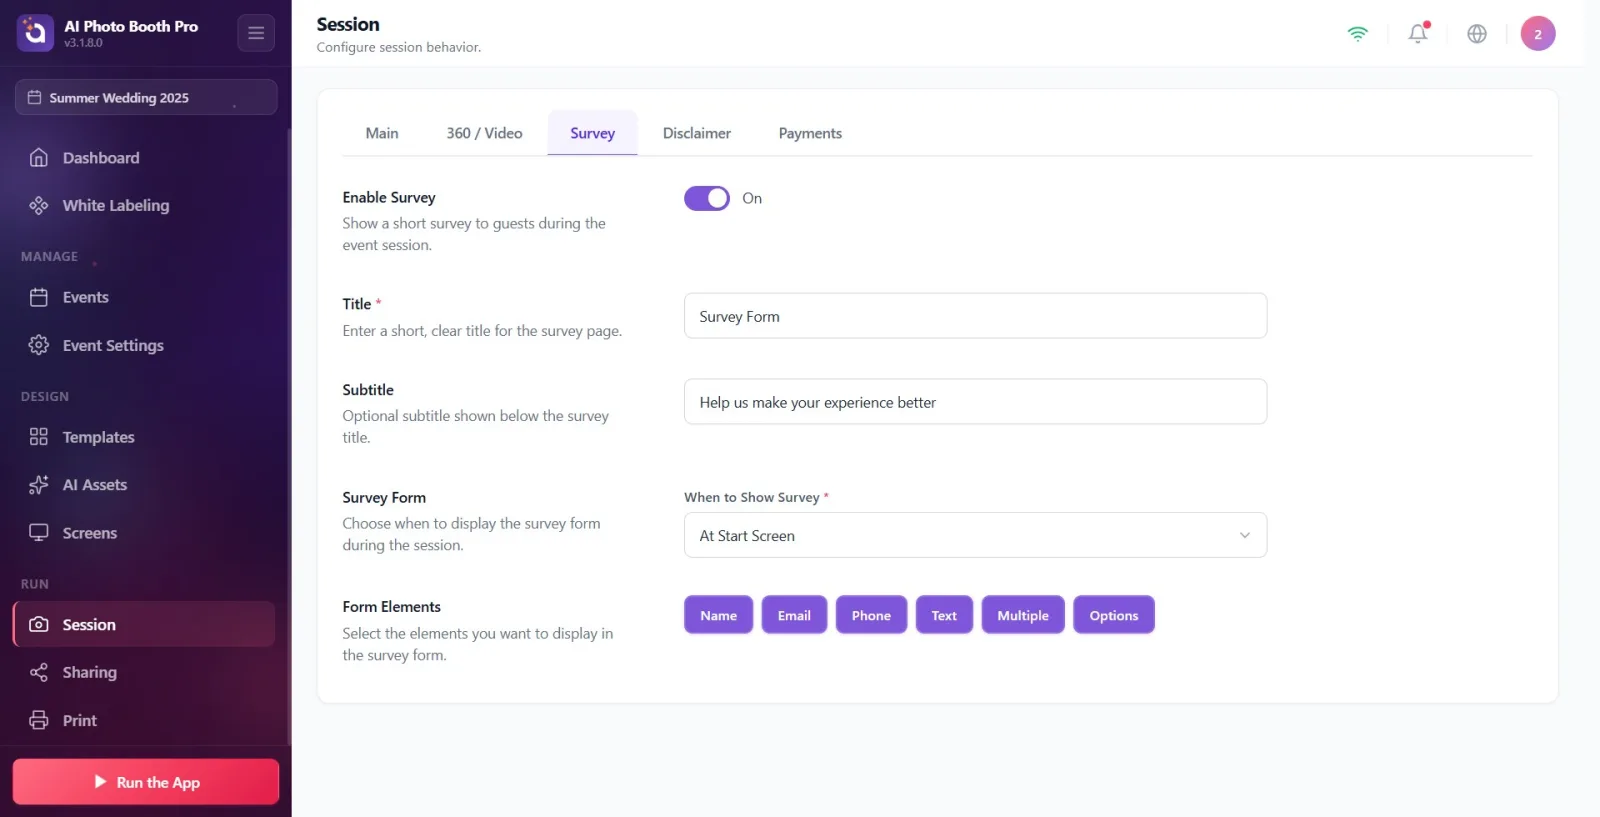
In the Form Elements section, click the label button for the field type you want to add — each click adds a field row of that type to the form. There are six types: Name (text field for guest's name), E-Mail (email field), Phone (phone field), Text (free text field), Multiple (list field with sub-options), and Options (list field with sub-options). You can add multiple fields of the same type.
🔎 Elements on the screen: title Form Elements + description Select the elements you want to display in the survey form.; label buttons: Name, E-Mail, Phone, Text, Multiple, Options.
Step 7 · Edit field label (question)
Session → Survey
Each added field is listed as a row; Write the actual tag / question text to be asked to the guest in the text box on the line. The small title at the top of the box indicates the type of the field (e.g. Name), and this type label does not change as you edit the box — only the text you enter in the box is the label that appears to the guest. The box hint is the same as the type name of that field.
🔎 Elements on the screen: Field row: type title (e.g. Name / E-Mail) at the top, editable text box below; box hint = type name .
Step 8 · Make the field required
Session → Survey
To enforce a field so guests can't pass through it, click the star button (Required) in that field row. When active, the star fills and a red '*' appears next to the domain name; Clicking again removes the obligation. (Note: Title and When to Show Survey settings are already marked with a solid red '*' — these are mandatory for configuration.)
🔎 Elements on the screen: Asterisk (★) button in the field row, hint Required; filled asterisk + red '*' next to domain name when active.
Step 9 · Manage options in fields with options (Multiple / Options)
Session → Survey
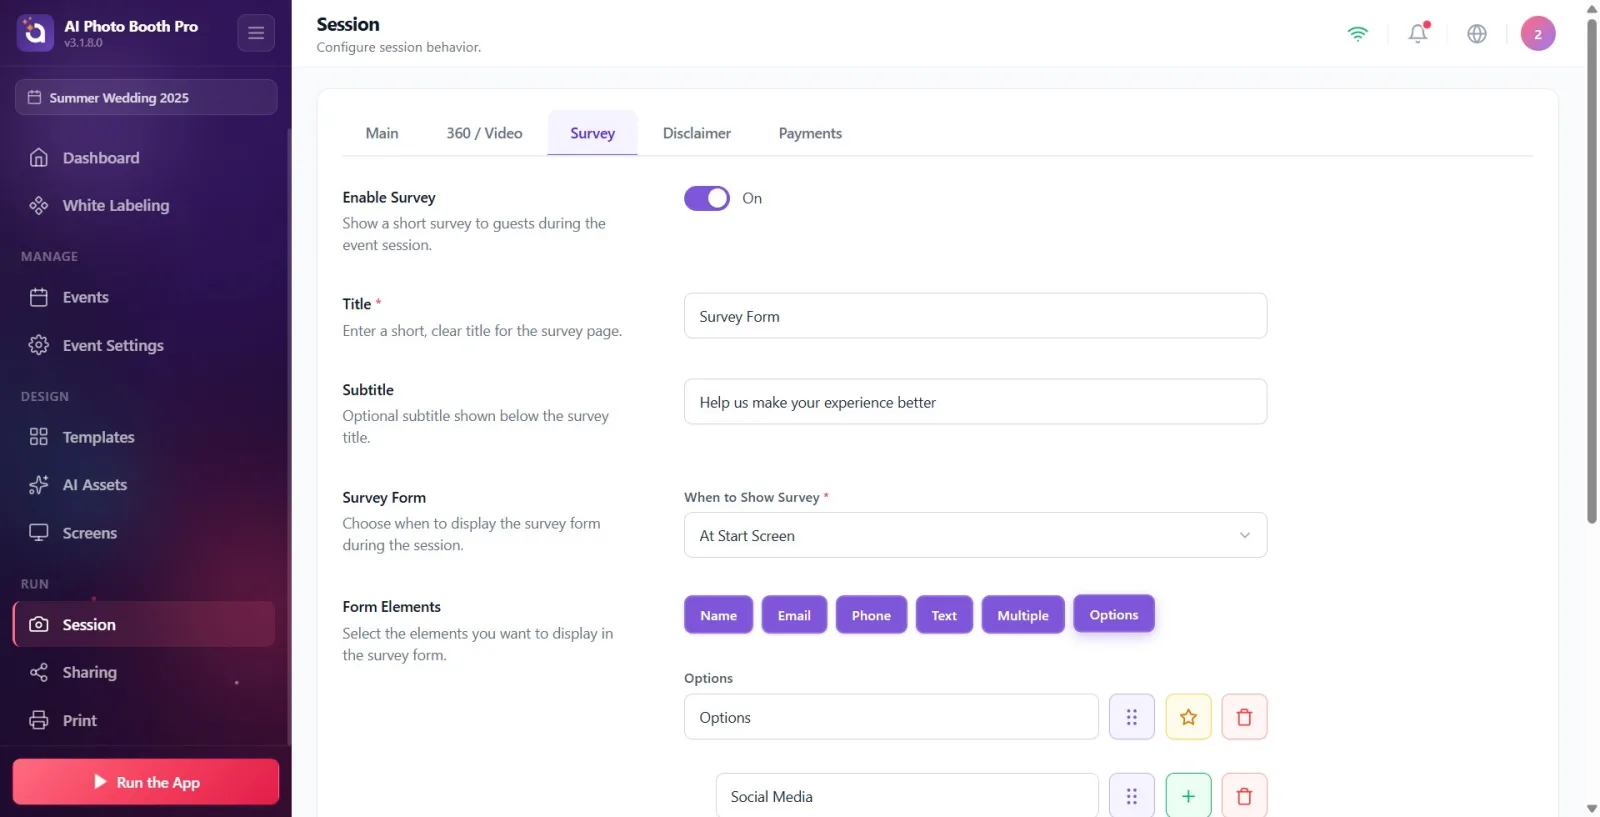
When you add a field of type Multiple or Options, option lines appear below the field and come with ready-made defaults. Options defaults: Social Media, Friend, Website, Event Listing, Other. Multiple defaults: Photo Quality, AI Effects, Speed, Fun Factor. Edit the text of each option from its box; add new option with plus (+) button (new option comes numbered like 'Option 6'); delete option with trash can button.
🔎 Elements on the screen: Rows of options under the field: text box + plus (+) insert button + trash (delete) button + drag handle. Default options are pre-populated based on the field type.
Step 10 · Reorder (drag) fields and options
Session → Survey
To change the order of fields or options for a field, grab the dotted drag handle (hint Drag to reorder) on the relevant row and drag up/down. The fields are reordered among themselves, and each option is reordered only within its own field.
🔎 On-screen elements: Dotted drag handle icon in each field row and each option row; hint Drag to reorder.
Step 11 · Delete field or option (confirmed)
Session → Survey
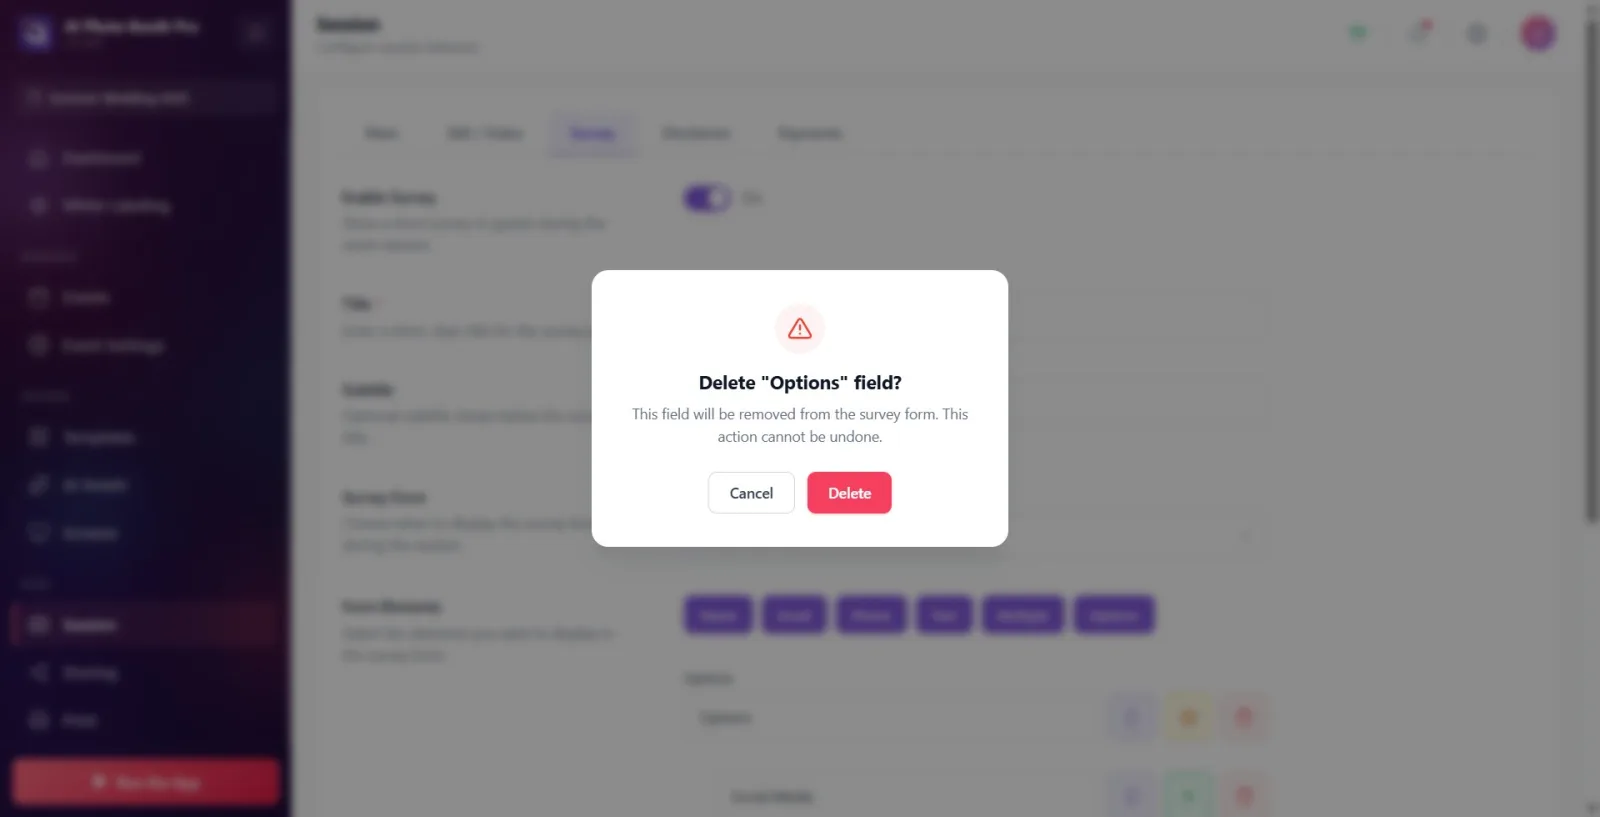
To remove a field, click the trash (Delete) button in the row; The title of the warning window that opens contains the name of the field to be deleted (e.g. 'Delete namespace?') and the description is 'This field will be removed from the survey form. This cannot be undone.' It is in the form. Press 'Delete' to remove or 'Cancel' to cancel. The same confirmation appears when deleting an option (header includes option name, e.g. 'Delete other option?').
🔎 Items on the screen: Trash button in row (hint Delete); confirmation window title 'Delete {domain}?' / 'Delete {option}?', description 'This field will be removed from the survey form. This cannot be undone.', buttons 'Delete' and 'Cancel'.
Step 12 · Changes are automatically saved
Session → Survey
There is no save button on this tab. Changes to the key Enable Survey, Title, Subtitle and When to Show Survey are saved immediately; Field and option edits (add, tag change, required, sort, delete) are automatically saved approximately 0.5 sec after you stop typing. You can make the setting and exit the tab.
🔎 On-screen elements: There is no separate save button; all changes are written automatically (~0.5 sec delay for form elements).
There is no save button — every change is automatically saved (~0.5 sec after the form element stops typing edits).
At Start Screen shows the survey before the shot, After Capture in the sharing screen (after the photo is taken) — think about which one fits your flow.
The Multiple and Options fields come with ready-made default options; freely edit them, delete them or add new option with '+'.
If Title is left blank, the guest will be shown Survey Form by default; However, it is recommended that you enter your own title (marked required).
If you set a field to Required, the guest cannot continue without filling in that field (an asterisk fills in, a red '*' appears next to the field name).
You can add multiple fields of the same type (e.g. two separate Text questions); Edit each row's label separately.
You can reorder both the fields and each field's options from the drag handle.
Searching for settings without making the switch On: When Enable Survey is off, none of the Title, showtime, and Form Elements sections are visible.
Mixing When to Show Survey options: At Start Screen = splash screen before capture, After Capture = share screen; wrong choice poll shows at unexpected moment.
Look for a save button: changes are saved automatically, there is no separate save step.
When you type in the text box in the field row, you are surprised to see that the type label at the top (e.g. Name) does not change: the title at the top indicates the field type; The text you enter in the box is the actual tag asked to the guest.
Deleting all options in the Multiple / Options field: the list field without options appears empty to the guest — leave at least a few options.
Forgetting that deletion is irreversible: After confirmation Delete the field or option is permanently removed (you can opt out with Cancel).
Related topics
Session Settings Disclaimer
