
Before this: How to Create an Event?
A template is the output design (layout) that your captured photo or video is placed into. It consists of a canvas size (e.g. 4×6, 6×4, 2×6 strip, 5×7), a background color, and layers: photo/capture slots, text, logo, shapes, QR code, and AI effect/FaceSwap/AI video layers. The number of capture slots in a template determines how many frames are captured in a session; the captured media fills these slots, and the result becomes a single output — at the template's size — ready to print or share. Templates are managed from the Templates page. Active Templates are the templates that have been activated for the currently selected event. This document is conceptual: it is not a how-to, but explains what a template is and what it is for.
- There must be a selected (active) event — the Active Templates list is always tied to the current event; if no event is selected, the list is empty or looks different.
- The Templates page is opened from Settings (Templates / Manage your output templates.).
- The output type (photo, or video/GIF) is determined by the event's capture mode; the template type is chosen to match it.
Step by step
Step 1 · What is a template? (the design your captured media sits inside)
Templates (Settings > Templates)
The user understands that a template is not just a 'frame image' but the complete output design that the captured media sits inside.
🔎 On-screen elements: Conceptual — there is no specific button. A template's components: canvas size (OutputSize), background color, layers (photo/capture slot, text, logo, shape, QR, AI effect/FaceSwap/AI video).
Step 2 · The Templates page and tabs
Templates
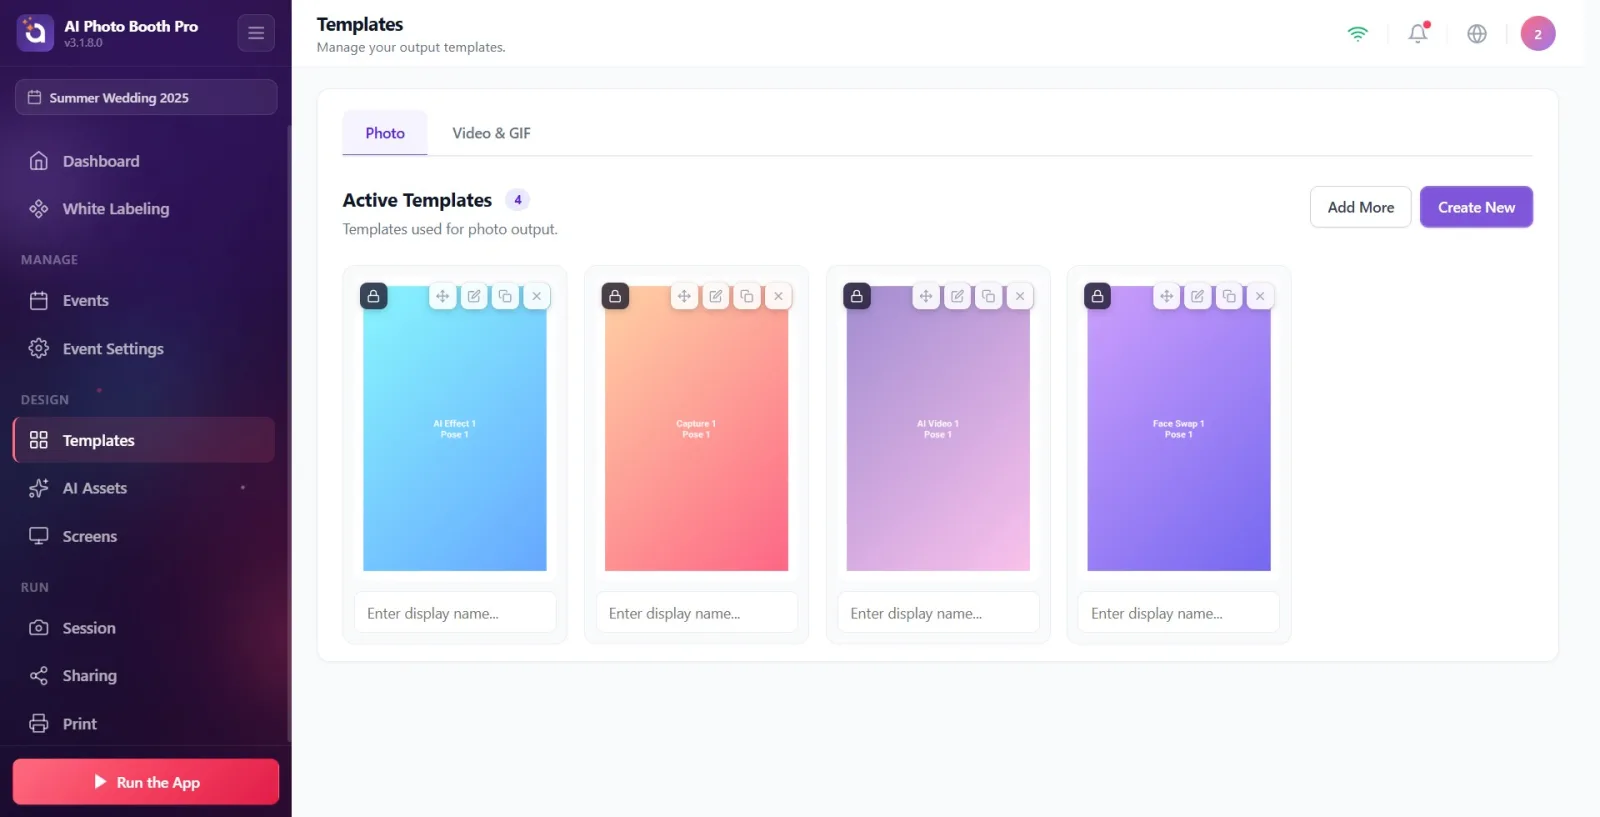
The user opens the Templates page; from the tabs at the top they switch to the template list by output type and see the Active Templates cards.
🔎 On-screen elements: Tabs: Photo and Video & GIF. Heading: Active Templates with a counter badge beside it. On the right, Add More and Create New buttons. Sub-caption: Templates used for photo output. / Templates used for video output.
Step 3 · The three template types and their differences
Templates
The user selects the template type appropriate for the output type.
🔎 On-screen elements: Photo (TemplateType.Photo) — for photo output. Video & GIF (TemplateType.GifVideo) — for video/GIF output. Video Print (TemplateType.VideoPrint, Video Print Templates) — a separate type for turning a frame selected from a video into a print. Photo and Video & GIF appear as tabs on the main page; Video Print is a separate template type.
Step 4 · Default (locked) templates in Active Templates
Templates
The user sees the active templates added to the event and notices that when they try to edit a ready-made/locked template, a copy is created automatically.
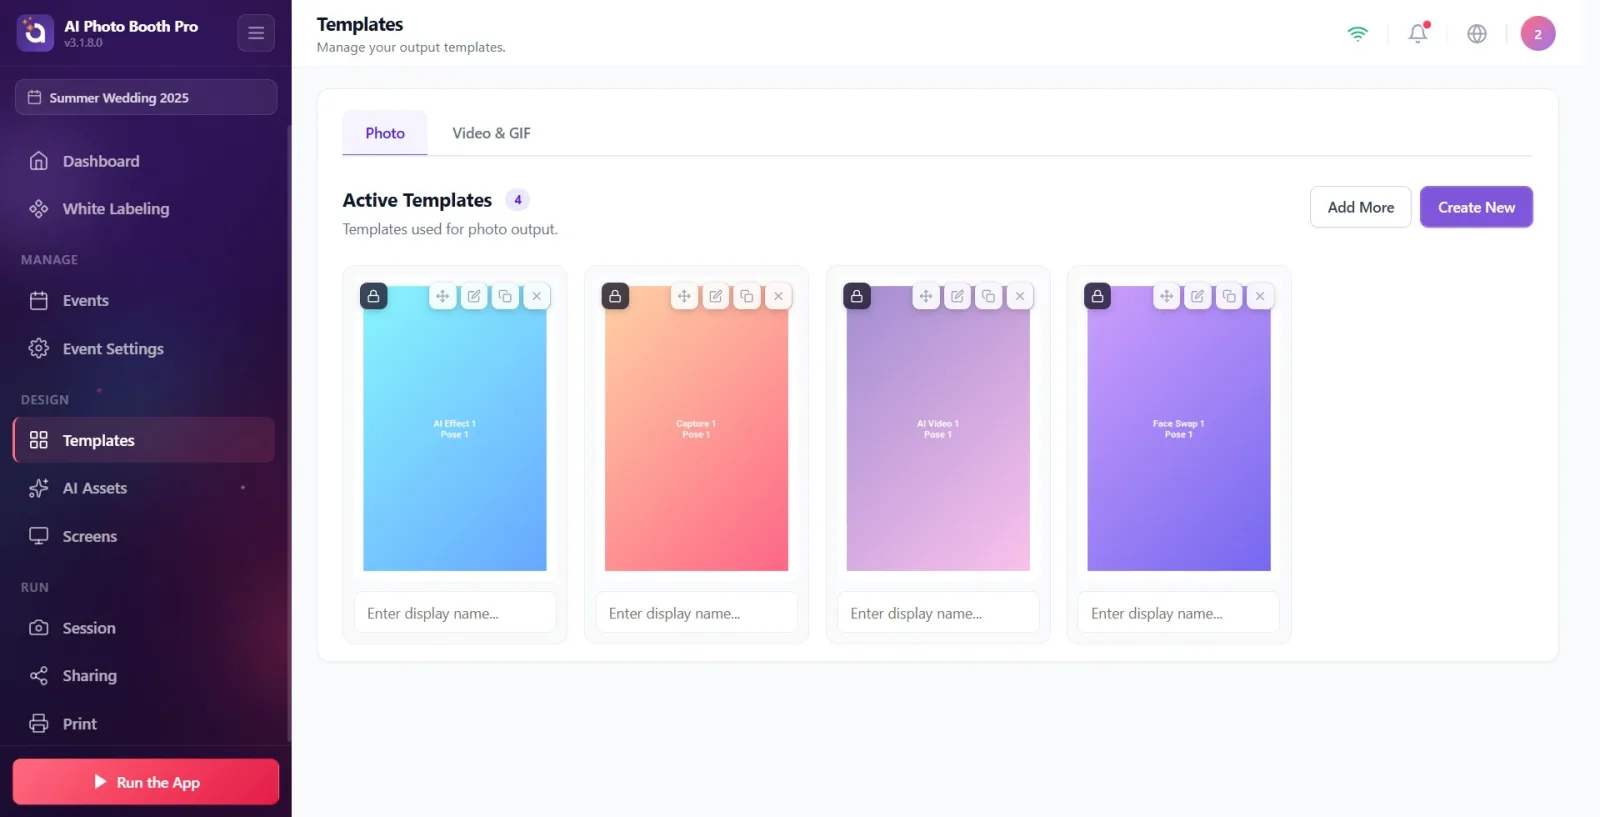
🔎 On-screen elements: Active Templates = the template cards activated for the current event. The counter badge shows how many active templates there are; while importing is in progress, 'X/Y Importing…' appears. Default/wizard-generated and not-yet-edited 'master' templates are marked with a Locked badge — editing is not in-place; Clone & Edit produces a clone. Your own templates that are not locked open directly with Edit. Card actions: Edit / Clone & Edit, Duplicate, Remove (or Delete), and drag-and-drop with Drag to reorder.
Step 5 · Orientation and size (portrait / landscape)
Templates
The user selects the template's print size and orientation.
🔎 On-screen elements: Size is determined by OutputSize (TemplateSize): the standard print sizes 4×6, 6×4, 2×6 (photo strip) and 5×7. Orientation is derived from the canvas width/height ratio: width < height → portrait, width > height → landscape. E.g. the default canvas 1200×1800 is portrait. The card preview is shown at this aspect ratio. Because a 2×6 strip cannot be printed on its own, two of them can be combined on a single 4×6 and separated with a 2-inch cut.
Step 6 · How a template is tied to its event
Templates
The user understands that the active template list always belongs to the selected event and that adding/removing templates is event-based.
🔎 On-screen elements: Active Templates is formed when a template is added to the event via a junction. Add More adds an existing template from the library; Create New creates a new template from the wizard. Remove on a template only takes it out of that event and does not delete it from the library/database (You can re-add it from your library later.); Delete, however, is permanent (This cannot be undone.). When a different event is selected, that event's own active templates are listed.
Editing a locked (default) template does not break the original — a copy is created automatically (Clone & Edit), so ready-made templates always stay clean.
Remove and Delete are different: Remove only takes the template out of the event (it stays in the library), Delete is permanent and cannot be undone.
A template's number of capture slots determines how many photos are taken in a session; this number is derived from the template's layers.
You can change the templates' order in the event by dragging the template cards (print/display order).
When choosing a size, don't forget the orientation: 4×6 is portrait, 6×4 is landscape; 2×6 is a photo strip.
Trying to edit a locked template and thinking 'why didn't the original change' — actually a clone is created and the edits go to the clone.
Confusing Delete with Remove — Delete is permanent; if you only want to take it out of the event, use Remove.
Expecting templates without selecting an event — the Active Templates list is tied to the selected event; if there is no event or a different one, the list is empty or looks unexpected.
Adding the wrong type of template — use the Photo tab for photo output and the Video & GIF tab for video/GIF output.
Trying to print a 2×6 strip on its own — it cannot be printed alone; two strips must be combined on a single 4×6.
Related topics
sablon-olusturma video-gif-sablon sablon-duzenleme
