
Before this: How to Create an Event?
AI Video (motion) effects turn a guest's photo into a short AI video. This document explains the steps to add, name, sort, favorite and remove ready-made AI video effects with Browse Library from the event; Creating a new effect from scratch is in a separate document.
- An event must be created and selected — AI Assets tabs always work on the selected (active) event
- The chart of accounts must support AI Entities — if the chart is insufficient, the Pro AI or higher required lock band will appear on the page and only the Upgrade Pro AIa button will appear
- Must have internet connection — library comes from server, cover videos and effects data are downloaded from cloud
step by step
Step 1 · On the AI Assets page, switch to the AI Video tab
AI Assets → AI Video
Open the AI Assets page in the settings (top heading AI Assets, bottom heading Select AI assets for your event.). There are three tabs at the top of the page: AI Effects, AI Face Swaps and AI Video. Click the AI Video tab. (If the Pro AI or higher required lockband appears on the page, your plan does not support AI Entities; you will need to upgrade with Pro AIa Upgrade to continue.)
🔎 Items on the screen: Top tab strip: AI Effects / AI Face Swaps / AI Video; Pro AI or higher required band + Pro AIa Upgrade button if plan is inadequate.
Step 2 · Recognize the AI Video Effects Library partition
AI Assets → AI Video
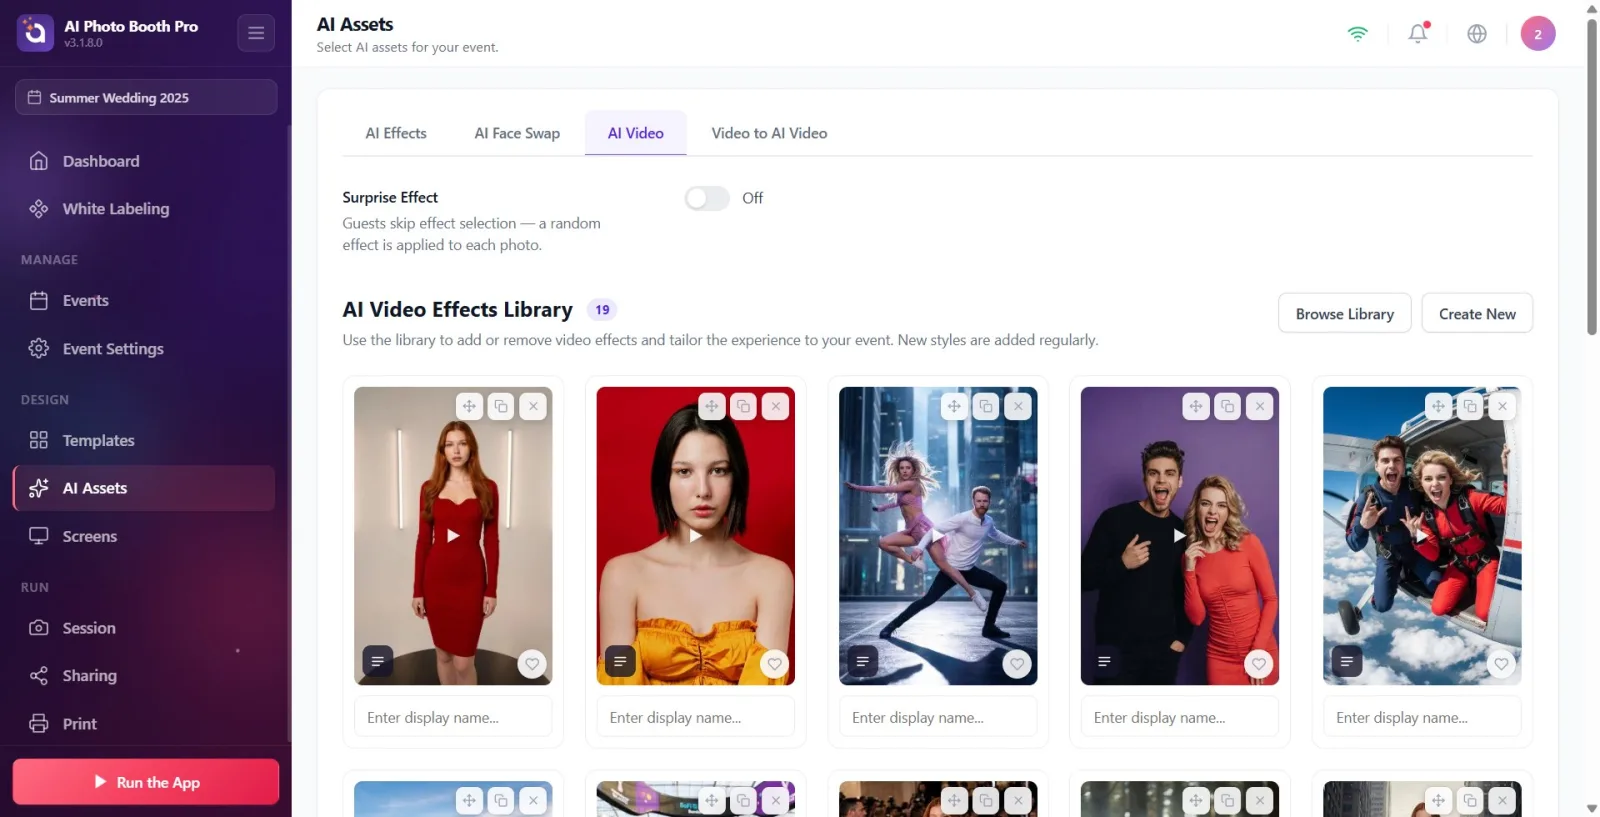
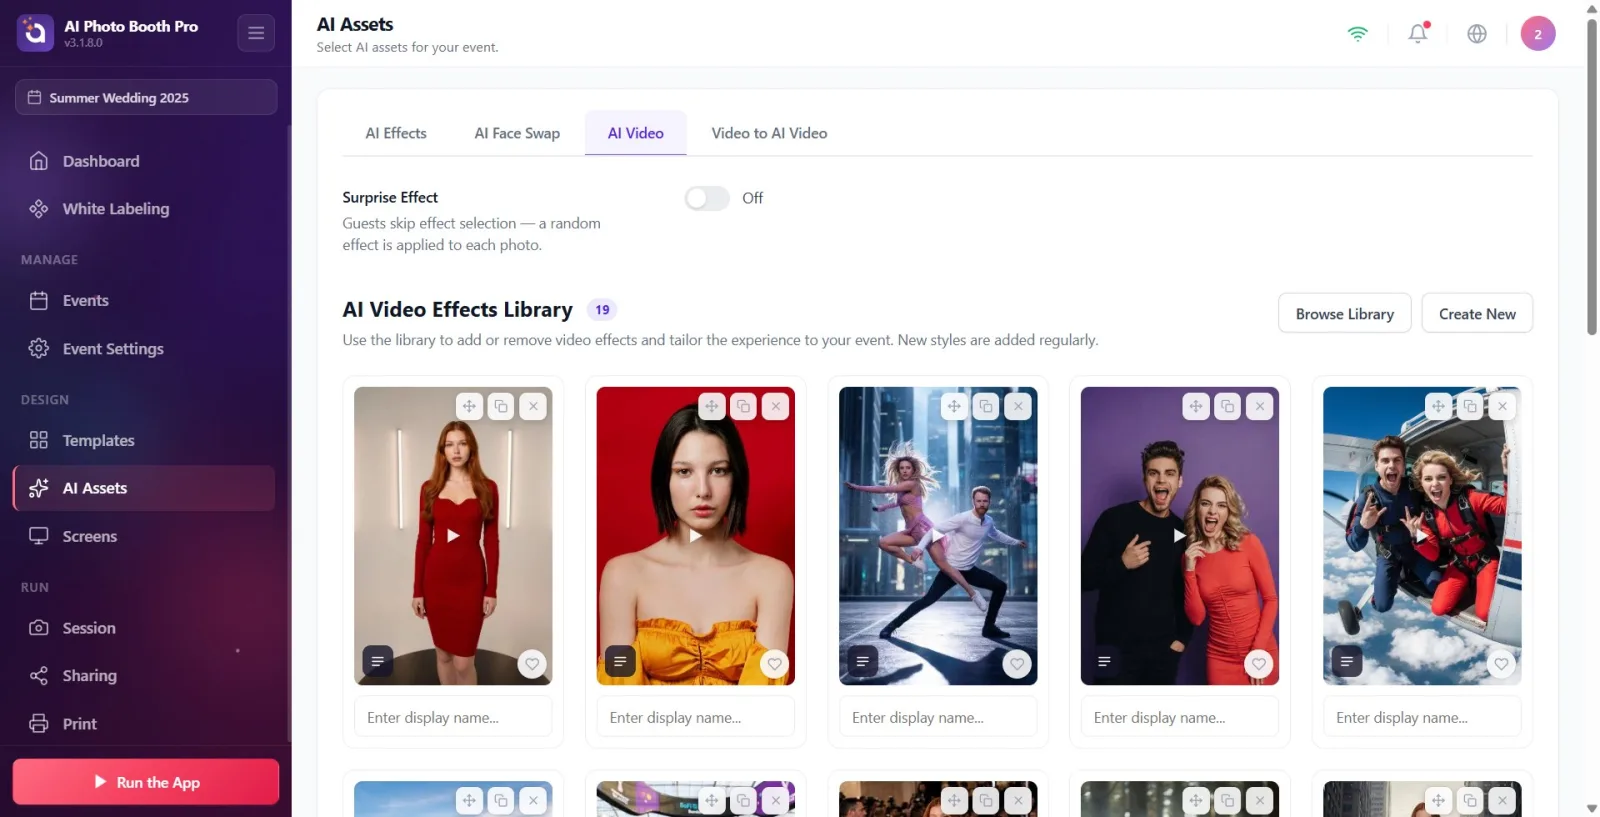
Find the AI Video Effects Library title in the AI Video tab; next to the title is a counter badge showing the number of videos attached to the event, with the description 'Add or remove effects using the library and customize the experience to your event...' underneath. There are two buttons at the top right: Browse Library to add a ready-made effect, Create New to generate it from scratch. This document describes the Browse Library path. The grid at the bottom of the section shows the videos currently added to the event (empty if there are none yet).
🔎 On-screen elements: AI Video Effects Library title + counter badge; Browse Library and Create New buttons at top right; grid of videos attached at the bottom.
Step 3 · Open library window with Browse Library
AI Assets → AI Video
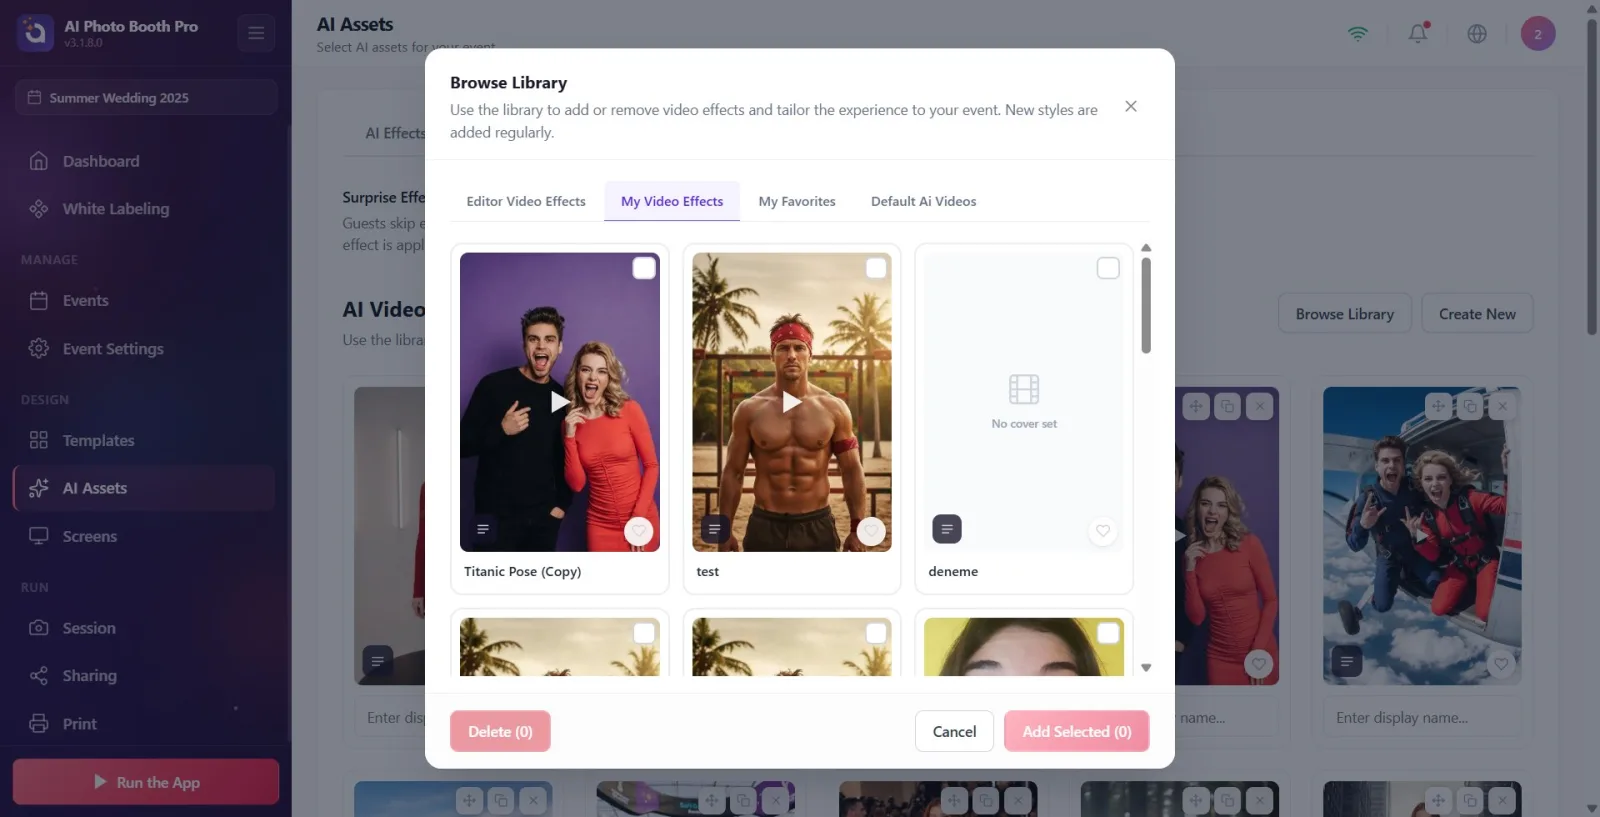
Click the Browse Library button in the top right. The library window (modal) with the title Browse Library opens. When the window first opens, it starts in the My Video Effects tab; for preset effects you need to change the tab (next step).
🔎 Items on the screen: Browse Library button; The opened modal title is Browse Library, the subtitle is library description.
Step 4 · Select the tab with ready-made videos
AI Assets → AI Video → Browse Library (window)
From the tab strip at the top of the window, select the tab that lists stock effects: Editor Video Effects for all stock videos provided by the system, Default Ai Videos for defaults that come with the application. The other two tabs are for your own content: My Video Effects (videos you've created) and My Favorites (your favorites).
🔎 Items on the screen: Tabs: Editor Video Effects / My Video Effects / My Favorites / Default Ai Videos.
Step 5 · Preview cover videos
AI Assets → AI Video → Browse Library (window)
Each card has a cover image and a play icon in the middle. To preview the cover, hover over the card on the desktop, tap the card once on the touchscreen — the short cover video plays inside the card (with sound on tap). Videos for performance are not preloaded, they just start on interaction. In videos without a cover, No cover set is written instead of the image.
🔎 Elements on the screen: Card cover + play icon; No cover set label on uncapped cards; heart (Favorite) on the card and Promptu View' icon if available.
Step 6 · Select the videos you want to add
AI Assets → AI Video → Browse Library (window)
Click on each card you want to add; A check (tick) mark appears on the selected card. You can select more than one video. Videos already added to the event will have the Added badge in the corner of the card and cannot be re-selected (you do not need to add the same video twice). The number on the Add Selected button in the bottom corner indicates the number of cards currently selected.
🔎 Items on the screen: Tick indicator on selected cards; Added badge on cards attached to the event; footer 'Add Selected (N)' counter.
Step 7 · Add to activity with Add Selected
AI Assets → AI Video → Browse Library (window)
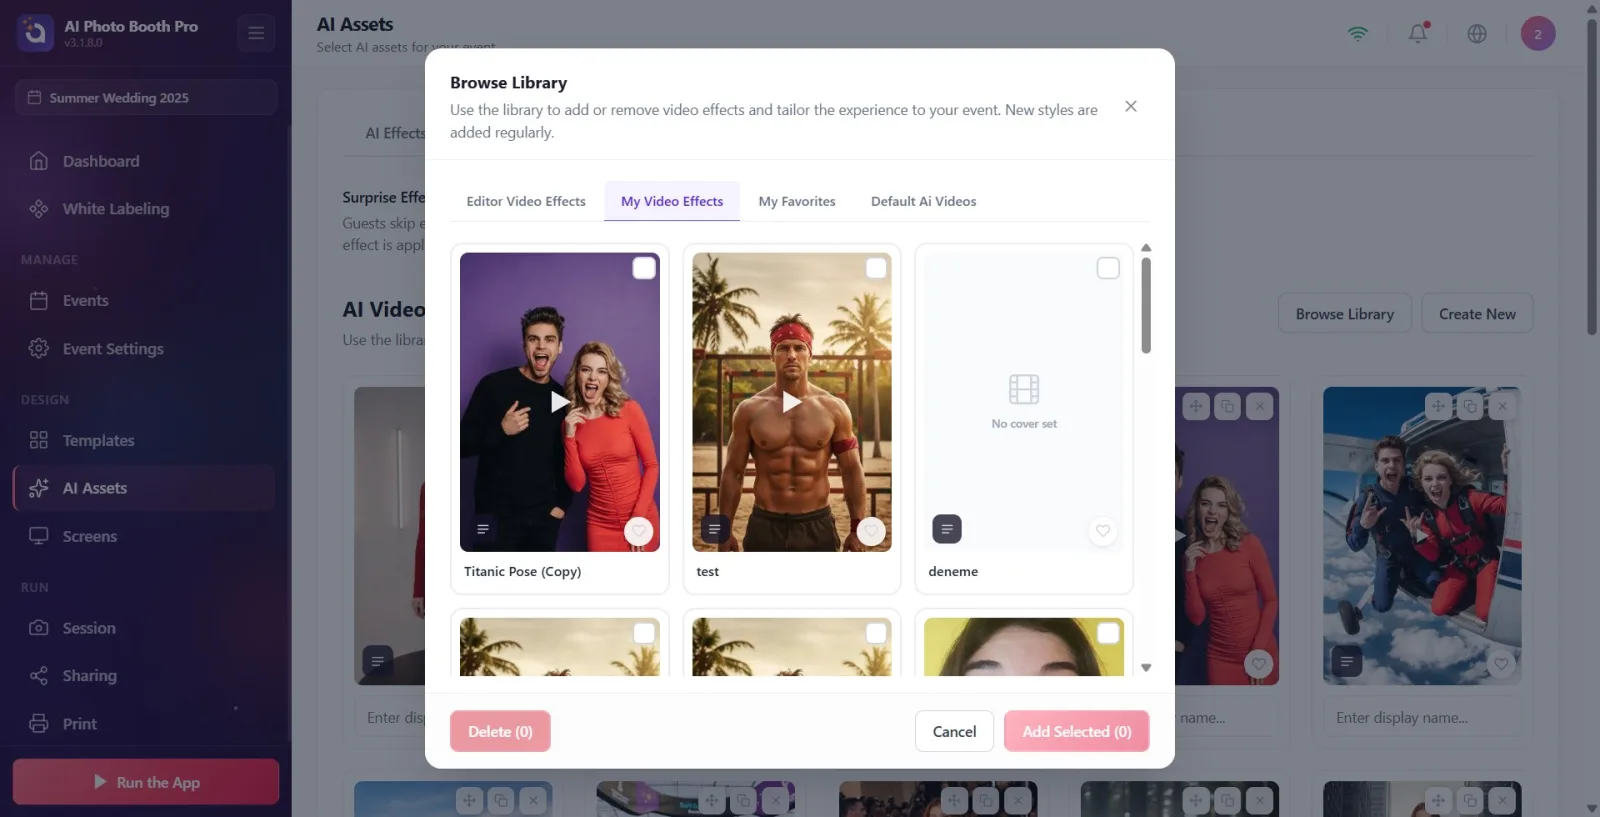
Click the Add Selected (next to the selected number) button in the bottom right. The selected videos are added to the event and the window closes. If you have made no selection, this button is dimmed/inactive. If you want to cancel, press the Cancel button or close the window (X in the top right).
🔎 On-screen items: 'Add Selected (N)' button (dimmed with no selection); Cancel button; closure (X) at top right.
Step 8 · See added videos in gallery (import)
AI Assets → AI Video
When the window closes, the videos you added appear as cards in the AI Video Effects Library grid and the counter in the header is updated. As video data is downloaded from the cloud, the counter changes to 'X/Y' format and gray skeleton cards appear with the text Importing... next to it; When the download is finished, the cards are replaced with their real cover. Wait until the import is finished — only then is the video ready for use in the booth.
🔎 On-screen items: Attached video cards; counter badge on header; 'X/Y' counter + Importing... + gray skeleton cards on import.
Step 9 · Give the video a display name
AI Assets → AI Video
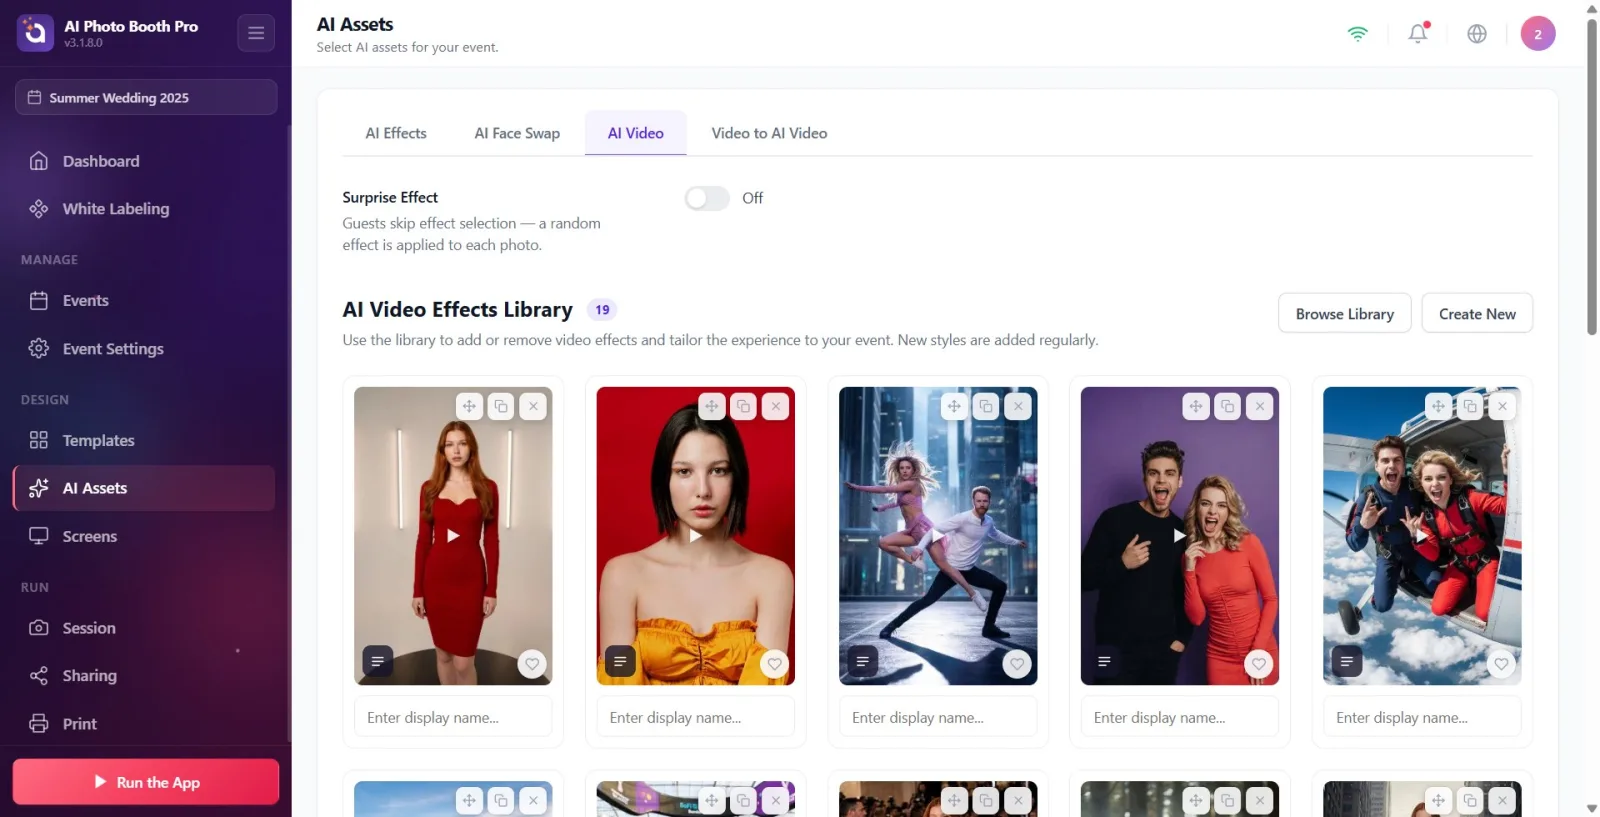
Tap the text box below each card and type a name for the video (placeholder Enter display name...). This name is the event-specific display name and is independent of the actual name of the effect in the library; It saves automatically when you take it out of the box.
🔎 Items on the screen: Name box under the card (placeholder Enter display name...).
Step 10 · Sort videos (drag-drop)
AI Assets → AI Video
You can change the display order by dragging the cards. Use the drag handle (Drag to reorder hint) on the card; press and hold the card for about half a second to start dragging it on the touch screen (a short tap scrolls the page). The order is updated and saved where you left off.
🔎 Items on the screen: Drag handle on the card (hint: Drag to reorder).
Step 11 · Mark as favorite and view prompt (optional)
AI Assets → AI Video
Add the video to favorites by pressing the heart icon (Favorite hint) in the corner of the card; favorites are collected in the My Favorites tab in the library window. If the video has a description (prompt), you can read the text in a separate window ('Prompt' title, 'Close' button) by pressing the list icon ('ViewPromptu') at the bottom left of the card.
🔎 Elements on the screen: Heart icon (Favorite); Promptu View' icon; Prompt window opens (title 'Prompt' + 'Close').
Step 12 · If you want to edit the ready video: create a copy
AI Assets → AI Video
You cannot directly modify a ready (default/system) video; On these cards, the Duplicate button appears instead of Edit and creates an editable copy when clicked. Only videos you create will be edited in-place with Edit. (Details in the 'AI Video Creation' document.)
🔎 Elements on the screen: Card actions: Duplicate in stock videos, Edit in own videos; also Remove on each card.
Step 13 · Remove video from event
AI Assets → AI Video
To remove a video from the event, press the cross (Remove) button on the card. In the confirmation window that opens, the title is 'Delete "
🔎 Items on the screen: Remove (X) button on the card; confirmation window: title 'Delete "{name}"?", message You can re-add it from your library later., buttons Delete / Cancel.
Step 14 · Set Surprise Effect (optional)
AI Assets → AI Video
At the top of the AI Video tab is the Surprise Effect key. If you open it, guests won't be able to choose effects in the booth; a random one of the videos attached to the event is applied to each photo (description: 'Guests skip the effect selection — a random effect is applied to each photo.'). The text next to the switch indicates 'On' / 'Off' status.
🔎 Elements on the screen: Surprise Effect title + description; on/off switch (On / Off).
The library window opens in the My Video Effects tab; Switch to Editor Video Effects or Default Ai Videos tab for ready-made effects.
You can select multiple videos at once and add them in bulk with Add Selected — the number appears above the button.
Cover preview: when hovering on desktop, one-touch on touch (with sound) plays cover video; Videos are uploaded only for interaction for performance.
Remove just removes the video from the event (remains in the library); You add it back with Browse Library when you want.
A video attached to the event is marked with the Added badge in the library window and cannot be selected again.
It is normal for there to be a short wait for Importing... after adding (video data is downloaded from the cloud); Meanwhile, the cards appear as skeletons.
The name box at the bottom of the card determines the event-specific display name only; It does not change the actual name of the effect in the library.
Not being able to find ready-made effects because the window is opened in the My Video Effects tab: ready-made videos are in the Editor Video Effects and Default Ai Videos tabs.
Trying to press Add Selected without selecting a card: when there is no selection the button is dimmed/inactive — you have to click on the cards first and the check mark appears.
Mixing Remove on the card with Delete on the My Video Effects tab: Remove just removes the video from the event; The Delete button on the My Video Effects tab of the library window permanently deletes the video from the library (it only works on its own videos, it cannot be undone).
Trying to edit a ready/default video directly: these cards don't have Edit; You need to create a copy with Duplicate and edit the copy.
Thinking the video is ready in the booth before Importing... ends: wait until the counter 'X/Y' and skeleton cards disappear.
Trying to use the tab when the event is not selected: AI Video library works on the selected event — create/select an event first.
Trying to drag the card on the touch screen immediately and causing the page to scroll: it is necessary to press and hold the card for about half a second to start dragging.
Related topics
AI Video Creation Adding Stock AI Effect Add Ready AI Face Swap
