
Before this: What are Sharing Settings and How to Configure them?
The Activation Share tab manages sharing the photos/videos taken with guests via the cloud (QR code, online gallery button, local sharing page of the device) and customizing the online Microsite opened after sharing according to the brand. QR/gallery/share keys are available to all plans; Logo, text and color customization of the microsite comes into play when White Label Event Override is turned on on an event basis (Ultimate plan required).
- An event must be selected from the left menu — the Sharing menu and therefore the Activation Share tab will only appear when an event is selected (the tab depends on the event selection).
- There must be an active/selected internet connection — the tab is internet connection dependent, not visible when offline.
- White Label Event Override must be turned on for microsite customization (text, logo, color, extra background); This section is only available with the Ultimate plan.
step by step
Step 1 · Open sharing settings and switch to Activation Share tab
Settings left menu → Sharing
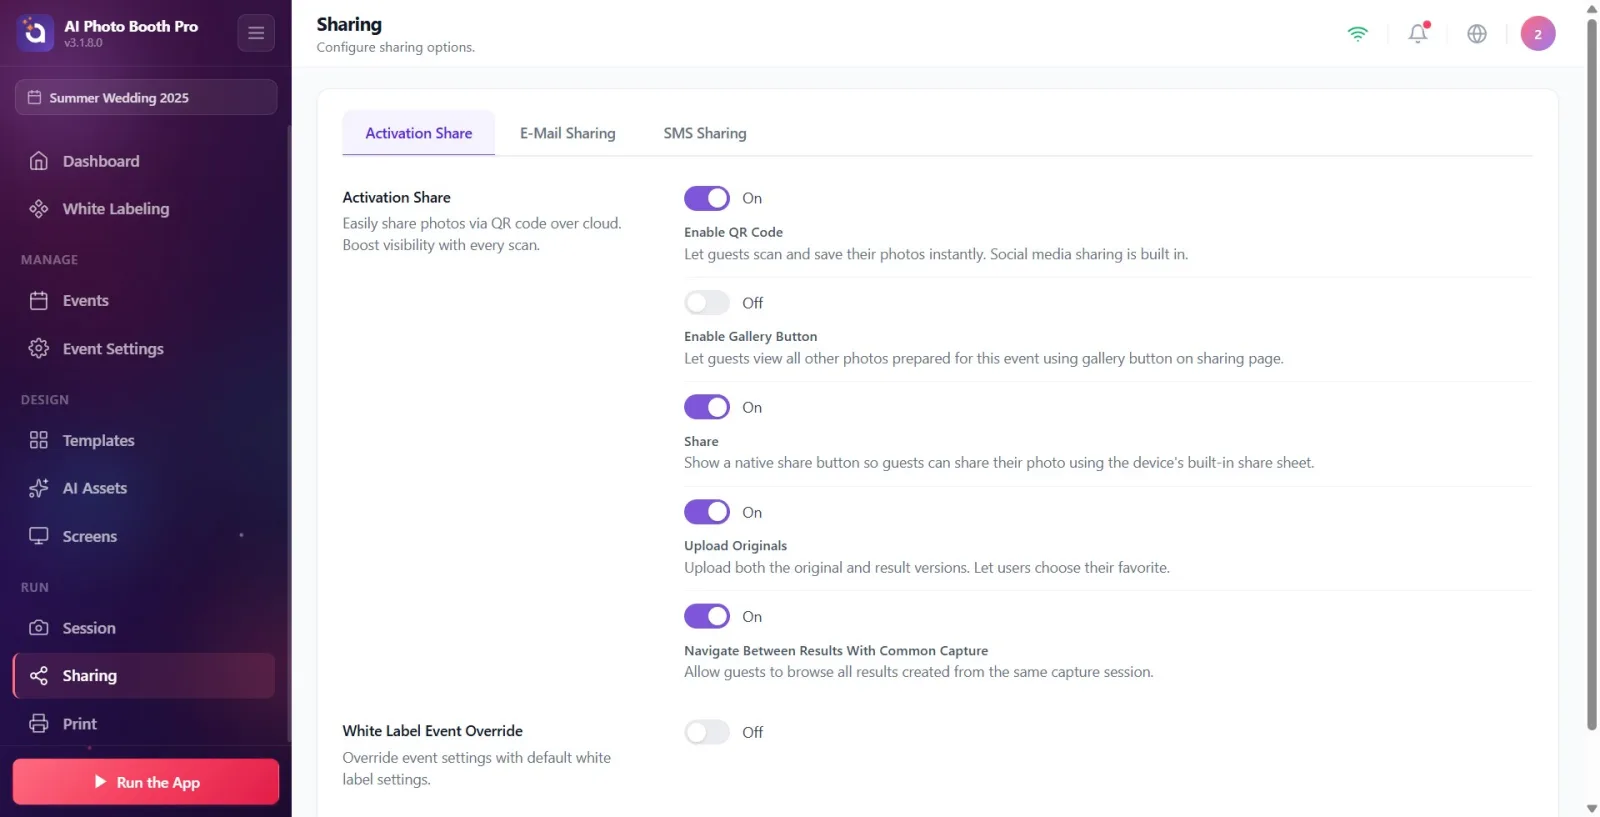
Open the Sharing (Sharing) page from the left menu (Run group). The page opens with three tabs: Activation Share, E-Mail Sharing and SMS Sharing. By default, the Activation Share tab is selected; If it is not selected, click the Activation Share tab button at the top. Note: This menu appears only when an event is selected and there is an internet connection.
🔎 Elements on the screen: Tabs at the top of the page: Activation Share / E-Mail Sharing / SMS Sharing.
Step 2 · Recognize the Activation Share partition
Sharing → Activation Share
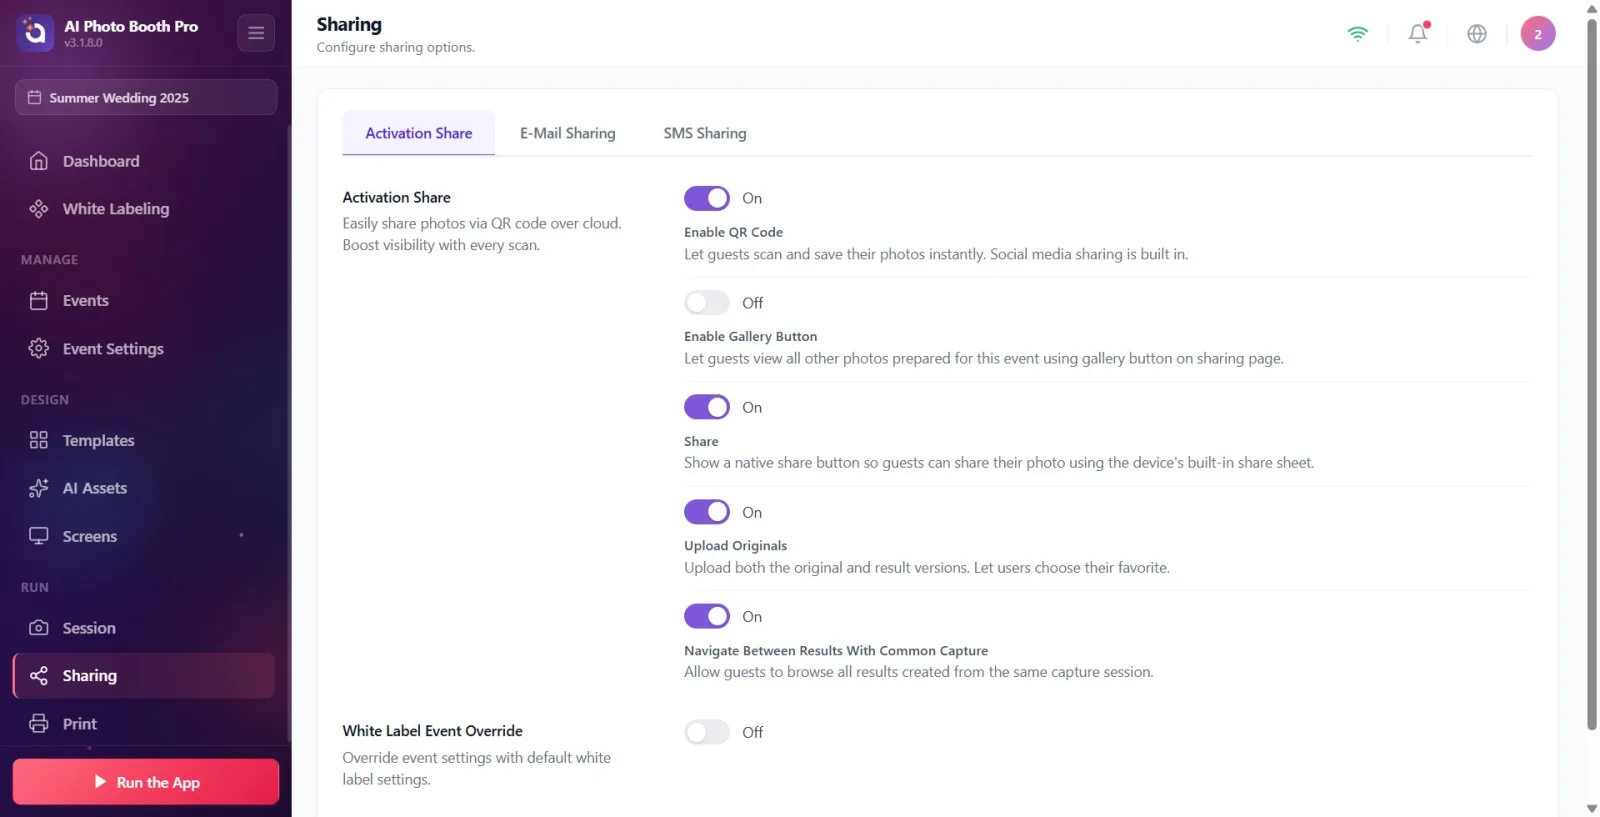
Under the Activation Share section heading at the top, the description reads 'Easily share photos via the cloud with a QR code. 'Increase visibility with every scan.' writer. This section contains five toggles that determine which sharing paths the guest will see on the sharing screen. They all come ON by default.
🔎 Elements on the screen: Activation Share title + description; 5 key cards in a row.
Step 3 · Set Enable QR Code key
Sharing → Activation Share
Toggle Enable QR Code switch. When on, the guest is shown the QR code on the sharing screen; The guest can scan their photos with their phone and instantly view and save them. 'Allow guests to instantly scan and save their photos. Social media sharing feature included.' writer. Default: on.
🔎 Elements on the screen: Key labeled Enable QR Code + description text underneath.
Step 4 · Set Enable Gallery Button key
Sharing → Activation Share
Toggle Enable Gallery Button switch. When it's on, guests can see all the photos prepared for that event via the gallery button on the sharing page. Its description reads: 'Allow guests to view all photos prepared for this event using the gallery button on the sharing page.' writer. Default: on.
🔎 Elements on the screen: key + description labeled Enable Gallery Button.
Step 5 · Set key Share (native share button)
Sharing → Activation Share
Toggle Share switch. When it's on, a button appears on the sharing screen that opens the device's own built-in sharing page. Its description reads: 'Show local sharing button so guests can share their photos using the device's built-in sharing sheet.' writer. Default: on.
🔎 Elements on the screen: key + description labeled Share.
Step 6 · Set Upload Originals key
Sharing → Activation Share
Toggle Upload Originals switch. When turned on, both the original and processed (result) versions are uploaded to the cloud and the guest can choose the one they like best. Its description says 'Upload the original and final versions. Let users choose their favorite.' writer. Default: on.
🔎 Elements on the screen: key + description labeled Upload Originals.
Step 7 · Set Navigate Between Results With Common Capture key
Sharing → Activation Share
Toggle Navigate Between Results With Common Capture switch. When on, the guest can navigate back and forth online through all the results (e.g. different effects) produced from the same shooting session. Its description reads: 'Let guests browse through all the results created from the same shooting session.' writer. Default: on.
🔎 Elements on the screen: key + description labeled Navigate Between Results With Common Capture.
Step 8 · Turn on microsite customization with White Label Event Override (Ultimate)
Sharing → Activation Share
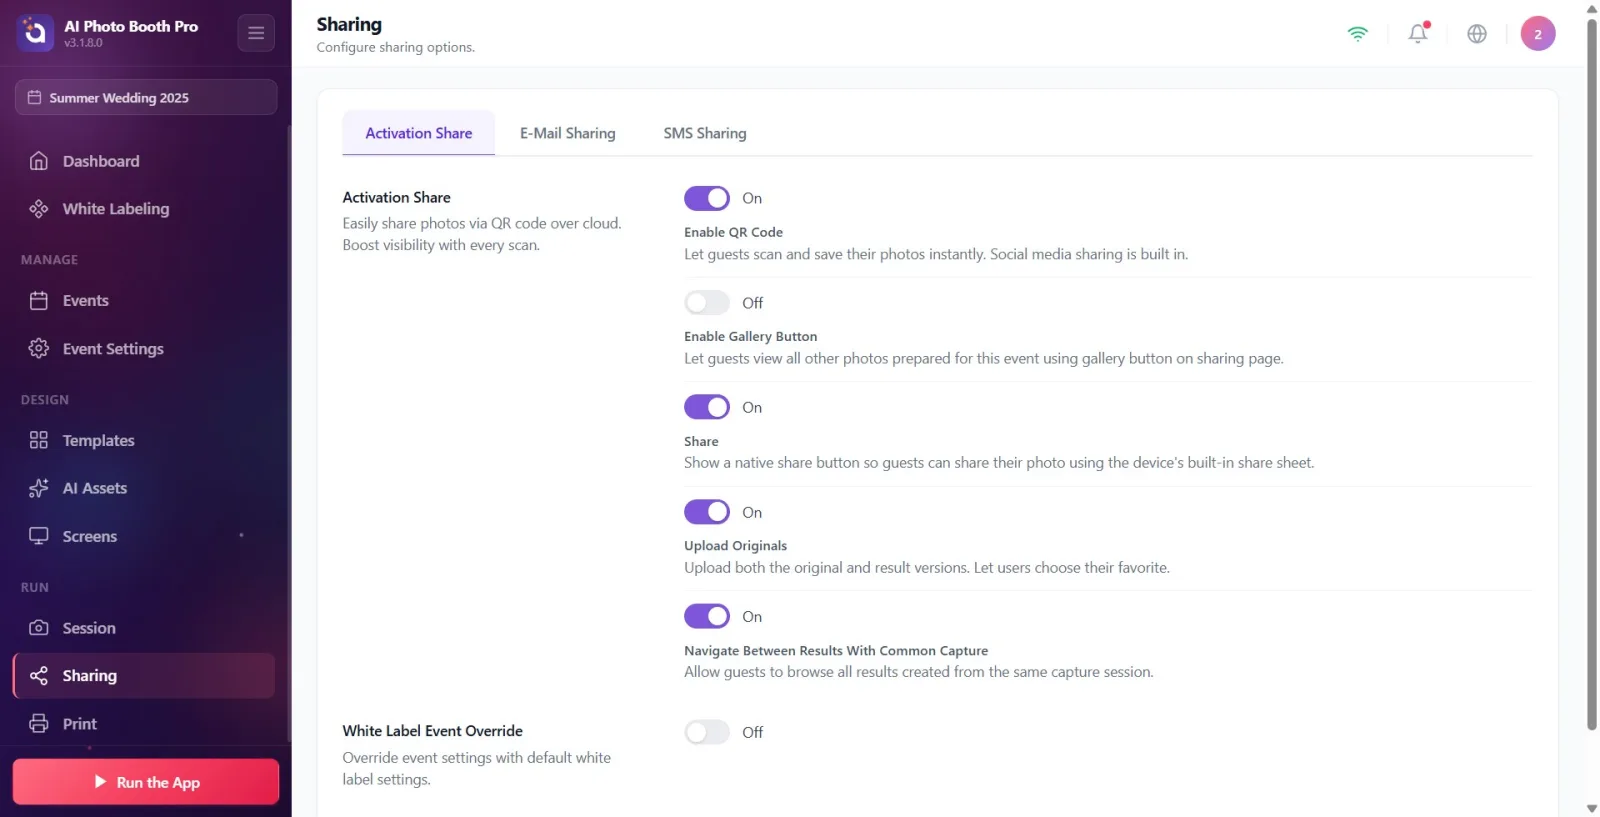
Turn on the switch in the White Label Event Override section. Description 'Override event settings with default white label settings.' is in the form; is off by default. When you open the key: look at the plan. If your plan is not Ultimate, a locked warning appears at the bottom — under the heading Ultimate plan only, under 'Your account is currently {plan name}. Upgrade to Ultimate AI to use White Label features.' and the 'Upgrade Ultimate AIa' button appears (pressing the button opens the subscription payment screen/paywall). If the plan is suitable, microsite customization sections (Texts, Logo, UI Colors, Preview, Extra Background) will be opened one by one.
🔎 Items on the screen: White Label Event Override key; lock banner if plan is inadequate ('Exclusive to Ultimate plan' + 'Upgrade to Ultimate AI' button).
Step 9 · Enter Micro Site Texts
Sharing → Activation Share (White Label on)
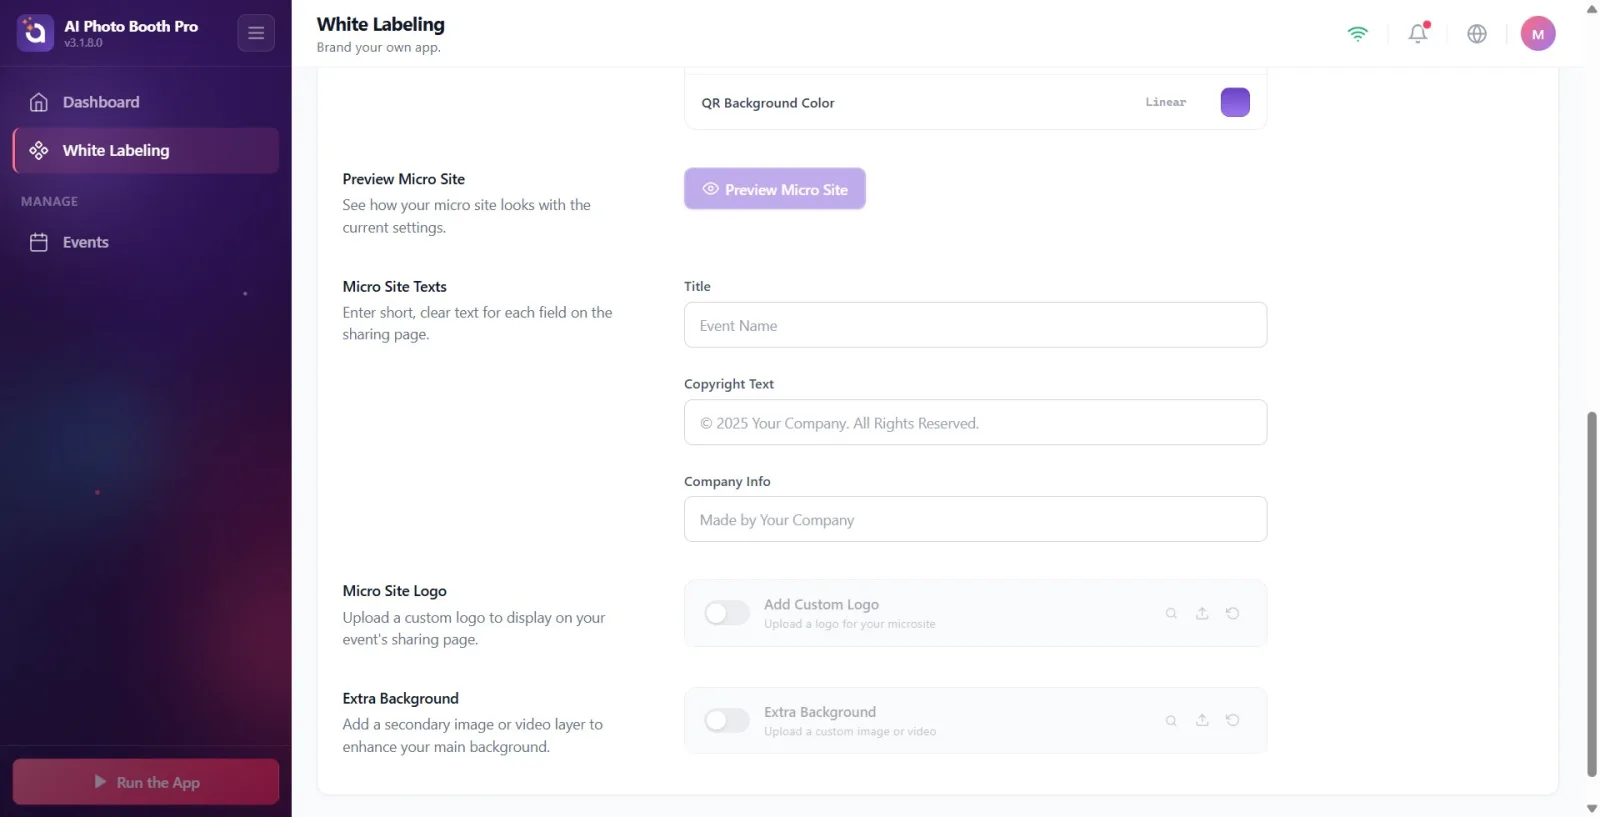
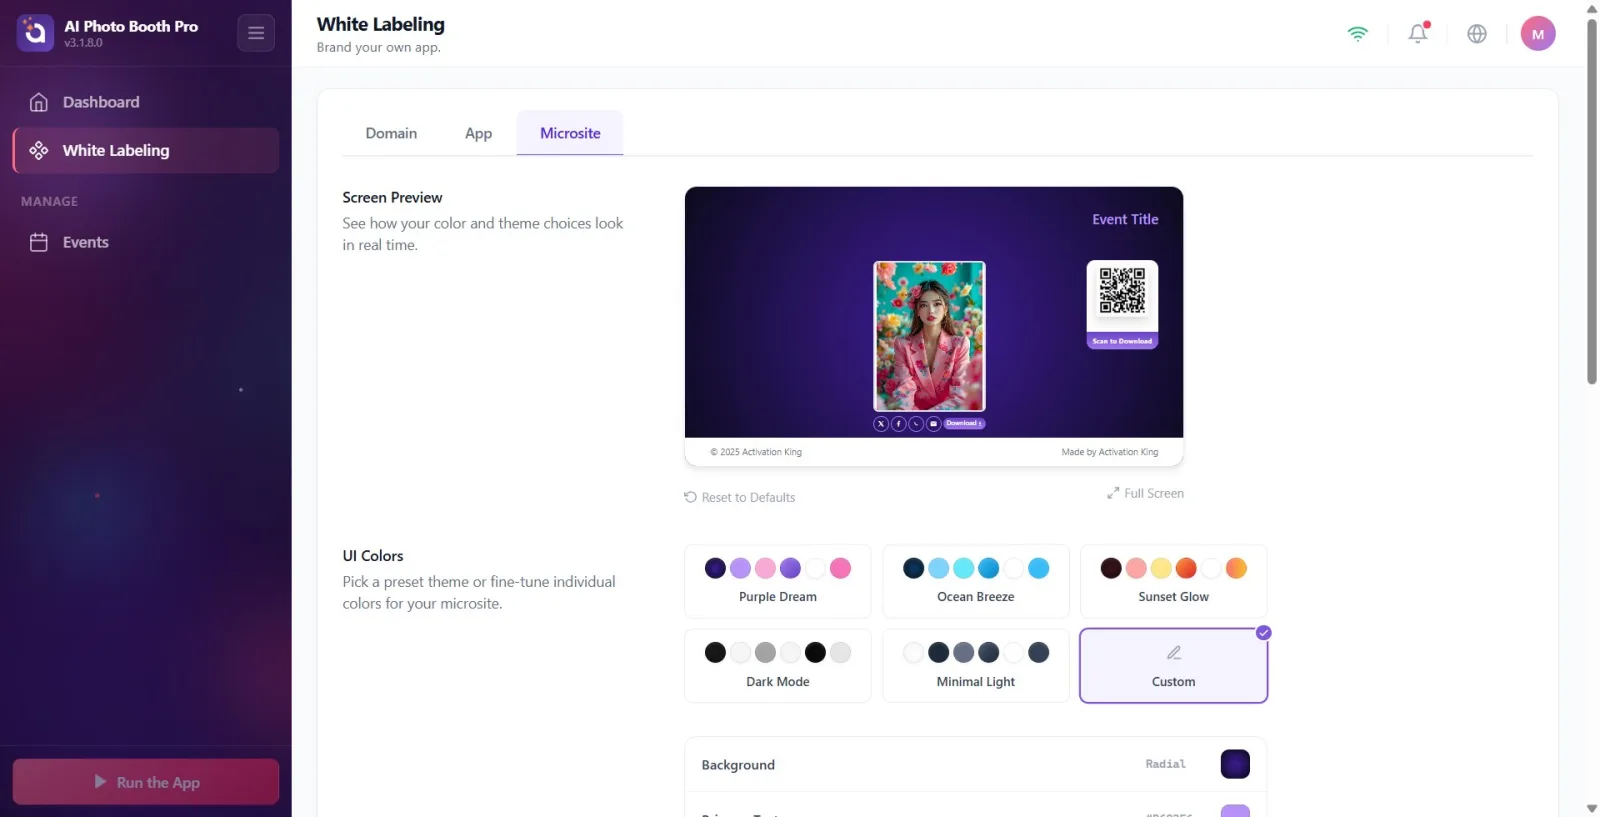
In the Micro Site Texts section (description: Enter short, clear text for each field on the sharing page.) fill in three text fields: Title (placeholder Event Name), Copyright Text (placeholder © 2025 Your Company. All Rights Reserved., default value '© 2025 Activation King. All Rights Reserved.') and Company Info (placeholder Made by Your Company, default is 'Made by Activation King'). These texts appear on the online sharing page.
🔎 Elements on the screen: Title, Copyright Text, Company Info text input boxes (wide).
Step 10 · Load Micro Site Logonu
Sharing → Activation Share (White Label on)
Use the 'Add Custom Logo' card in the Micro Site Logo section (description: 'Upload a custom logo to be displayed on your event's share page.'). The description of the card is 'Upload logo image'. Toggle the logo on/off with the small switch on the left; The native file chooser opens to select a file (only image type is accepted). Use the card's restore button to return to default.
🔎 Items on the screen: File selector card titled Add Custom Logo: toggle switch, select file, restore button (Image only).
Step 11 · UI Colors — choose ready theme
Sharing → Activation Share (White Label on)
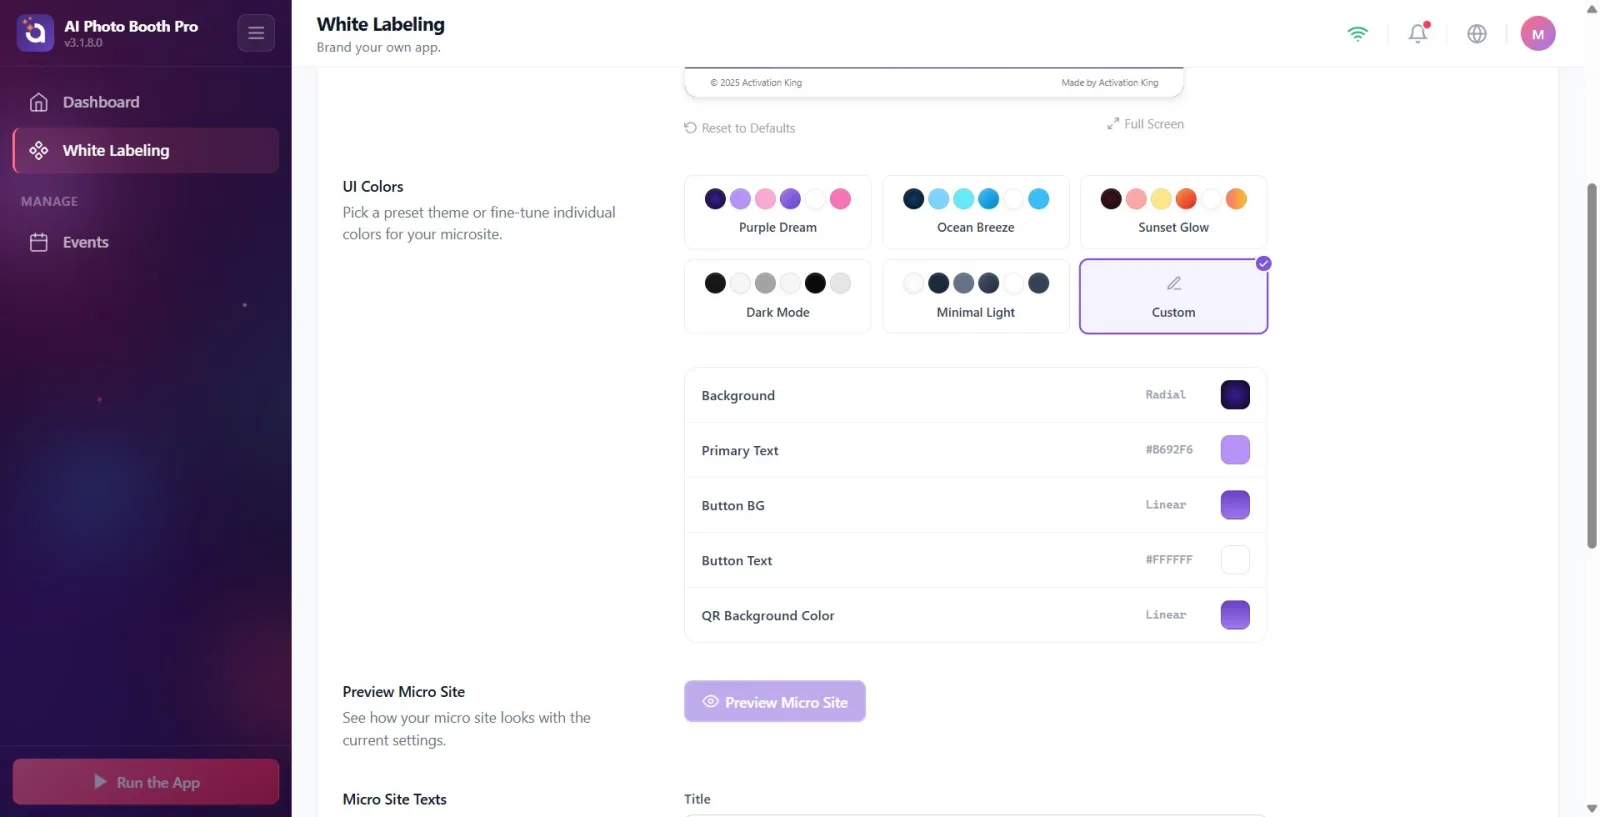
In the UI Colors section (description: 'Choose a preset theme or adjust colors individually. All displays share these colors.') click on one of the preset theme cards: 'Purple Dream', 'Ocean Breeze', 'Sunset', 'Dark Mode', 'Minimal Light' or 'Custom' with a pencil icon. When you select a preset theme, all color rows (including the QR background) are filled with the colors of that theme and saved. Colors coming from the server/changed manually appear as Custom.
🔎 Items on screen: Theme preview cards: Purple Dream / Ocean Breeze / Sunset Glow / Dark Mode / Minimal Light / Custom.
Step 12 · UI Colors — adjust colors one by one
Sharing → Activation Share (White Label on)
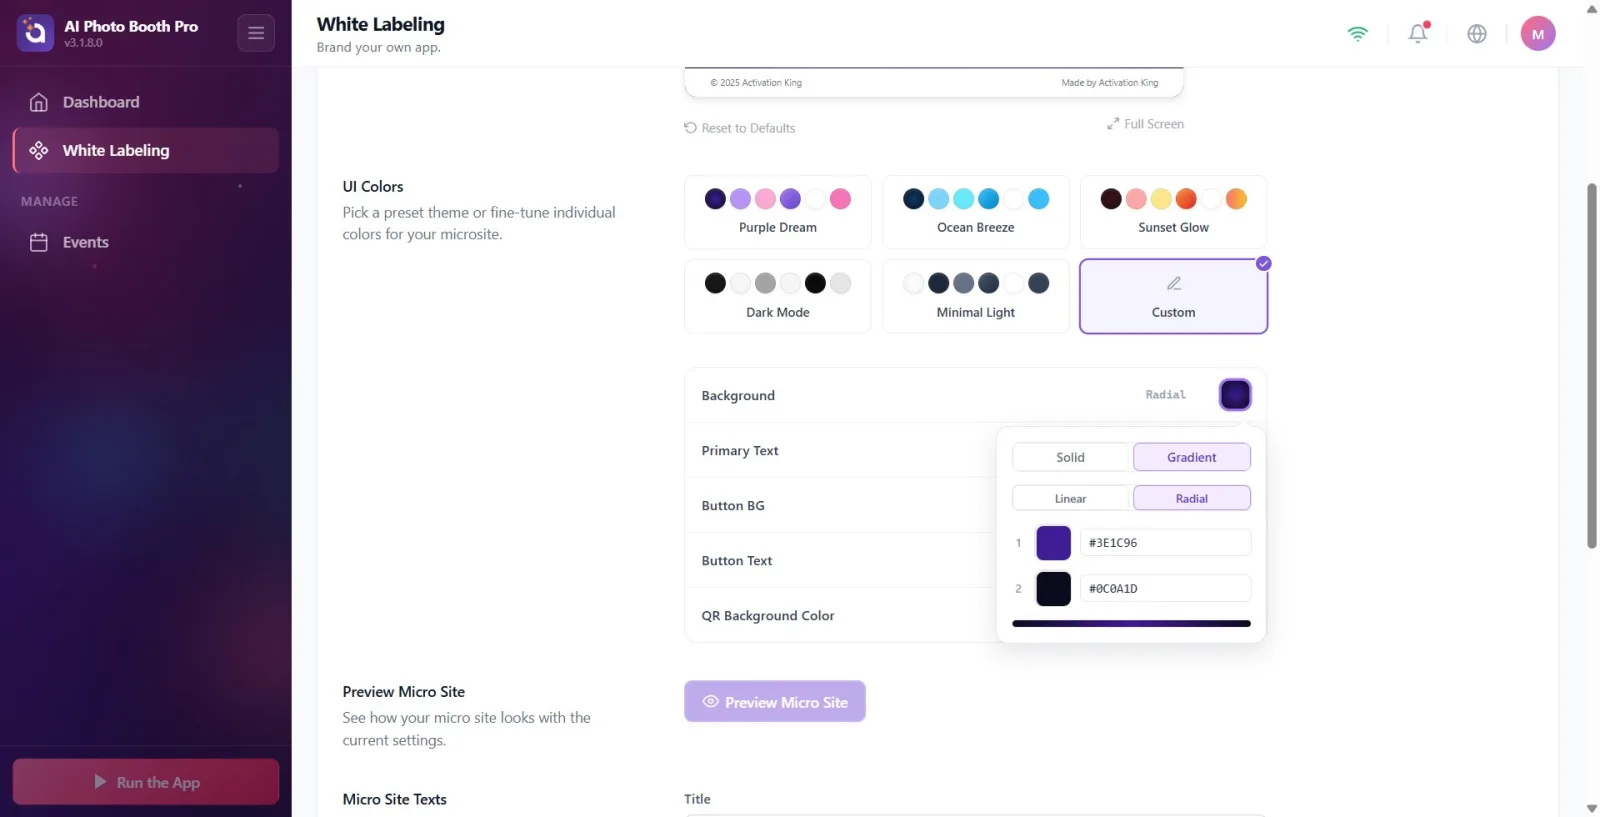
Open the color picker (solid color / gradient) and adjust the color by clicking on the swatch to the right of each color in the color rows below the theme cards; The change is saved immediately. The rows that appear are: Background, Main Text, Button BG, Button Text and QR Background Color. Note: Secondary Text and countdown color lines are hidden here because they are not used on the microsite.
🔎 Elements on the screen: Color rows (label + value + clickable swatch); popover color picker (Solid/Gradient) — the same picker as in the template background.
Step 13 · See the result in the browser with Preview Micro Site
Sharing → Activation Share (White Label on)
Press the purple Preview Micro Site button in the Preview Micro Site section (description: See how your micro site looks with the current settings.); The sample session of the selected event opens in the system browser and shows live how the settings appear on the online page. If the event's cloud ID (CloudId) is not yet ready, the button is inactive and the Select an Event warning appears below it.
🔎 Elements on the screen: Preview Micro Site button (with eye icon); Passive + Select an Event note if CloudId is not present.
Step 14 · Add Extra Background (optional)
Sharing → Activation Share (White Label on)
Use the file selector card titled 'Background' in the Extra Background section (description: 'Add a secondary image or video layer to enhance your main background.'). The description for the card reads 'Upload a custom image or video'; Both Images and Video are accepted. Power on/off with the switch on the left, select file (native selector), return to default with the restore button if necessary.
🔎 Items on the screen: File selector card titled Background: toggle switch, select file, restore button (Image + Video).
The first five switches (QR Code, Gallery Button, Share, Upload Originals, navigation through results) are available on every plan and are on by default — they determine which paths the guest sees on the share screen.
The Activation Share tab name and Activation Share section title remain in English (brand name) in the Turkish interface; The labels of the subkeys are in Turkish.
Microsite text/logo/color customizations are on an event-by-event basis: White Label Event Override only differentiates that event's online page from the default account-wide white label.
As the UI Colors description states, 'All displays share these colors' — changing one color affects all relevant areas on the microsite.
When you choose a preset theme, QR Background Color is automatically set to the same color as the button background; If you want, you can change the QR color manually later.
Color changes are saved instantly when you click on the swatch and adjust it from the picker; There is no separate Save button.
To verify changes before publishing, always open the sample session with Preview Micro Site in the browser and check.
Microsite customization areas (Texts, Logo, Colors, Extra Background) not appearing: The White Label Event Override switch may be off or the plan is not Ultimate (remove lock banner).
The Preview Micro Site button remains inactive: the cloud ID (CloudId) of the selected event has not yet been created (the event is new/not synchronized) — the Select an Event warning indicates this.
Turning off the QR Code or Gallery Button switch and then complaining that the guest cannot see the corresponding button on the sharing screen: these switches directly control the visibility of those buttons.
Searching for Secondary Text or countdown color in the color rows: these two rows are intentionally hidden as they are not used on the microsite.
The tab does not appear at all in the left menu: an activity is not selected or there is no active internet connection (the tab depends on both).
Surprised that the Copyright/Company fields are left blank and the default English values ('© 2025 Activation King...', 'Made by Activation King') remain on the online page: if these fields are not filled in, the defaults are used.
Related topics
E-Mail Sharing SMS Sharing Share Screen Design White Labeling
