
Before this: What is Screen Design, How to Use General Tab?
The Capture tab of the Screens page is where you position and size the on-screen elements that the guest sees during the photo/video capture (live camera preview, countdown, photo thumbnails, logo, cancel button, flash effect, and background). The top Screen Preview shows changes live immediately. Some elements, such as color, theme, logo image, and background backdrop, are only shown in this tab; Its main source is the General tab.
- event-creation
- An event must be created and selected — settings are event specific, changes made while the event is not selected will not be saved
- Color/theme, logo image and main background must first be set in the General tab (these elements are only positioned in the Capture tab)
Step by step
Step 1 · Open Capture tab
Screen Design → Capture
Open the Screen Design page from the left menu. The top tab strip has, from left to right, General, Welcome, Capture, Sharing, Pause, Animations, Texts, Voices. Tap the third tab, Capture.
🔎 Items on the screen: Top tab strip: General / Welcome / Capture / Sharing / Pause / Animations / Texts / Voices.
Step 2 · Recognize the Screen Preview partition
Screen Design → Capture
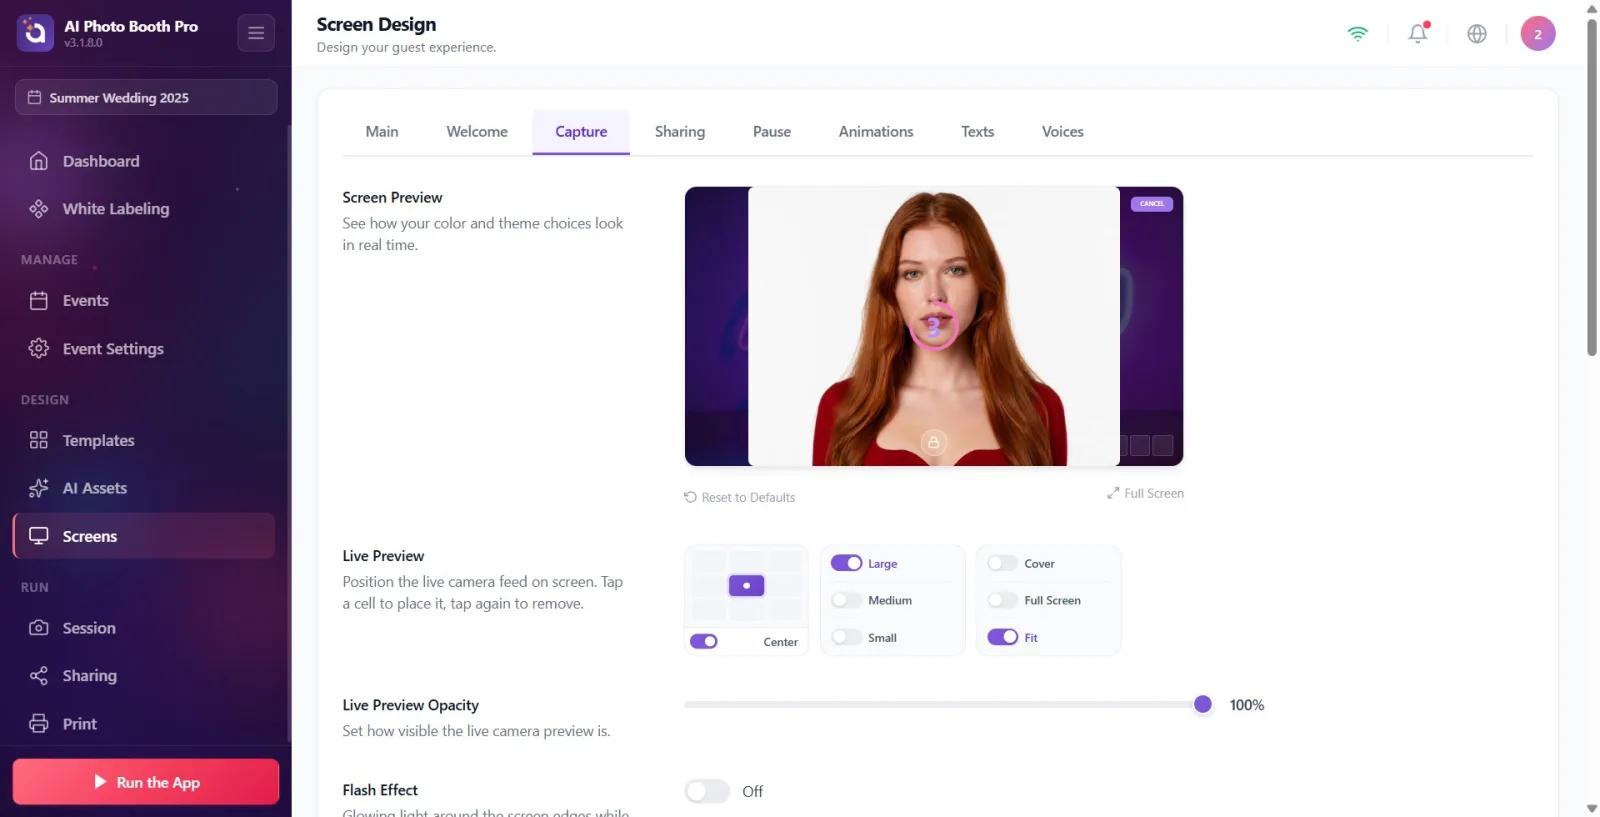
The Screen Preview box at the top of the tab instantly shows you any changes you make (See how your color and theme choices look in real time.). Preview combines the result of all the following settings (camera preview, countdown, thumbnails, logo, cancel button, background, flash). Tapping an item in the preview will scroll directly to that item's settings section; Hovering over highlights the item with a dashed line. There are two actions in the bottom right: Reset to Defaults and Full Screen.
🔎 On-screen elements: Screen Preview title + live preview box (clickable elements); Reset to Defaults link and Full Screen button on the bottom right.
Step 3 · Live Preview — position camera feed
Screen Design → Capture
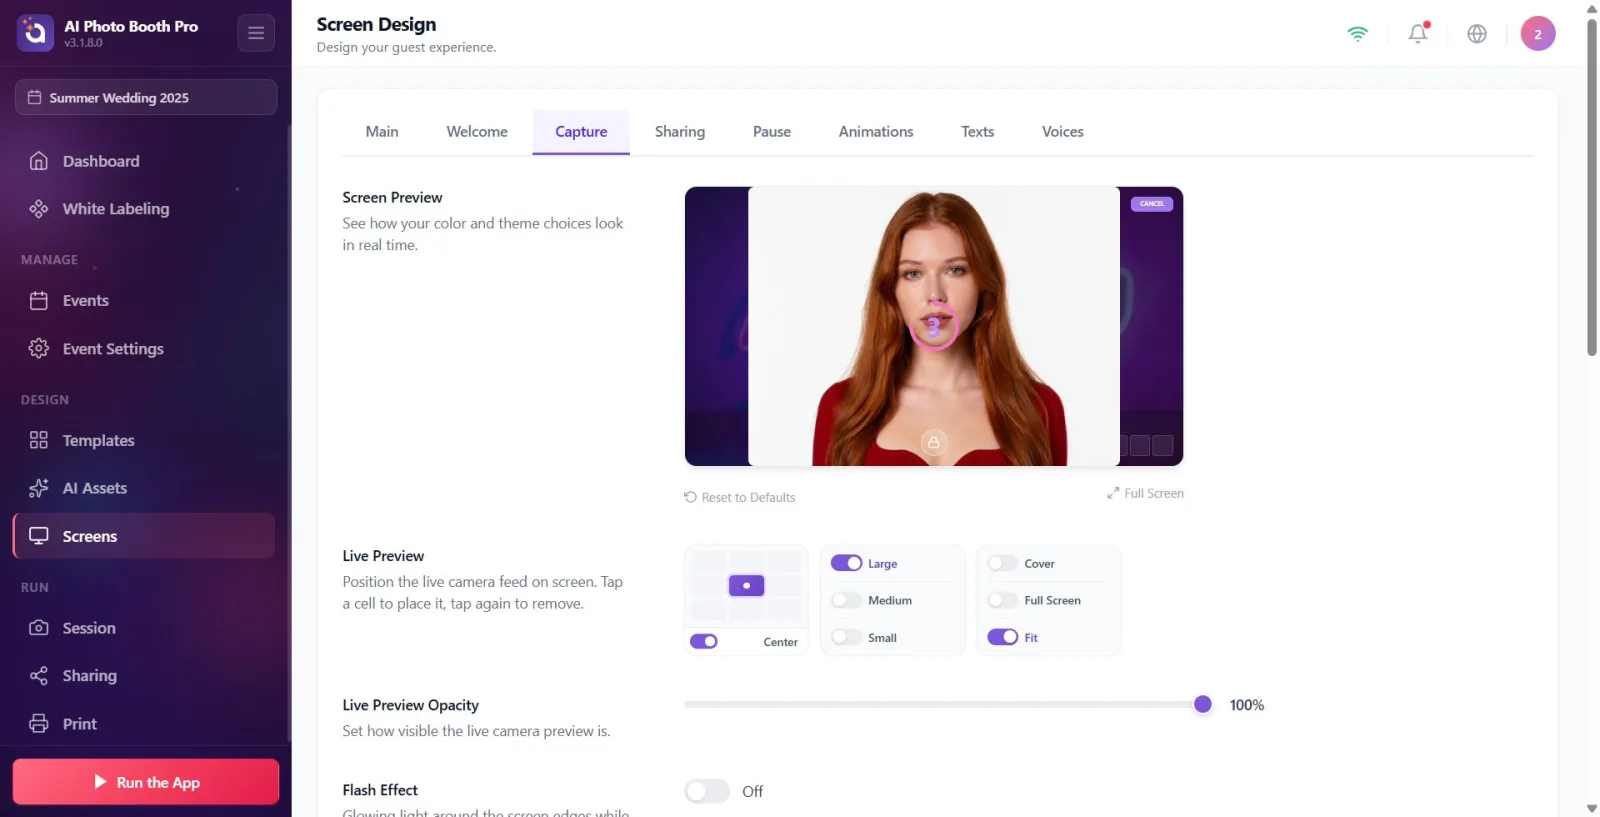
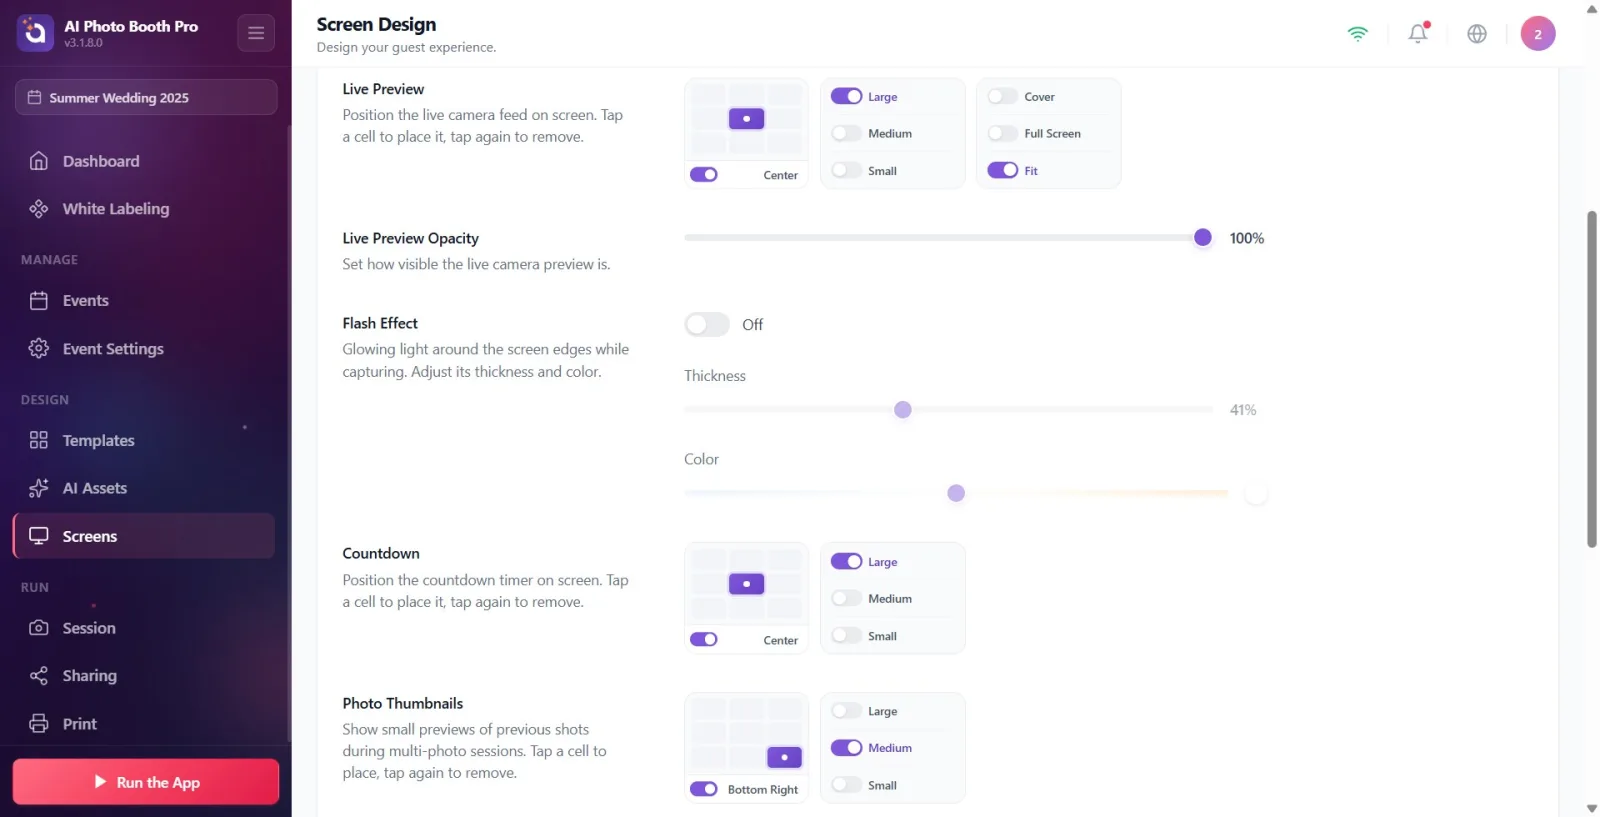
The Live Preview section has a 3x3 position grid ('Position the live camera feed on the screen. Tap a cell to place it, tap again to remove it.'). Tap the desired cell to place the camera feed in that corner/center; the selected cell appears at the bottom with the location name (Center, Top Left, Top Right, Bottom etc.). The small On/Off switch to the right of the grid shows and hides the preview entirely.
🔎 Elements on the screen: 3x3 location grid (9 cells); next to it is the location label and the On/Off switch.
Step 4 · Live Preview — Select size
Screen Design → Capture
Check one of the size options in the same section: Large, Medium or Small. This determines the size of the camera preview box on the screen. Note: When fill mode Full Screen is selected, the size becomes meaningless and these options become dimmed and disabled.
🔎 Items on the screen: Size selector: Large / Medium / Small (single selection).
Step 5 · Live Preview — Select fill mode
Screen Design → Capture
The fill mode determines how the camera image fills the box: Cover (image fills the box with no gaps, may crop at edges), Full Screen (camera fills entire screen; position and size are disabled), and Fit (entire image fits into box, may have margins at edges). In Full Screen mode or Cover + Large combination, the position grid is locked; In this case, only the On/Off switch on the right works.
🔎 Items on the screen: Fill mode selector: Cover / Full Screen / Fit.
Step 6 · Set Live Preview Opacity
Screen Design → Capture
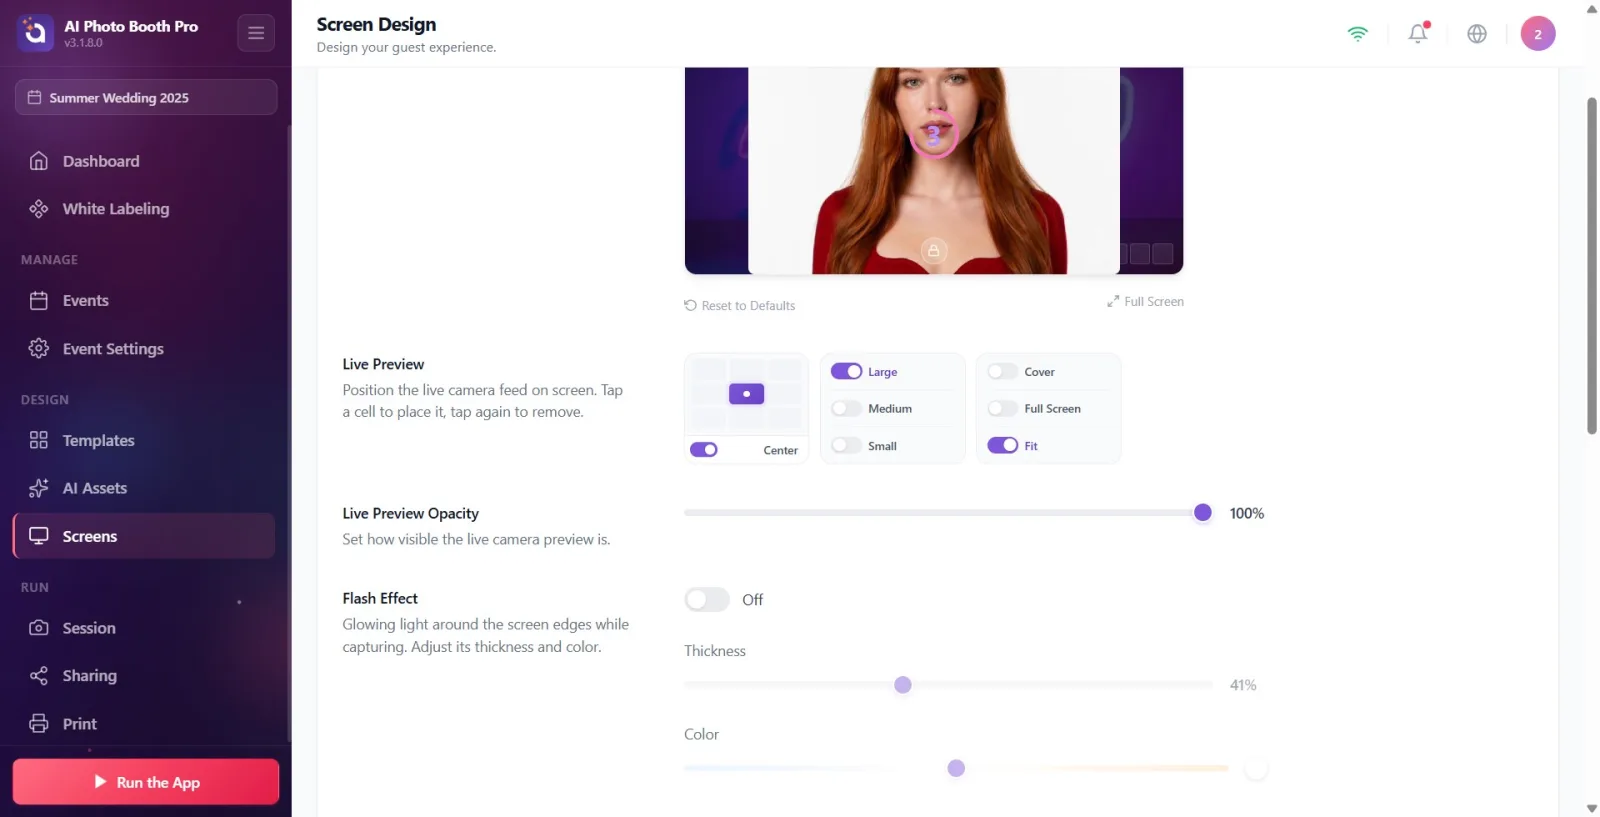
Determine how visible the camera preview is by dragging the slider in the Live Preview Opacity section ('Adjust how visible the live camera preview is'). 100% completely clear, 0% completely invisible; The value is shown as a percentage next to the slider.
🔎 Items on the screen: range slider + percentage value in the range 0–100.
Step 7 · Turn Flash Effecton or off
Screen Design → Capture
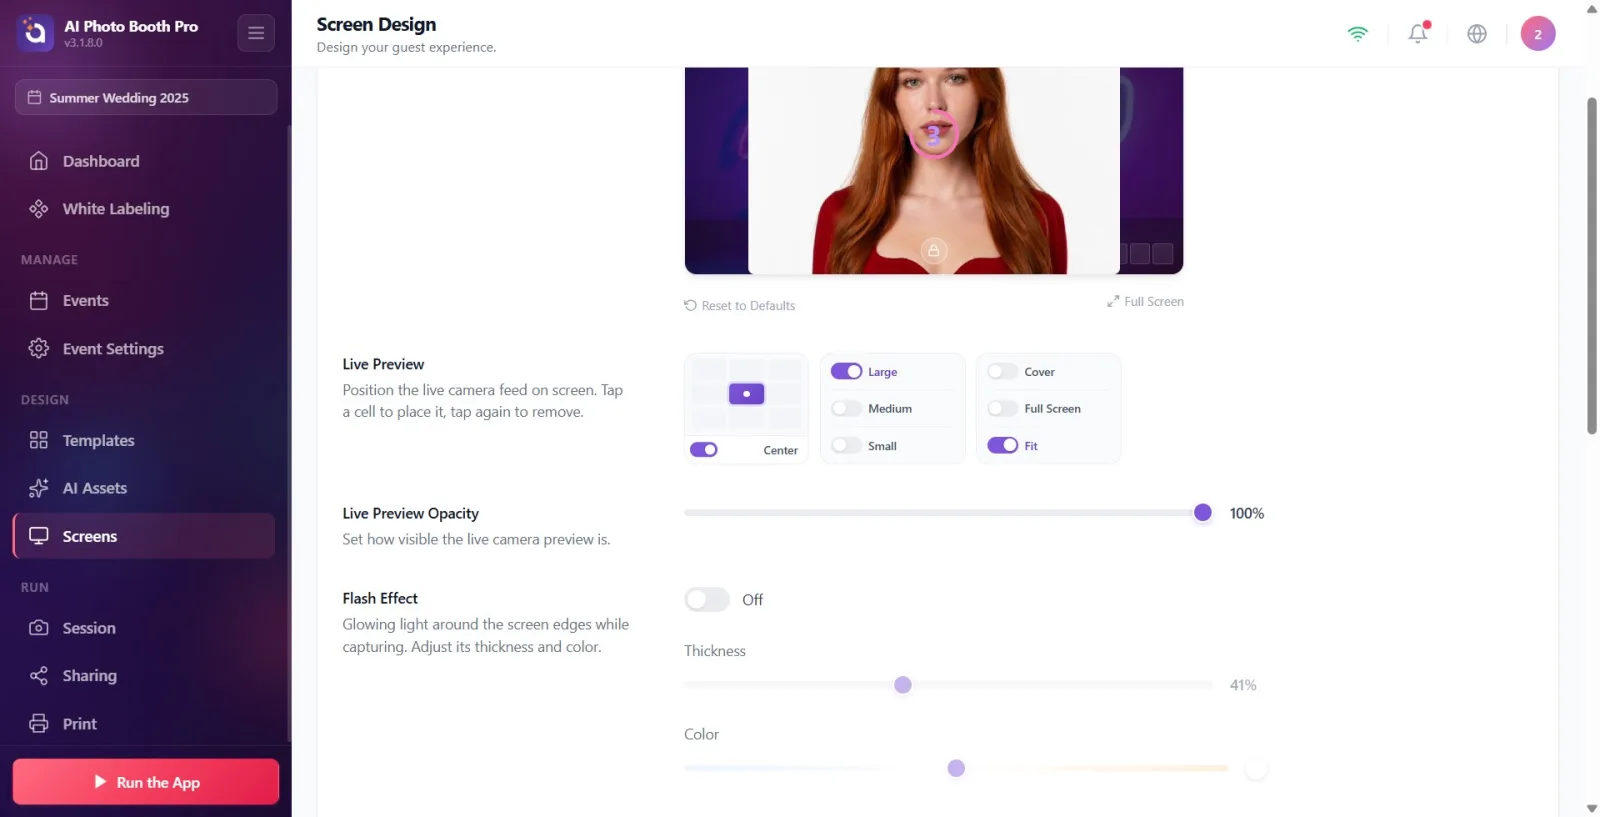
Activate the glow around the edges of the screen at the time of shooting with the On/Off switch in the Flash Effect section ('Light at the edges of the screen when shooting. Adjust its thickness and color.'). This switch is the same as the flash switch in the 'Camera' settings; Turning it on and off in one also affects the other. When off, the bottom Thickness and Color sliders are dimmed.
🔎 Items on the screen: On/Off switch (SwitchSettingComponent) — common with the Camera tab.
Step 8 Flash Effect — Set thickness
Screen Design → Capture
Adjust the width of the light stripe at the screen edge with the Thickness slider when the flash is on. The value is a level from 0–100, and the edge glow in the preview is updated instantly. This slider is disabled when the flash is off.
🔎 Elements on the screen: 0–100 slider + percentage value labeled Thickness.
Step 9 Flash Effect — Set color (temperature)
Screen Design → Capture
The Color slider is a temperature adjustment: cool blue-white to the left, pure white in the middle, and warm amber/orange tone to the right (similar to macOS Edge Light). The round sample to the right of the slider shows the selected color. Important: This is just an edge effect on the screen; It does not interfere with the color of the photograph taken. Disabled when flash is off.
🔎 Elements on the screen: temperature slider labeled Color (orange→white→blue gradient) + round swatch.
Step 10 · Set Countdown location and size
Screen Design → Capture
Select the location of the countdown timer on the screen from the 3x3 grid in the Countdown section ('Position the countdown timer on the screen. Tap a cell to place it, tap again to remove it.'). Then determine the size with 'Large' / 'Medium' / 'Small'. The color of the countdown number comes from the theme colors in the 'General' tab; is not changed here.
🔎 Elements on the screen: 3x3 position grid + size selector (Large / Medium / Small).
Step 11 · Set Photo Thumbnails location and size
Screen Design → Capture
The Photo Thumbnails section shows thumbnail previews of previously captured frames in multiple photo sessions ('Show thumbnail previews of previous shots in multiple photo sessions. Tap a cell to place it, tap again to remove it.'). Select location from 3x3 grid, then size with 'Large' / 'Medium' / 'Small'.
🔎 Elements on the screen: 3x3 position grid + size selector (Large / Medium / Small).
Step 12 · Set Logo location and size
Screen Design → Capture
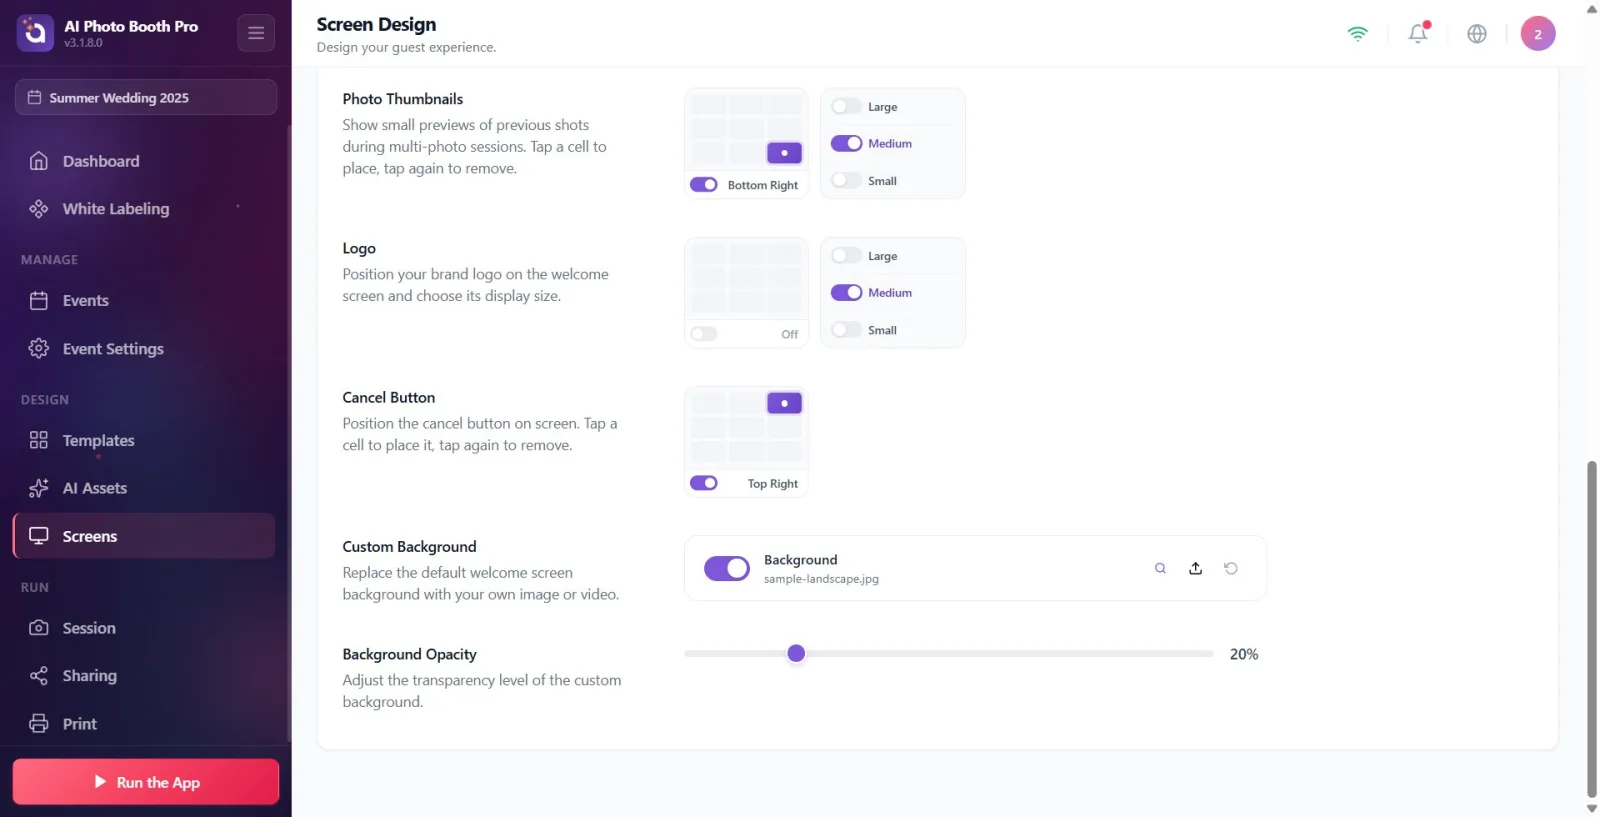
Select the location of your brand logo on the capture screen (default top-middle) from the 3x3 grid in the Logo section and determine its size with Large / Medium / Small. The logo image itself is loaded from the General tab; is simply positioned here. If the logo is turned off in the General tab, the logo will not appear even if you select a cell here.
🔎 Elements on the screen: 3x3 position grid + size selector (Large / Medium / Small).
Step 13 · Set Cancel Button
Screen Design → Capture
From the 3x3 grid in section Cancel Button, select the on-screen location of the button that allows the guest to cancel the shot ('Locate the cancel button on the screen. Tap a cell to place it, tap again to remove it.'). There are no size options in this section; The button's color and text come from the settings in the 'General' tab.
🔎 Items on the screen: 3x3 position grid only (no size options).
Step 14 · Load or toggle Custom Background
Screen Design → Capture
The Custom Background section allows you to replace the background of the shooting screen with your own image or video (Upload a JPG, PNG or MP4 file). Press the upload (up arrow) button in the row and select an image or video from the local file chooser; review full screen with preview (magnifier/play) button; Revert to default sample image with restore button. The switch on the left turns the entire background on and off. If you do not upload your own file, the main background in the General tab will be inherited.
🔎 On-screen elements: Open/Close switch + file line (name · size) + Preview / Load / Restore buttons; allowed types: Image and Video (approx. max. 50 MB).
Step 15 · Set Background Opacity
Screen Design → Capture
Adjust the transparency level of the custom background with the slider in the Background Opacity section (Adjust the transparency level of the custom background.). At a low value, the background fades out and the underlying theme background appears. This slider is active only if a background is defined; If there is no background it is disabled.
🔎 Items on the screen: slider + percentage value from 0–100 (disabled when there is no background).
Step 16 · Return to top with Reset to Defaults if necessary
Screen Design → Capture
If you tap the Reset to Defaults link at the bottom of the preview box, a confirmation window will open ('This will restore all item positions and options on the capture screen to their original settings. This cannot be undone.'). Confirm with 'Reset' or cancel with 'Cancel'. Resetting only returns the element positions/sizes, transparencies, and flash thickness+color settings on this tab to default; It does not change the flash On/Off switch (since it is common with General/Camera) and the colors on the General tab.
🔎 Items on the screen: Reset to Defaults connection → confirmation window (Reset / Cancel buttons).
The top Screen Preview is interactive: tapping an item in the preview (camera, countdown, thumbnails, logo, cancel button) takes you directly to that item's settings section.
Use the Full Screen button below the preview to see the result in full size.
The background can be both image and video (approx. max. 50 MB). The video plays automatically in the background preview.
The Flash Effect color is just a glow at the screen edge; It does not change the color of the captured photo.
Tapping a cell in the location grid places the item, while the On/Off switch next to the grid shows/hides the item entirely.
Reset to Defaults only resets the layout of the Capture tab; Does not affect color/theme or other tabs.
Searching for countdown color, button color or background background color in this tab: these come from the General tab; They are only positioned in the Capture tab.
Trying to load the logo from this tab: the logo image is loaded from the General tab; Here only the position and size are adjusted. If the logo in General is turned off, it will not appear here at all.
Turning off the flash in this tab and being surprised that it is also turned off in the Camera settings: the flash On/Off switch is common to the two tabs.
Setting the fill mode to Full Screen and not understanding why the position grid and size options are disabled: position/size is meaningless since full screen mode covers the entire screen.
Making adjustments when no event is selected: changes are not saved. First create an event and make it selected.
If the background is not visible: Check that the Custom Background switch is not turned off and the Background Opacity slider is not at 0%.
Related topics
Welcome Screen Share Screen General (Color and Theme) Settings Camera Settings (Flash)
