
Before this: How to Create an Event?
Sharing Settings is where you determine how booth guests will receive their photos and videos. The page is divided into three tabs: Activation Share (cloud/QR sharing and microsite), E-Mail Sharing and SMS Sharing. Each setting is applied to the currently selected event and saved automatically, without a separate save button.
- An event must be created and selected (active) — The sharing setting depends on the event, Sharing will not appear in the sidebar at all when no events are selected
- Must have internet connection — Activation Share runs cloud-based; email/SMS test transmissions also go to the server
- You must have access to the settings (carrier) screen
step by step
Step 1 · Open the sharing settings page
Settings (sidebar)
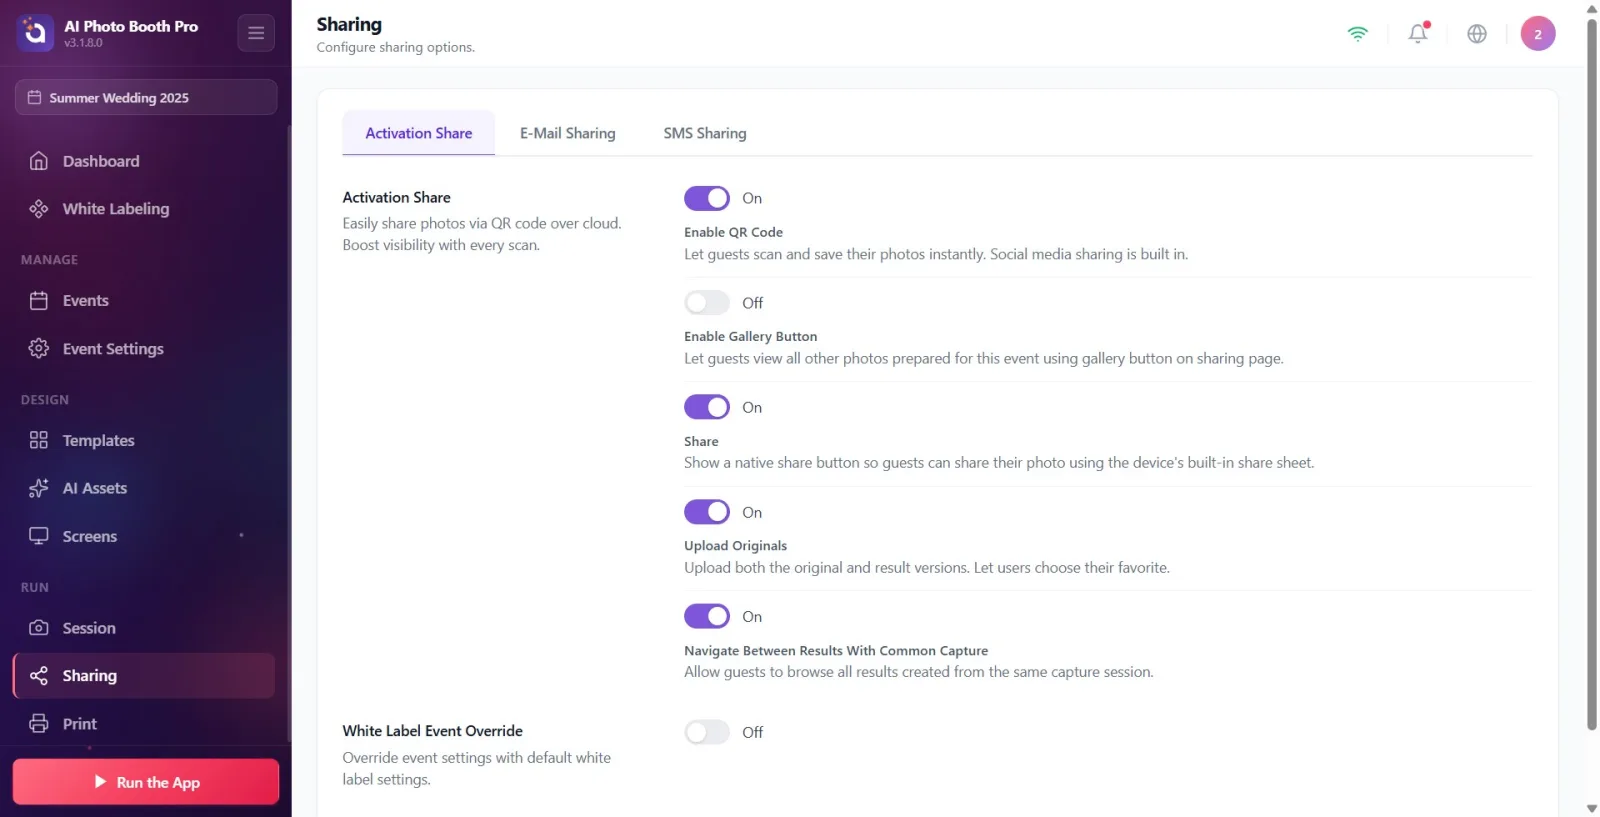
Tap Sharing (Sharing) under the group titled Run in the left sidebar. This item is only listed when an event is selected; If the event is not selected, it will not appear. When the page is opened, the title Sharing appears at the top and the subtitle Configure sharing options. appears right below it. (Note: the title and sidebar label appear in the interface as Sharing in English, they have not been translated into Turkish.)
🔎 Elements on the screen: Sidebar element Sharing (share/branch icon) in group Run — in the same group as 'Session' and 'Print Settings'
Step 2 · Navigate between three tabs
Sharing
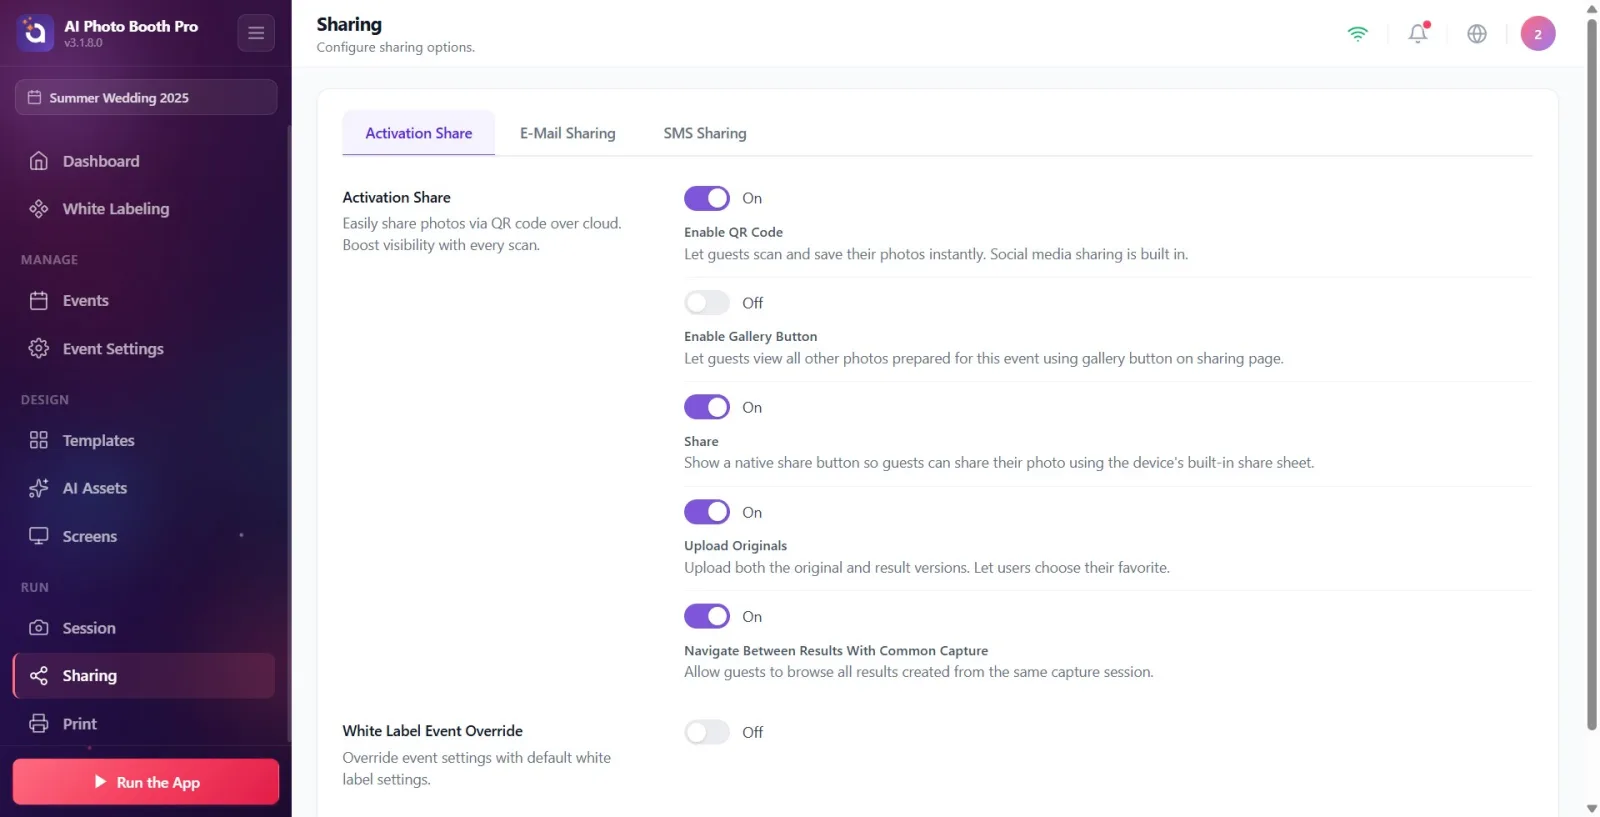
There are three tabs at the top of the page: Activation Share, E-Mail Sharing and SMS Sharing. You switch by tapping the tab you want; the selected tab appears highlighted. When the page is first opened, the Activation Share tab appears by default. Each tab configures a different way for the guest to receive their photo — they are independent of each other, and more than one can be open at a time.
🔎 Elements on the screen: Tab bar: Activation Share | E-Mail Sharing | SMS Sharing (active tab hover)
Step 3 · Activation Share tab — cloud and QR sharing options
Sharing → Activation Share
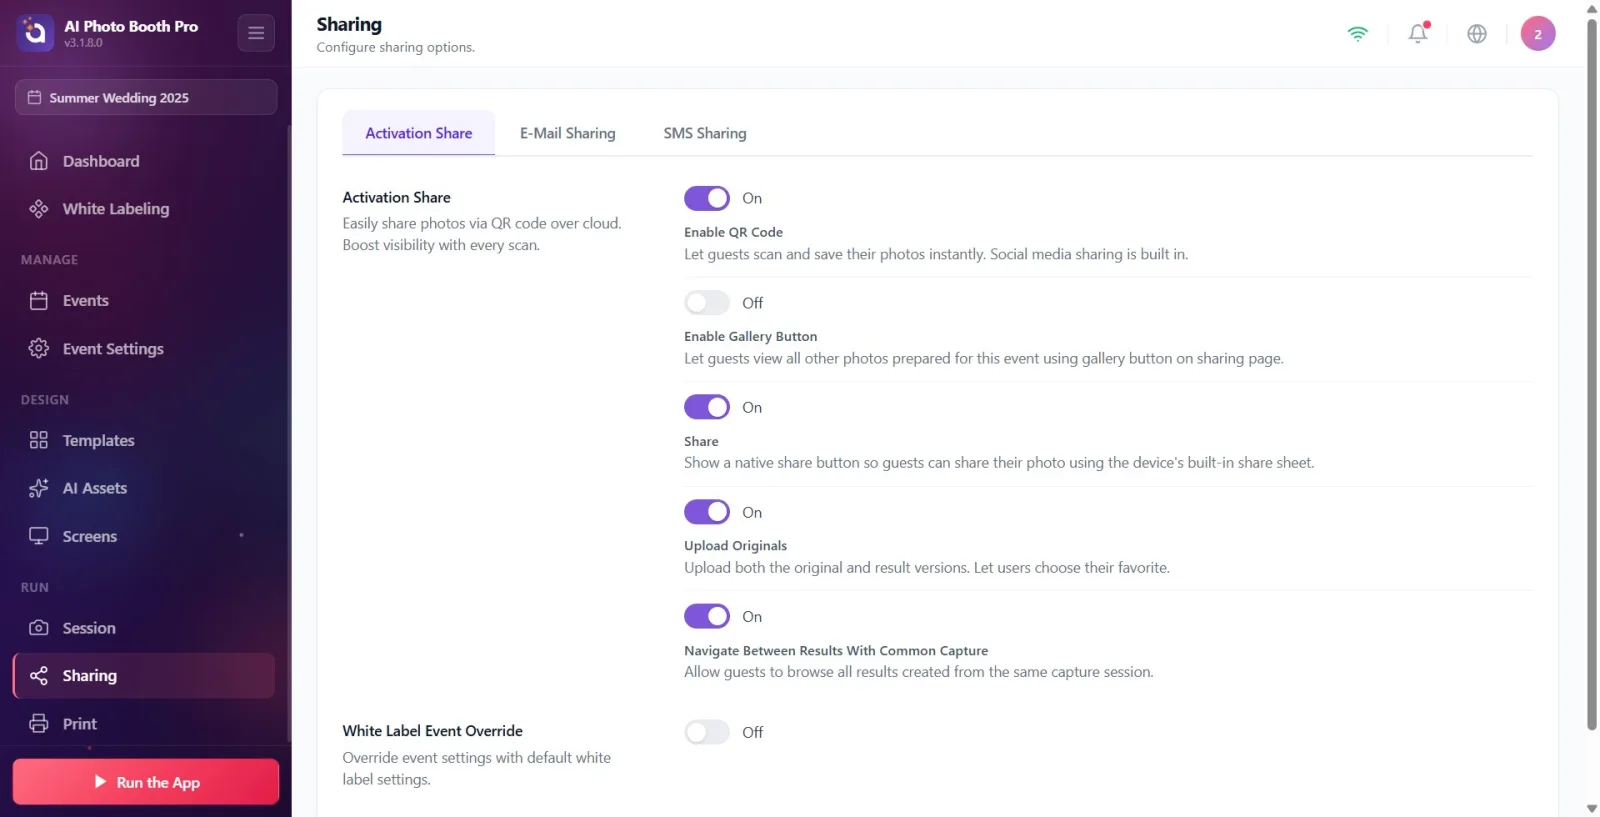
The first section is Activation Share (description: 'Easily share photos via the cloud with a QR code. Increase visibility with every scan.'). There are five toggle switches here: 'Enable QR Code' (instantly scans and saves guest photo, including social media sharing), Enable Gallery Button (guest can see all photos from this event), Share (button that opens the device's built-in native sharing window), Upload Originals (loads original + result versions) and Navigate Between Results With Common Capture. Most of these switches are on by default.
🔎 Items on the screen: 5 keys under the heading Activation Share: Enable QR Code, Enable Gallery Button, Share, Upload Originals, Navigate Between Results With Common Capture
Step 4 · Activation Share tab — microsite (share page) customization
Sharing → Activation Share
Below in the same tab is the key White Label Event Override (description: 'Override event settings with default white label settings.'). When you open it, additional sections appear that customize the share page (microsite) the guest sees for this event: Micro Site Texts (title, copyright, and company name), Micro Site Logo, UI Colors (ready themes or individual colors), Preview Micro Site button, and Extra Background. This customization is only available on the Ultimate plan; If the plan is insufficient, a locked warning band and 'Upgrade to Ultimate' button will appear when override is turned on.
🔎 Items on the screen: White Label Event Override key; Micro Site Texts, Micro Site Logo, UI Colors, Preview Micro Site, Extra Background sections when on (lockband in low plan)
Step 5 · E-Mail Sharing tab — sending via email
Sharing → E-Mail Sharing
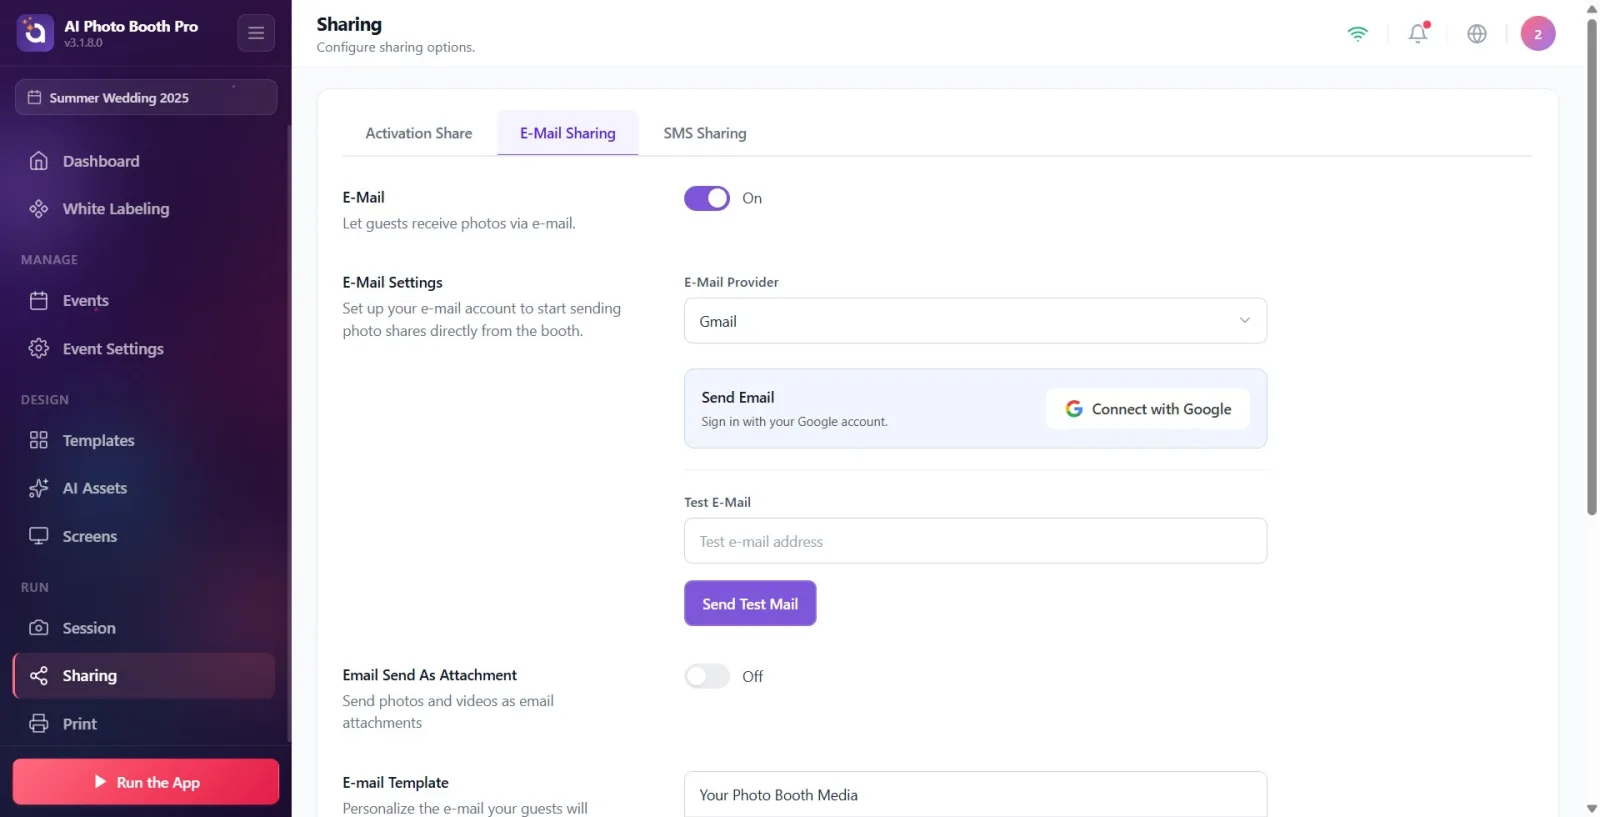
At the top of this tab is the E-Mail section and a toggle switch (On/Off); description Let guests receive photos via e-mail.. In the new event, this feature is OFF by default — the guest will not see the email option in the booth unless they turn it on. When you turn on the switch, the 'Email Settings' section opens: Gmail, Outlook or Custom SMTP is selected from the 'Email Provider' list. If Gmail/Outlook is selected (and the platform supports it), a one-time login is made with the Connect with Google / Connect with Outlook button — while connected, 'Emails will be sent from this account without a password. No need for SMTP settings.' information is removed and SMTP password fields are hidden. On other providers, the Sender Name, E-Mail Address and SMTP fields are entered manually. At the bottom is the Test E-Mail address + Send Test Mail button, as well as the Email Send As Attachment key and the E-mail Template editor (available variables: {share_link}, {image}).
🔎 Items on the screen: E-Mail on/off switch; on E-Mail Settings (provider selection + OAuth/SMTP), Send Test Mail, Email Send As Attachment, E-mail Template
Step 6 · SMS Sharing tab — Sending via SMS
Sharing → SMS Sharing
At the top of this tab is the SMS section and a toggle switch (description: 'Enable your guests to receive their photos instantly via SMS.'). Like email, this defaults to OFF in the new activity. Opening it brings up the SMS Provider section — currently only Twilio is supported. If Twilio connection is supported, connect with Connect with Twilio (web login) or Manual Entry (Account SID / Auth Token / sender number modal); When connected, the green card Twilio Connected and Disconnect appear. Otherwise the Auth Key / SID, Account ID, Sender Phone Number and Country Code fields are filled manually (Country Code default '+1'). At the bottom is the Test SMS number + Send Test SMS button, as well as the Text Message template (variable available: {share_link}).
🔎 Items on the screen: SMS on/off switch; template SMS Provider (Twilio), Connect with Twilio/Manual Entry, Send Test SMS, Text Message when on
Step 7 · Registration and scope of settings
Sharing
There is no separate Save button on this page — changes are automatically saved when you turn switches and fill in fields. All sharing settings apply only to the currently selected (active) activity; you need to configure them separately in another activity. Unless you open the E-Mail and SMS sections, these options will not appear on the booth sharing screen that the guest sees.
Sharing appears in the sidebar only when an activity is selected — if you don't see it, select an activity first.
E-Mail Sharing and SMS Sharing are OFF by default in the new event; In order for the guest to use it, you must turn on the relevant switch.
Don't look for a separate save button — key and field changes are saved automatically.
All sharing settings are event specific; Make sure the correct event is selected before editing.
For Gmail/Outlook, a one-time login of Connect with Google / Connect with Outlook is sufficient — no password or SMTP setting required ('Mails will be sent from this account without a password.').
Only Twilio is supported for SMS; No other providers are listed.
Verify settings with Send Test Mail / Send Test SMS before sending.
Microsite (share page) customization is under White Label Event Override and requires the Ultimate plan.
You can use {share_link} and {image} variables in the email template and {share_link} variables in the SMS template.
Forgetting to turn on Email or SMS — the guest will never see this option in the booth because they are off by default.
Trying to press Savee manually — there is no such button; Registration is automatic.
Searching for the sharing setting when no events are selected — Sharing will not appear in the sidebar in that case.
Expecting an SMS provider other than Twilio — there is only Twilio.
Trying to fill in SMTP password fields while Gmail/Outlook OAuth is connected — those fields are hidden once the connection is established, it is not necessary.
Open White Label Event Override with inadequate plan and wait for microsite areas — If there is no Ultimate plan, a locked warning banner appears.
Thinking that the sharing settings you make in one event apply to all events — the settings are event specific.
Related topics
ActivationShare E-Mail Sharing SMS Sharing
