
Before this: How to Create an Event?
The General tab is where you edit the currently selected event's basic identity details — its name and description. Changes are saved automatically, without a separate save button.
- An event must be created and selected (active) — the General tab edits the currently selected event; if no event is selected, the fields appear empty
- You must have access to the Event Management (Events) screen
Step by step
Step 1 · Open the Event Settings page
Event Management (Events)
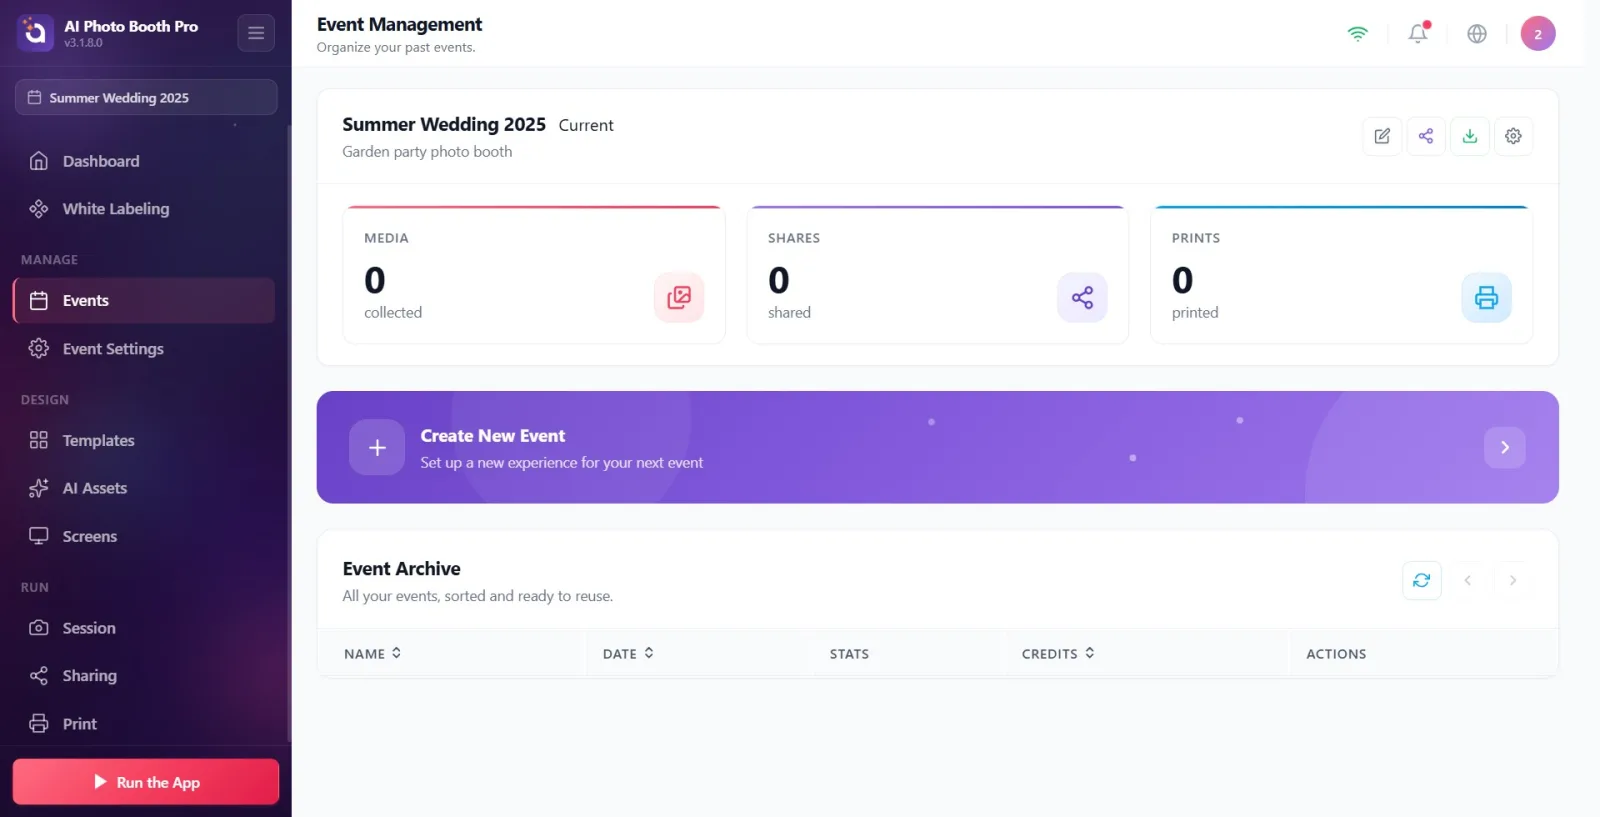
On the Events screen, select the event you want to edit. Among the action buttons to the right of the event title, tap the gear-icon Event Settings button. This opens the settings page for the selected event (page title: Event Settings, subtitle: Configure your event.).
🔎 On-screen elements: The gear-icon Event Settings button — located next to the Edit, Share and Create Export buttons
Step 2 · Make sure you are on the General tab
Event Settings
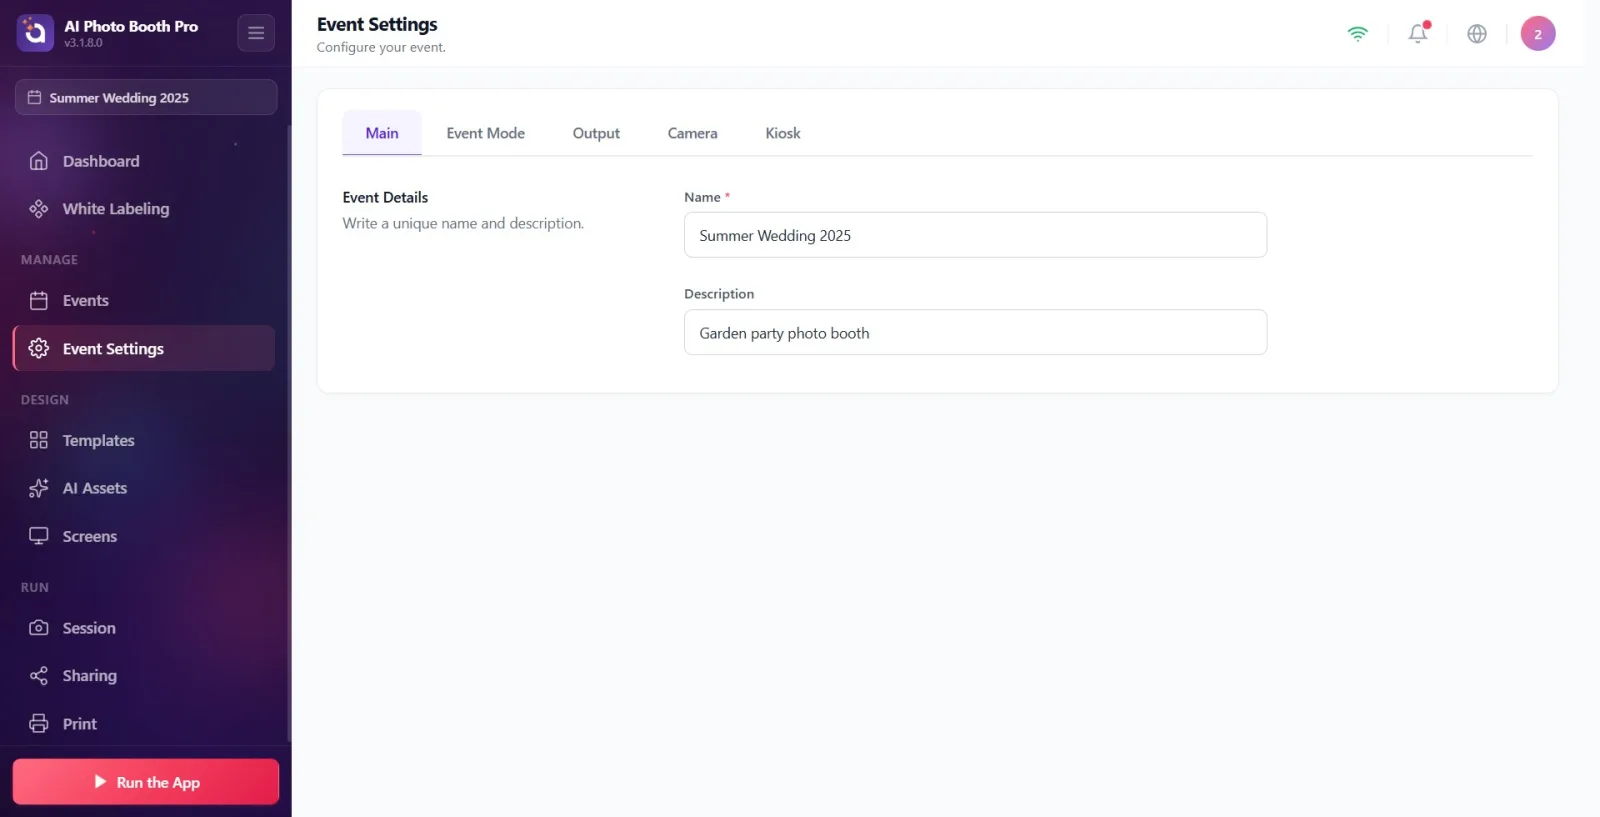
Tap the General tab in the tab bar at the top of the page. When the settings page is first opened, the General tab is shown by default. The tab you select is remembered — the next time you open the page, the tab you last opened appears. The tab bar contains, in order, the General, Event Mode, Output, Camera and Kiosk tabs.
🔎 On-screen elements: Tab bar: General | Event Mode | Output | Camera | Kiosk (the active tab appears highlighted)

Step 3 · Review the Event Details section
Event Settings → General
The General tab contains a single section: Event Details (description line: Write a unique name and description.). This section has two fields — the required Name field at the top and the optional Description field below. This is where you edit your event's name and description.
🔎 On-screen elements: The Event Details heading + the Write a unique name and description. description, with Name and Description text boxes below
Step 4 · Enter the event name in the Name field (required)
Event Settings → General
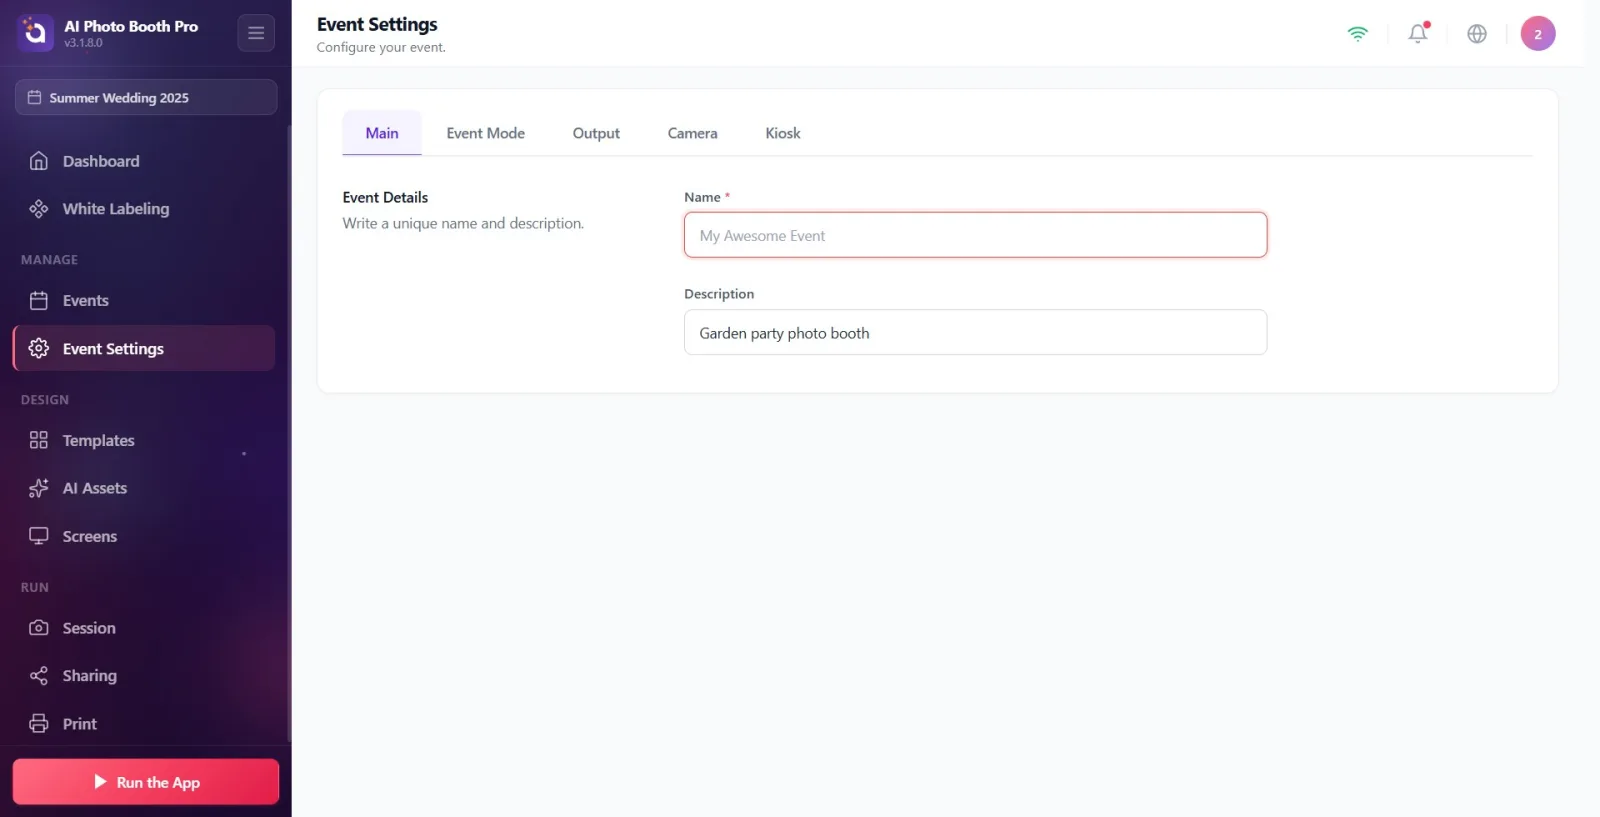
Type your event's name in the Name field. The red asterisk (*) next to the label indicates that this field is required. When the field is empty, the placeholder text My Awesome Event appears (this is only a hint, not an actual value). This field cannot be left empty.
🔎 On-screen elements: The Name text box (with a red * next to it — required), placeholder text My Awesome Event when empty
Step 5 · The warning that appears if Name is left empty
Event Settings → General
If you leave the Name field empty or enter only spaces, nothing is saved; a red Event name is required. warning appears below the field and the text box is marked with a red border. When you tap the field again and start typing (on focus), this warning disappears. Enter a valid name to continue.
🔎 On-screen elements: The red-bordered Name box + the Event name is required. message with a warning icon below it
Step 6 · Fill in the Description field (optional)
Event Settings → General
You can write a short description/tagline for your event in the Description field. This field is optional; you can leave it empty. When the field is empty, the placeholder text A short description of your event appears.
🔎 On-screen elements: The Description text box (optional, no asterisk), placeholder text A short description of your event when empty
Step 7 · Changes are saved automatically
Event Settings → General
There is no separate Save button. About half a second after you stop typing, changes are saved automatically and applied to the currently selected event. When the name is saved, leading and trailing spaces are trimmed automatically. If the name is not valid (empty / only spaces), nothing is saved — you must enter a valid name first.
Don't look for a separate Save button — changes are saved automatically ~0.5 seconds after you stop typing.
Name is required; Description is optional and can be left empty.
Extra spaces at the beginning and end of the name are cleaned up automatically when it is saved.
The changes you make apply only to the currently selected (active) event — make sure the correct event is selected before you start editing.
Your tab choice is remembered: the next time you open Event Settings, the tab you last left off on appears.
The faint text in the text boxes (My Awesome Event, A short description of your event) is only a sample hint; it is not saved unless you type.
Thinking the Name field was saved while it is empty — if the field is empty, saving is blocked and the red Event name is required. warning appears.
Thinking you entered a name when you only typed space characters — spaces alone are considered invalid, and the name-required warning still appears.
Trying to press Save manually — there is no such button; saving is automatic, and it is enough to wait a short moment after typing.
Editing while the wrong event is selected — the General tab always edits the currently active/selected event.
Mistaking the placeholder text for the actual event name — the My Awesome Event text is treated as empty until you type over it.
Related topics
Event Settings → Event Mode Event Settings → Output Event Settings → Camera Event Settings → Kiosk Event Management (Events)
