
Before this: What is Screen Design, How to Use General Tab?
Voices How to Set?
The Voices tab manages the audio prompts (countdown, selection, post-take, processing, payment, thank you sounds) that will be played to guests throughout the kiosk experience. The main Voice Guidance switch is opened first; When this switch is turned on, audio lines for 8 moments of the experience appear and you can load your own audio file (MP3, WAV, AAC, OGG, FLAC, etc.) into each line and turn on and off each step separately. The system does not automatically speak text (no TTS); The operator uploads each audio clip himself.
- event-creation
- An event must be selected — settings are saved based on the event; Changes you make when no events are selected will not be permanent
- The audio files to be loaded must be ready on the device (MP3, WAV, AAC, OGG/OPUS, FLAC, WMA, M4A, MIDI, etc.); each file can be up to 50 MB
Step by step
Step 1 · Open Voices tab
Screen Design → Voices
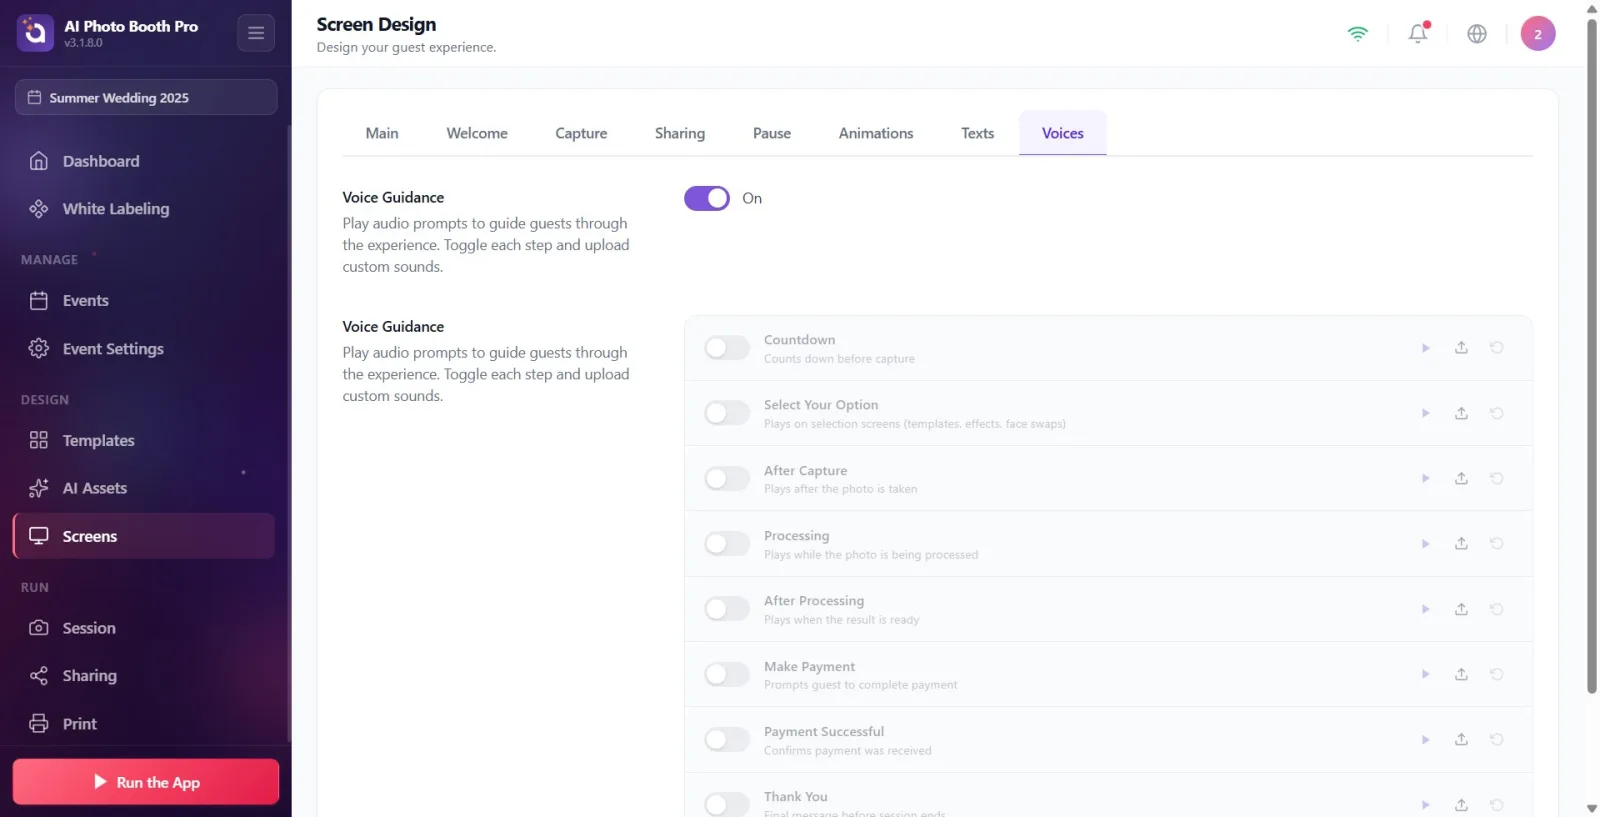
Open the Screen Design page in the Design group in the settings menu. Click the Voices tab at the far right in the top tab strip. Tab strip from left to right: General, Welcome, Capture, Sharing, Pause, Animations, Texts, Voices.
🔎 On-screen elements: Ribbon with 8 tabs at top; Voices tab on the far right.
Step 2 · Open the main Voice Guidance key
Screen Design → Voices
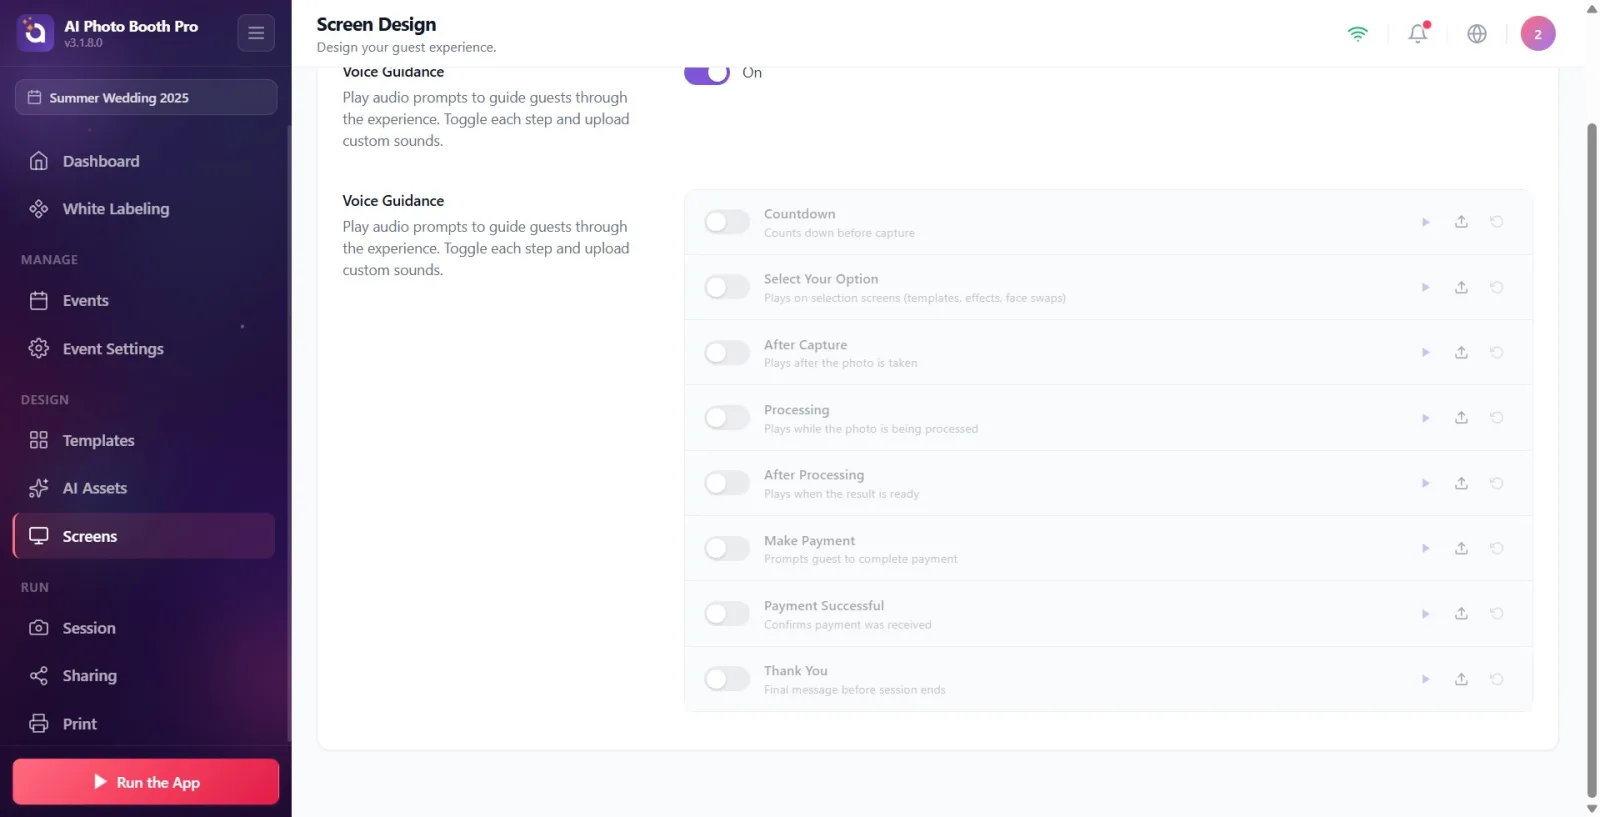
Click the on/off switch in the Voice Guidance section at the top of the page. Here's the description: 'Play voice commands to guide guests through the experience. 'Turn each step on and off and load custom sounds.' This master switch is OFF BY DEFAULT, and when it is off, the underlying volume steps are not visible at all. As soon as you turn on the switch, 8 voice lines appear.
🔎 Elements on the screen: Voice Guidance title + description; large on/off switch (toggle) to the right.
Step 3 · Get to know the controls of a voice line
Screen Design → Voices
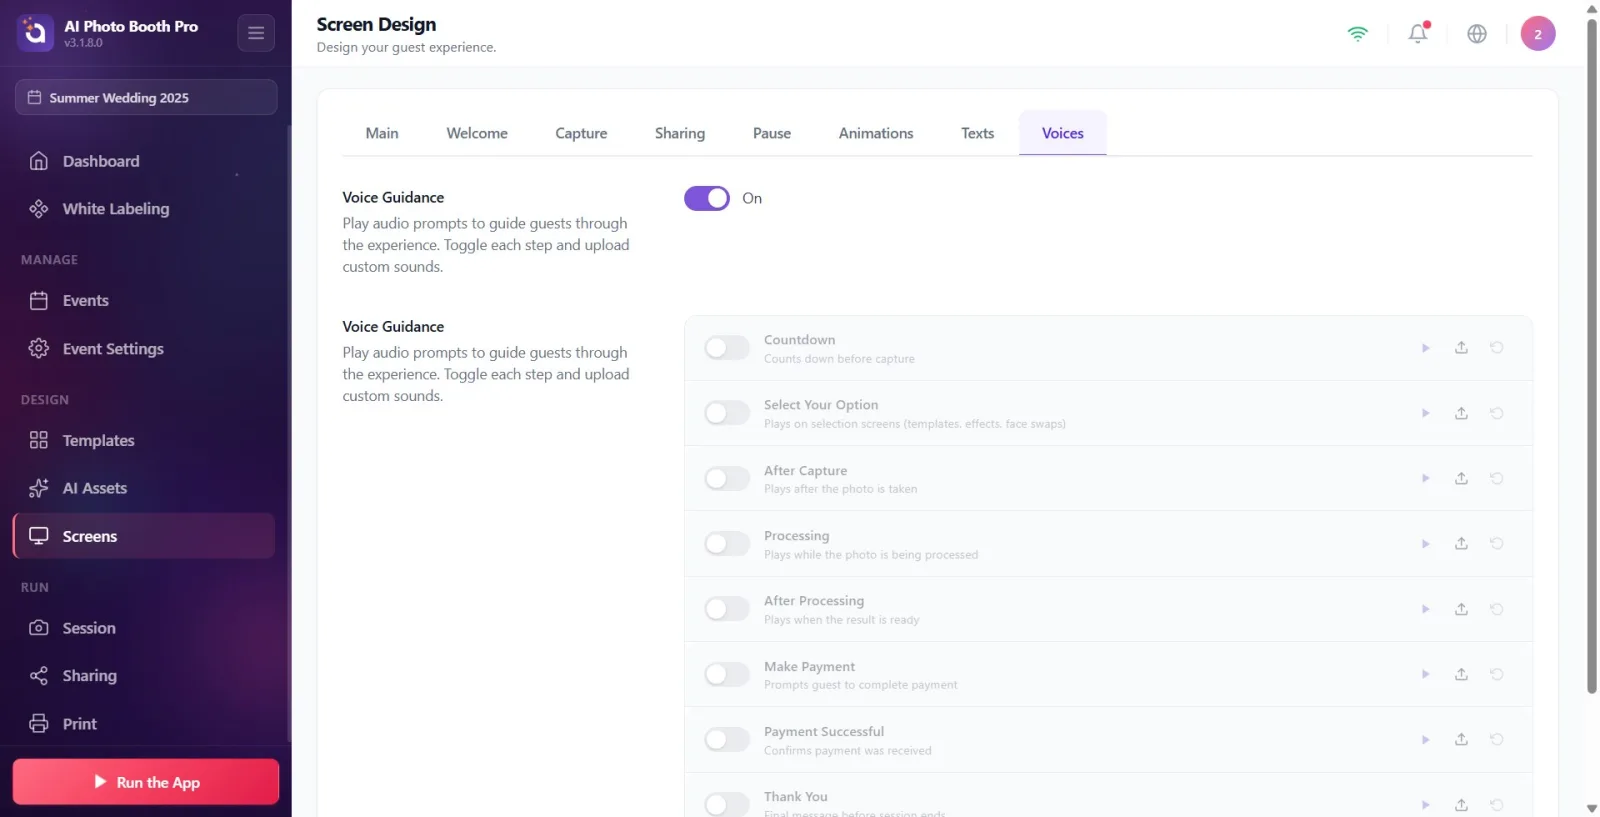
Each audio line has the same layout and contains: (1) the SMALL on/off switch for the line on the left (enables/disables the sound of this step — when off the line appears dimmed), (2) the step name and description in the middle (replaced by the file name and size when the file is loaded), (3) three round buttons on the right: 'Play' (▶, plays/pauses the loaded sound — English hint Play/Pause), 'Install' (↑ arrow selects file — English hint Upload) and Reset (↺ circular arrow returns step to default — English hint Reset). A thin progress bar appears in the line during installation.
🔎 Elements on the screen: Row: small toggle · name/description (or filename · size) · 'Play' (▶) · 'Load' (↑) · Reset (↺) buttons; upload progress bar.
Step 4 · Upload audio file to a step (general flow)
Screen Design → Voices
For the relevant step, first turn ON the SMALL switch on the left (otherwise the sound will not be played even if it is recorded), then press the 'Load' (↑) button on the right. The device's own (native) file chooser opens — not the browser loading window. Only audio files are accepted. Select a file; When the import is completed, the file name and size appear in the line and the file is uploaded to the cloud (the progress bar fills up). Supported formats include MP3, WAV, AAC, OGG/OPUS, FLAC, WMA, M4A and MIDI; The maximum limit per file is 50 MB.
🔎 On-screen elements: 'Install' (↑) button; native file selector; import/upload progress bar.
Step 5 · Countdown sound
Screen Design → Voices
Turn on the switch for the Countdown line and select the audio file with 'Load'. Description: 'Counts down before shooting begins.' This sound plays during the countdown moment just before the camera takes the photo (e.g. '3-2-1' announcements).
🔎 Elements on the screen: Countdown line: key + 'Install' button.
Step 6 · Select Your Option sound
Screen Design → Voices
Turn on the key of the Select Your Option line and load a voice. Description: 'Plays on selection screens (templates, effects, face replacement).' This audio plays as the guest selects a template, effect, or face replacement option.
🔎 Elements on the screen: Select Your Option line: key + 'Install' button.
Step 7 · After Capture sound
Screen Design → Voices
Turn on the key of the After Capture line and load a voice. Description: 'Plays after the photo is taken.' This is the sound that will be played immediately after the shooting is completed.
🔎 Elements on the screen: After Capture line: key + 'Install' button.
Step 8 · Processing sound
Screen Design → Voices
Turn on the key of the Processing line and load a voice. Description: 'The photo plays while it is being processed.' This is the sound that will be played while the photo/effect is being processed (during the waiting period); distracts the guest.
🔎 Elements on the screen: Processing line: key + 'Install' button.
Step 9 · After Processing sound
Screen Design → Voices
Turn on the key of the After Processing line and load a voice. Description: 'Plays when the result is ready.' This is the sound that will be played when the processed result (photo/video) is ready.
🔎 Elements on the screen: After Processing line: key + 'Install' button.
Step 10 · Make Payment sound
Screen Design → Voices
Turn on the key of the Make Payment line and load a voice. Description: 'Directs the guest to complete the payment.' In kiosks with a fee/payment flow, it is the voice that directs the guest to pay.
🔎 Elements on the screen: Make Payment line: key + 'Install' button.
Step 11 · Payment Successful sound
Screen Design → Voices
Turn on the key of the Payment Successful line and load a voice. Description: 'Confirms receipt of payment.' The confirmation sound that will be played when the payment is successfully received.
🔎 Elements on the screen: Payment Successful line: key + 'Install' button.
Step 12 · Thank You sound
Screen Design → Voices
Turn on the key of the Thank You line and load a voice. Description: 'Last message before session ends.' It is the last thank you/closing sound to be played before the session ends.
🔎 Elements on the screen: Thank You line: key + 'Install' button.
Step 13 · Preview the audio, turn off a step or reset
Screen Design → Voices
Press the 'Play' (▶) button on the line to listen to the audio you uploaded; The sound plays within the line, stops when you press it again (a separate window does not open). To disable a step, turn off the row's minor switch (the sound is not deleted, just played). To completely reverse the step — removing the custom voice you installed and returning to the default — press Reset (↺); This makes the step closed and unfiled.
🔎 On-screen elements: 'Play' (▶) button (inline play/pause); small on/off switch; Reset (↺) button.
Two-stage switch logic: The main Voice Guidance switch at the top turns the entire partition on/off; The small switch in each line turns on/off the sound of that step only. For a sound to play, BOTH the major key AND the minor key of that row must be open.
Sounds are recorded depending on the event. Adjust while an event is selected; What you do while no events are selected will not be permanent.
The system does not perform automatic voiceover (TTS). You prepare and upload the sound of each step yourself; You can use any language/tone register you want.
You don't have to fill out all 8 steps — just toggle the steps you want to use and load audio, leaving the rest off.
The sounds Make Payment and Payment Successful only have meaning in paid/payment flow setups; For free kiosks, you can leave these steps blank.
The progress bar fills in the post-upload line — this indicates that the file has synced to the cloud; Don't leave the page until the bar is full.
The file chooser is the device's own (native) window; You select your audio files from here. Supported formats: MP3, WAV, AAC, OGG/OPUS, FLAC, WMA, M4A, MIDI, etc. (up to 50 MB per file).
Searching for volume steps without turning on the main Voice Guidance switch: when the main switch is off, the 8 lines do not appear at all — turn on the top switch first.
Loading audio but not leaving the row's minor switch on: the steps DEFAULT comes to OFF; The loaded sound will not be played when the switch is closed. Install it and turn on the little key.
Waiting for automatic voiceover (TTS): the system does not translate text into voice; The operator uploads each audio clip.
Trying to upload a file larger than 50 MB or in an unsupported format: import returns an error. Shrink the file to a supported format such as MP3/WAV and under 50 MB.
Making adjustments without selecting an event: changes are tied to the event, so they won't be saved while no event is selected.
Pressing Reset (↺) when trying to temporarily mute a sound: reset removes the loaded custom sound. Just close the row's minor switch instead of Reset to silence it.
Related topics
Texts Screen Design
