













Before this: How to Create a Photo Template?
A logo, a frame or a corporate banner is added to the template as an Image layer and is printed on top of the photo in the output. Whether the frame appears in front of the photo depends on the layer order. To take more than one photo, each capture area gets its own Pose number. The editor's screens are described in the How to Create a Photo Template? and How to Edit an Existing Template? documents; this document describes the task itself.
- The template editor must be open: Templates → pencil icon on the template card (Edit or Clone & Edit).
- The logo or frame file must be saved on your device. Do not select the file directly from an email attachment; save it to your computer first. On Mac, a file selected from the email program's temporary folder can close the app.
- Prepare a PNG with a transparent background for everything that needs to show what is behind it.
A JPEG file has no transparency: the white or colored box behind the logo stays in the output too, and a frame you think has an empty center covers the photo completely.
The Opacity setting does not make the background transparent; it fades the whole layer, including the logo itself.
Every newly added capture layer comes with Pose 1. If you don't change the poses, the booth takes a single photo and puts the same photo in every area.
In GIF mode, the number of photos taken is determined by the photo template, not by the GIF template.
Adding a logo or a frame
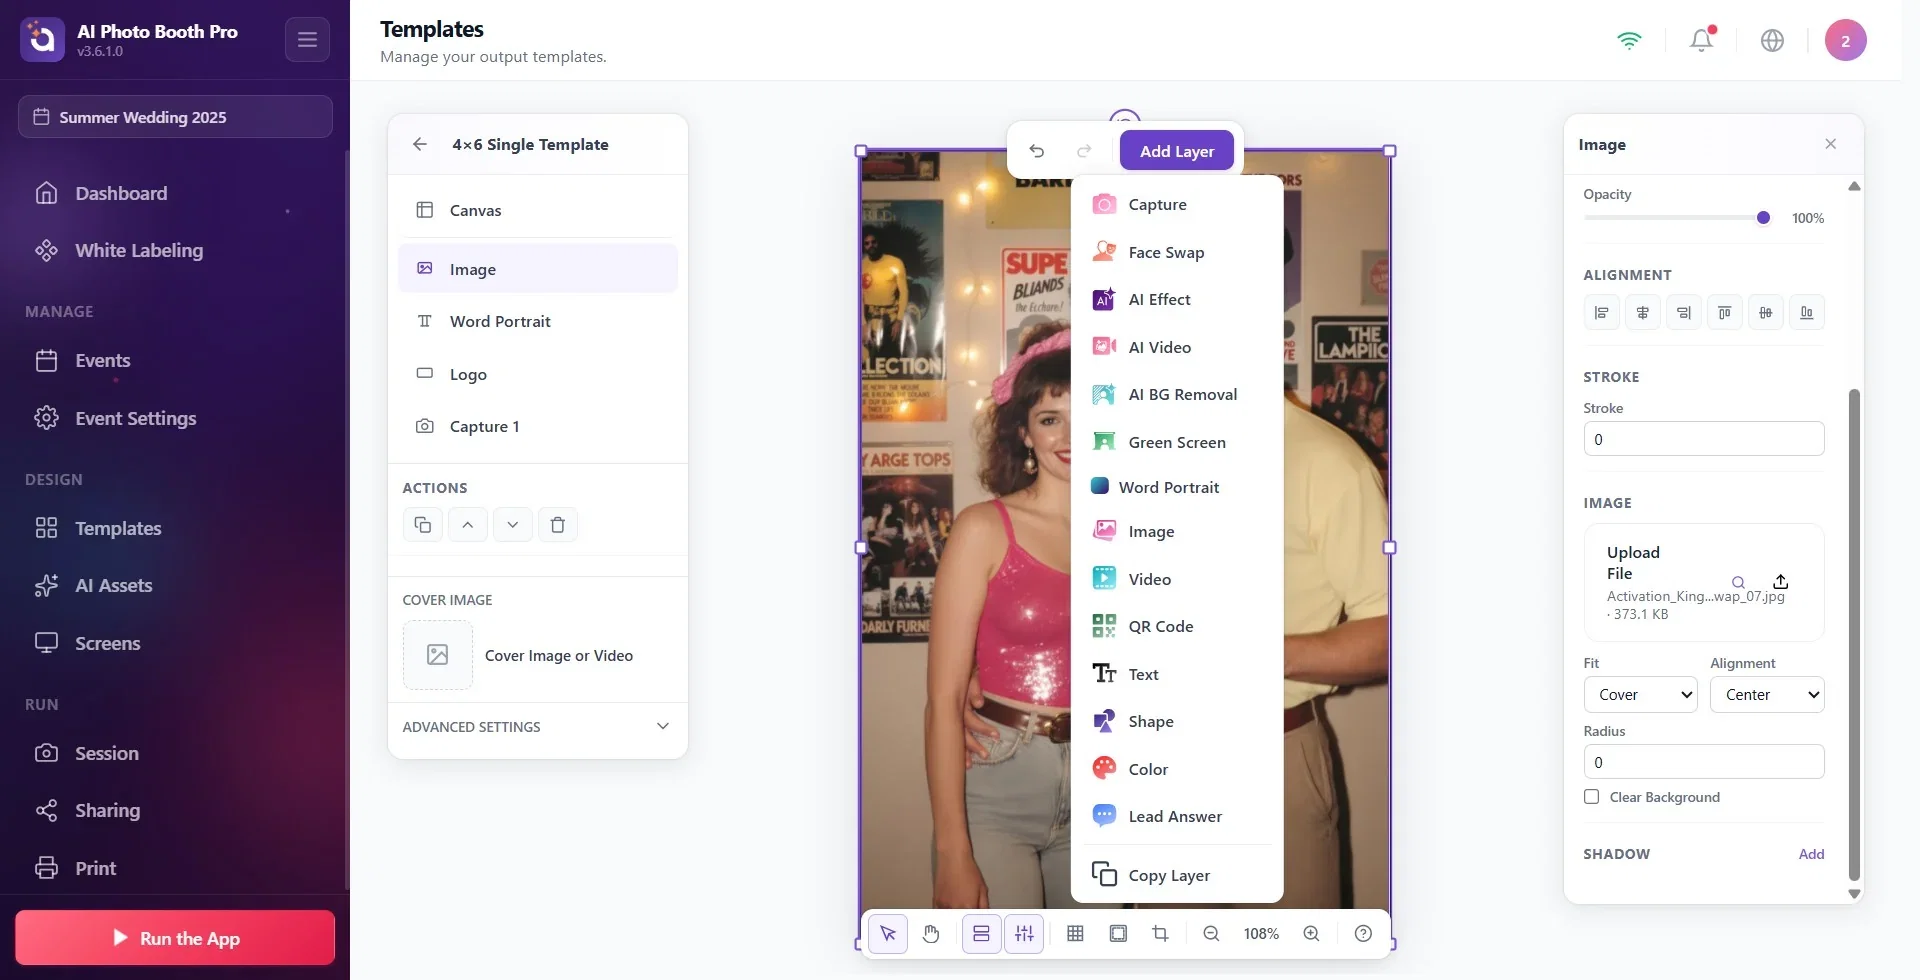
Step 1 · Add Layer → Image
Template Editor → Add Layer
Press the purple Add Layer button in the editor's top bar and choose Image from the list. An empty image layer is added to the canvas and appears at the top of the list in the left Layers panel. The names of the layer types (Capture, AI Effect, Image, Text…) are written in English in the menu.
Templates created with the wizard may have a ready-made image layer named Logo in the bottom left corner. To use your own logo, instead of adding a new layer you can select that one and change its image.
🔎 Items on the screen: purple Add Layer button; in the list that opens, layer types such as Capture, AI Effect, Image, Text; at the very bottom Copy Layer
Step 2 · Upload and place the image
Template Editor → Properties → Image
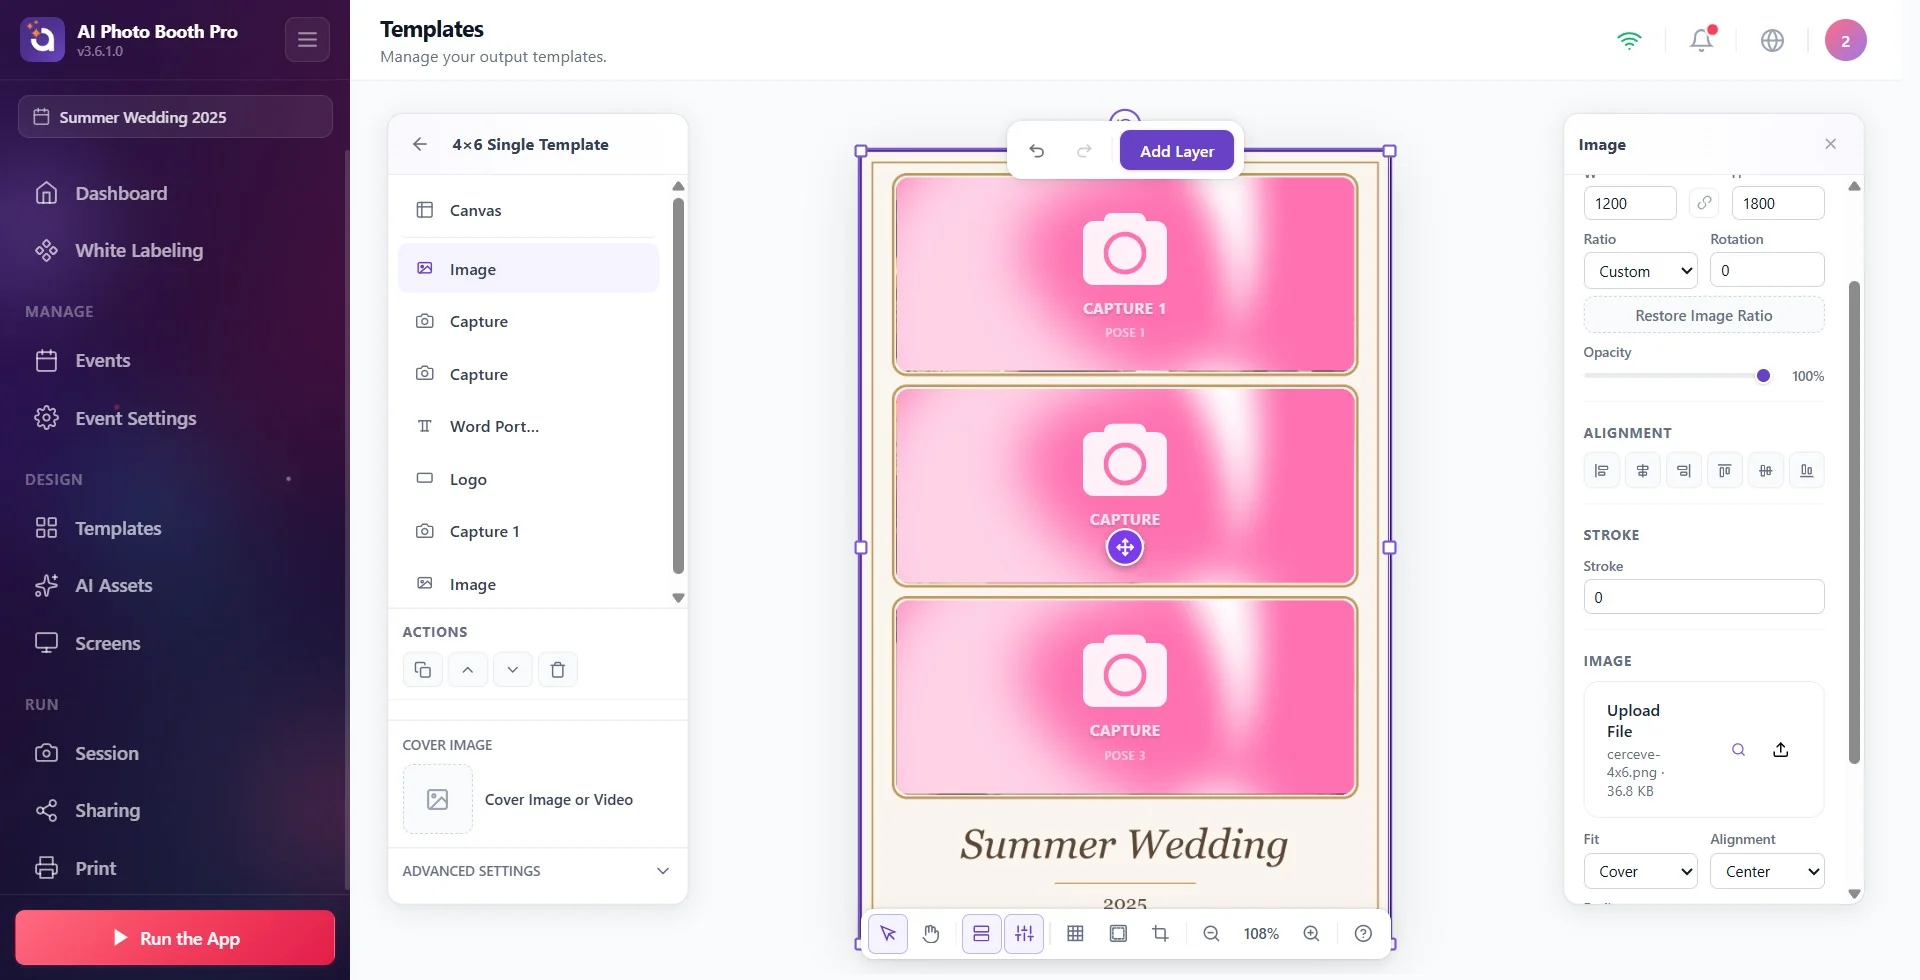
While the layer is selected, the Image section opens in the Properties panel on the right. Press the upload icon and choose your file (PNG or JPG, up to 50 MB). Then use Fit to choose how the image sits in the area: Contain shows the whole image without distorting its proportions, Cover fills the area and crops what overflows, Stretch fits it to the area regardless of proportions.
Grab the logo by its corner to resize it and drag it into place. For a full-page frame, spread the layer over the whole canvas: in the Position & Size section, set X and Y to 0 and W and H to the canvas size (e.g. 1200 and 1800 in a 4×6 portrait template).
🔎 Items on the screen: in the Image section the file row and the upload icon; Fit (Contain / Cover / Stretch) and Alignment; in the Position & Size section X, Y, W, H
Step 3 · Check the transparency
On the canvas, the photo area underneath must be visible through the parts of the logo or frame that should stay empty. If you see a white box, your file is not transparent: delete the background in your design program and save the file again as a PNG with transparency on. The app stores images that really have transparent pixels as PNG, and the transparency is kept in the print as well; images without transparency are stored as JPG.
Full-page frame: prepare it with the same pixel size as the template. 4×6 portrait 1200 × 1800, 6×4 landscape 1800 × 1200, 2×6 strip 600 × 1800 pixels (300 DPI). You can see the template's size in the Canvas → Size section while no layer is selected (see Portrait or Landscape? Template Orientation and Size).
Logo: it should not be smaller than the size it will be printed at; a small image prints blurry when it is enlarged.
Putting the frame in front of the photo
Step 4 · Set the layer order
Template Editor → Layers · Actions
In the left Layers panel, the layer at the top of the list is in front in the output, and the one below is behind. The frame or logo must be above the photo area (Capture, AI Effect, Face Swap…); a full-page background image goes at the very bottom. To change the order, drag and drop the layer in the list, or select the layer and use the Move Up (Ctrl+], on Mac ⌘]) or Move Down (Ctrl+[, on Mac ⌘[) button in the Actions section of the left panel. The output is printed in the same order as on the canvas.
The AI Effect and Face Swap result replaces the capture area. The logo or frame on top is not sent to the AI; it is printed on top as a separate layer after the result is ready, so it is not distorted. If you don't want the AI to change your logo, put the logo into the template as an Image layer, not into the prompt.
🔎 Items on the screen: the Layers list (the Canvas row at the top, the layers below it, each with an eye icon); for the selected layer, Actions: Duplicate, Move Up, Move Down, Delete
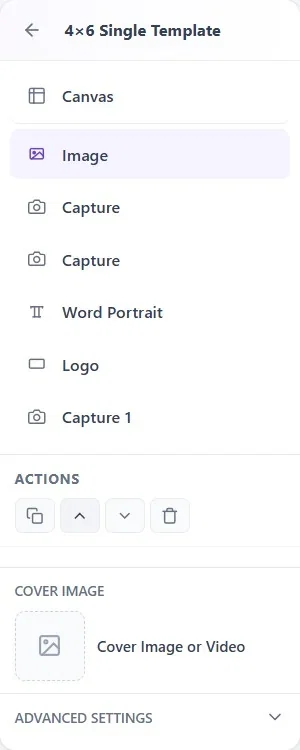
The logo or frame may have ended up behind the photo: move the layer above the photo area in the Layers list.
The layer may be hidden: check the layer's eye icon in the list.
Changes are saved automatically, but leave the editor with Back to Templates; the cover image and the final save are completed at that moment.
Multiple poses: 2-, 3- and 4-photo templates
Step 5 · Add one capture layer for each photo
Template Editor → Add Layer → Capture
The template needs as many capture layers as it will have photos. Add them with Add Layer → Capture (or AI Effect, Face Swap, AI BG Removal…); you can also copy the selected layer with Duplicate (Ctrl+D). Note: every newly added capture layer comes as Pose 1, while a duplicated layer keeps the same pose as its source; in both cases you have to change the pose by hand.
Step 6 · Give each layer its own Pose
Template Editor → Capture layer → Properties → Pose
Select the capture layer; in the right panel, choose Pose 1, Pose 2, Pose 3… from the Pose list (up to Pose 10). Pose 1 is the first shot, Pose 2 the second. The booth takes as many photos as the highest pose number in the template: a template with poses 1, 2, 3 has the guest take 3 shots and puts each photo in its own area.
🔎 Items on the screen: with a Capture layer selected, in the right panel Fit, Alignment and the Pose list (Pose 1 … Pose 10)
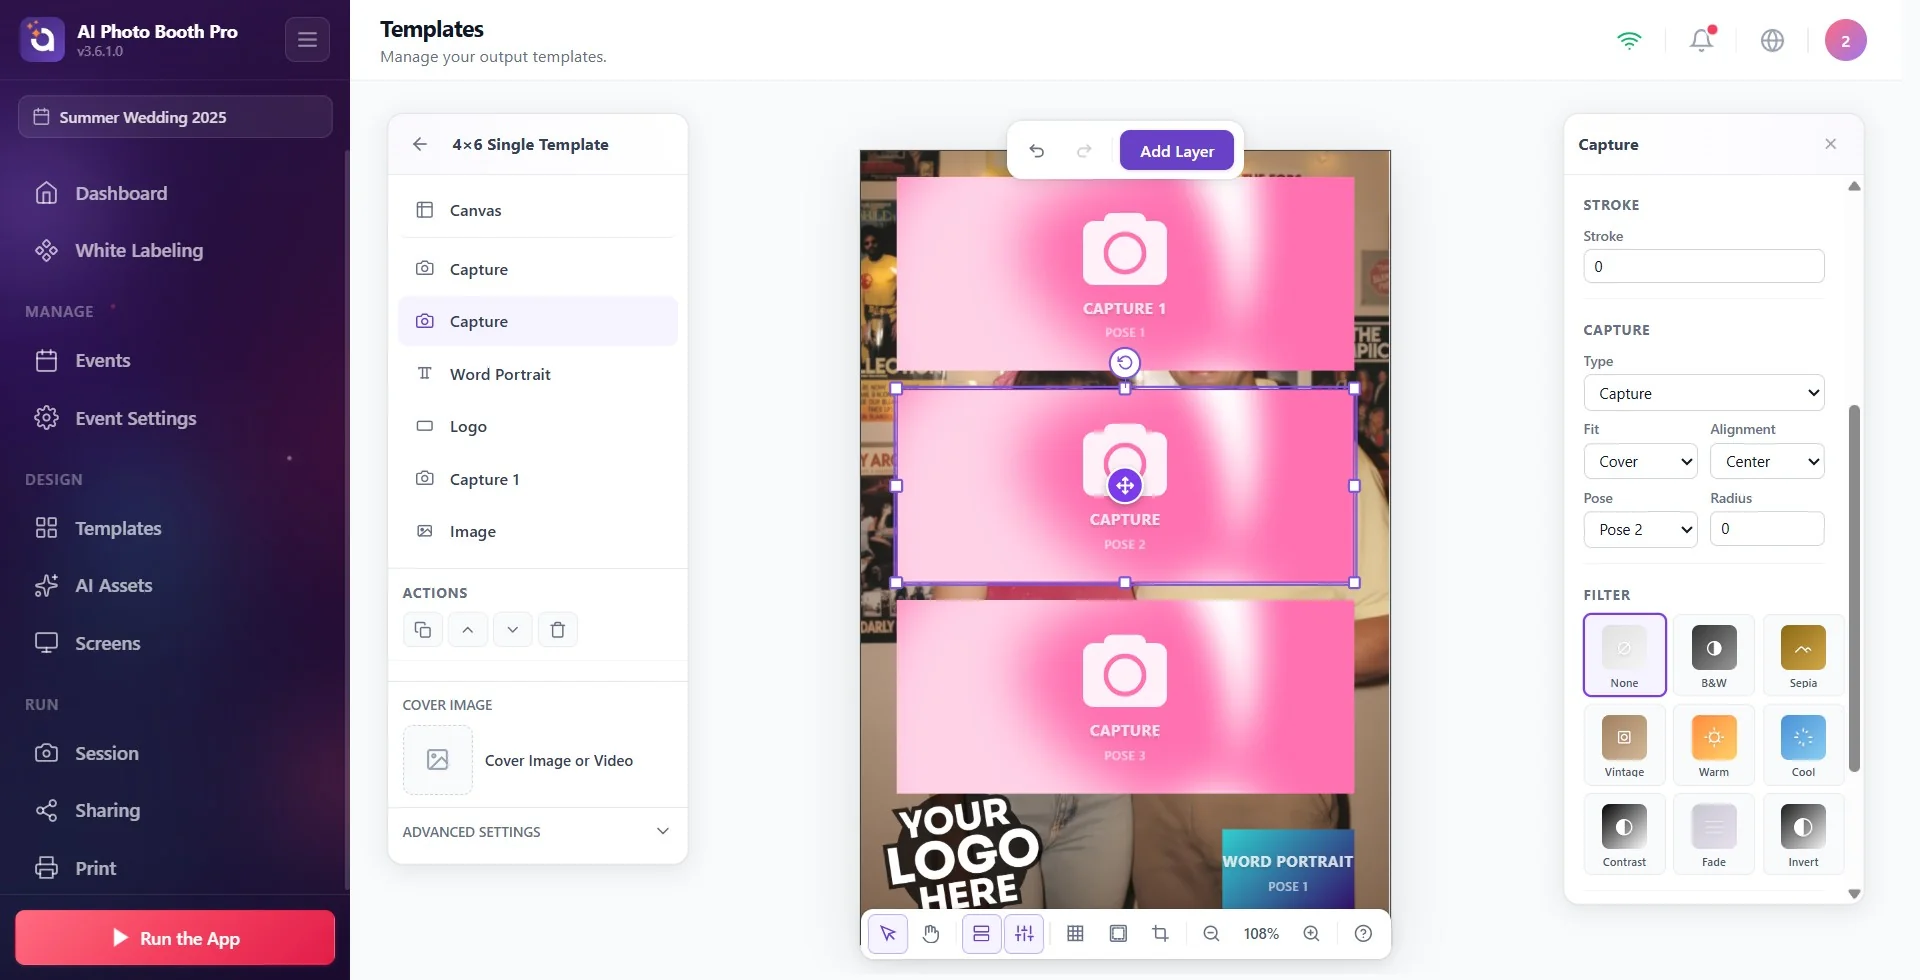
Pose is not a separate layer type; it is a setting of the capture layer. Instead of looking for “Pose 2” in the Add Layer menu, add a second capture layer and set its Pose value to 2; set the third one to 3.
If you want a ready-made layout, choose a multi-photo layout in the Choose a layout step of the new template wizard (e.g. Side by Side, Top & Bottom, Grid 2×2). If only one mode is selected in the Modes section, the poses in these layouts come numbered 1, 2, 3…; if you select more than one mode, the same shot is spread over several areas with different modes.
If you give two areas the same pose number, the same photo appears in two places. For example, to show a single shot with two different AI effects, set both AI Effect layers to Pose 1. Each AI layer is a separate generation and uses separate credits.
If the template has more than one AI Effect area, the Separate AI Effect Per Photo switch appears in the Advanced Settings section of the left panel: when it is off, the guest chooses one effect and it is applied to all photos; when it is on, the guest chooses a separate effect for each photo.
3-photo strip (2×6)
Step 7 · Three poses in a 2×6 template
Templates → Create New → Choose a size → Print → 2×6
In the size step of the new template wizard, choose 2×6 (600 × 1800) in the Print section. Give the strip three capture areas and set their poses to 1, 2, 3 (Steps 5-6). Again, put the logo or frame as an Image layer at the top of the list.
A 2×6 strip is not printed on its own; it is printed on 4×6 paper and separated by the printer's 2-inch cutter. Turning on the cut, printing two copies of the same strip on one sheet (Print Two Copies at Once) and combining two guests' strips on one sheet (Combine with Another 2x6 (Print as 4x6)) are described in the How to Enable 2 Inch Cut (Photo Strips)? document. The cut only works on printers that support the 2-inch cut.
Why does GIF take only one photo? Why does Video mode record several times?
In GIF mode, the photo template determines the number of photos
In GIF mode, the session uses two templates. First a photo template is selected (if the event has only one photo template, it is selected automatically), and the number of photos taken comes from that template's number of poses. Then the GIF / Video template provides the frame when the GIF is made from the photos taken. So in GIF mode, the capture layer in the GIF template does not determine the number of photos.
If your photo template has a single pose, the booth takes a single photo and the GIF consists of a single frame. Solution: in the photo template to be used for the GIF, put as many capture layers as you want in the GIF and set their poses to 1, 2, 3, 4. Photo mode and GIF mode use the same list of photo templates; if the event has both a single-pose and a multi-pose photo template, the guest has to choose the multi-pose one in GIF.
If a GIF template is chosen in Video mode, several videos are recorded
In Video mode, GIF templates also appear in the template list along with the video templates, and the number of recordings is determined by the chosen template's number of poses. In the GIF template created by the event wizard, the capture layer is Pose 4 (the layer's name is Capture 4). If the guest chooses this template in Video mode, the booth records 4 videos in a row. This is a known behavior. If a single video is wanted, make sure the guest chooses the Video template; if you don't use GIF mode in the event, remove the GIF template from the event.
Leaving all capture layers at Pose 1: the booth takes a single photo and the same frame is printed in every area.
Uploading the logo as a JPEG: the white box behind it stays in the output.
Leaving the frame below the photo area: the photo is printed over the frame and the frame is not visible.
Preparing the frame at a different size from the canvas: gaps remain at the edges, or its proportions get distorted with Stretch.
Changing only the GIF template's pose for GIF: in GIF mode, the number of photos comes from the photo template.
Related topics
How to Create a Photo Template? How to Edit an Existing Template? Portrait or Landscape? Template Orientation and Size How to Enable 2 Inch Cut (Photo Strips)? How to Create a Video / GIF Template? Template Background: Color, Gradient and Image
