
Before this: How to Create a Photo Template?
There are two ways to edit a template in AI Photo Booth Pro. Templates you created or have modified before (that belong to you) are edited directly; the changes are saved onto the same card. Default (ready-made) templates and wizard-generated templates that have never been touched are marked with a Locked badge; these can also be opened and edited with the pencil icon, and changes are saved to the same template. This document walks you through the on-card actions (Edit / Duplicate / Remove) and the editing path step by step.
- An event must be selected — templates are listed according to the selected event.
- There must be at least one template added on the Photo tab. If not, add one from the library with Add More or create a new template with Create New.
- No camera or render infrastructure is needed to generate the output/cover image after editing; the editor runs in-browser (Blazor).
Step by step
Step 1 · Open the Templates page and the Photo tab
Settings > Templates > Photo tab (/templates)
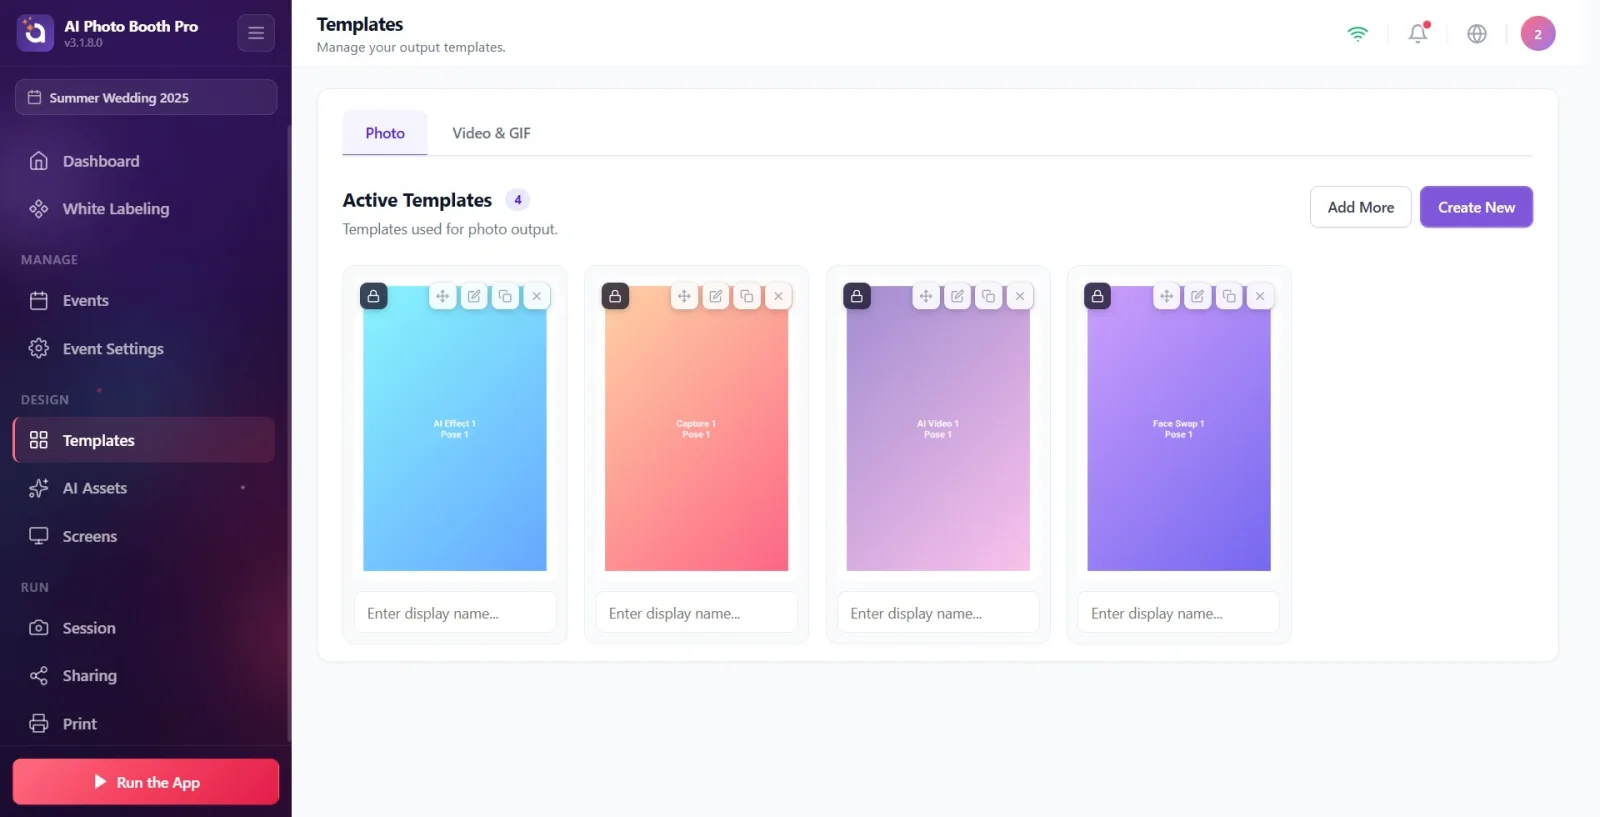
From the Settings menu, go to the Templates page. From the tabs at the top, select the Photo tab (open by default). For Video/GIF output, switch to the Video & GIF tab.
🔎 On-screen elements: Tab bar: Photo and Video & GIF. Under the Active Templates heading, template cards are listed in a grid (masonry). At the top right are the Add More and Create New buttons.
Step 2 · Hover over a template card to see the action buttons
Templates > Photo tab
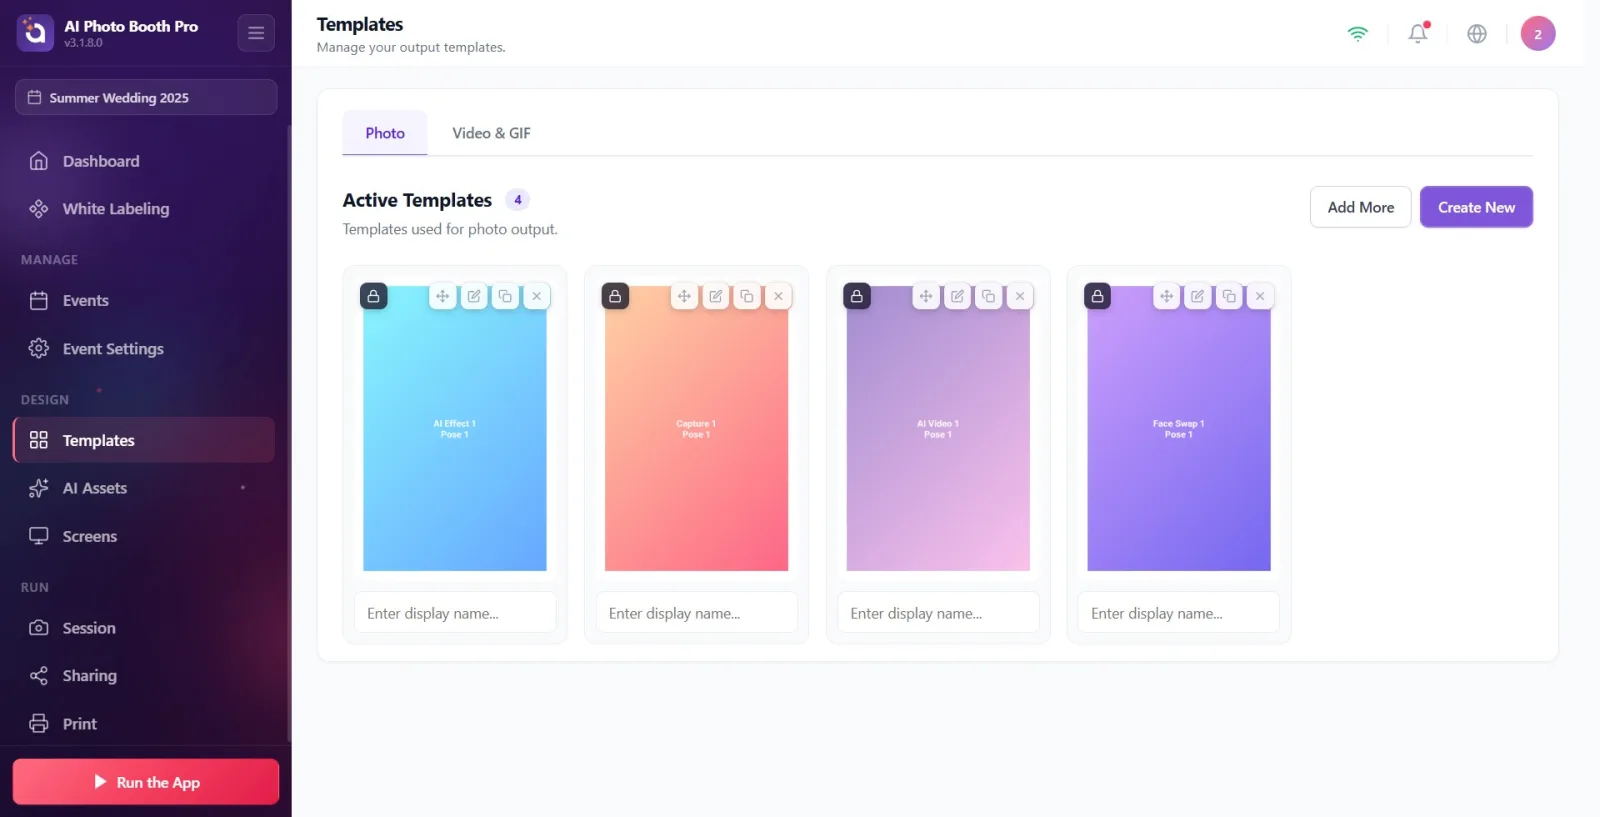
Hover over the template card you want to edit (with the mouse, or tap the card on a touchscreen). Four action buttons appear on the card.
🔎 On-screen elements: On-card actions: drag handle (Drag to reorder), pencil icon (Edit), duplicate icon (Duplicate), X icon (Remove). An inline text box to edit the name shown below the card (Enter display name...).
Step 3 · Identify the card: is it yours or locked?
Templates > Photo tab
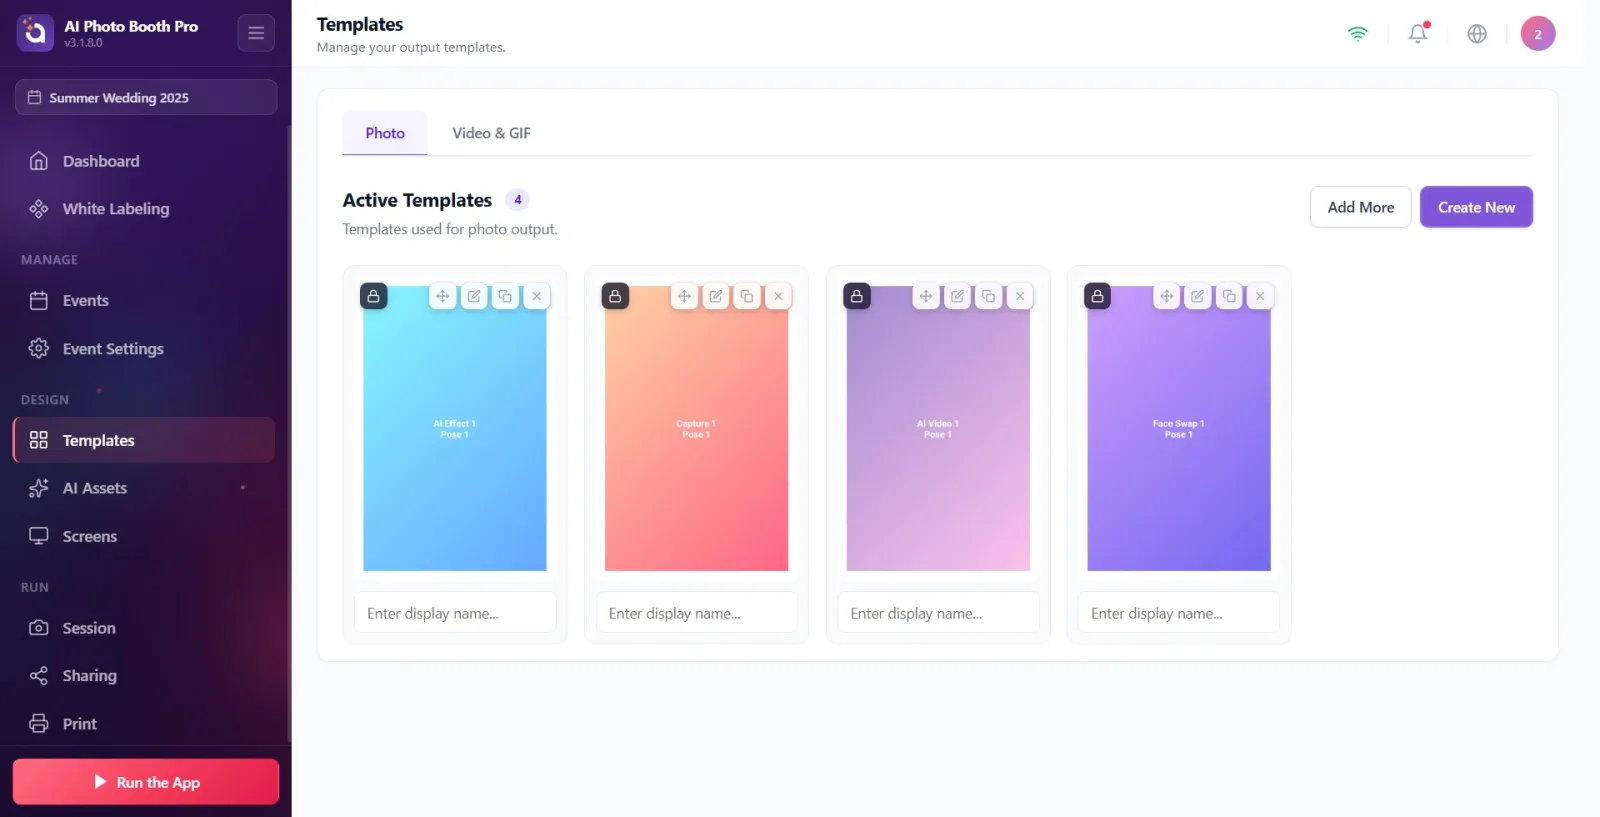
Check whether the card image has a Locked badge with a lock icon. If the badge is there, this is a default/ready-made (never-modified) template; if there's no badge, the template is yours. In both cases you can open and edit it with the pencil icon — changes are saved to the same template.
🔎 On-screen elements: A Locked badge with a lock icon in the corner of the card image (only on ready-made/default or wizard-generated, never-touched templates).
Step 4 · Edit your own template directly
Templates > Photo tab → Template Editor
On a card without a badge (yours), click the pencil icon (Edit) or click the card image directly. The template editor opens and your changes are saved directly to the same template; no new copy is created.
🔎 On-screen elements: The Edit button (pencil icon) or clicking the card image. The editor opens on the /templateeditor page.
Step 5 · Edit the locked/default template
Templates > Photo tab → Template Editor
Click the pencil icon on a card with the Locked badge. The editor opens with the ready-made template's content and your changes are saved directly to this template. No separate 'variant' card is added to the list — the card count does not change, the card you edited is updated. No separate confirmation window appears.
🔎 On-screen elements: Edit button (pencil icon). The editor opens at /templateeditor; changes are saved to the same template, no new card is added to the list.
Step 6 · Change the design in the editor
Template Editor (/templateeditor)
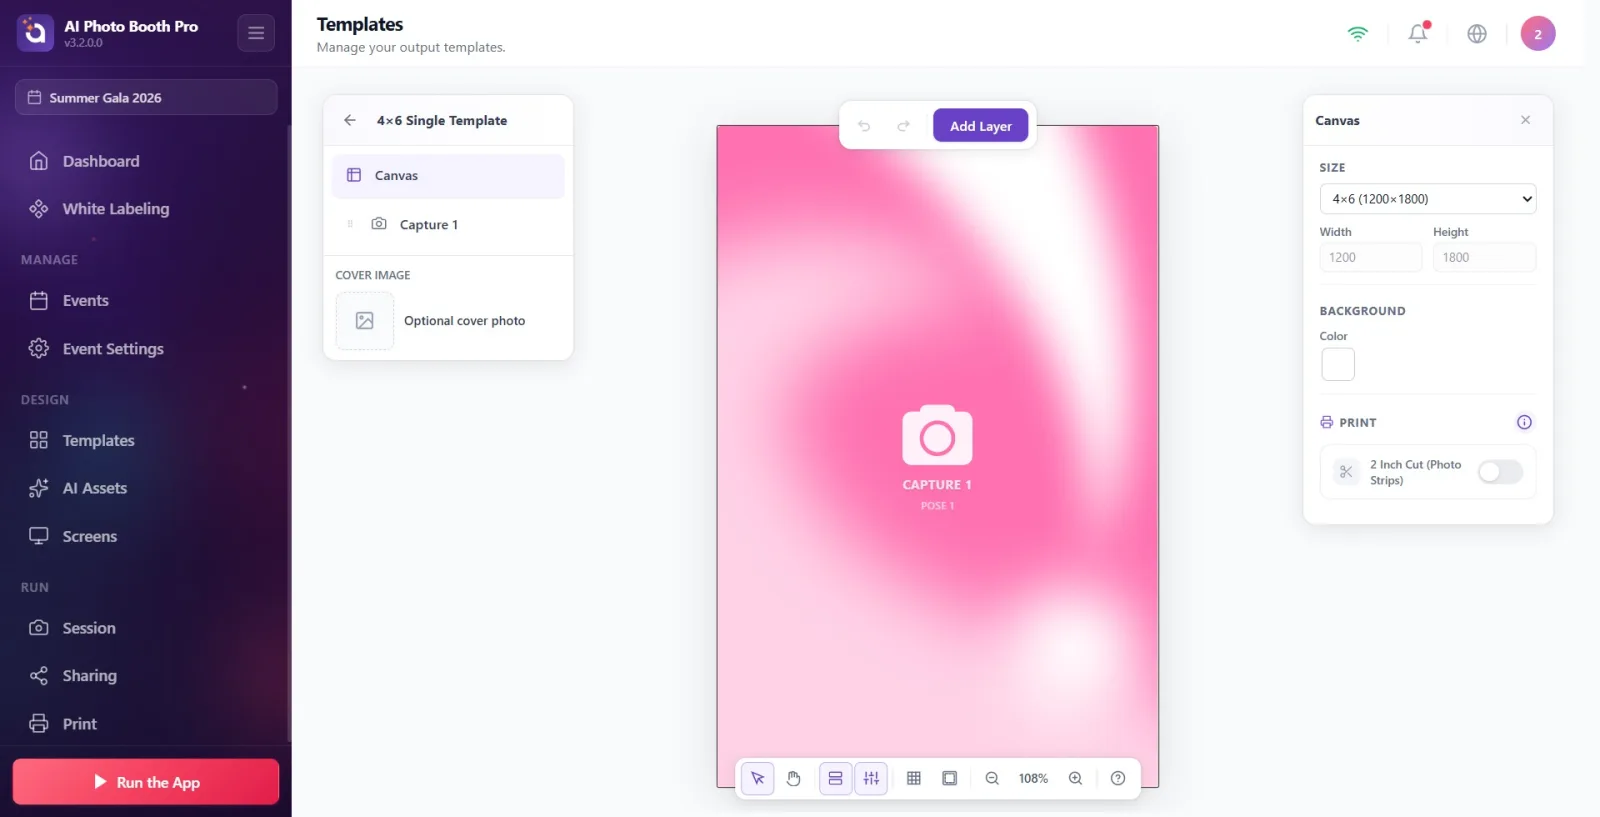
In the Template Editor, move and resize the layers (photo area, text, image, QR, etc.); change the text and colors; adjust the background color, output size, and print options. Changes are saved automatically in the background (autosave).
🔎 On-screen elements: A layers panel on the left, a properties panel on the right, and the canvas in the center. Add/remove layer, align, group, Undo/Redo. Changes are saved automatically.
Step 7 · Save and exit with Back to Templates
Template Editor → Templates page
Click the back (←) button at the top left (Back to Templates). The app performs a final save (the cover image is also generated at this point) and takes you back to the Templates page.
🔎 On-screen elements: The back (←) button, tooltip Back to Templates. On exit, a final save + cover image render is performed and you return to the /templates page.
Step 8 · (Alternative) Create an independent copy with Duplicate
Templates > Photo tab
On any card (yours or locked), click the duplicate icon (Duplicate). An independent, editable copy with ' Copy' appended to its name is created and placed right after the original. Duplicate does NOT open the editor — it only adds the copy to the list. The difference from Edit: Edit opens the template in the editor and changes the same card, while Duplicate produces a separate, independent card without opening the editor.
🔎 On-screen elements: The Duplicate button (copy icon). The new card is added right after the original; its name becomes '... Copy', and the editor does not open.
Step 9 · (Alternative) Remove the template from the event with Remove
Templates > Photo tab
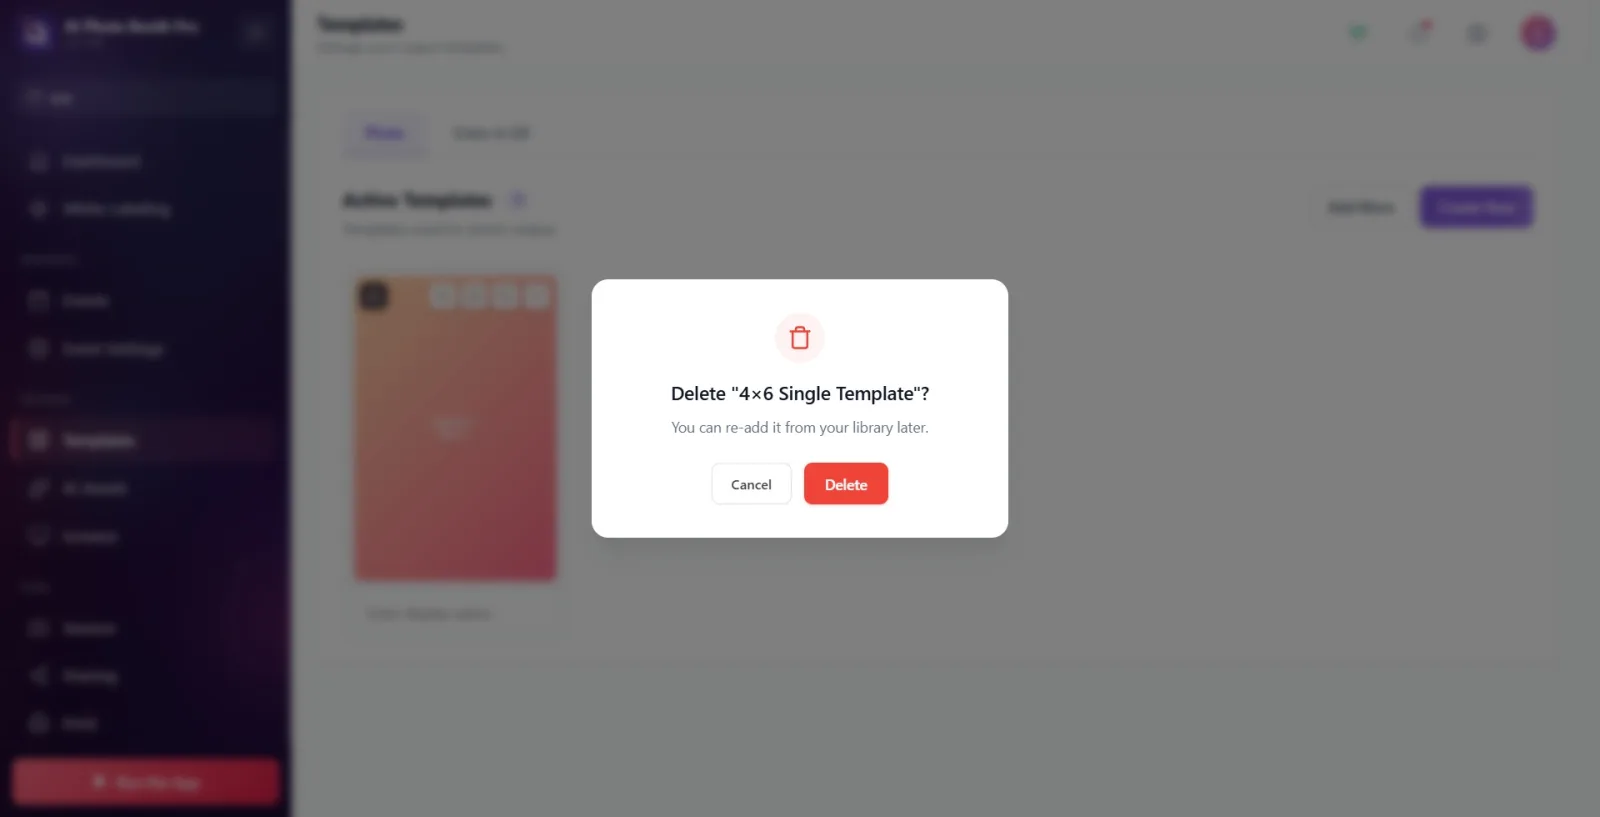
On a card, click the X icon (Remove). A confirmation dialog titled 'Delete ...?' opens; its description reads You can re-add it from your library later.. Confirm with Delete or Cancel. This action only removes the template from the SELECTED EVENT; the template is NOT deleted from the library/database and can be re-added with Add More.
🔎 On-screen elements: The Remove button (X icon) → confirmation dialog: title 'Delete "{name}"?', description You can re-add it from your library later., Cancel / Delete buttons.
Step 10 · (Optional) Change the card's display name inline
Templates > Photo tab
Without entering the editor, click the text box below the card (Enter display name...) and type a new name. This changes the template's display name in this event; it does not affect the design and is saved automatically.
🔎 On-screen elements: The name text box below the card, placeholder Enter display name.... The name is saved on focus loss (blur).
The Locked badge only indicates that the template is ready-made/default; it does not prevent you from editing. If you want to return to the original version, you can remove the template and re-add it from the library.
If you just want an independent copy of a template rather than editing it (without opening the editor), use Duplicate.
Remove does not delete the template, it only takes it out of the selected event; if needed, you can add it back from the library with Add More.
Even though changes are saved automatically in the editor, exit the editor properly with the Back to Templates button so that the cover image is updated.
You can change the output order by grabbing cards from the drag handle and dragging them.
Thinking that Remove (X) deletes the template entirely — it only takes it out of the event; the template remains in the library.
Seeing the wrong/incomplete templates — templates are listed according to the selected event; make sure the correct event is selected.
Exiting the editor by abruptly changing the page instead of using Back to Templates — the cover image may stay outdated.
Related topics
sablon-olusturma sablon-arkaplan sablon-nedir
