
Before this: How to Login to the Application?
What is White-Label and How to Use It?
White Labeling is the section where you customize the app, sharing/download site, and custom domain with your own branding. It consists of three tabs (Domain, App, Microsite) and is only open on the Ultimate (Ultimate AI) plan. Settings are at the account level — applied to the entire application, not a single activity, and are automatically saved without a separate Save button.
- Being logged in (session is open)
- Ultimate (Ultimate AI) subscription — White Label features are enabled on the Ultimate plan only; if not the page will only show the lock banner
- Internet connection — settings are reflected in the cloud (WhiteLabelService); Validation in the Domain tab is done via the server
step by step
Step 1 · Open the White Labeling section
Settings (Left Menu)
Tap White Labeling from the left-side navigation menu of settings. This item sits at the top of the menu, ungrouped, with Dashboard (Dashboard) and is indicated by a tag icon. When the page is opened, the title is White Labeling and the subtitle is Brand your own app.. This item always appears in the menu regardless of your plan — the lock control is inside the page.
🔎 Items on the screen: White Labeling link with label icon in the left menu (top section, in the same group as Dashboard)
Step 2 · Plan requirement: Ultimate unlocked
White Labeling
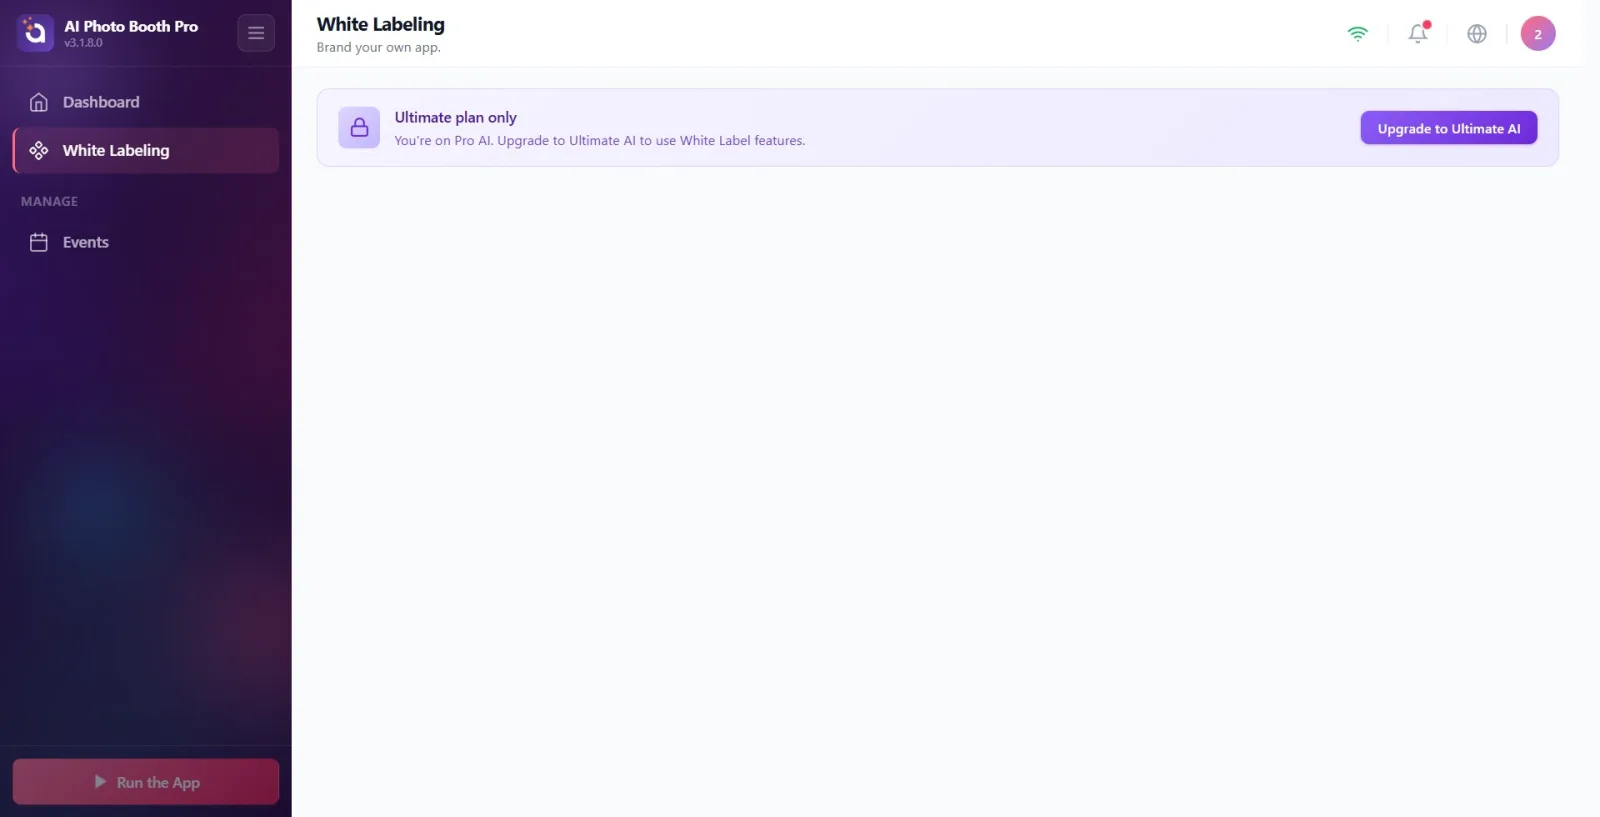
If your account is not on the Ultimate plan, the page shows a lock banner instead of tabs: the title is 'Exclusive to the Ultimate plan', below it 'Currently your {plan} account. Upgrade to Ultimate AI to use White Label features.' ({plan} is replaced by the name of your current plan — e.g. Trial). The 'Upgrade to Ultimate AIa' button on the right opens the Ultimate subscription paywall (Stripe WebView on Windows, RevenueCat on mobile). When you switch to Ultimate, the page automatically refreshes and tabs open.
🔎 Elements on the screen: Banner with lock icon: Ultimate plan only title + '... Upgrade to Ultimate AI.' description + 'Upgrade to Ultimate AI' button
Step 3 · Navigate between tabs (overview)
White Labeling
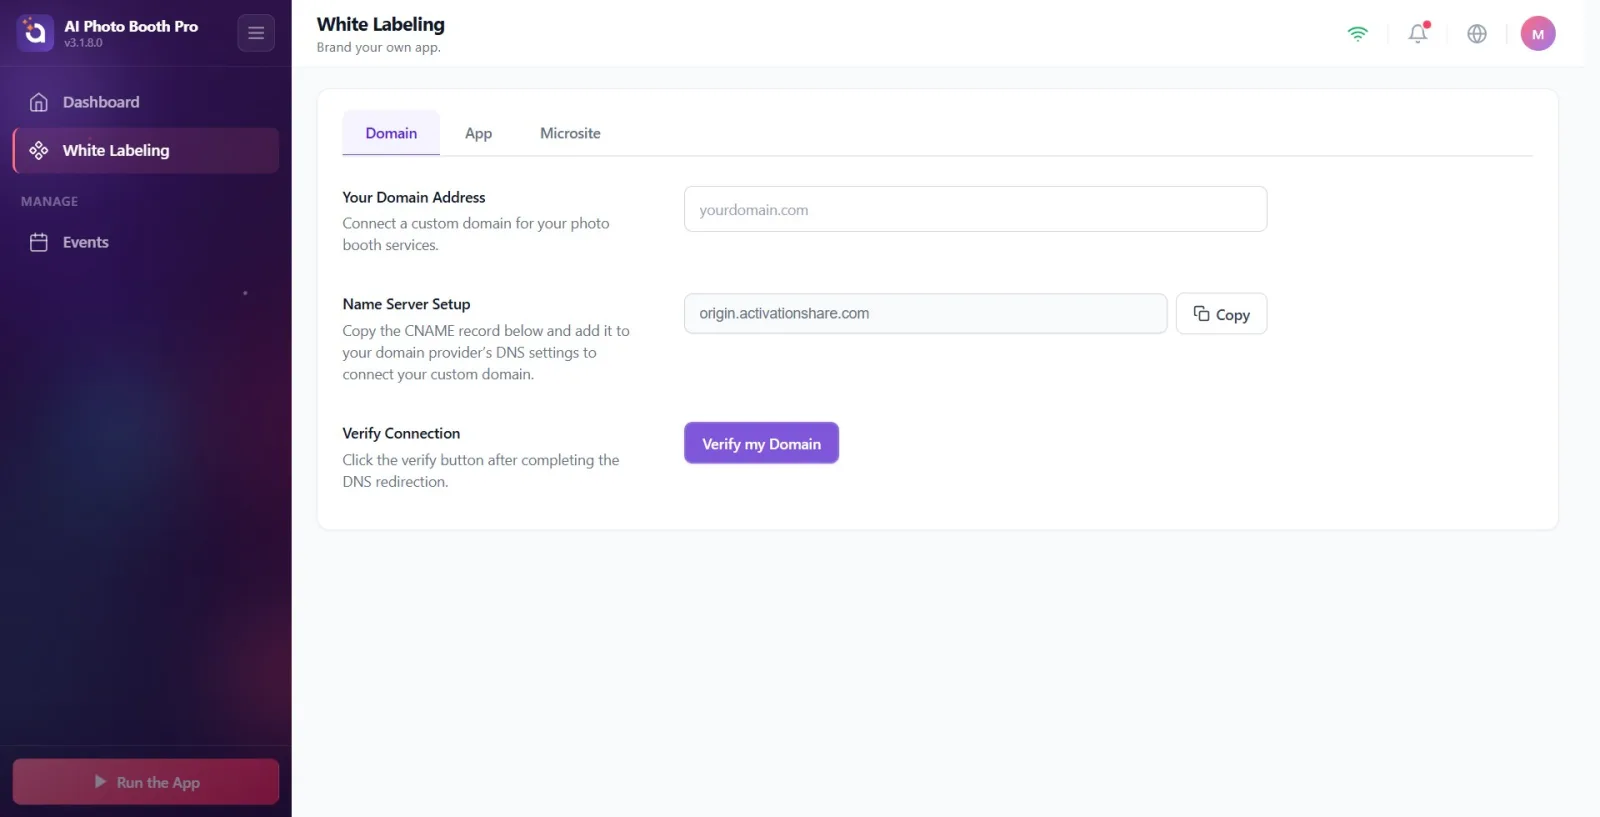
On the Ultimate account, you'll see a bar with three tabs at the top of the page: Domain, App, and Microsite. You switch by touching the tab you want. When the page is first opened, the Domain tab appears by default. The tab you selected is remembered — the next time you open it, the last tab you opened will appear.
🔎 Elements on the screen: Tab bar: Domain | App | Microsite (active tab hover; default Domain)
Step 4 · What does the Domain tab do
White Labeling → Domain
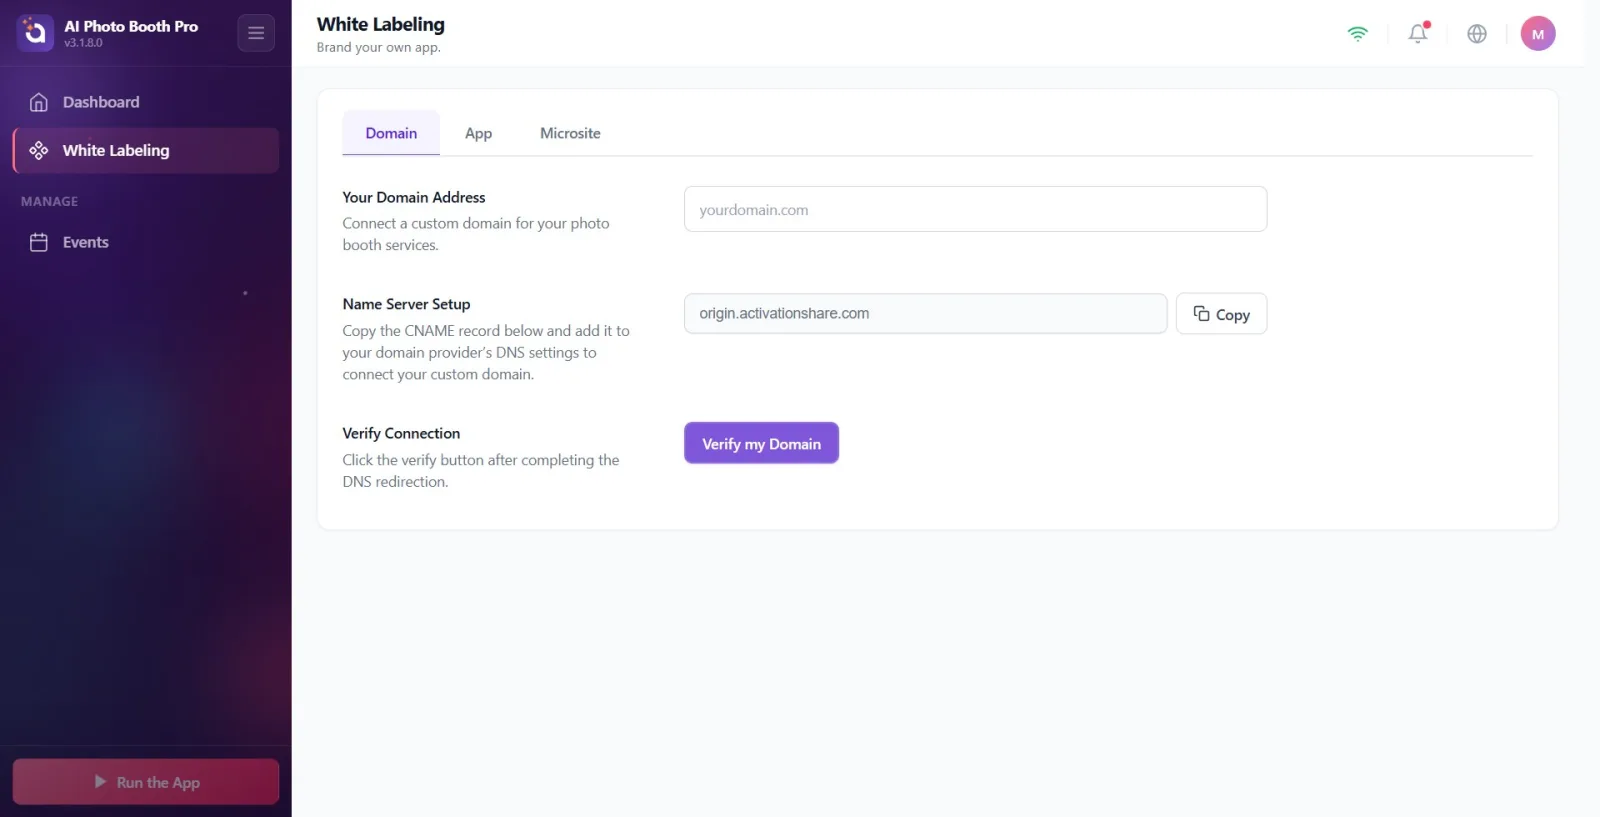
The Domain tab is where you connect your own custom domain (e.g. yourdomain.com) to your photo booth sharing services. Sections: Your Domain Address (description: 'Connect a custom domain for your photo booth services.'), 'DNS Setup Directive' (copiable TXT and CNAME records), which appears when you type the domain name, 'Name Server Setup' and 'Verify Connection'. The 'Verify My Domain' button triggers verification from the server; When successful, the Domain Connected badge appears. The field name is recorded once upon loss of focus (when leaving the field), not with each keystroke.
🔎 Items on the screen: Sections: Your Domain Address, DNS Setup Instructions, Name Server Setup, Verify Connection (Verify my Domain button, Domain Connected badge)
Step 5 · What does the App tab do (the main toggle switch is here)
White Labeling → App
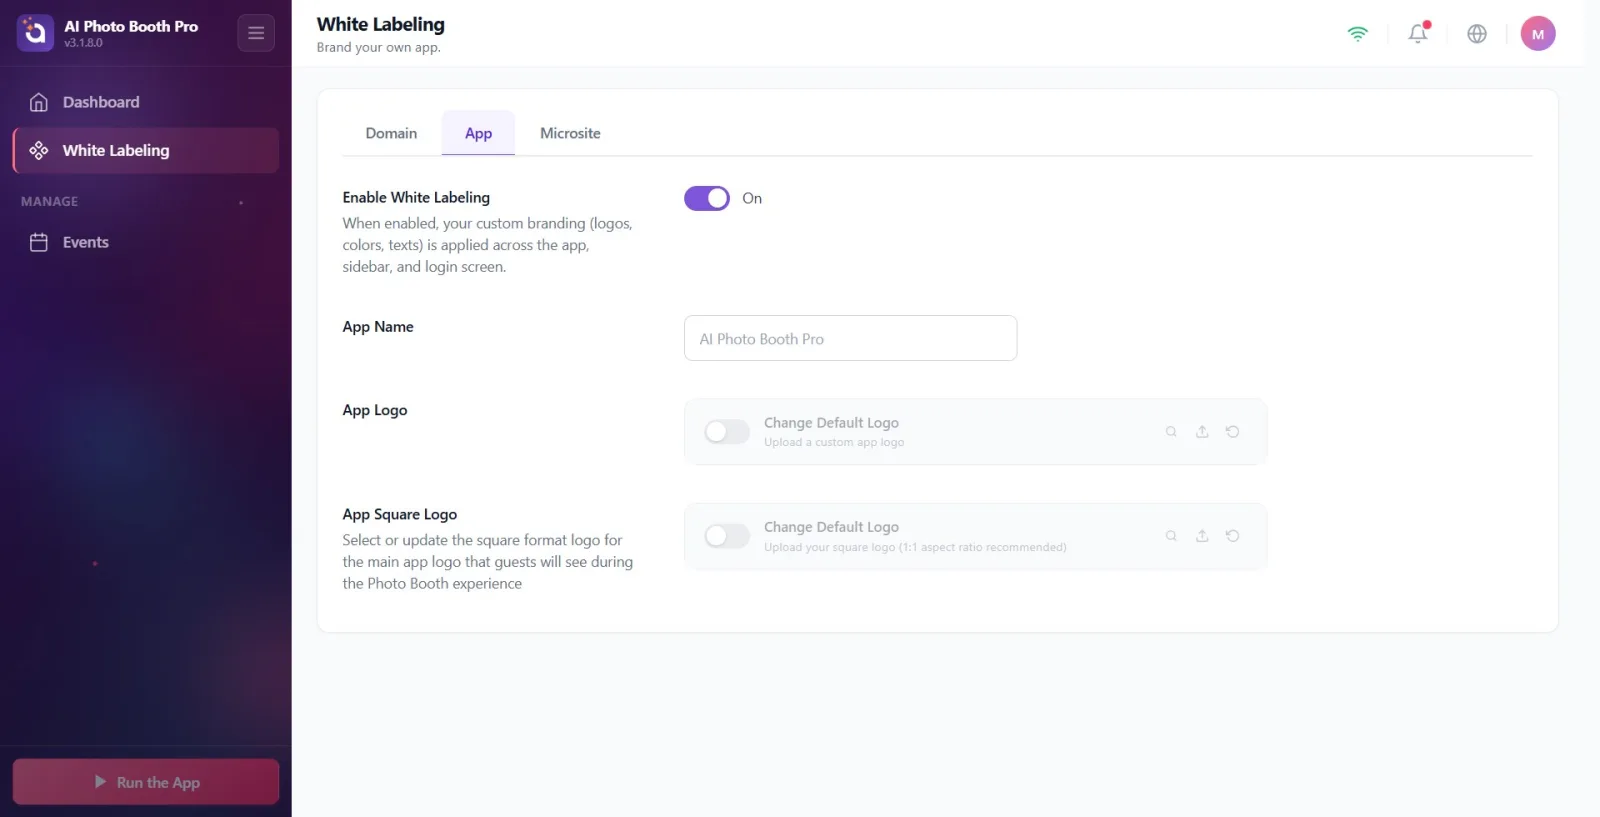
The App tab is where you set the app's self-branding. At the top is the main toggle switch 'Enable WhiteLabel' (description: 'When enabled, custom branding (logo, colour, text) will be applied across the app, sidebar and home screen.'). When this switch is off, no brand settings in other tabs are applied. Other sections: App Name, App Logo (horizontal) and App Square Logo (square — for sidebar collapse and login screen). Changes are instantly saved to your account.
🔎 Items on the screen: Sections: 'Enable WhiteLabel' (On/Off switch), 'App Name', 'App Logo', 'App Square Logo'
Step 6 · What does the Microsite tab do
White Labeling → Microsite
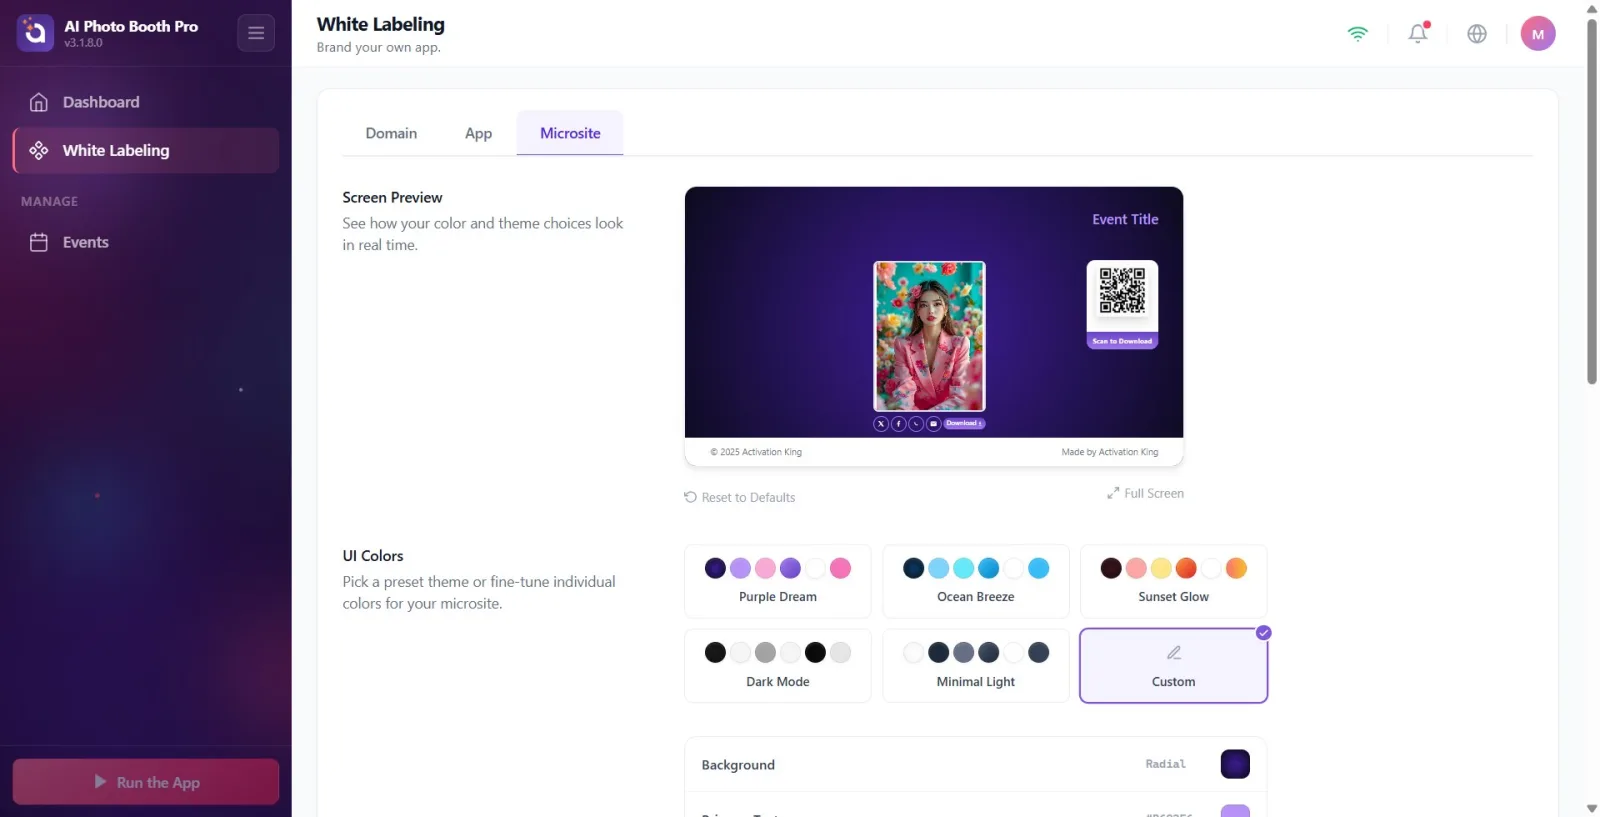
The Microsite tab is where you design the appearance of the website where guests download/share their photos. At the top is a live Screen Preview (next to which Reset to Defaults and Full Screen). Sections: UI Colors (ready-made theme cards + individual color adjustment), Preview Micro Site (opens the actual site in the system browser), Micro Site Texts (Title, copyright and company information), Micro Site Logo and Extra Background (image or video). Color/text changes you make are instantly visible in the preview and saved automatically.
🔎 Items on the screen: Sections: Screen Preview (Reset to Defaults / Full Screen), UI Colors, Preview Micro Site, Micro Site Texts, Micro Site Logo, Extra Background
Step 7 · How to save changes and where to apply them
White Labeling
White Labeling settings are at the account level — applied to the entire app and all activities, not the selected activity. There is no separate Save button: changes in the App and Microsite tabs are saved to the cloud immediately (after a short wait in the text fields); The field name in the Domain tab is saved once upon focus loss. The 'Enable WhiteLabel' switch on the App tab needs to be on for the brand settings to actually appear.
White Labeling is only available on the Ultimate (Ultimate AI) plan; If you are not, the page shows a lock banner and a paywall opens with 'Upgrade to Ultimate AI'.
Settings are account-specific (event-independent) — they apply to the entire app and microsite, not to a single event.
The main toggle switch, 'Enable WhiteLabel', is in the 'Application' tab; When it is turned off, none of the logo/color/text settings are reflected on the application, sidebar and home screen.
Your tab selection is remembered: the next time you open it, the last tab you left off will come up (default Domain).
Don't look for a separate Save button — changes are saved automatically. The Domain field is saved when you leave the field (losing focus).
In the Microsite tab, color/text changes appear instantly in the live preview at the top; With Preview Micro Site you can test the real site in the browser.
Setting the logo/color/text and forgetting to turn on the 'Enable WhiteLabel' switch in the App tab — when the switch is off, no branding is applied.
Thinking that settings apply only to the selected activity — White Labeling is at the account level, affecting the entire app and all activities.
looking for Save button — there is no such button; registration is automatic (Domain field is recorded only on focus loss).
Trying to use features without being on the Ultimate plan — the page only shows the lock banner, need to upgrade to Ultimate first.
In the Domain tab, type the domain name and wait for Verify my Domain to succeed immediately without adding the DNS records (TXT/CNAME) — after the verification DNS records are propagated, it becomes Domain Connected.
Expecting the Preview Micro Site button to work when the activity is not selected — the preview depends on the instance session of the current activity; If there is no activity, the button appears inactive.
Related topics
White Labeling → App White Labeling → Domain White Labeling → Microsite Subscription / Upgrade (Ultimate AI paywall)
