
Before this: What are AI Assets and How to Use them?
What Is Video to AI Video?
Video to AI Video is a separate AI feature whose input is a video, not a photo — it lives in Settings → AI Assets → Video to AI Video tab. The AI Video (AiMotion) feature in Documents 20/21 takes a photo as input and is a completely different feature; the two are not in the same tab, don't mix them up. Here, a short video the guest captures (or the operator uploads) is transformed by AI into a new video.
- Pro AI subscription or higher — the general restriction on the AI Assets page, which also applies to this tab
- An event must be selected/open
- Enough AI credit — every test and final production spends credit
- Internet connection — production runs server-side (Grok model)
The AI model in use (Grok) has an 8-second video-to-video input limit. If the video you select/upload exceeds this, the app automatically trims it to the first 8 seconds — it doesn't throw an error, it just trims silently. When Video to AI Video is chosen as the event type, the booth's own capture duration should be kept short to match; otherwise the end of the guest's captured video never makes it into the AI transformation.
Step by Step
Step 1 · Open the tab — library and overview
Settings → AI Assets → Video to AI Video
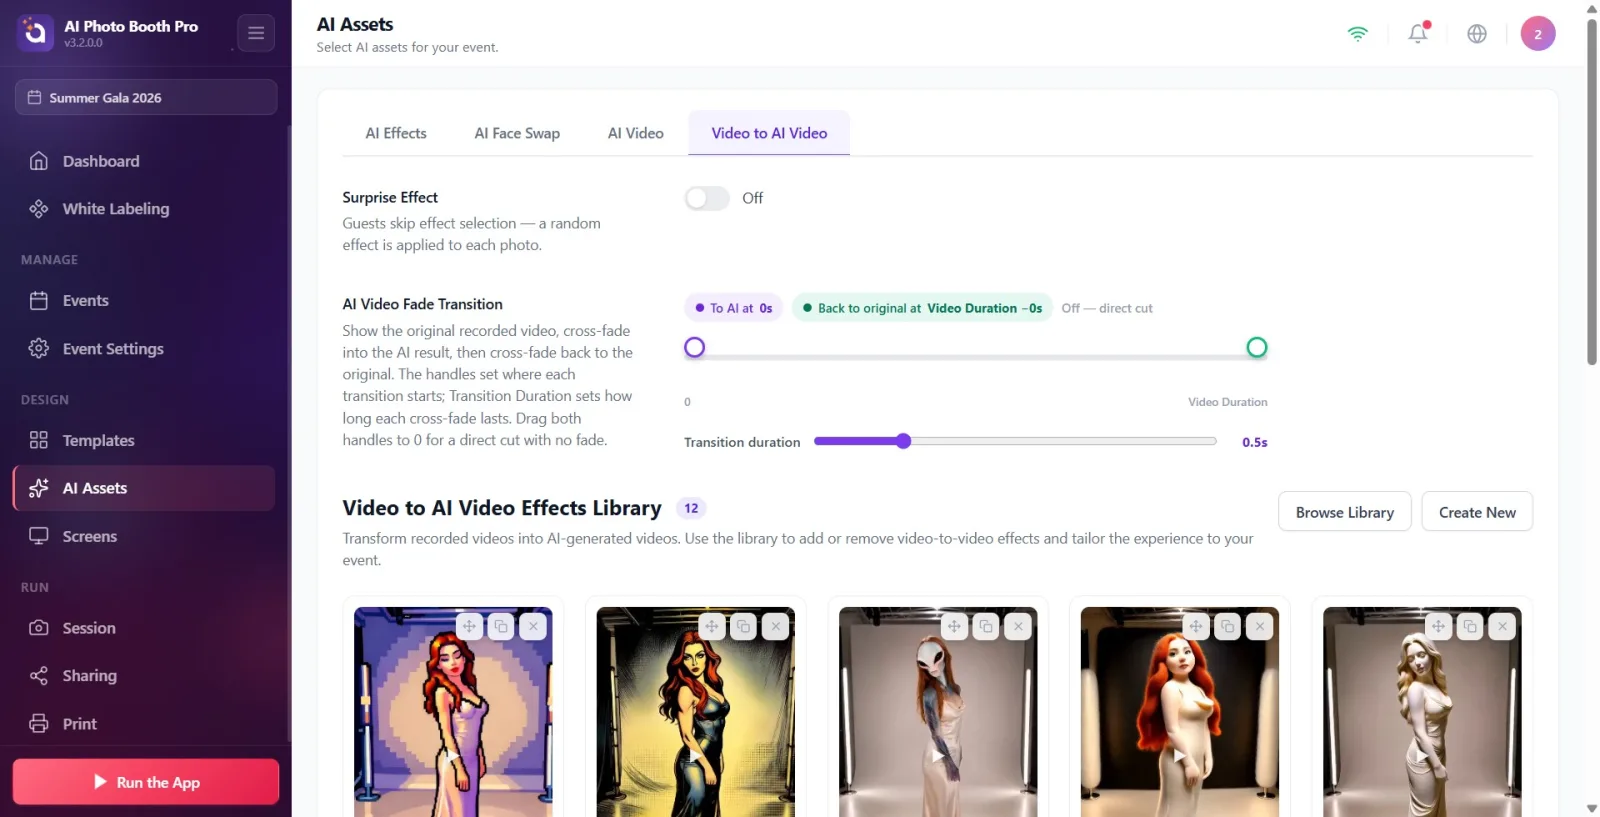
Open the AI Assets page from Settings; switch to the Video to AI Video tab in the tab bar at the top. At the top there's a Surprise Effect toggle (when on, the guest doesn't pick an effect — a random video effect is applied). Below it is the Video to AI Video Effect Library heading and a grid of the existing video cards, with Browse Library and Create New buttons in the top right. Clicking a card — for a card you created yourself, it opens the Edit & Customize modal; for a card that isn't yours / is a default one, it opens the Clone & Customize modal (the same ownership rule as AI Video applies here too).
🔎 On-screen elements: Surprise Effect toggle; library heading + counter; Browse Library / Create New buttons; grid of video cards (plays on hover over the cover)
Step 2 · Browse Library — add ready-made videos to the event
Video to AI Video → Browse Library
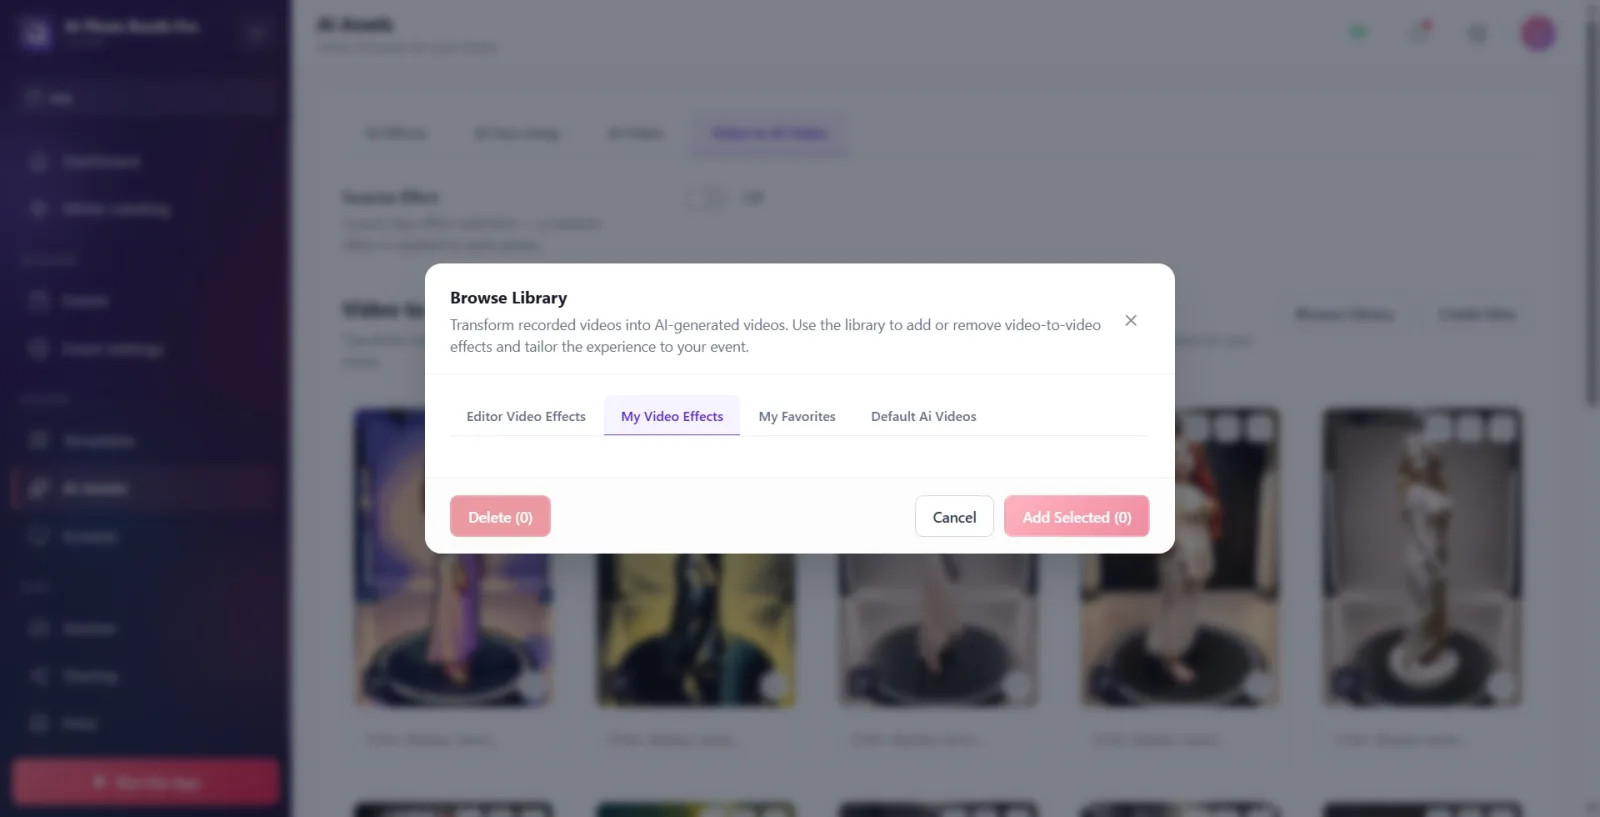
This modal is split into 4 tabs: Editor Video Effects (editor/system catalog), My Video Effects (the ones you created), My Favorites, Default Ai Videos. Clicking a card selects/deselects it; cards already added to the event show an "Added" badge (this badge doesn't have a separate translated string, it stays in English). Once you've made your selection, the button at the bottom of the modal adds the selected ones to the event's library.
🔎 On-screen elements: 4-tab bar at the top; card grid with a checkmark icon on selected cards; an English Added badge on cards already added
Step 3 · Create New — input video and test
Video to AI Video → Create a Video to AI Video Effect
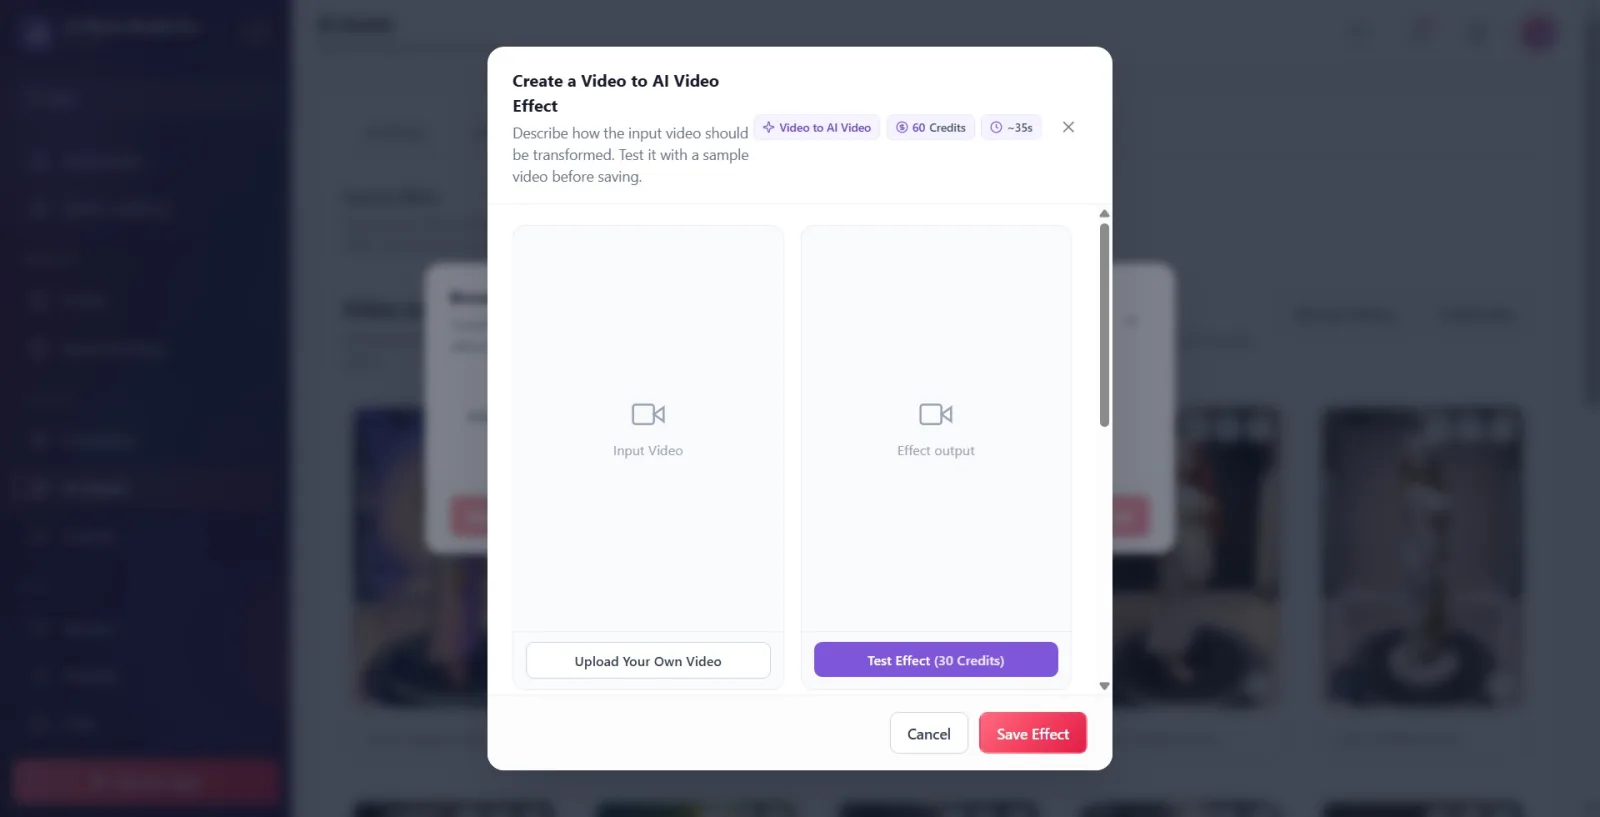
The modal that opens when you press Create New shows a Video to AI Video badge, the credit cost, and the estimated production time (~seconds) in its title. The left preview box is the input video — unlike AI Video, this isn't a photo, it's an actual video file; the Upload Your Own Video button below it lets you pick your own video file from the native file picker (it plays with sound on hover/tap). The right box is where the test result (the generated AI video) appears.
🔎 On-screen elements: Video to AI Video badge + credit + duration badges; input video + Upload Your Own Video button in the left box; Effect output placeholder in the right box when empty
Step 4 · Effect name, Prompt, and personalization chips
Create a Video to AI Video Effect — form
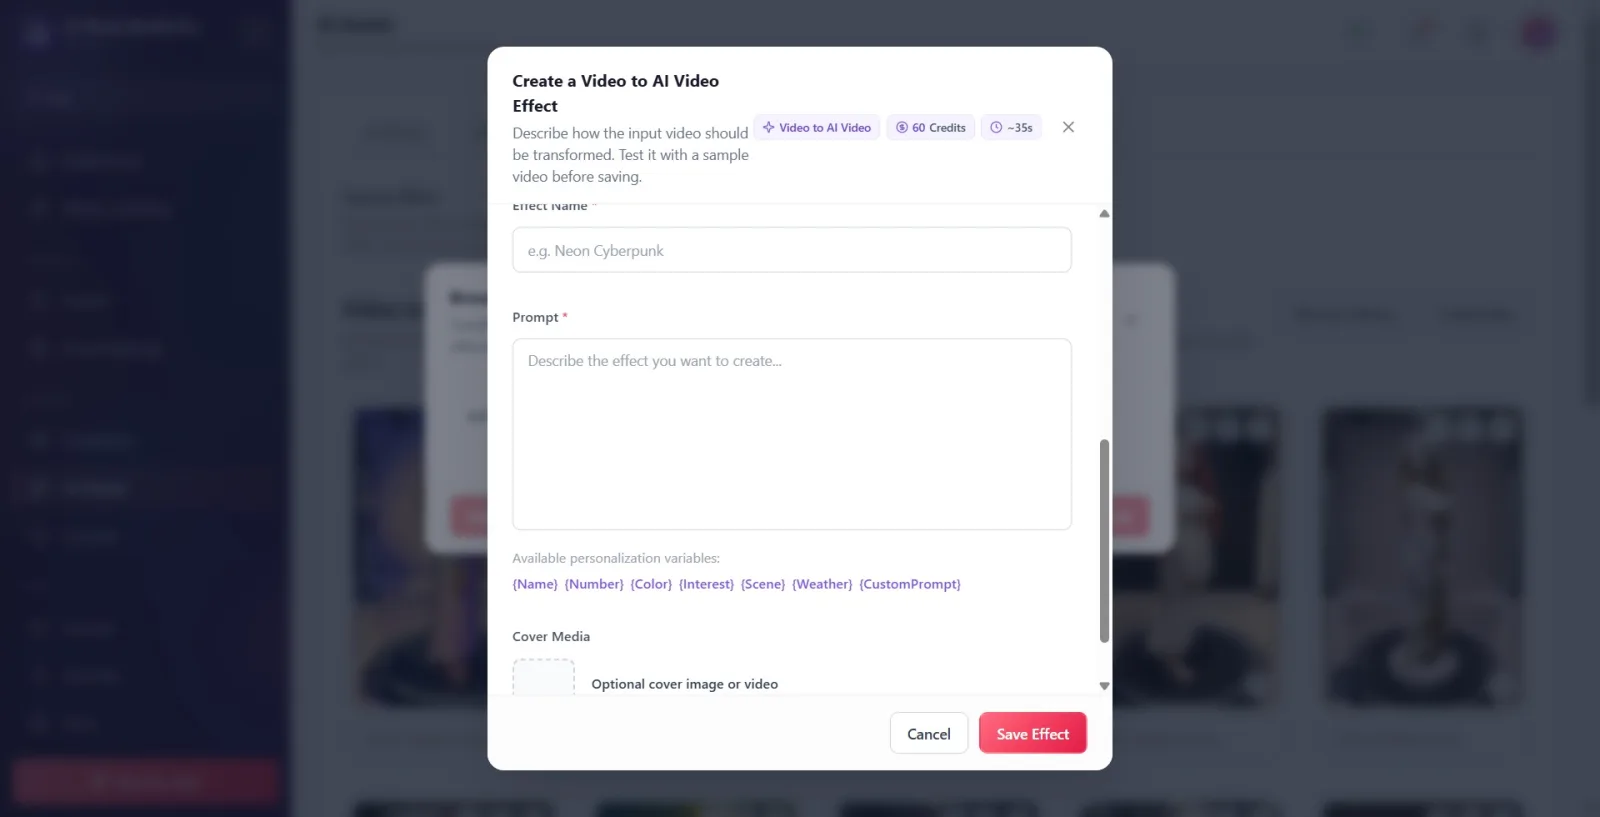
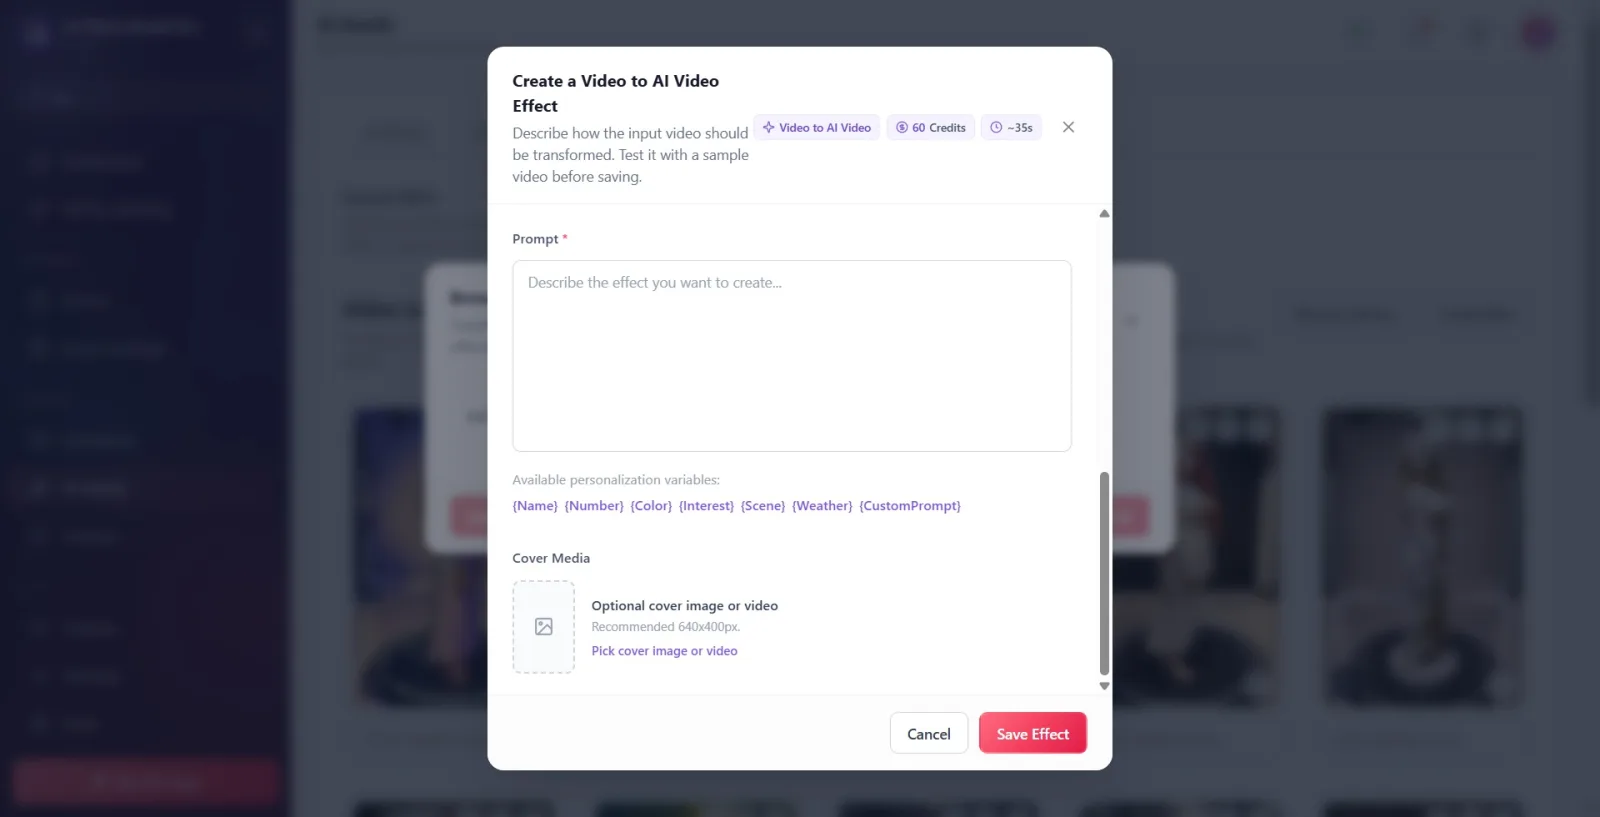
Fill in the Effect Name (required, e.g. Neon Cyberpunk) and Prompt (required, the text describing how the video should be transformed) fields. Below the Prompt box, 7 chips are listed under the Available personalization variables: label — {Name} {Number} {Color} {Interest} {Scene} {Weather} {CustomPrompt}. Clicking a chip pastes that variable at the cursor position; at capture time, the server replaces these placeholders with real session data (the exact same mechanism as the chips in the AI Effect / AI Video creation modals).
🔎 On-screen elements: Effect Name text box; Prompt multi-line text box; 7 chip buttons below it ({Name}…{CustomPrompt})
Step 5 · Cover media and save
Create a Video to AI Video Effect — Cover Media
In the Cover Media section, you can pick an image or video with the Pick cover image or video button (recommended 640x400px). If you don't choose a cover, the result video from a successful Test Effect can be made the cover with the Use as Cover button. Once the form is complete, press the Save Effect / Save Changes / Save as New Effect button at the bottom (depending on the mode); the Make It Public option is hidden for this feature (it comes off and can't be changed).
🔎 On-screen elements: Cover Media preview box + Pick cover image or video button; save button in the bottom bar
Step 6 · Selecting it as an event type
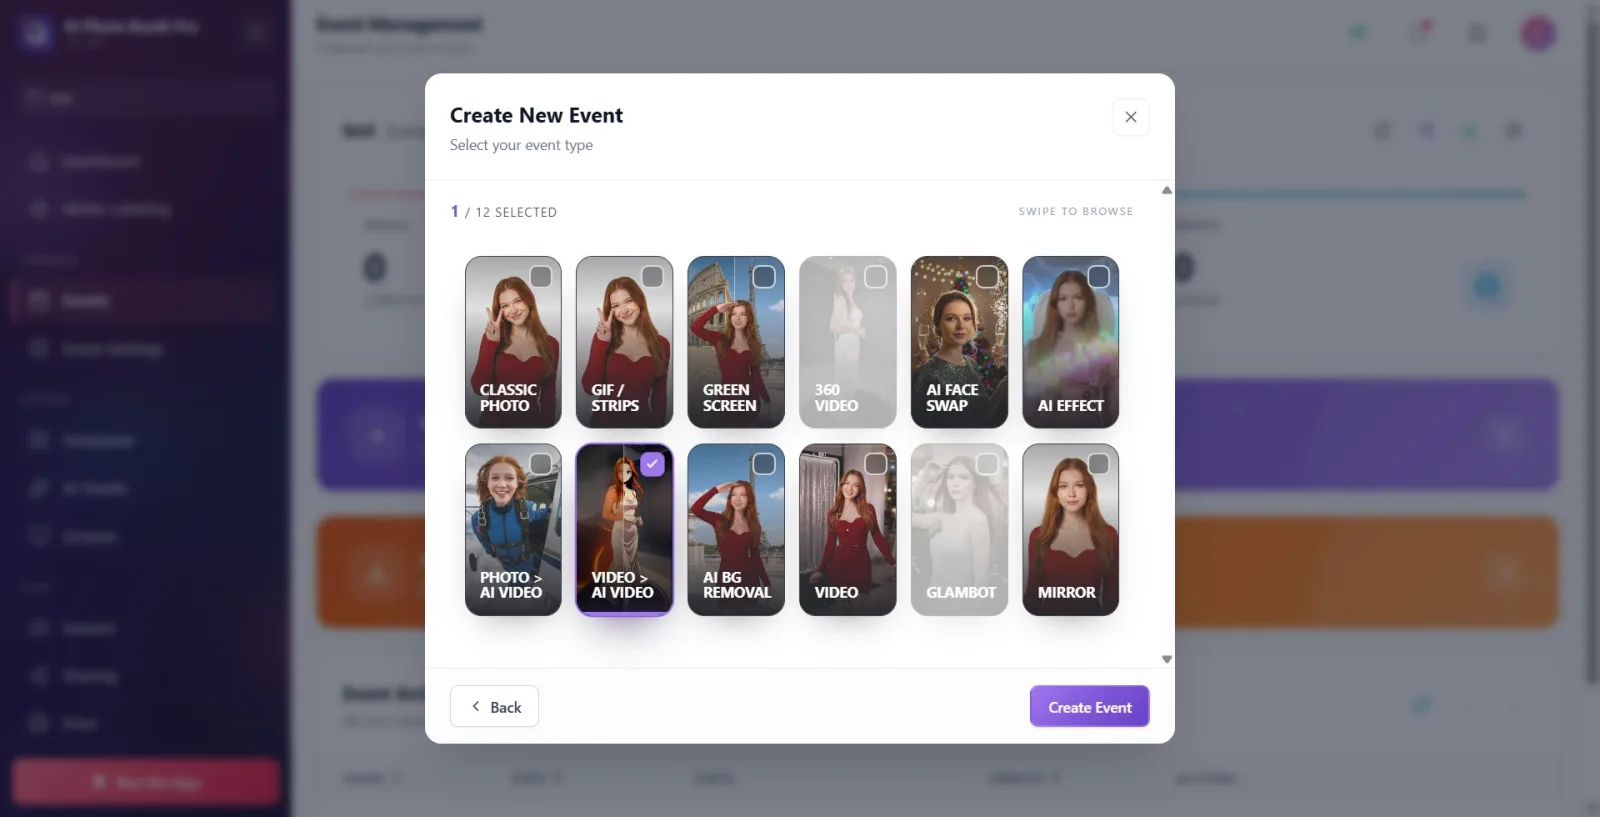
Event creation wizard → Step 7: Type selection
To use these effects live in the booth, check the Video to AI Video card in the event type selection (Document 09, Step 7 — now one of 12 types). The booth captures a video from the guest, and the captured video is transformed into an AI video using one of the effects defined in this tab (or a random one if Surprise Effect is on). Remember: if the input video is longer than 8 seconds, it's automatically trimmed (see the warning above).
🔎 On-screen elements: The Video to AI Video card in the event type selection screen (with a video preview)
AI Video (Documents 20/21): input is a photo, output is a video. Video to AI Video (this document): input is a video (up to 8 sec), output is a video. The two live in separate tabs, separate libraries, and separate event-type cards — don't look for one effect in the other's library, you won't find it.
Related topics
AI Assets Overview How to Create Custom AI Video?
