
Before this: How to Create a Photo Template?
In the template editor (Template Editor) there are three separate methods for setting a template background, and they must not be confused. (1) Canvas Background color: the base that sits at the very bottom of the canvas and cannot be deleted or moved; it can only be a solid color or a gradient, no image can be placed on it, and there is only one. (2) Color layer: a real block filled with a solid color or gradient that can be moved, resized and deleted. (3) Image layer: a real layer that displays an image file; you turn it into a background image by setting Fit to 'Cover', enlarging it enough to cover the canvas, and lowering it to the bottom with 'Move Down'. Method 1 is the base; Methods 2 and 3 are layers. The color picker (solid/gradient) is the same for both Method 1 and Method 2.
- A template must have been created, or an existing template must be open for editing (the Template editor / Template Editor canvas must be visible on screen)
- The Layers panel on the left (with the Canvas item at the top), the Properties panel on the right, and the Add Layer button at the top must be visible
- For the image layer, the image file to be used (jpg/png) must be ready on the device
Step by step
Step 1 · Get to know the editor panels
Template Editor (Template Editor canvas)
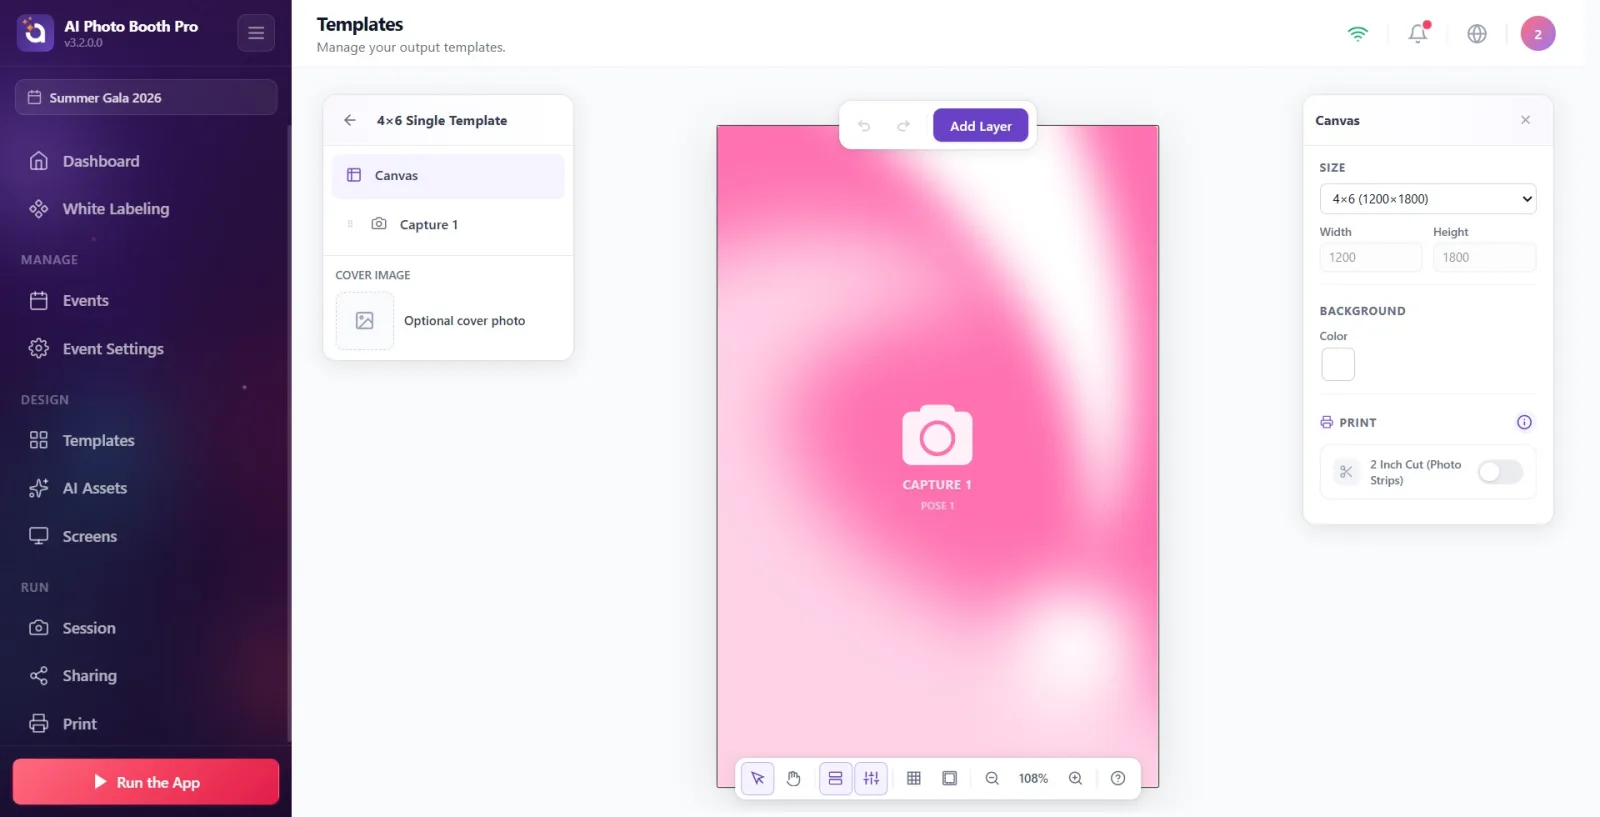
Open the template editor. Review the layout of the screen: on the left is the Layers panel (with the Canvas item at the top), on the right the Properties panel, and in the top bar the purple Add Layer button along with the undo/redo buttons. All background operations are done through these two panels.
🔎 On-screen elements: Left: the Layers panel + Canvas item; Right: the Properties panel; Top: the Add Layer button; the bottom floating toolbar (tools/zoom).
Step 2 · Method 1 — Open the Canvas properties (non-deletable base)
Template Editor — Properties panel (Canvas selected)
Click the Canvas item at the top of the left Layers panel (or click an empty area of the canvas to deselect all layers). The Properties panel on the right switches to the Canvas heading; here Size, Background and Print settings appear.
🔎 On-screen elements: the Canvas item in the Layers panel; the Canvas heading in the right panel, the Background group.
Step 3 · Method 1 — Open the background color picker
Template Editor — Color picker (Background)
In the Background group of the right panel, click the color box (small square sample/swatch) next to the Color label. A color picker opens. This base covers the entire canvas, behind all layers; it is not a separate layer and cannot be deleted or moved.
🔎 On-screen elements: the Background group, the Color label, the clickable color box (color-result-swatch); the ColorSettingPicker that opens.
Step 4 · Method 1 — Choose a solid color for the base
Template Editor — Color picker (Background)
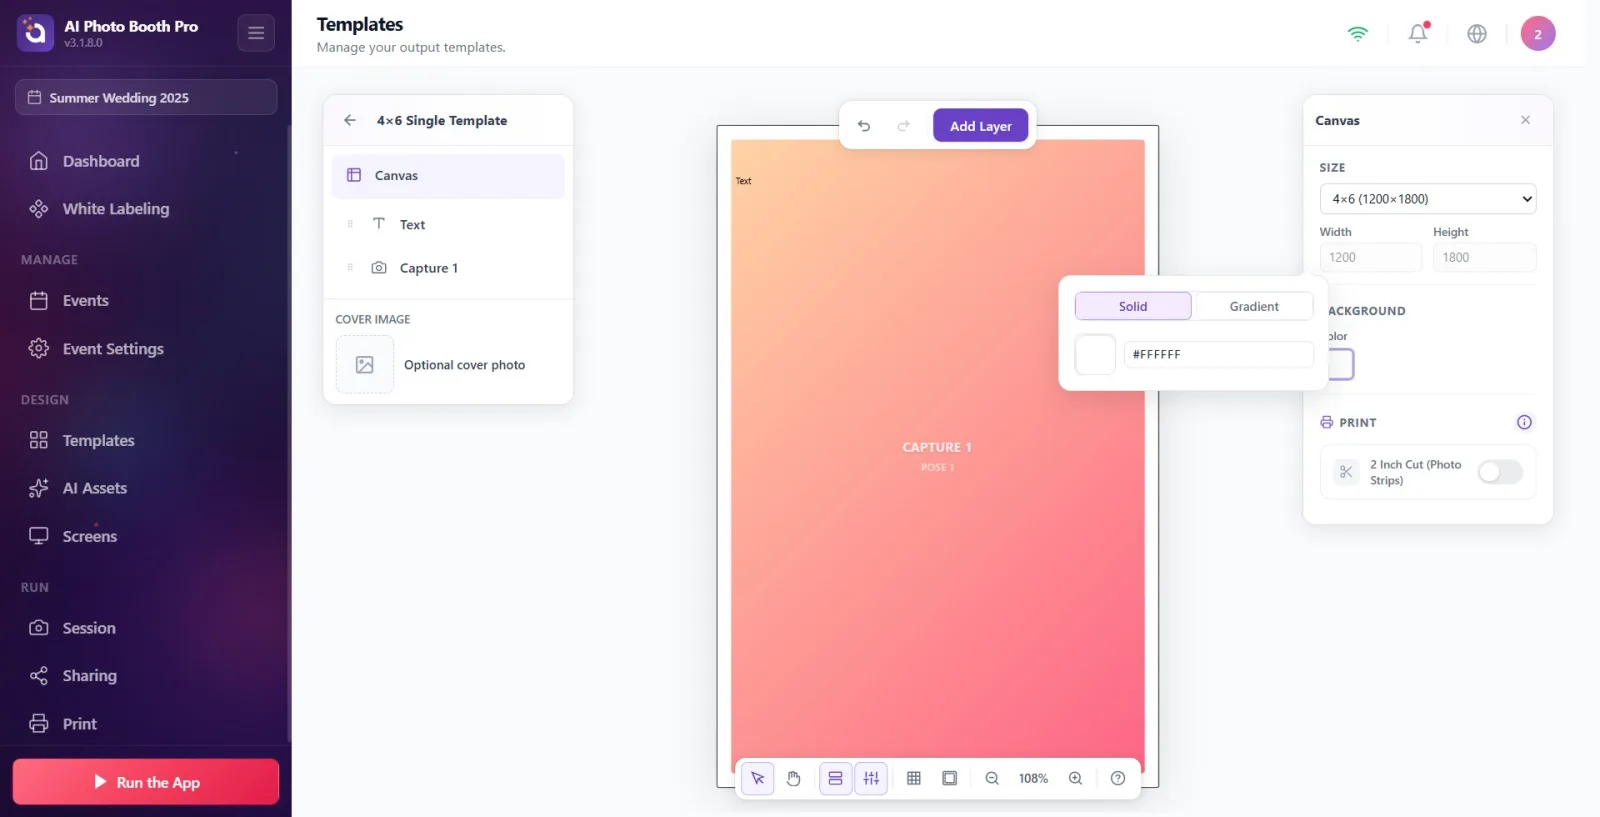
In the color picker that opens, make sure the Solid tab at the top is selected. Pick a color from the color wheel or enter #RRGGBB in the hex box. The color you choose immediately becomes the canvas base. If you want a gradient, move on to the next step.
🔎 On-screen elements: the Solid / Gradient tabs in the color picker; in Solid mode the color wheel + hex input box.
Step 5 · Gradient settings (shared for Background and Color layer)
Template Editor — Color picker (Gradient mode)
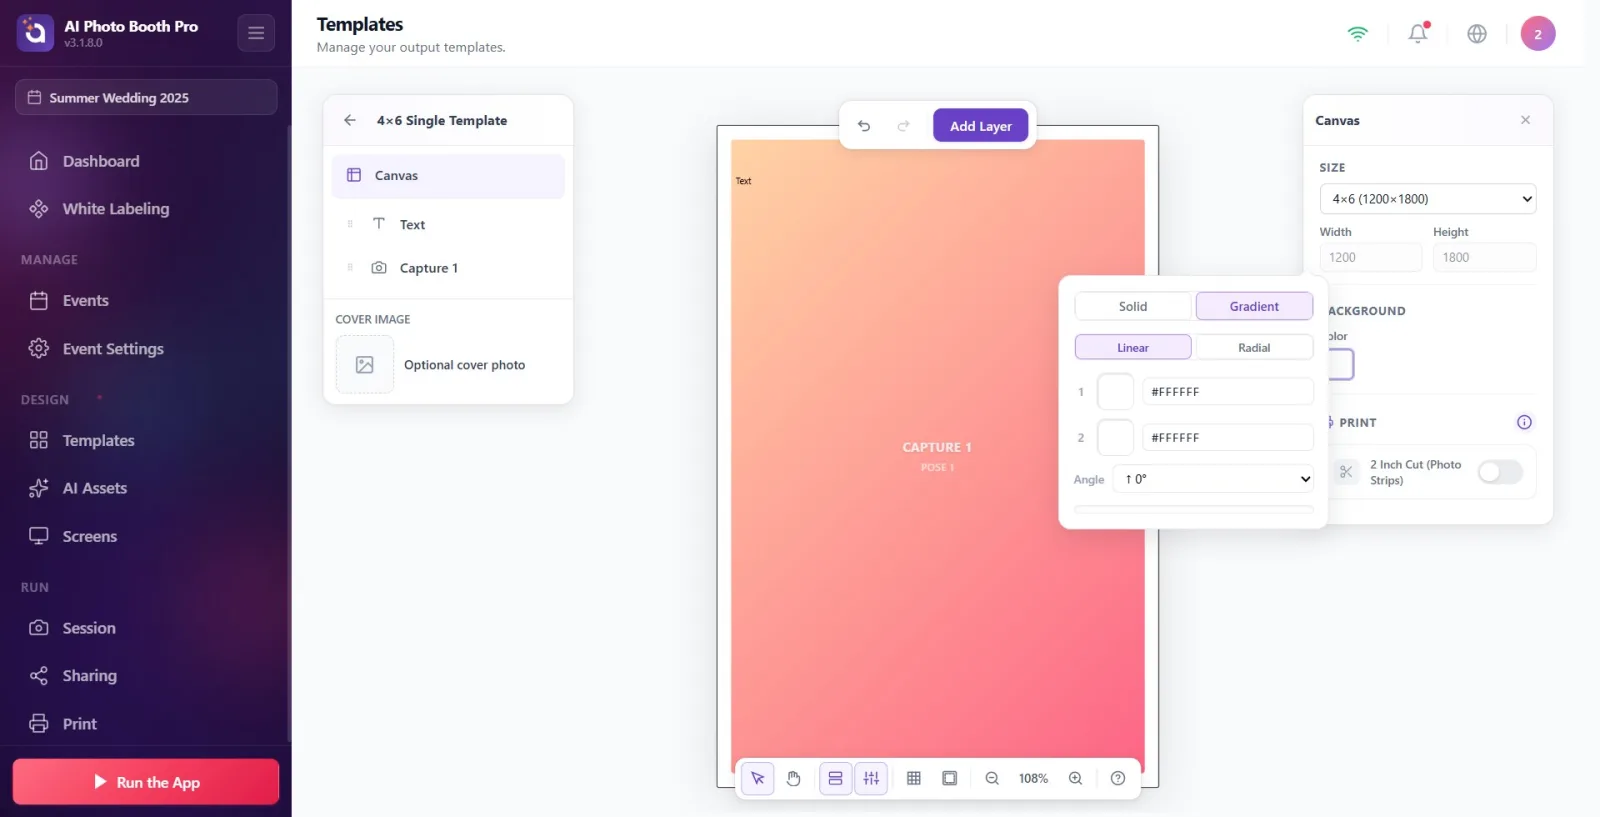
In the color picker, switch to the Gradient tab. Choose the Linear or Radial type. Set the two color stops marked '1' and '2' (with the color wheel or hex). If the type is Linear, choose the direction from the Angle menu (8 options: ↑ 0°, ↗ 45°, → 90°, ↘ 135°, ↓ 180°, ↙ 225°, ← 270°, ↖ 315°). The preview bar at the bottom shows the result live. This picker is exactly the same for both the 'Background' in Method 1 and the Color layer in Method 2.
🔎 On-screen elements: the Gradient tab; the Linear / Radial sub-tabs; the '1' and '2' color stops; the 'Angle' menu only in Linear; the bottom gradient preview bar.
Step 6 · Method 2 — Add a Color layer
Template Editor — Add Layer menu
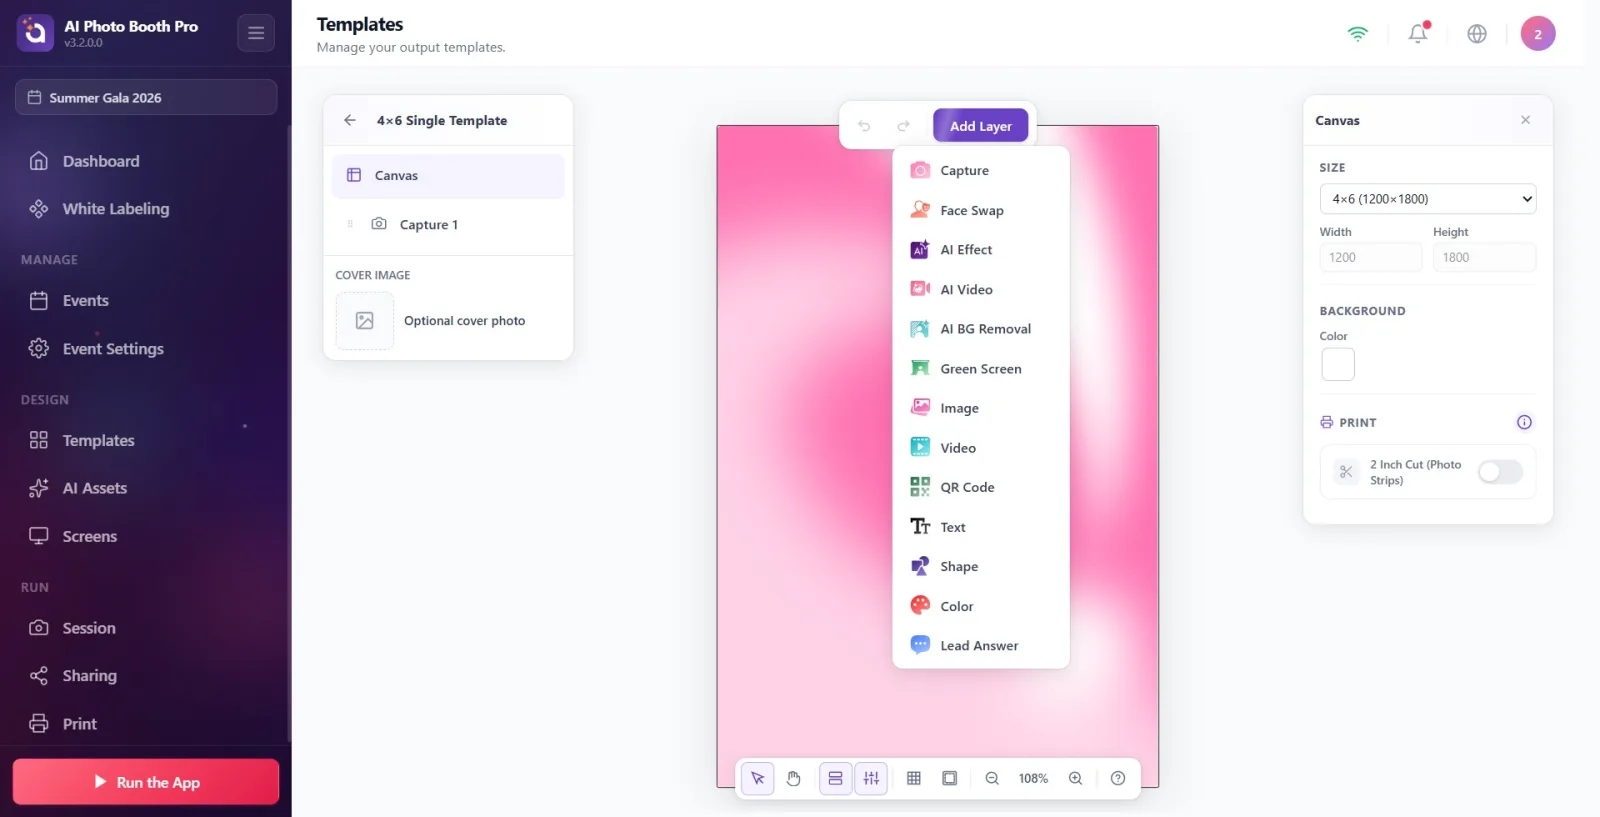
Click the Add Layer button in the top bar; from the menu that opens, select Color. A 200×200 color block filled with solid gray (#CCCCCC) is added to the canvas. This is a real layer that can be moved, resized, rotated and deleted — it is not the base.
🔎 On-screen elements: the Add Layer button at the top; the Color item in the layer type menu that opens (the name appears in English in the menu).
Step 7 · Method 2 — Set the color layer fill
Template Editor — Properties panel (Color layer selected)
With the color layer selected, find the Color group in the right Properties panel; click the color box next to the Fill label. The same color picker as in Method 1 opens — you can choose a solid color or a gradient (as in step 5).
🔎 On-screen elements: the Color group in the right panel, the Fill label and the color box; the ColorSettingPicker that opens (solid/gradient).
Step 8 · Method 2 — Position the color block (optionally use it like a base)
Template Editor — Canvas + Properties panel
Drag to move the color layer, resize it with the corner handles, or enter X/Y/W/H and Opacity values from the Position & Size group. If you want to use the color block as a full background, enlarge it enough to cover the canvas and send it to the bottom with Move Down (the difference from Method 1: this block can be moved and deleted).
🔎 On-screen elements: the selection frame + corner handles; the Position & Size group (X/Y/W/H), Opacity; the Move Down button in the Layers panel.
Step 9 · Method 3 — Add an Image layer
Template Editor — Add Layer menu
Click the Add Layer button at the top; from the menu select Image. An empty image layer is added (default Fit = Stretch/fill). This too is a real layer that can be moved, resized and deleted.
🔎 On-screen elements: the Image item in the Add Layer menu (the name appears in English in the menu).
Step 10 · Method 3 — Choose the image file
Template Editor — Properties panel (Image layer selected)
With the image layer selected, use the file picker in the Image group of the right Properties panel; from the native file picker that opens, choose the image you want to use. The image becomes visible inside the layer.
🔎 On-screen elements: the Image group in the right panel; the FilePicker (file selection) component.
Step 11 · Method 3 — Cover the canvas with the image (Fit → Cover)
Template Editor — Properties panel (Image layer selected)
In the Image group, set the Fit menu to Cover — so the image fills the layer box with no gaps. Then enlarge the image layer to cover the entire canvas using the corner handles or the W/H values in Position & Size. Adjust the position of the image within the box from the Alignment menu. (If you like, you can apply corner rounding with Radius, or chroma key/green screen with Clear Background.)
🔎 On-screen elements: the Image group: the Fit menu (Contain / Cover / Stretch), the Alignment menu, Radius, Clear Background + Chroma Key Color; the selection frame corner handles.
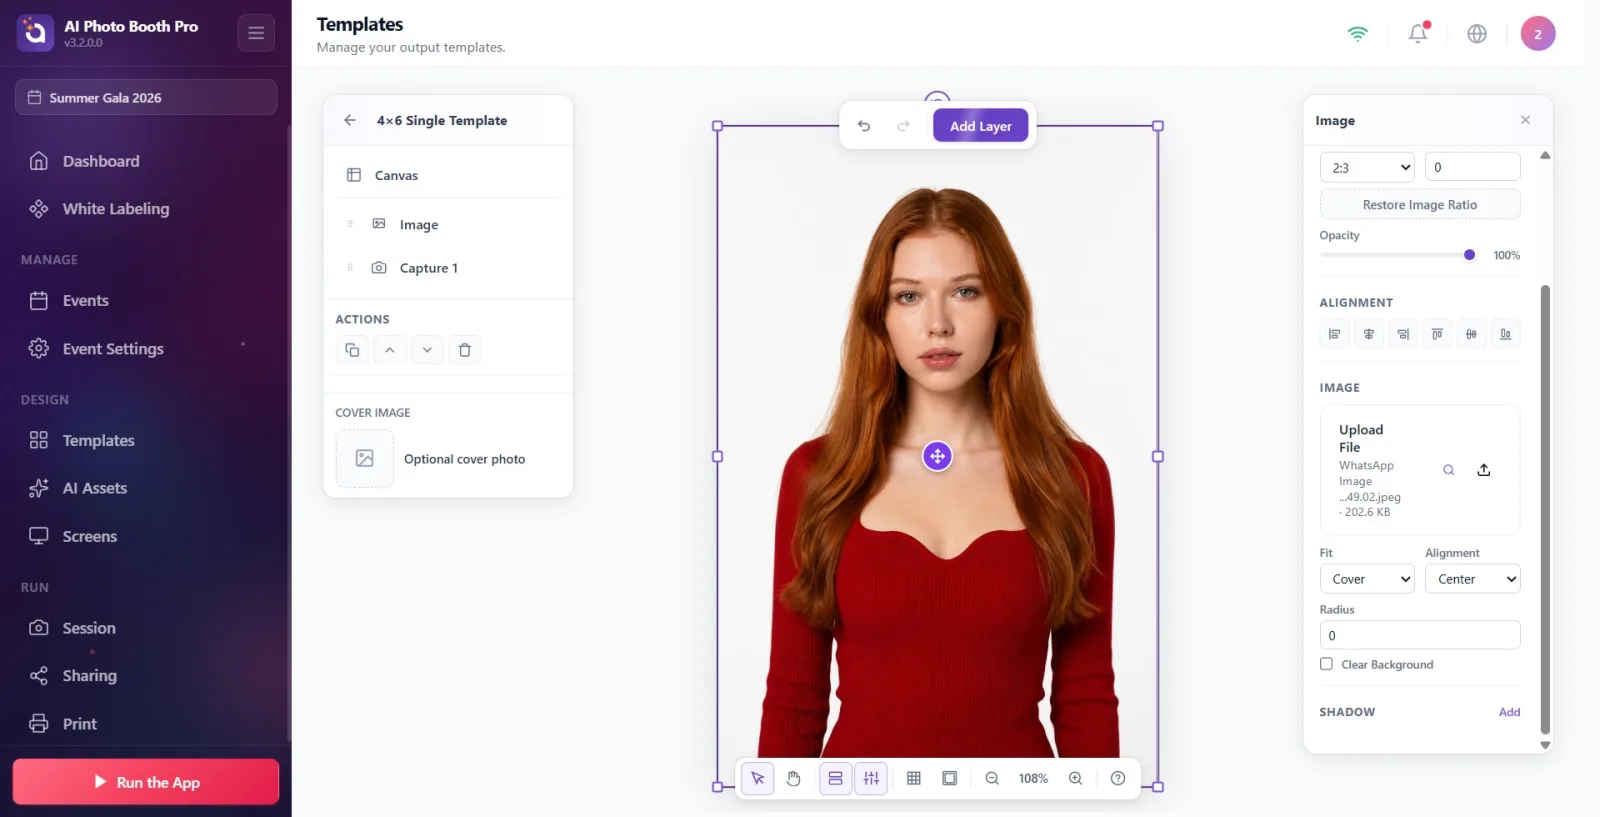
Step 12 · Method 3 — Send the image to the bottom (Move Down)
Template Editor — Layers panel (Actions)
With the image layer selected, press the Move Down button (or ⌘[) in the 'Actions' section of the left Layers panel repeatedly until the image drops below all layers. This turns the image into a background; the photo slots, text and other layers appear in front of it. (There is no single-step 'send to back'; each click moves it down one position.)
🔎 On-screen elements: the 'Actions' group shown when a single layer is selected in the Layers panel: the Duplicate, Move Up, Move Down, Delete icon buttons (shortcut ⌘[ / ⌘]).
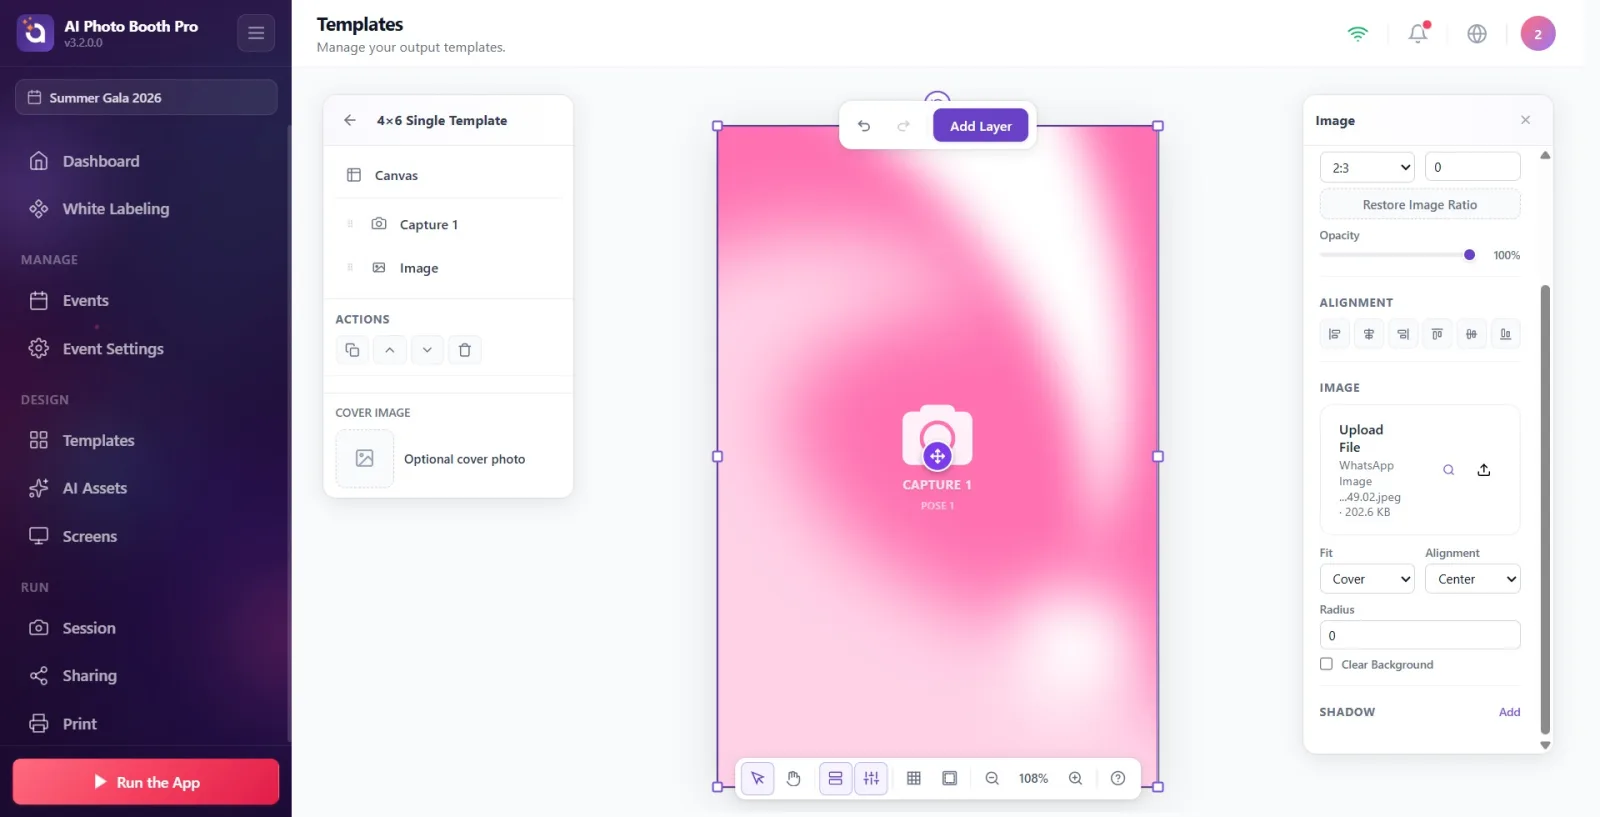
The essence of the three methods: Method 1 (Canvas Background) = the single non-deletable/non-movable base, color/gradient only. Method 2 (Color layer) = a movable/deletable color-gradient block. Method 3 (Image layer) = an image; to make it a background use Cover + enlarge + Move Down.
The same color picker is used both for the Background base and the Color layer; the solid/gradient setting is exactly the same in both.
In a gradient only 2 color stops ('1' and '2') can be edited. Angle (direction) exists only in a Linear gradient; there is no angle in Radial.
Color/hex changes are applied with a ~0.5 s delay (debounce) — if it does not change instantly, wait a moment.
To make an image a full background, be sure to set Fit to Cover and enlarge the layer to the canvas size; if you leave it on Contain, the image stays small in the center.
The item names in the Add Layer menu appear in English (Color, Image, Text ...); however the headings in the right Properties panel appear in your interface language (Color, Image).
If you enlarge the color block (Method 2) enough to cover the canvas and lower it to the bottom, it behaves like a base, but unlike Method 1 it can be moved and deleted.
Looking for an image option in the Canvas Background group: the base is only color or gradient; for an image you must add an Image layer (Method 3).
Adding the image layer but forgetting to send it to the bottom with Move Down: the image covers the photo slots and the text.
Leaving the Fit menu on Contain and then complaining that the image does not fill the canvas: a background needs Cover and the layer must be enlarged to the canvas size.
Thinking the Color layer is a permanent base: it is a movable/deletable block. For a permanent, non-deletable base, use Method 1 (Canvas 'Background').
Looking for a 3rd color in the gradient: only two stops ('1' and '2') can be edited in the picker.
Looking for Angle in a radial gradient: the angle appears only in a Linear gradient.
Related topics
sablon-olusturma sablon-duzenleme
