













Before this: How to Create an Event?
At trade shows and conferences you scan the attendee's name badge with a barcode reader; information such as their name, company and email is saved to the session. Scanning is done from a small panel on the welcome screen and, if you want, the scan starts the session automatically. This article explains the setting, the reader and the format in which the organizer must print the barcode.
- On the Settings → Run → Badge Scanning page, turn on the Badge scanning switch.
- Choose the event's registration system from the Badge provider list. For barcodes printed by the organizer themselves, RegularOffline is enough; it requires no credentials.
- Connect a USB or Bluetooth barcode reader and test a badge in the Test a badge field on the page.
- When you run the booth, the 'Scan your badge' panel appears at the bottom of the welcome screen. Scanning works without touching the screen.
- The information read is written to the session record; it is exported as described in the article on downloading attendee data.
Before you start
- An event must be created and selected. The Badge Scanning page does not appear in the menu while no event is selected.
- The event must be synced to the cloud: the attendee is resolved by the server. If the event has not been synced yet, the panel shows 'The event is not synced to the cloud yet.'
- The booth must be connected to the internet (even with RegularOffline the barcode is resolved on the server).
- The reader must be a barcode reader that types like a keyboard (USB or Bluetooth HID) and must add Enter at the end of each scan. Most readers do this by default.
Step by step
Step 1 · Open the page and turn scanning on
Settings → Run → Badge Scanning
| Setting | What it does | Default |
|---|---|---|
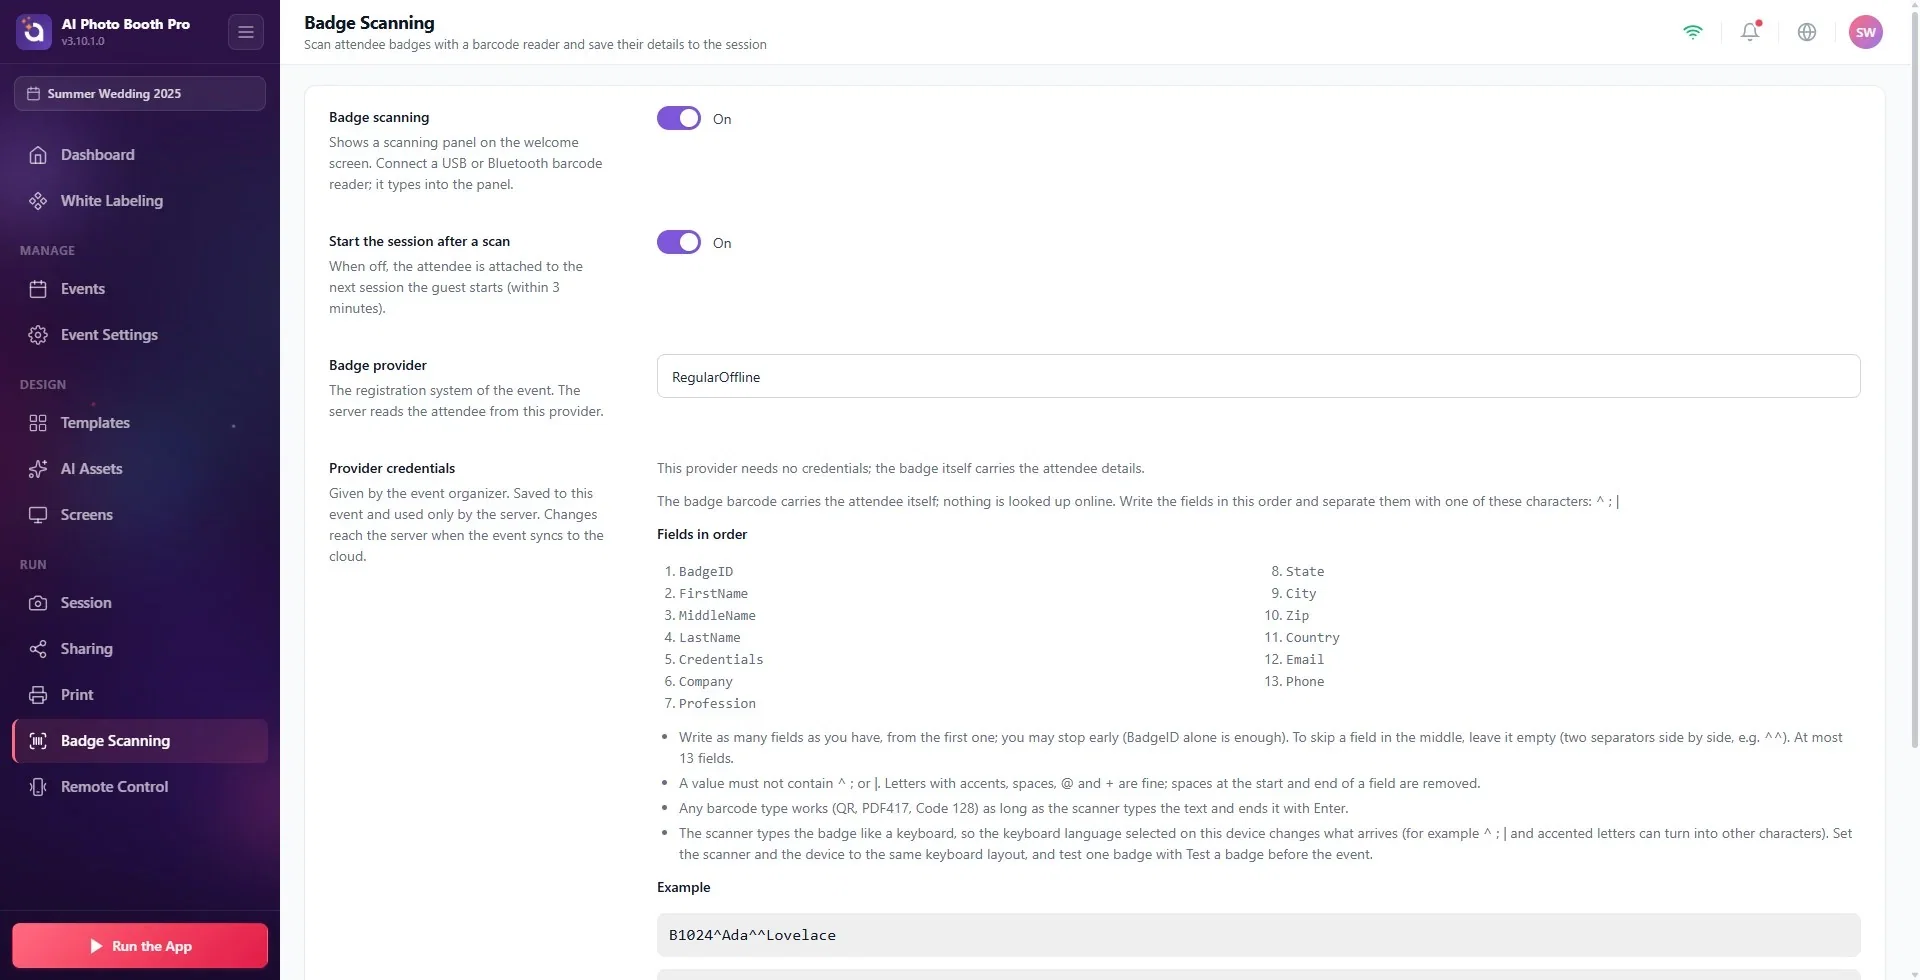
| Badge scanning | Shows a scanning panel on the welcome screen. Connect a USB or Bluetooth barcode reader; the reader types into the panel. | Off |
| Start the session after a scan | When on, a successful scan starts the session immediately. When off, the attendee is linked to the next session the guest starts (within 3 minutes). | On |
Step 2 · Choose the provider
Settings → Run → Badge Scanning → Badge provider
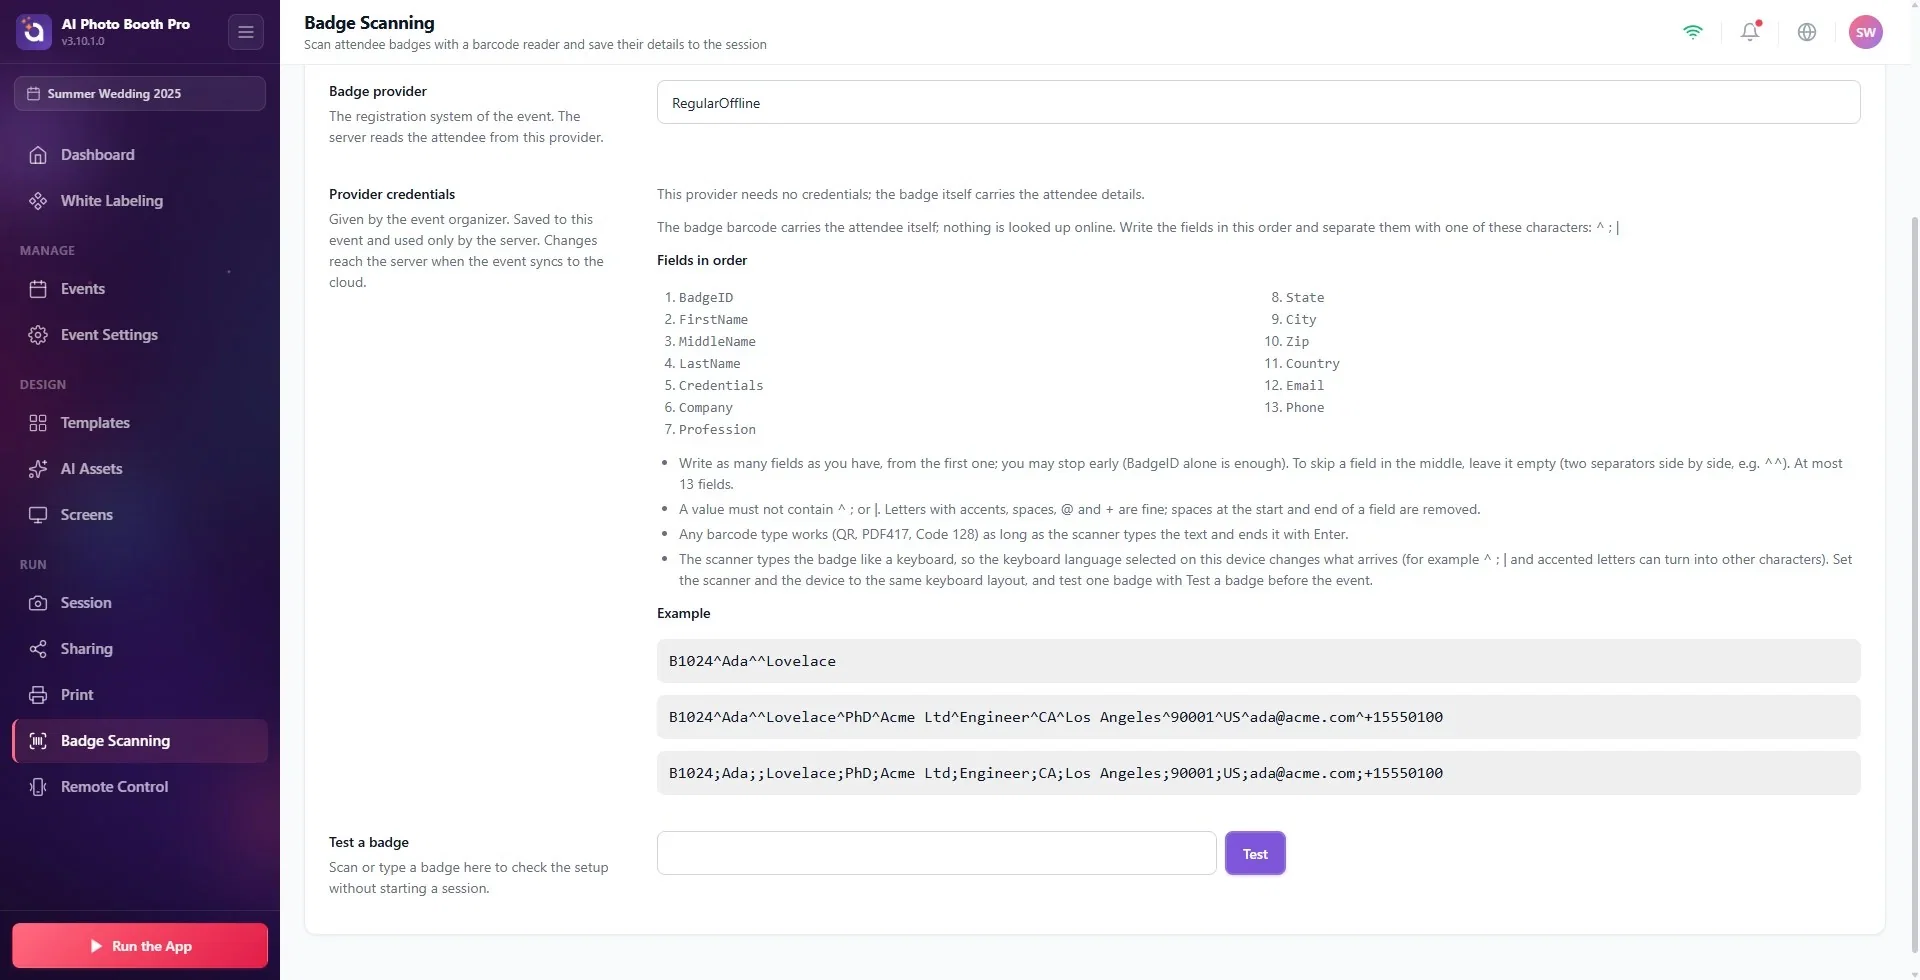
Choose the event's registration system from the list. The list starts with RegularOffline; if no provider is selected when you first open the page, RegularOffline is selected. Other options: RetrieveMyLeads, XpressLeadPro, ExpoLeads, Maritz, ExpoBadge, Cvent, EventCitadel, FieldDriveLeads, CompuLEAD.
- RegularOffline requires no credentials: the attendee's information is inside the barcode on the name badge. The page shows the barcode format and an example (details below).
- For other providers, the fields you need to fill in appear in the Provider credentials section (with RegularOffline, the same section shows the barcode format and examples). The event organizer provides this information; it is saved only for this event and used only by the server. For example, for CompuLEAD the Event UID (digits only) and the token are in the CompuSystems confirmation email. For ExpoLeads more than one device can be entered (Add device).
- If you changed the credentials, the change reaches the server once the event is synced to the cloud.
Step 3 · Connect the reader and test a badge
Settings → Run → Badge Scanning → Test a badge
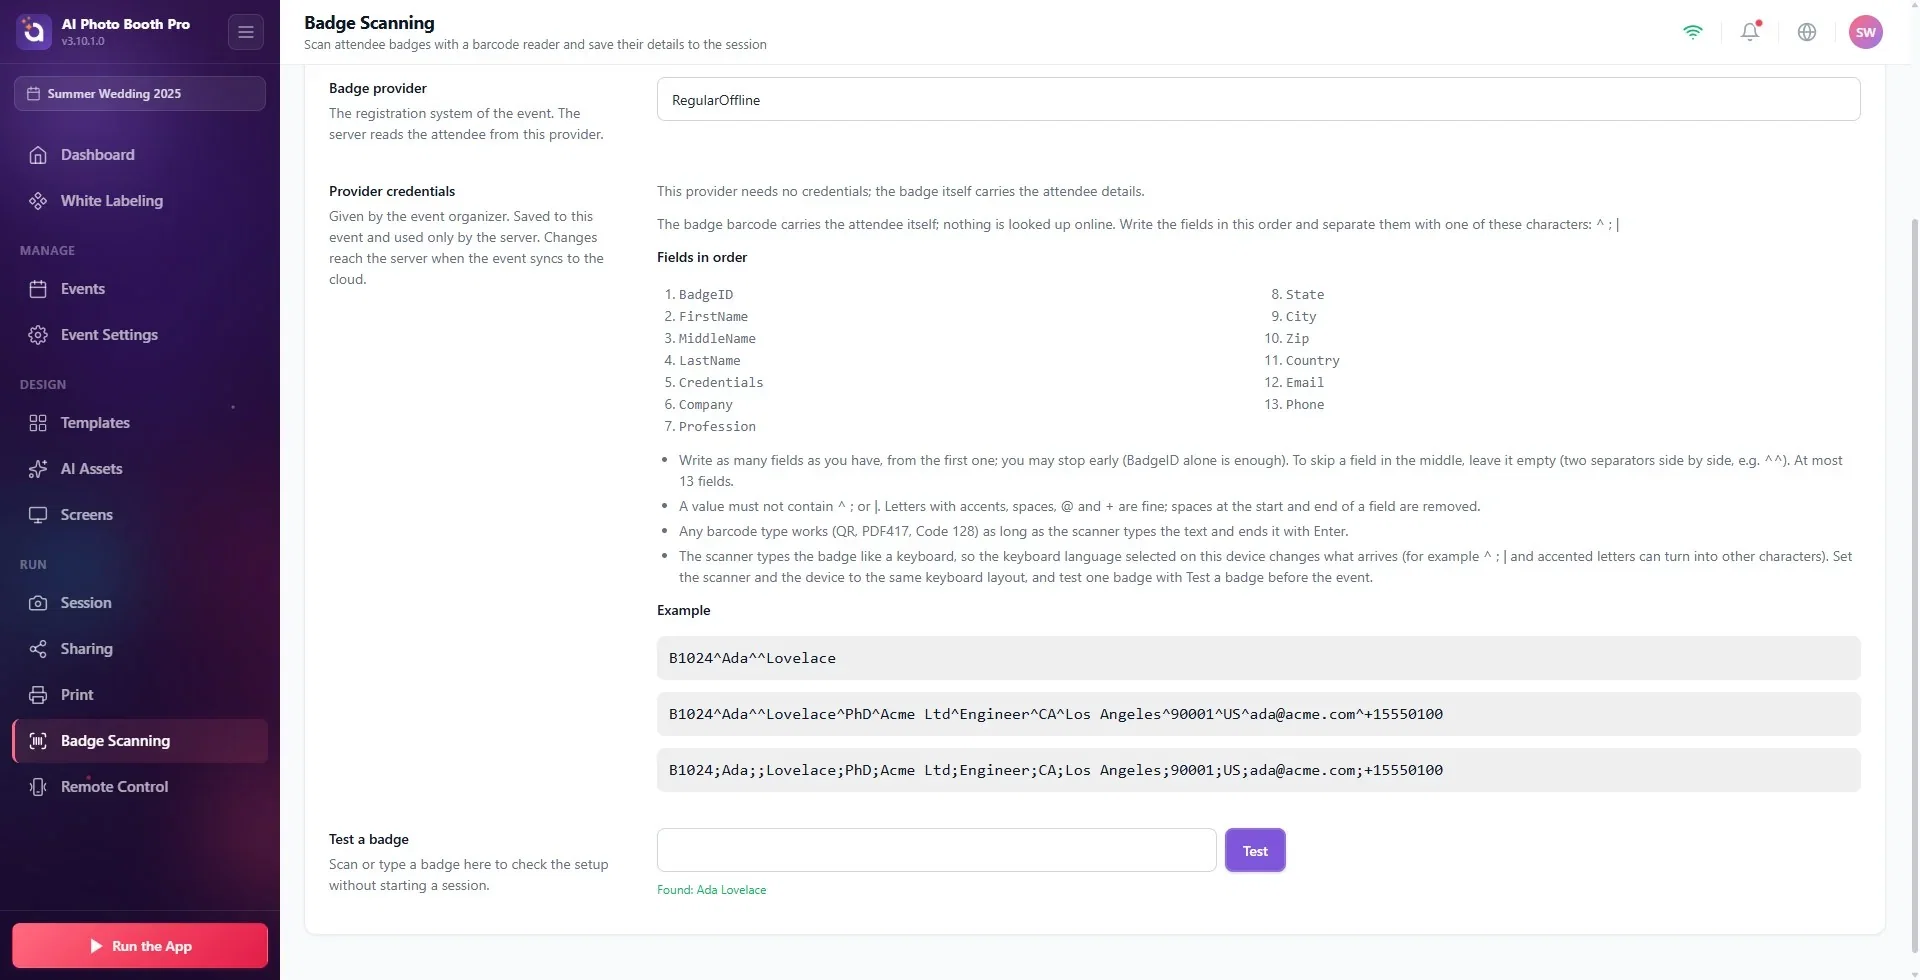
Connect the reader to the device. Scan a badge into the Test a badge field, or type the barcode text, and press Test. If it is correct, 'Found: First Last' appears; no session starts and no record is created. If there is an error, one of the messages in the table below appears.
Step 4 · Run the booth and scan a badge
Settings → Run the App → Run as Photo Booth
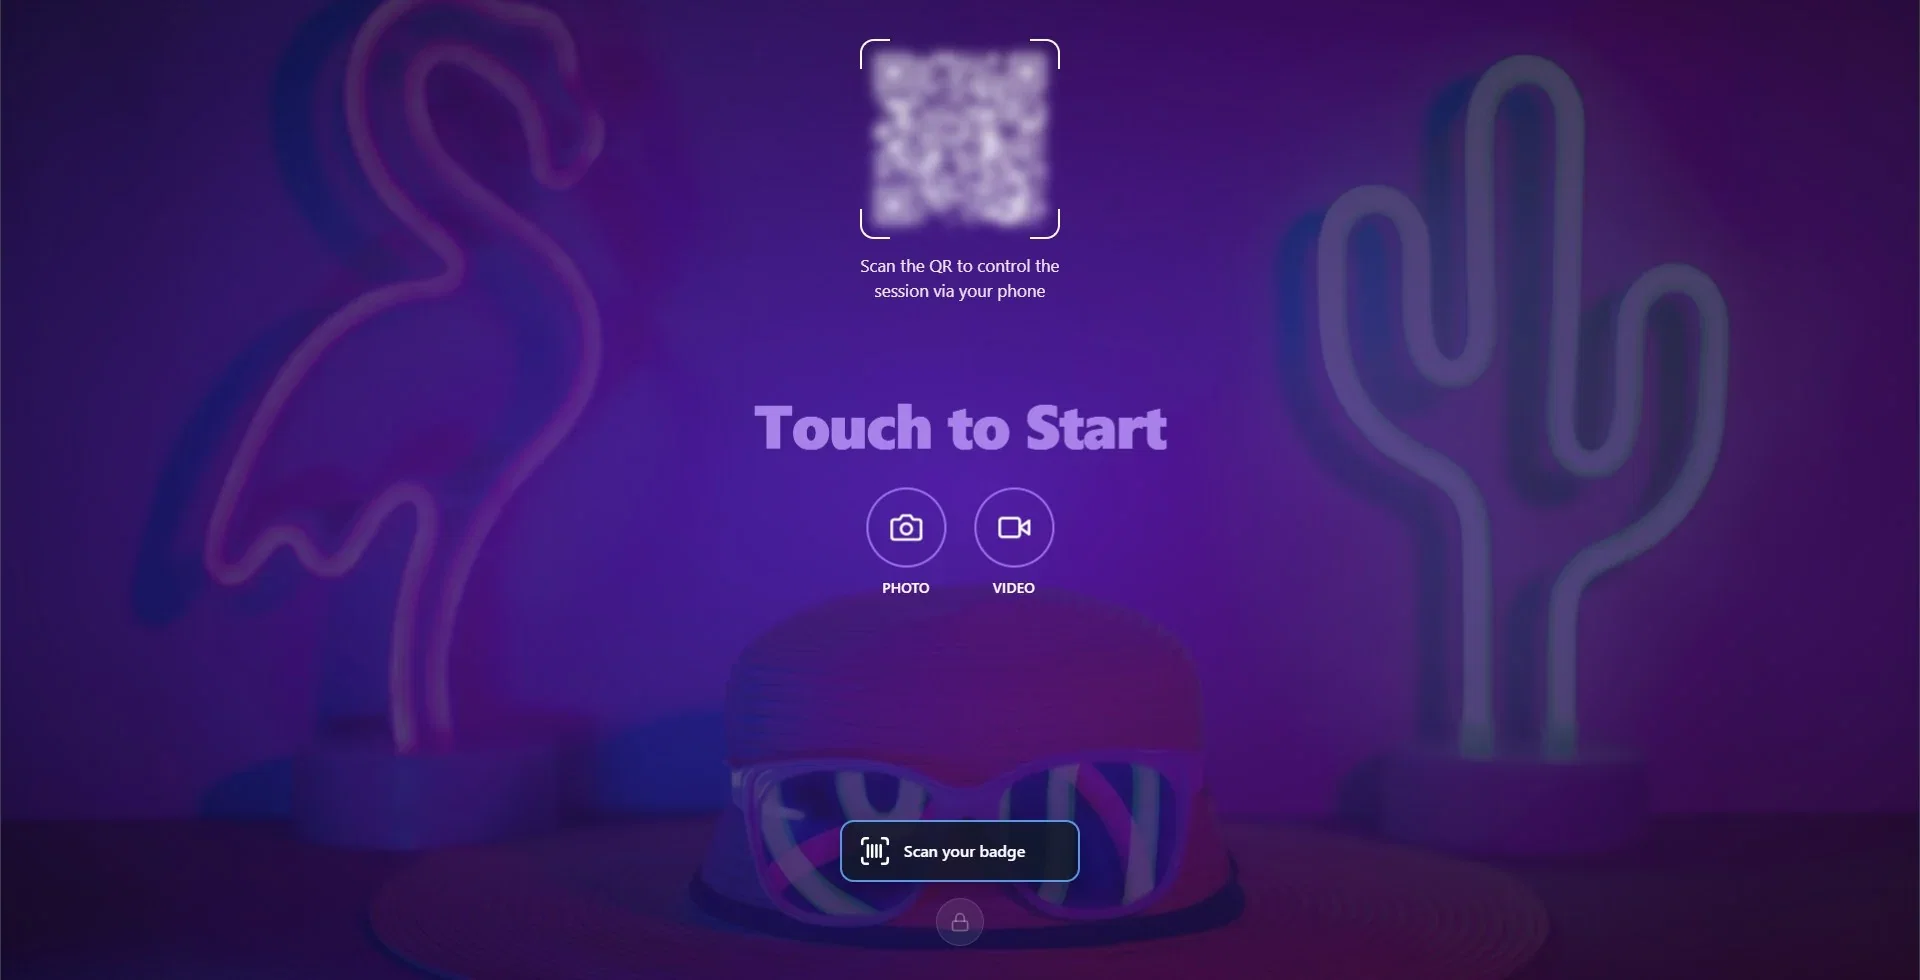
The 'Scan your badge' panel appears at the bottom center of the welcome screen, right above the dashboard button. The panel is ready automatically when it opens; you can scan the badge without touching the screen. On tablets and phones the on-screen keyboard does not open.
Panel states:
| On the panel | Meaning |
|---|---|
| 'Scan your badge' | Waiting for a scan. |
| 'Reading badge…' | The badge is being resolved on the server. |
| 'Registered: First Last' | The attendee was found. If Start the session after a scan is on, the session starts. |
| 'Start a session to continue' | The setting is off: when the guest presses a mode button, the session starts with this attendee. |
While the scanning panel is active, F11/F12 (back to the dashboard) work; the space and S keys do not start a session, they are read as part of the badge text.
RegularOffline: how should the organizer print the barcode?
With RegularOffline the information is inside the barcode. The organizer prints barcodes from their own registration system that follow this rule:
- The fields are written in this order: BadgeID, FirstName, MiddleName, LastName, Credentials (title: Dr, PhD…), Company, Profession, State, City, Zip, Country, Email, Phone.
- The fields are separated by ^, ; or |. Starting from the beginning, write as many fields as you have; BadgeID alone is also enough. At most 13 fields.
- If a field in the middle is skipped, leave it empty but keep its place: B1024^Ada^^Lovelace (MiddleName empty).
- A value cannot contain ^, ; or |. Turkish characters, spaces, @ and + are no problem.
- The barcode type is up to you (QR, PDF417, Code 128); the reader must type the text and add Enter at the end.
Example: B1024^Ada^^Lovelace^PhD^Acme Ltd^Engineer^CA^Los Angeles^90001^US^ada@acme.com^+15550100
The reader types the badge like a keyboard; the keyboard language selected on the device converts the keys into characters. That is why ^, ;, | and Turkish characters can turn into other characters. Set the reader and the device to the same keyboard layout, and always test a badge with Test a badge before the event.
Error messages
| Message | What to do |
|---|---|
| 'Badge provider is not set up.' | Make a selection in the Badge provider list. |
| 'The event is not synced to the cloud yet.' | Wait a little while the booth is connected to the internet, then try again. |
| 'The event was not found on the server.' | The event is not in the cloud or has been deleted; wait for the event to sync while the booth is connected to the internet, and if it persists, contact support. |
| 'This barcode is not a valid badge.' | With RegularOffline, check the format: there can be no more than 13 fields and BadgeID cannot be empty. Check the keyboard language. |
| 'Badge not found. Please try again.' | The badge is not in the provider's records; ask the organizer. |
| 'The provider rejected the credentials.' | Get the credentials from the organizer again. |
| 'The provider did not respond in time. Please try again.' / 'The badge provider returned an error.' | A problem on the provider's side; try again after a while. |
| 'No connection to the server. Check the internet connection.' | Check the booth's internet connection. |
Testing the reader for the first time during the event: a keyboard language mismatch can corrupt characters. Always test a badge with Test a badge first.
Using a reader that does not add Enter: the badge is read but not submitted. Add Enter at the end of the scan in the reader's settings.
Deleting a field in the middle completely with RegularOffline: the following fields shift (the last name is written into the middle name). Leave the skipped field's place empty.
Expecting scanning to work on a booth without internet: the badge is resolved on the server, so a connection is required.
Related topics
How Do I Download Survey and Customer Data (CSV)? How to Design the Welcome Screen? How to Set Survey Tab? How to Create an Event?
