
Before this: How to Create a Photo Template?
2 Inch Cut physically splits the print into 2×6 photo strips. The switch is not on the printer, but in the template — it is enabled separately for each template. There are two ways to make the cut: if the printer is connected directly (USB) (Windows/macOS), or over the network via WCM Pro — DNP/Citizen’s wireless module — (all platforms: Windows · macOS · Android · iOS).
Controlling physical 2 inch cutting from within the app based on the printer brand (DNP · Citizen · HiTi · Mitsubishi · Sinfonia) — and cutting on all platforms (Windows · macOS · Android · iOS) with WCM Pro — is a rare, distinctive feature among photo booth software. In most solutions, cutting is done only from the printer driver, on a single platform, and manually.
- The template must be a strip (2×6) layout — if you enable it on a normal photo template, the print gets sliced down the middle.
- A printer that can physically cut must be connected (support list below).
A) Enabling the cut in the template (the main way)
- Open the template to edit it → the Template Editor opens.
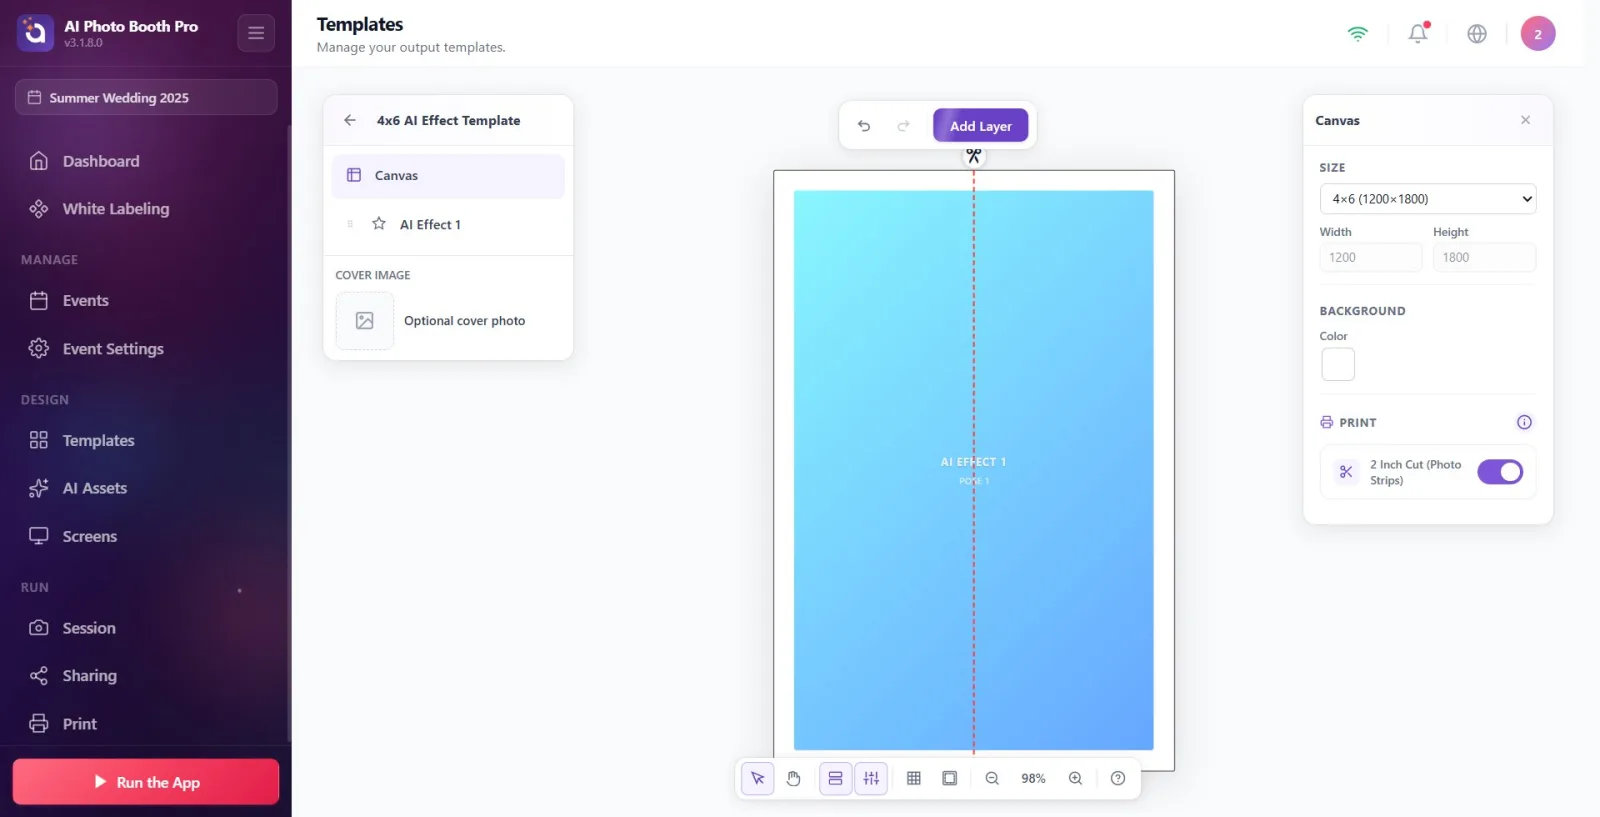
- Open the Properties panel on the right; select not any layer, but the canvas/background → the Printing section appears.
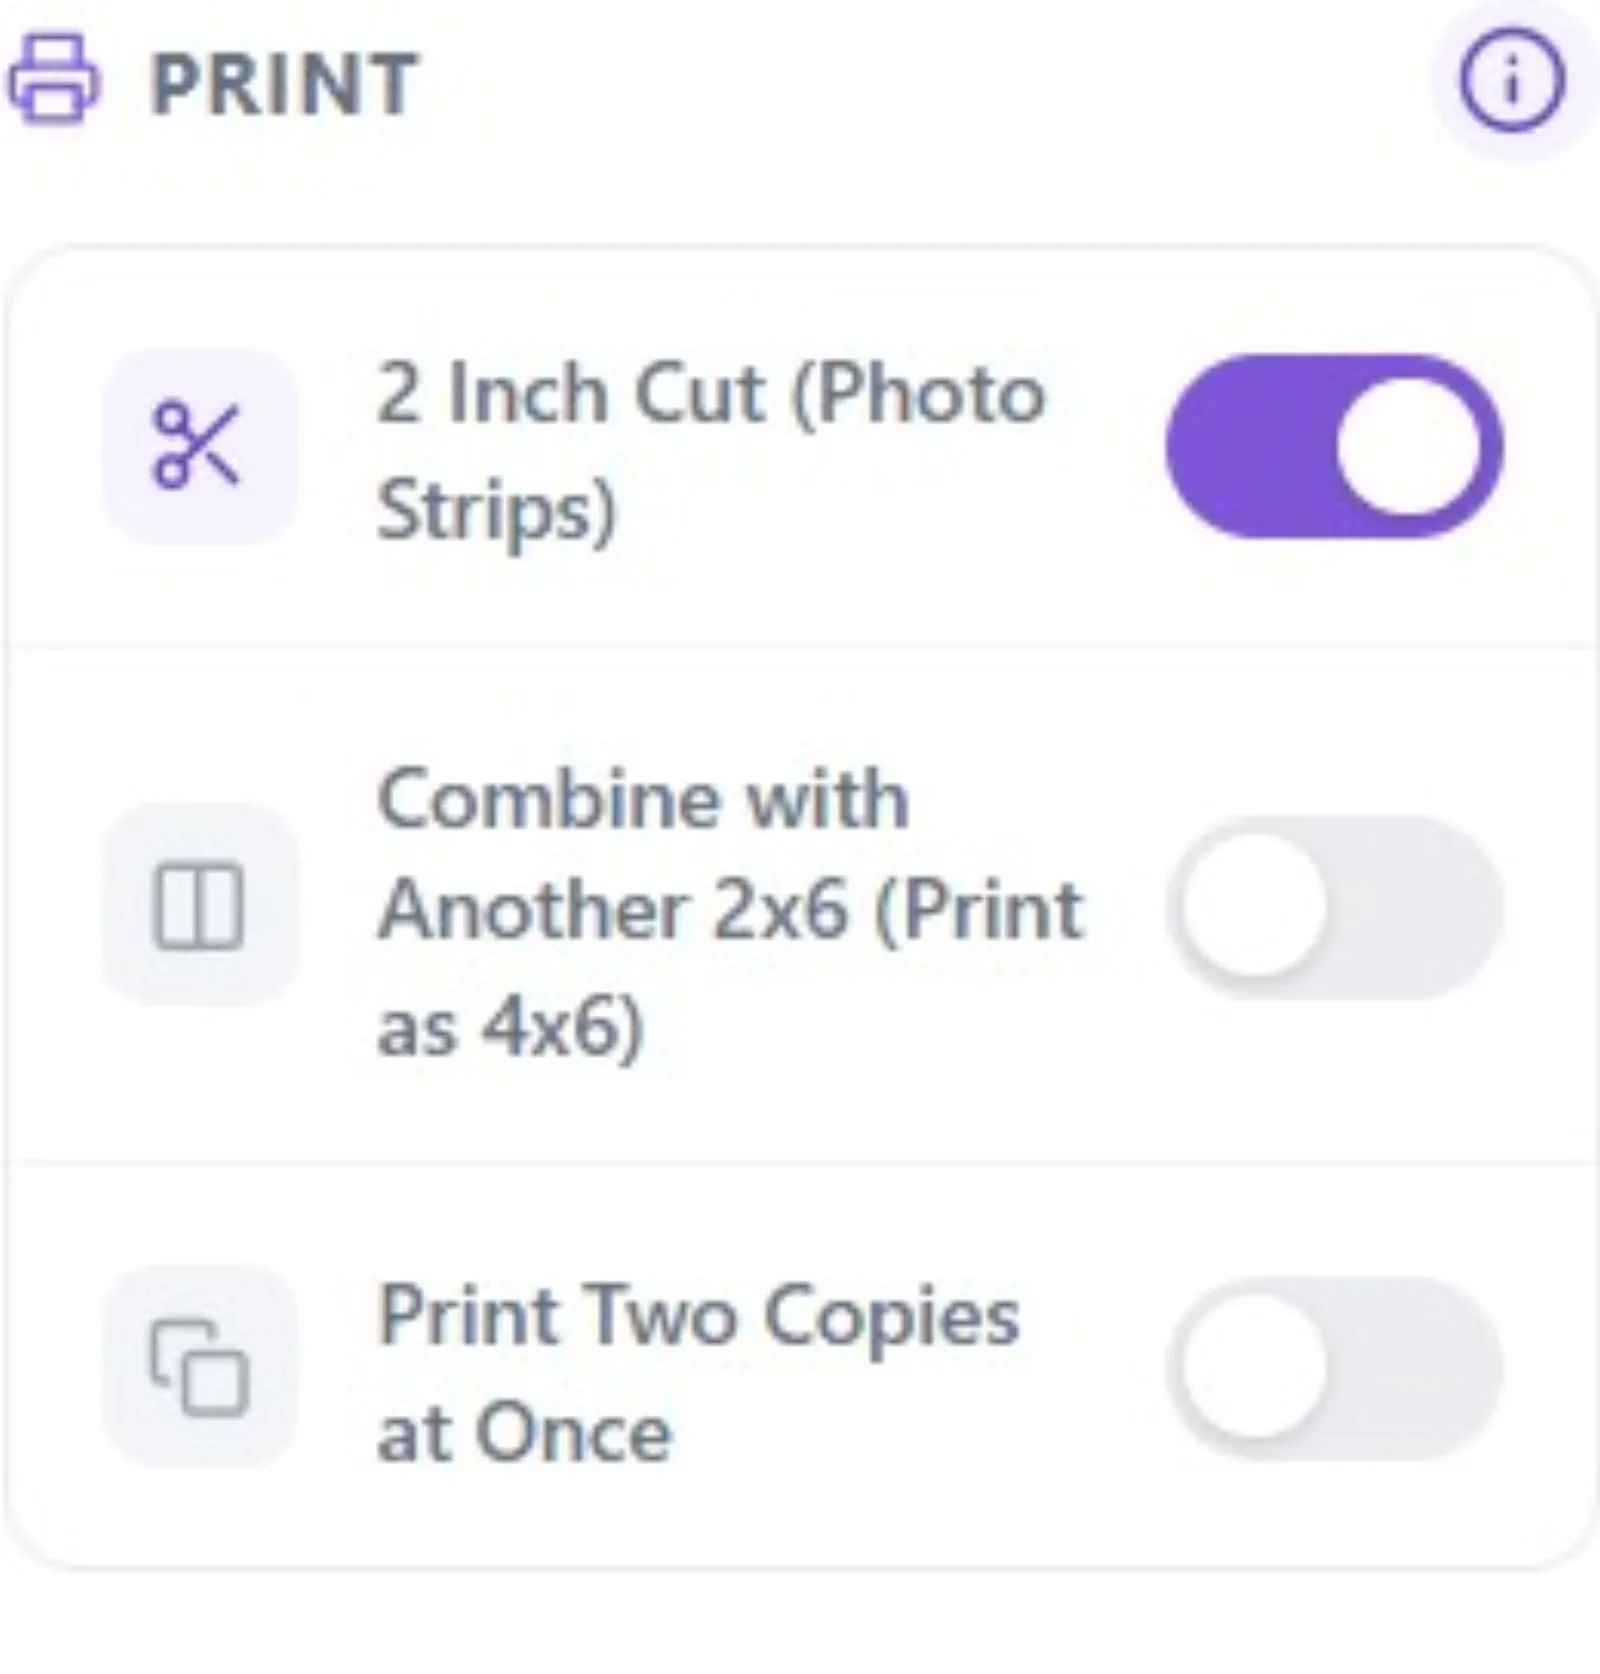
- Turn on the 2 Inch Cut (Photo Strips) switch. A red dashed line + ✂ scissors showing where the cut goes appears on the canvas.
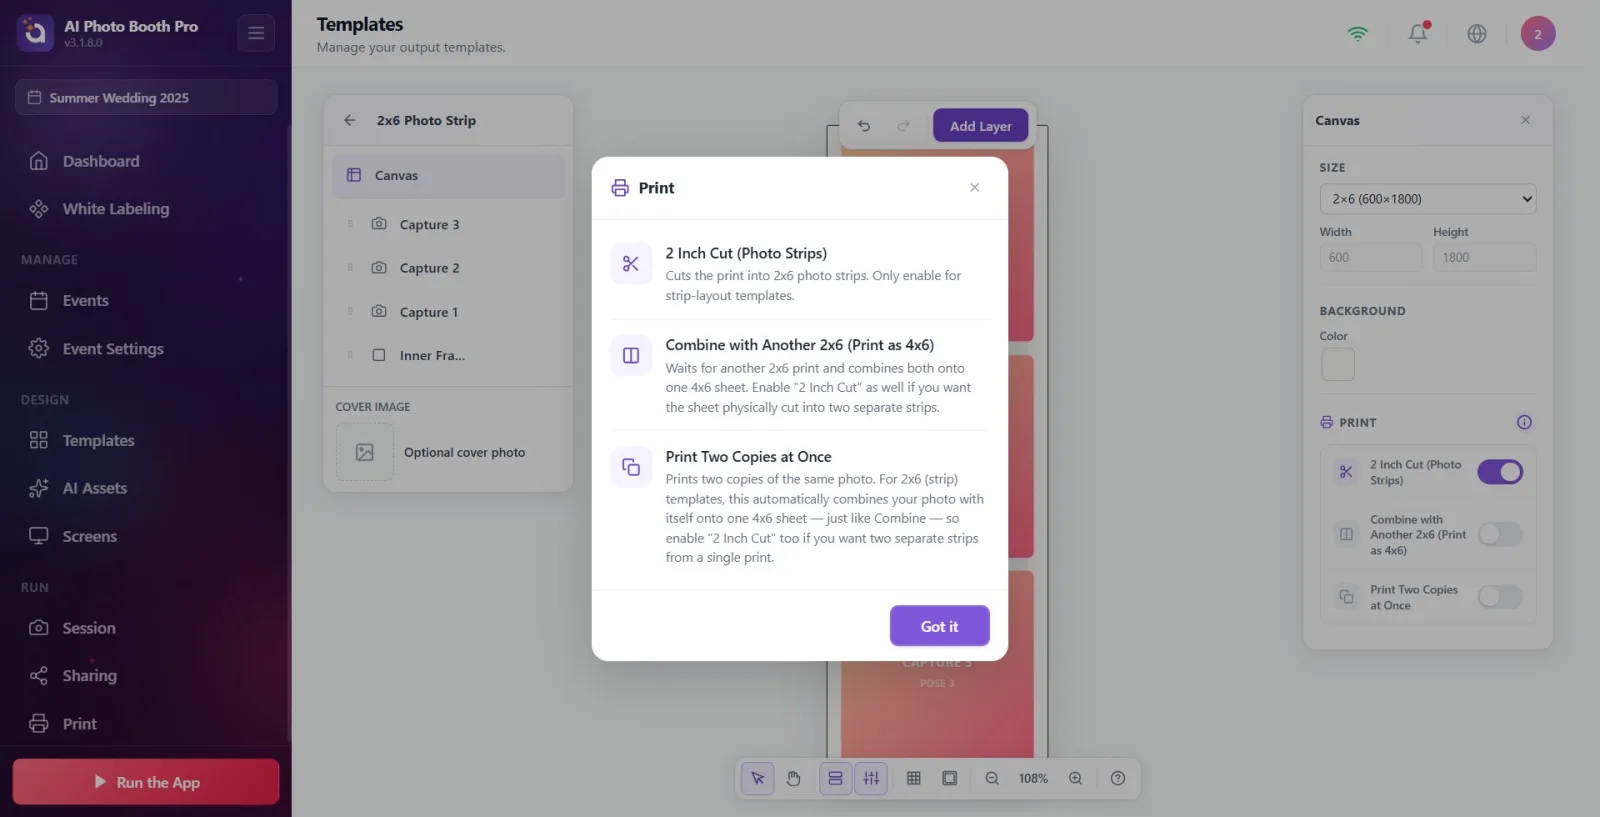
- (If it is a strip template) optional: Combine with Another 2x6 (Print as 4x6) or Print Two Copies at Once.
- The change is saved automatically.
Preparing the Printer for Cutting
Cutting is done in two ways: if the printer is connected directly (USB) (Windows/macOS), or over the network via WCM Pro — DNP/Citizen’s wireless module — (all platforms).
B) Directly (USB) connected printer — Windows/macOS
- Connect the printer via /printsettings → Add Printer.
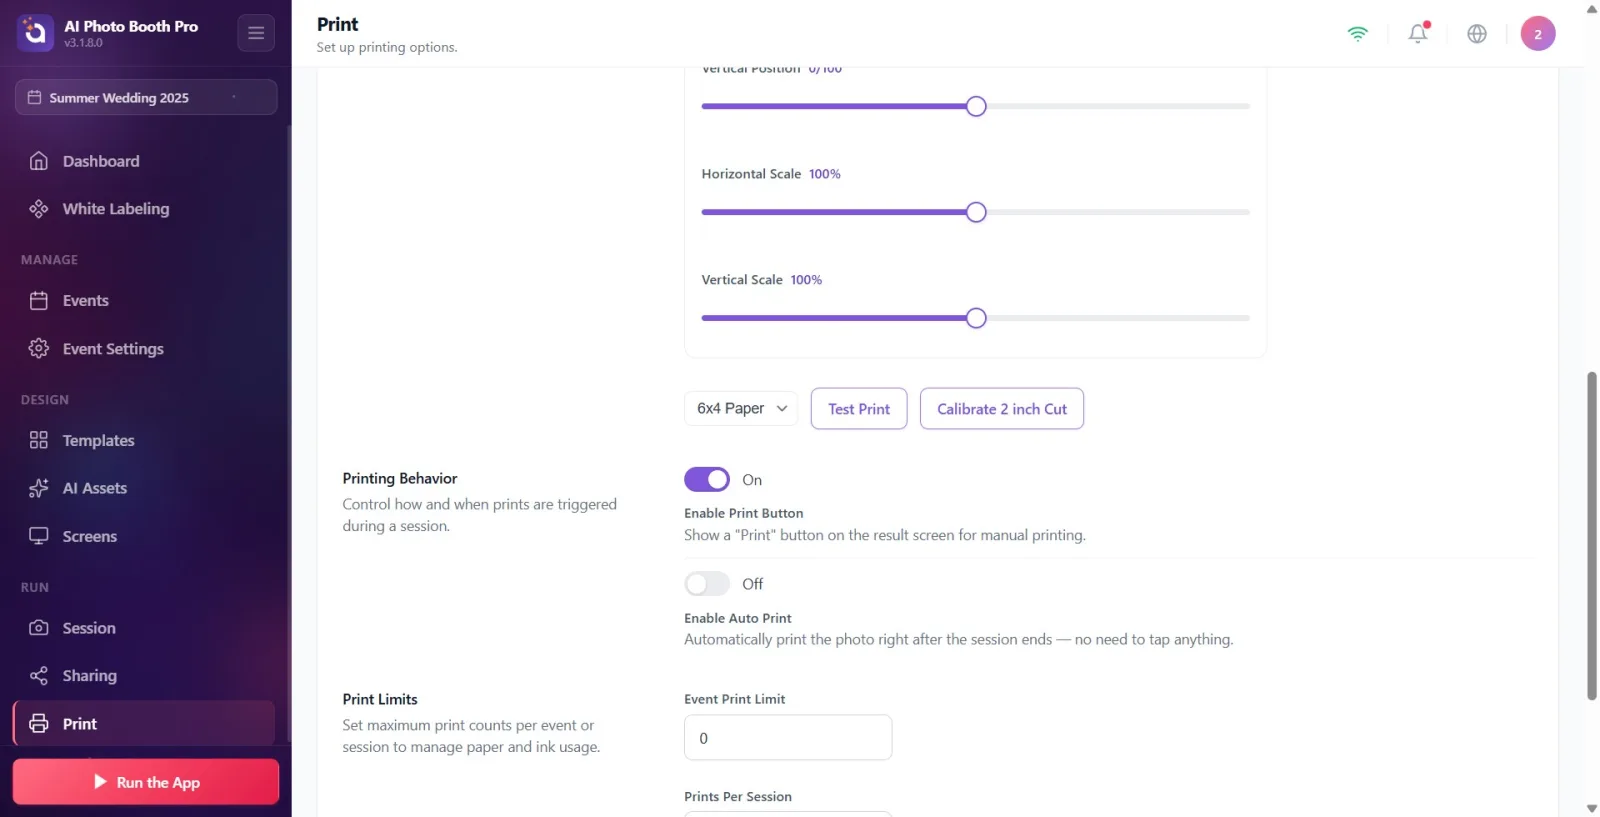
- Windows · DNP/Citizen: select the printer tab → tap the Calibrate 2 inch Cut button. In the driver window that opens, enable the Cutter / 2 inch cut option → Arrow. The app saves the cut-enabled profile locally for that printer.
- If the printer already supports it, a toast says “Your printer is ready for 2 inch cutting.” and no calibration is needed.
- macOS: cutting is automatic via CUPS — there is no calibration concept.
• DNP / Citizen: with the driver cutter profile (calibration or embedded profile).
• HiTi (P525L, P750L, M610) · Mitsubishi (CP70D, CPD80D, CPD90D, CP-M1) · Sinfonia (CHC-S6145): auto-discovered, no calibration — but on these models cutting works only on 4x6/6x4 templates.
• Not supported (wide format): DNP DS820, Citizen CX-02W, Sinfonia S6245.
C) WCM Pro (DNP wireless module) — cutting on all platforms
WCM Pro is the wireless module for DNP/Citizen printers (WCM Plus). It puts the printer on the WiFi network and the WCM device does the cutting — not the client driver. This way, regardless of Android · iOS · PC · Mac, you can print to the DNP printer on the network and have the paper cut. This is the only platform-independent way to cut.
- Connect the WCM Pro device to the same WiFi network as the kiosk.
- /printsettings → Add Printer.
- WCM is auto-discovered on the network — it appears in the list as WCM Printer (IP/host is not entered manually; it is found via mDNS). Tap it and it is added.
- Print with 2 Inch Cut enabled on the template — WCM physically cuts two 2x6 strips from the 4x6 media.
WCM validates the loaded media itself — if the code and the media do not match, the print will not go through; load the correct media. Currently guaranteed to work: two 2x6 strips from 4x6 media. (Four strips from 6x8 media is not supported yet.)
Platform × method — where you can cut
Windows: USB direct ✓ · WCM Pro ✓
macOS: USB direct ✓ · WCM Pro ✓
Android: USB direct ✗ · WCM Pro ✓
iOS: USB direct ✗ · WCM Pro ✓
On Android/iOS the only way to cut is WCM Pro. Windows/macOS can do both.
• Do not enable the cut on a normal photo template — the photo gets cut down the middle. Strips (2×6) only.
• There is no general toggle to “enable cutting” in Print Settings; the cut is always enabled through the template. The Print page only provides calibration/help (and connecting for WCM).
• Printing two 2×6 on a single 4×6 sheet (Combine) and physically cutting the paper are separate things — if you want both, both Combine and 2 Inch Cut must be enabled.
