
Before this: What is Session Settings, How to Use General (Main) Tab?
The Payments tab in session settings allows you to charge guests in your booth via Stripe for print and digital downloads. In this tab, you first turn on payment, connect your Stripe account (and an optional Stripe Terminal card reader), then configure payment options such as currency, price, product name, payment timing, and watermark.
- An event must be created and selected — payment settings are stored within the event/session.
- A Stripe account is required to actually charge guests; plus a Stripe Terminal card reader for in-person card payment.
step by step
Step 1 · Open Payments tab
Session → Payments
Go to Session page in settings. Tap the rightmost Payments tab on the top tab strip (there are several tabs in the ribbon, starting with General; payment settings are on the Payments tab).
🔎 Elements on the screen: Top tab strip: General ... Payments.
Step 2 · Turn on receiving payments (key Payments)
Session → Payments
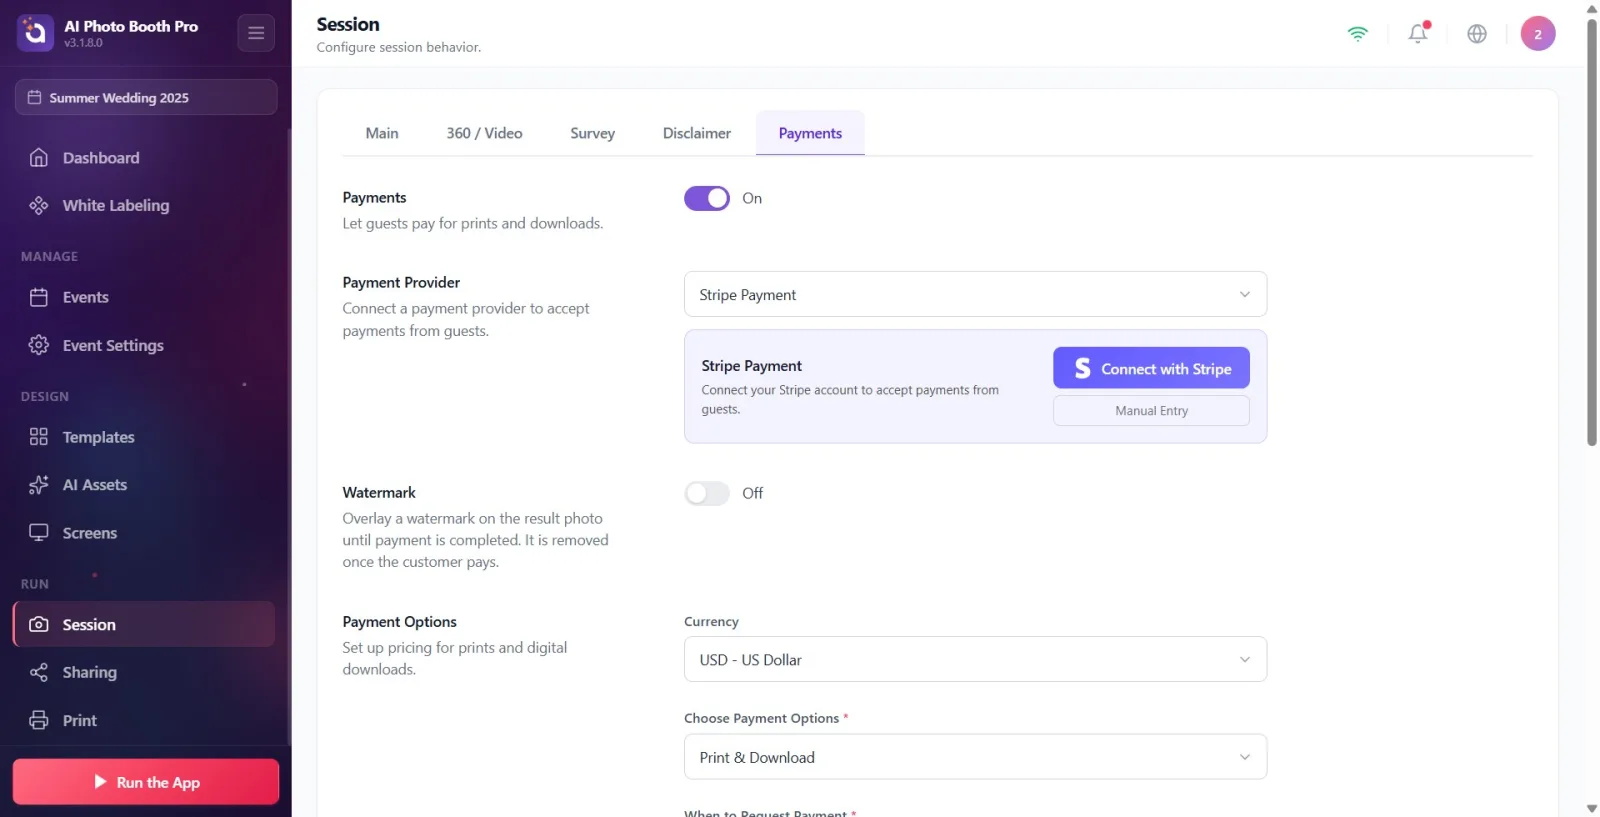
Move the switch under the Payments header to On. Description: 'Let guests pay for prints and downloads.' When the switch is 'Off', none of the underlying payment settings will be visible; When you turn it to 'On', the provider, watermark and payment options sections appear.
🔎 Elements on the screen: Payments title + description; On/Off switch (SwitchSettingComponent).
Step 3 · Connect payment provider (Payment Provider)
Session → Payments
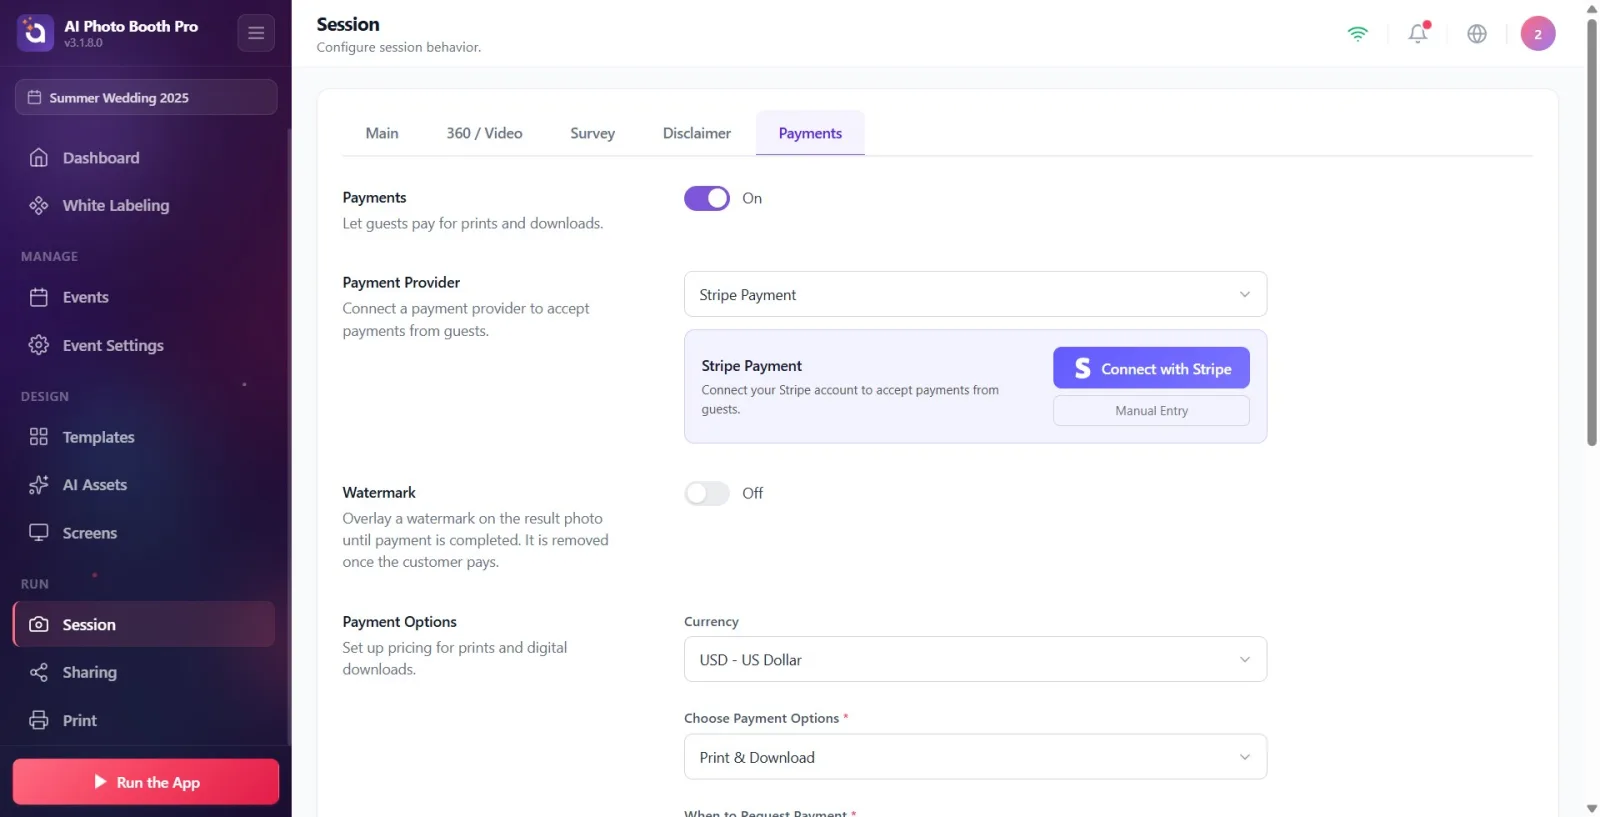
In the Payment Provider section, Stripe Payment is selected in the provider drop-down menu (currently the only provider is Stripe). The Connect your Stripe account to accept payments from guests. card appears when the account is not linked. Tap the purple Connect with Stripe button to link the account and complete the Stripe authorization (OAuth) flow that opens; when connecting the button says Connecting....
🔎 Elements on the screen: Payment Provider title; provider dropdown (Stripe Payment); purple Connect with Stripe button; Manual Entry button below.
Step 4 · Alternative: Link Stripe account with Manual Entry
Session → Payments → Connect Stripe Account
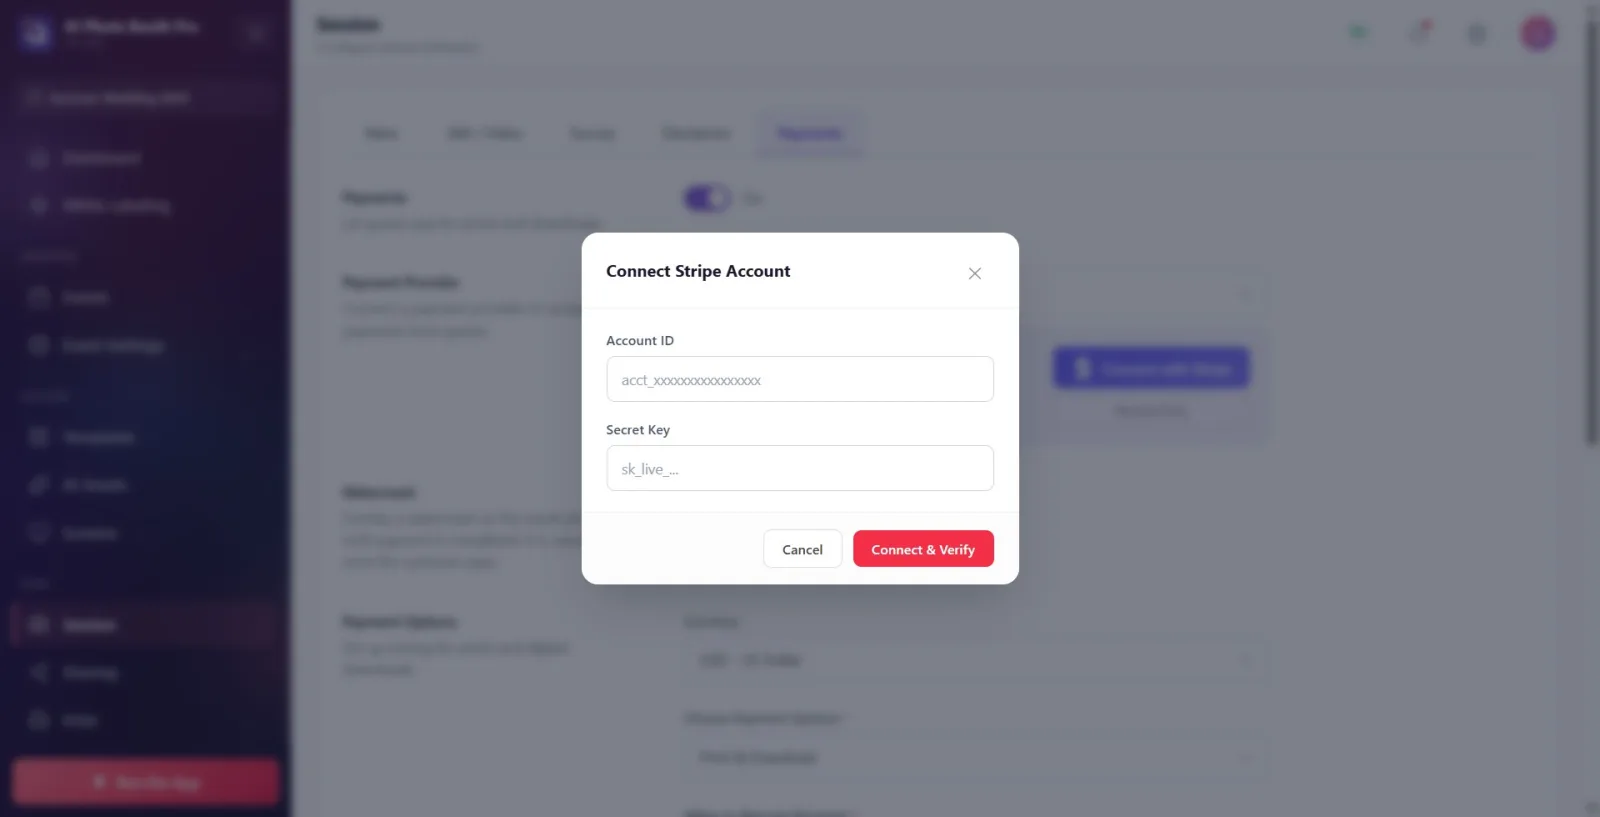
If you want to enter keys manually instead of OAuth, tap the Manual Entry button. In the Connect Stripe Account window that opens, fill in the Account ID (starts with acct_) and Secret Key (starts with sk_live_) fields, then tap the Connect & Verify button; the app verifies the information by asking Stripe directly. Use 'Cancel' to cancel.
🔎 Elements on the screen: Connect Stripe Account modal: Account ID box, Secret Key box (masked/hidden), Cancel and Connect & Verify buttons.
Step 5 · Verify connected account or disconnect
Session → Payments
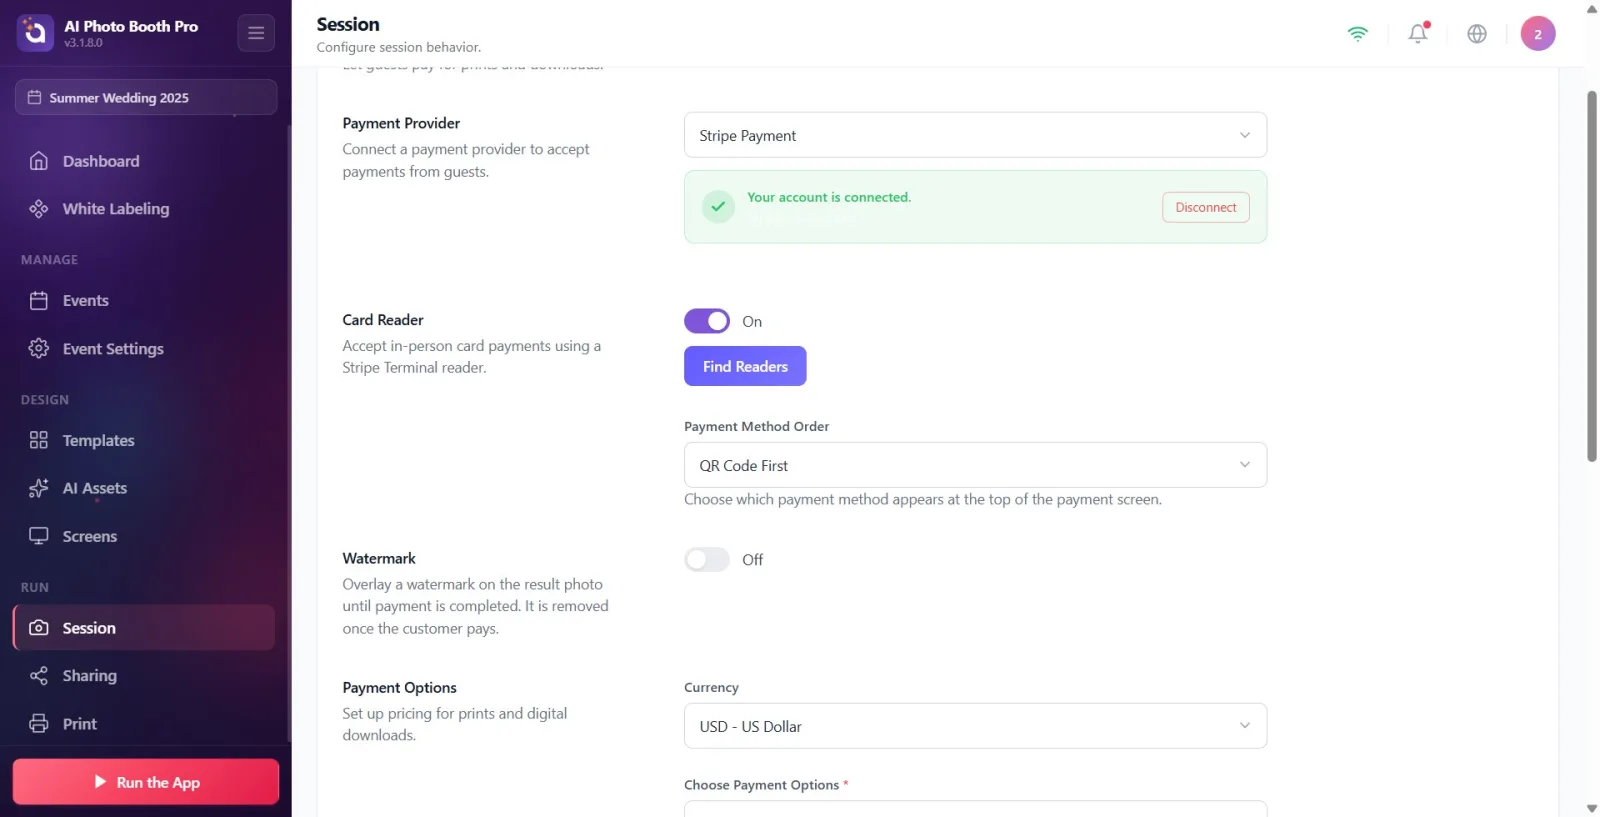
If the connection is successful, a green certified card saying Your account is connected. and masked account ID ('Stripe - acct_...') appears. Tap Disconnect to remove the account; In the confirmation window that appears ('This will remove the connection. You can reconnect at any time.') select 'DisconnectorCancel' again.
🔎 Items on the screen: Green certified Your account is connected. card + masked account ID; Disconnect button; confirmation window (Disconnect / Cancel).
Step 6 · Add card reader (Card Reader, optional)
Session → Payments
To receive in-person card payments, set the key in the Card Reader section to On — this section is only visible when a Stripe account is connected. Description: Accept in-person card payments using a Stripe Terminal reader. Then tap Find Readers button; Readers in your Stripe account are listed with their online/offline status, tap to select the one you want to use. Once selected, the reader's name, status, and ID appear on the card; use Change reader to change it.
🔎 Elements on the screen: Card Reader title + On/Off switch; Find Readers button (Finding readers... while loading); reader list (with online/offline badge); selected reader card + Change reader button.
Step 7 · Select payment method order (Payment Method Order)
Session → Payments
From the Payment Method Order menu that appears when the card reader is open, choose which method will appear at the top of the booth payment screen: QR Code First or Card Reader First. Description: 'Choose which payment method appears at the top of the payment screen.'
🔎 Items on the screen: Payment Method Order drop-down menu: QR Code First / Card Reader First.
Step 8 · Add watermark (Watermark, optional)
Session → Payments
To protect the result photo before the guest pays, change the key from Watermark to On. Description: 'Add a watermark to the result photo until payment is completed. It will be removed once the customer pays.' Upload a transparent PNG with the 'Watermark Image' file selector that appears when you open it ('Upload a transparent PNG to use as a watermark.'). This section appears when 'Payments' is on, even if it's not connected to Stripe.
🔎 Elements on the screen: Watermark title + On/Off switch; Watermark Image file selector (with restore button).
Step 9 · Select currency (Currency)
Session → Payments
In the Payment Options section, select the currency of the prices from the Currency menu (default is USD). The symbol for the currency you choose automatically appears in front of the price boxes — so specify your currency before entering prices.
🔎 Elements on the screen: Payment Options title; Currency drop-down menu (currency code + name).
Step 10 · Select what is paid (Choose Payment Options)
Session → Payments
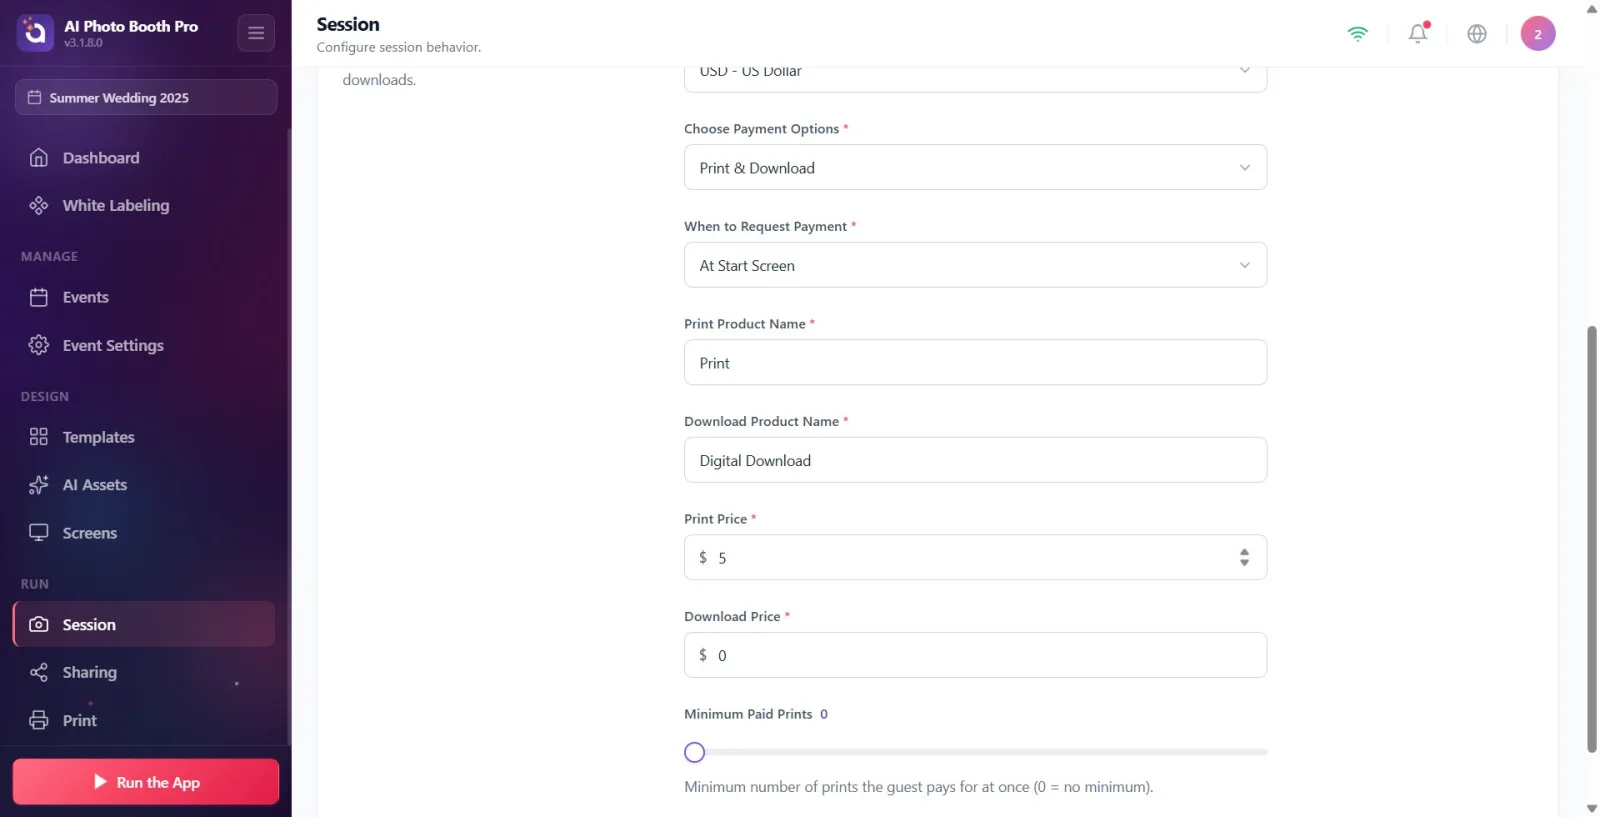
From the Choose Payment Options (mandatory, * marked) menu, determine what the guest will pay for: Print & Download, Print Only or Download Only. Description of the section: Set up pricing for prints and digital downloads.
🔎 Items on the screen: Choose Payment Options drop-down menu (mandatory *): Print & Download / Print Only / Download Only.
Step 11 · Choose when to request payment (When to Request Payment)
Session → Payments
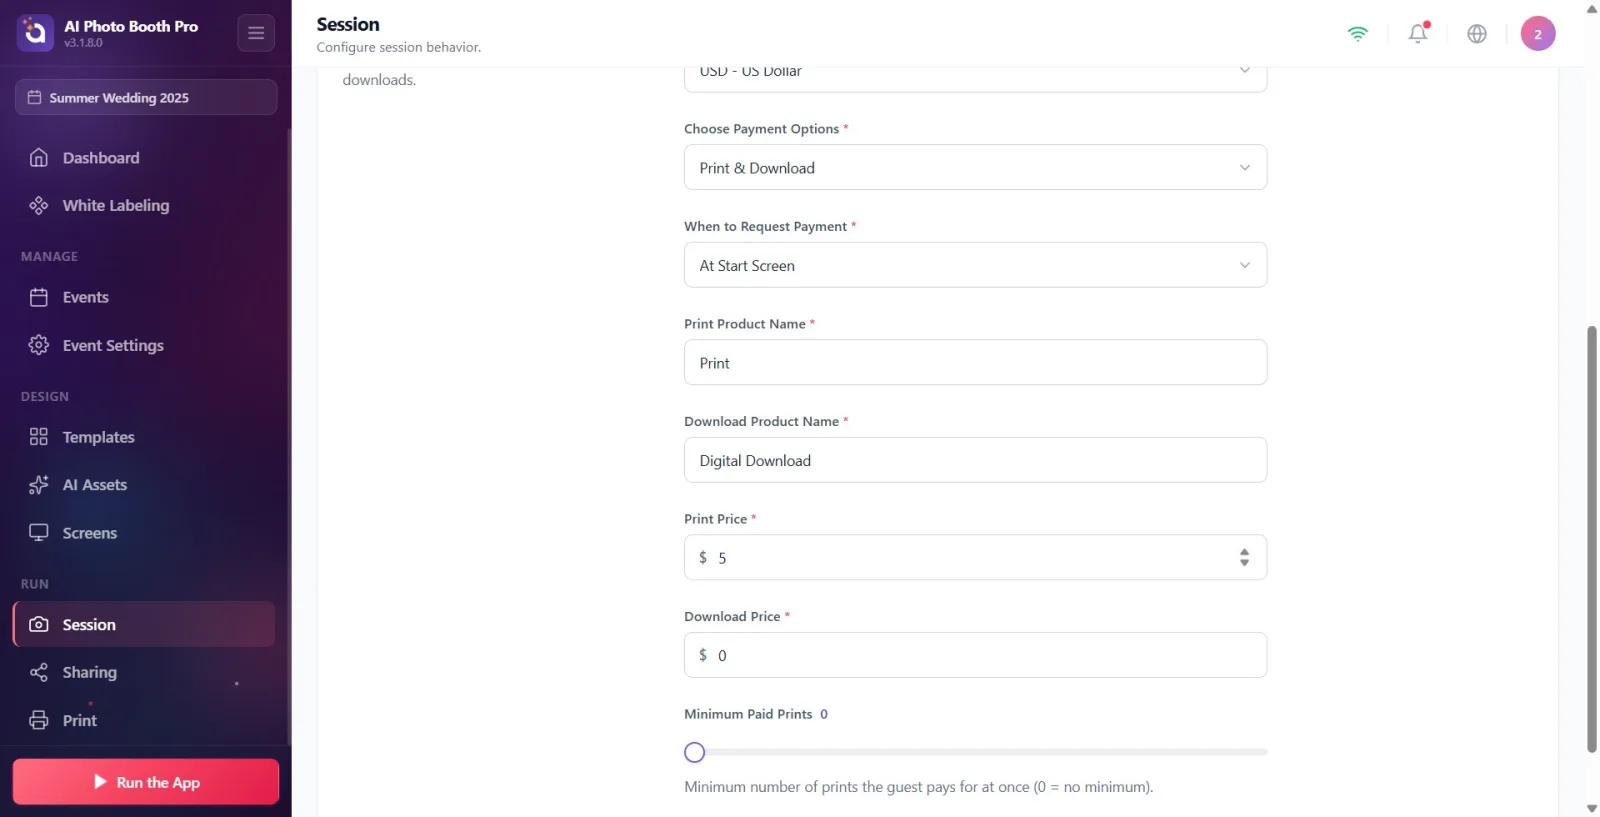
Select timing from the When to Request Payment (mandatory) menu: At Start Screen (before the session starts), After Capture (after the photo is taken), or After Sharing. If After Sharing is selected, the payment flow will not be blocked; Payment is requested when the guest presses the Print/QR button on the sharing screen.
🔎 Items on the screen: When to Request Payment drop-down menu (mandatory *): At Start Screen / After Capture / After Sharing.
Step 12 · Write product names (Print Product Name / Download Product Name)
Session → Payments
Enter the product names that will appear to the guest: Print Product Name is the name of the print product (default Print), Download Product Name is the name of the digital download product (default Download). Both are required (*) fields.
🔎 Elements on the screen: Print Product Name and Download Product Name text boxes (required *).
Step 13 · Set prices (Print Price / Download Price)
Session → Payments
Enter amounts in the Print Price and Download Price boxes (default 5). The symbol of the currency you selected appears in front of the boxes and you can enter decimal values in 0.01 steps. Both are required (*) fields.
🔎 Elements on the screen: Print Price and Download Price number boxes (preceded by currency symbol; mandatory *).
Step 14 · Set minimum paid print quantity (Minimum Paid Prints)
Session → Payments
Adjust the Minimum Paid Prints slider between 0 and 5. Description: 'Minimum number of prints paid by the guest at a time (0 = no minimum).' If left 0, the lower limit is not applied; The selected value appears next to the slider.
🔎 Items on the screen: Minimum Paid Prints slider (0–5) displays the selected value next to it (FilledRangeSlider).
While the master key Payments is Off, all underlying payment settings are hidden; If nothing appears, first set this key to On.
Currently the only payment provider is Stripe; There are no other options in the provider menu. There are two ways to connect: Connect with Stripe (OAuth) or Manual Entry.
The Card Reader section and Find Readers only work when the Stripe account is connected; To find readers, first connect the account (preferably Connect with Stripe).
The symbol in front of the price boxes changes depending on the selection of Currency; so select the currency first, then enter the values Print Price / Download Price.
Defaults: Currency USD, Print and Download Price 5, product names Print/Download, schedule At Start Screen, Minimum Paid Print 0.
Be sure to use a transparent (alpha channel) PNG for the watermark; The watermark is automatically removed when the guest completes the payment.
Secret Key (sk_live_...) entered at Manual Entry is sensitive — keep safe; the app verifies this information directly to Stripe.
Searching for settings without turning on the main switch Payments: when the switch is turned off, the provider, watermark and payment options sections do not appear at all.
Just entering prices without linking a Stripe account: although payment options and prices appear editable, the guest cannot actually pay when the account is not linked.
Can't find Card Reader section: this section only appears when connected to Stripe; Link the account first.
Forgetting to set the card reader to On and select a reader: It is necessary to list it with Find Readers and tap a reader from the list.
Leaving mandatory (*) fields blank: Choose Payment Options, When to Request Payment, product names and prices are mandatory.
Entering the wrong key/account in Manual Entry: Invalid Secret Key, Account not found. or 'Secret Key does not belong to this Account ID' error will be received.
Avoid situations such as choosing a payment type that is incompatible with booth hardware: choosing 'Print Only' at a booth that does not have a printer.
Related topics
Session Settings Sharing Settings Print Settings
