
Before this: How to Create an Event?
Importing a ready-made template into an event is done by opening the Add Templates library modal via the "Add More" button on the Templates page, selecting one or more ready-made templates, and tapping "Add". In the ACTUAL code this is the ONLY import path exposed to the user (adding from the ready-made library). Although the codebase defines methods to import from a file (.aktemplate) (TemplateFileService.ImportFromFileAsync/ExportToFileAsync) and a bundled template loader (LoadBundledTemplateJsonAsync), NO UI calls them — meaning importing from a file is currently NOT available in the interface.
- The user must be signed in and an event must be selected — AddTemplateToCurrentEvent fails silently if currentEventInfo is null (RepositoryResponse.Success=false).
- There must be ready-made templates in the library (AllLocalPhotoTemplates / AllLocalVideoGifTemplates); this list is populated from the server/CloudSync and default templates, and if it is empty the modal shows No templates yet.
Step by step
Step 1 · Open the Templates page
Settings → Templates (/templates)
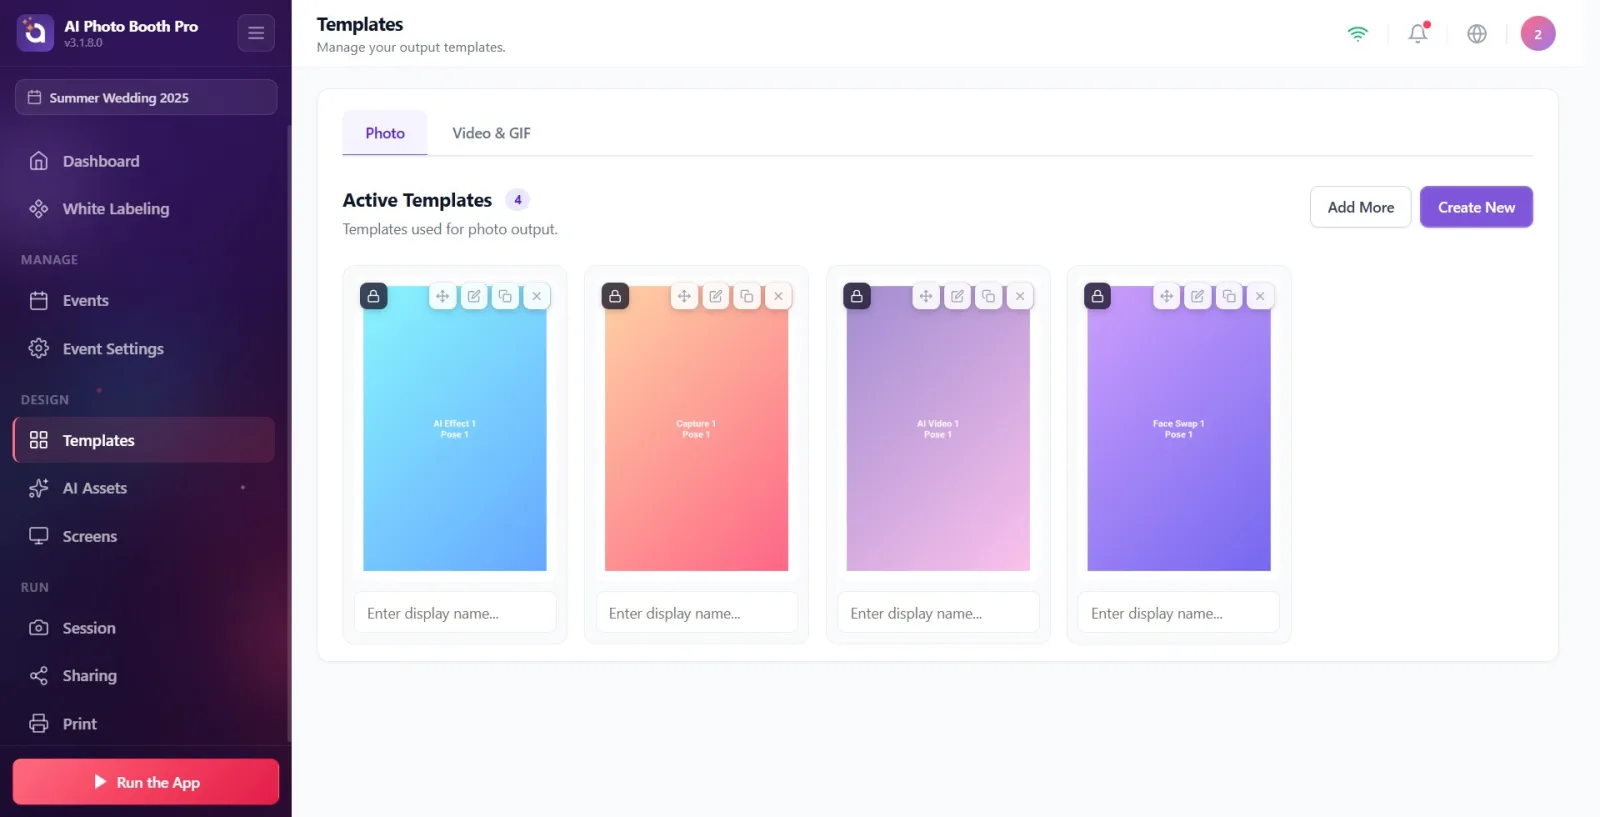
From Settings, go to the Templates page. The page opens at the /templates route, showing two tabs at the top (Photo, Video & GIF) and the Active Templates section.
🔎 On-screen items: Tabs: Photo, Video & GIF; heading Active Templates + counter badge
Step 2 · Select the correct tab
Templates (/templates) → tab bar
Choose the tab based on the type of template you want to import: Photo for photo output, Video & GIF for video/GIF output. The selected tab determines which library list (photo vs video) is shown in the modal.
🔎 On-screen items: Photo tab, Video & GIF tab
Step 3 · Tap the Add More button
Templates (/templates) → section header actions
Tap the Add More button to the right of the section heading. This calls OpenBrowseModal() in the editor VM and opens the 'Add Templates' library modal (photo library from the photo tab, video library from the video tab).
🔎 On-screen items: Add More (btn-outline) button; next to it the Create New (purple) button
Step 4 · Browse the Add Templates library modal
BrowseLibraryModal — Add Templates modal
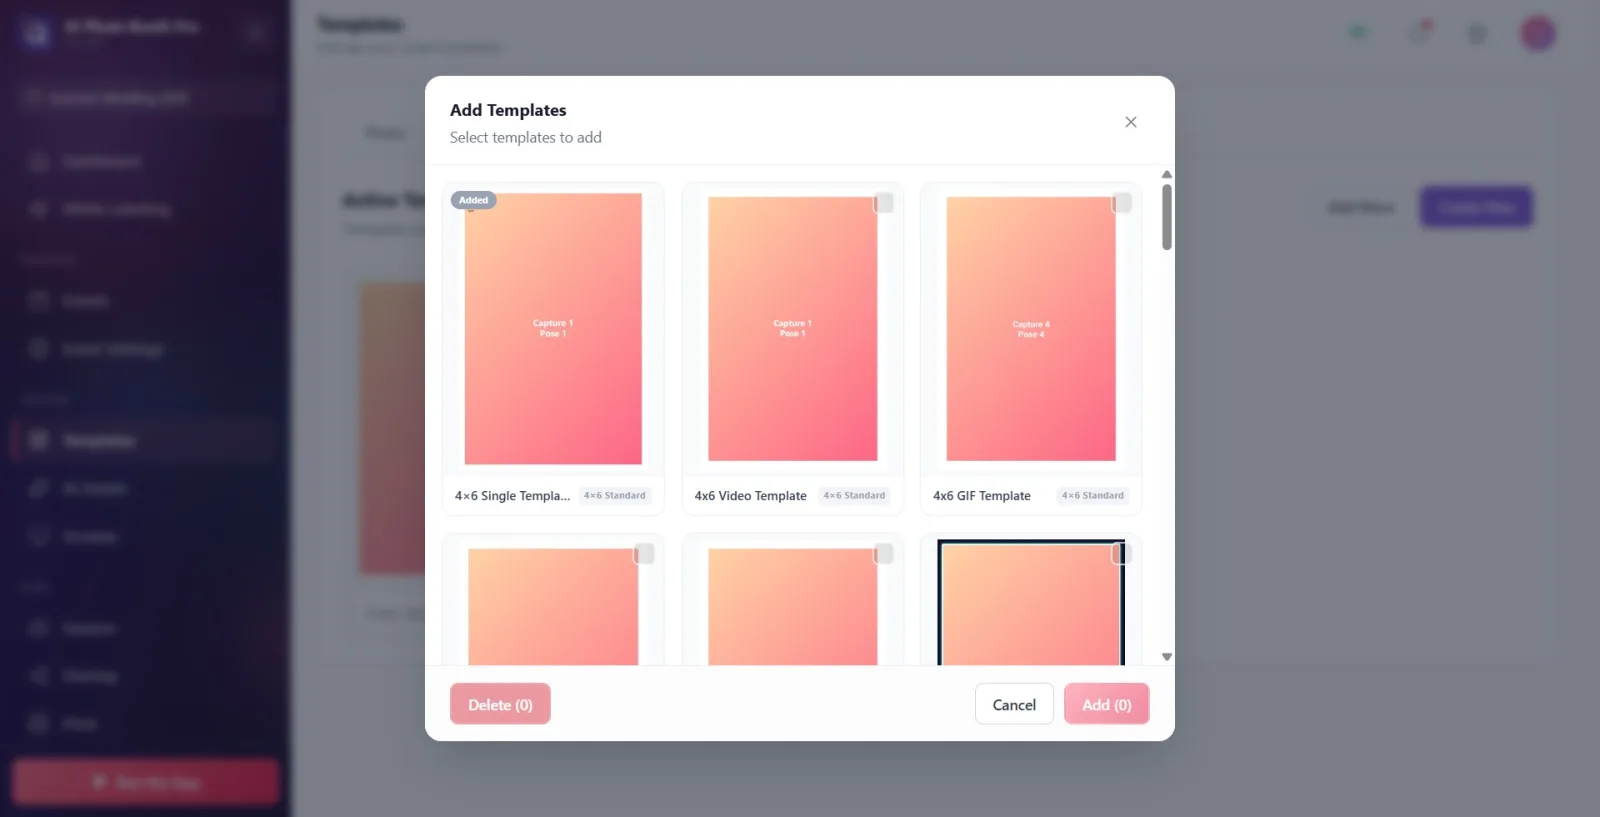
In the Add Templates modal that opens, review the ready-made template cards. Cards appear in a masonry layout, and as you scroll down more load in pages of 30 (infinite scroll). Templates already added to the event are shown with an Added badge and cannot be selected.
🔎 On-screen items: Modal title Add Templates, subtitle Select templates to add; a check box on the cards and the Added badge; each card shows name + format (OutputSize.DisplayName)
Step 5 · Select one or more templates
BrowseLibraryModal — card grid
Tap the template card(s) you want to add. Each tap toggles the card's selection (the check box fills purple). Cards marked Added cannot be tapped (they are skipped in OnCardClick). The number on the Add button at the bottom shows only the count of selected cards that have not yet been added.
🔎 On-screen items: The purple check box on the card (browse-selected), the 'Add (N)' button in the footer
Step 6 · Import into the event with the Add button
BrowseLibraryModal — footer
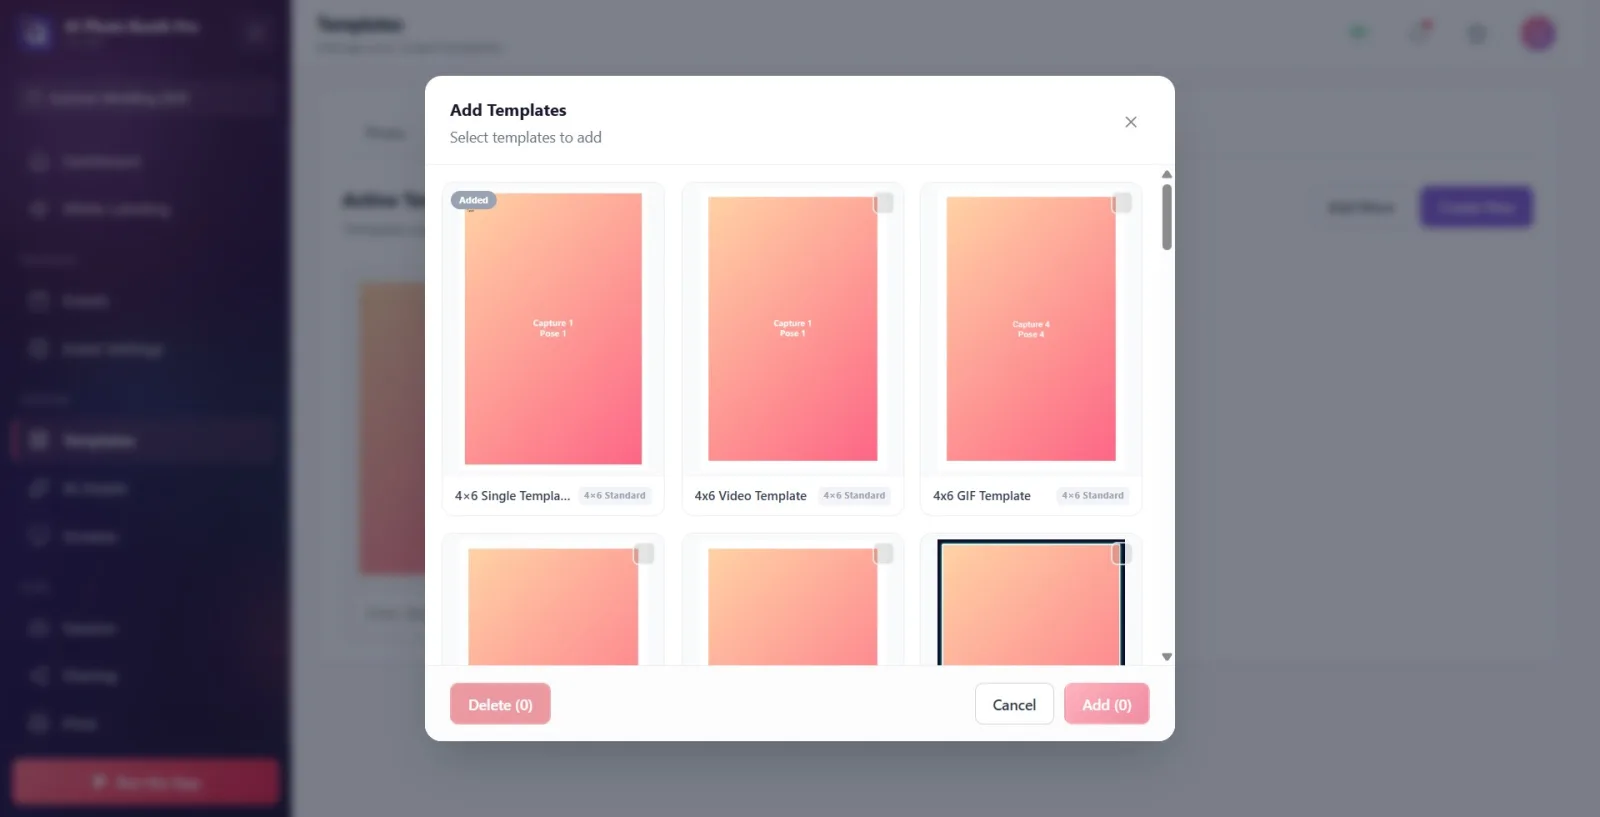
Tap the 'Add (N)' button in the footer. For each selected template, AddTemplateToCurrentEvent(templateLocalId) is called; this creates a junction (TemplateEventJunction) between the template and the current event, linking the template to the event. The selection is cleared and the modal closes.
🔎 On-screen items: 'Add (N)' (btn-update-now) button; Cancel button; red 'Delete (N)' button on the left
Step 7 · (Intermediate step) Mode-enable suggestion popup
Confirmation dialog (BlazorUserDialogService)
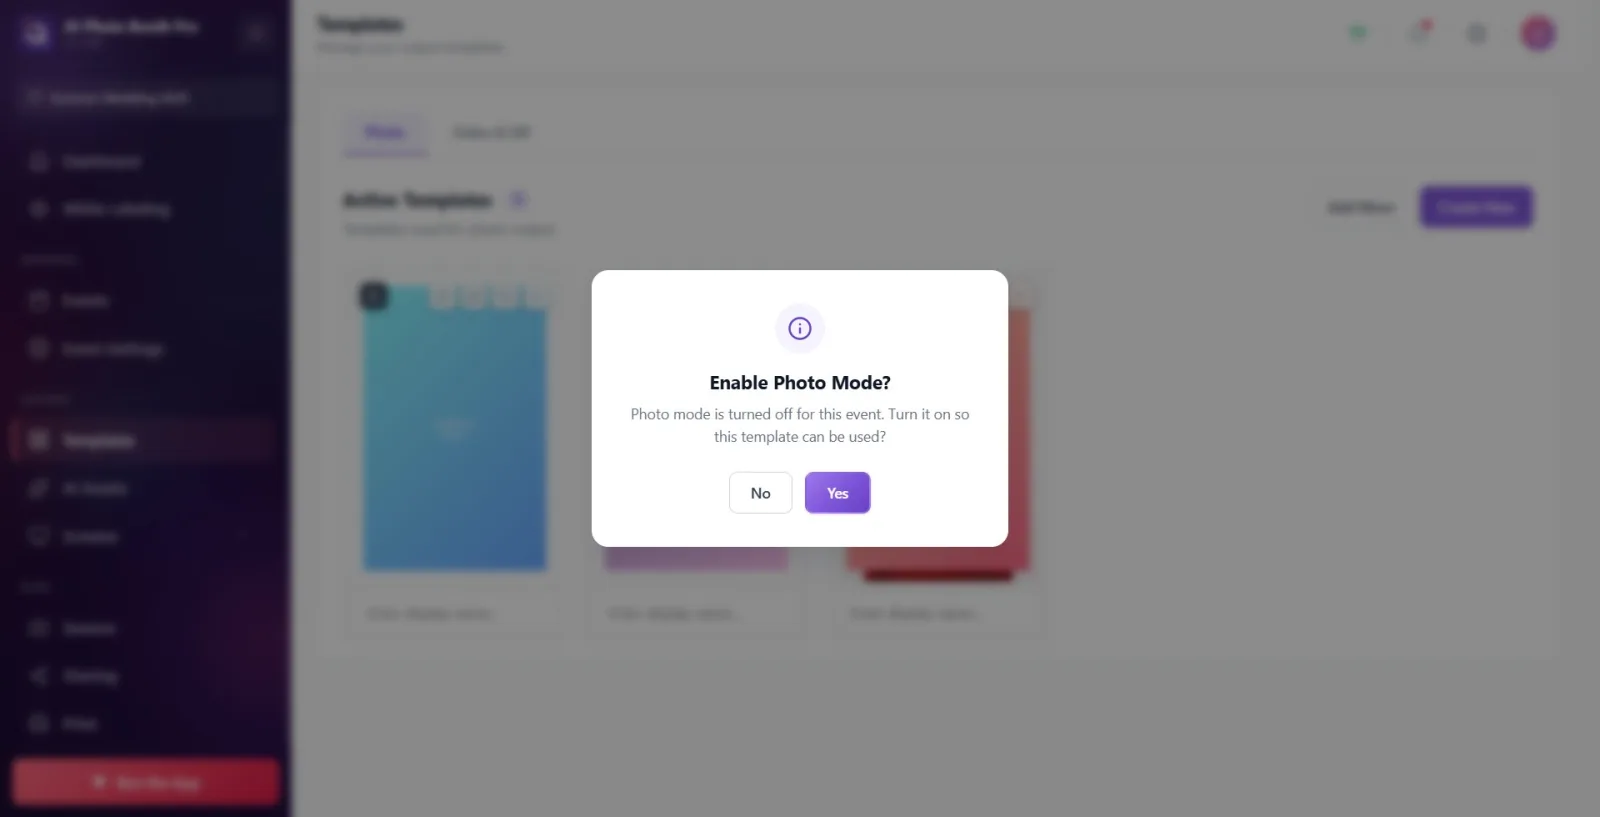
If the output mode (Photo/GIF/Video) of the added template is disabled for the event, a 'shall we enable the mode?' confirmation popup appears after the modal closes (TemplateModeSuggestionService.CheckAndOfferAsync). If you say 'Yes', the relevant setting (e.g. PhotoOutputFormatActive / GifOutputFormatActive / VideoOutputFormatActive) is enabled; if you say No, nothing changes. A multi-frame (2+) photo template may also suggest GIF mode.
🔎 On-screen items: Info dialog title (e.g. 'EnableGifModeTitle'), Yes / No buttons
Step 8 · The added template appears in the Active Templates grid
Templates (/templates) → Active Templates grid
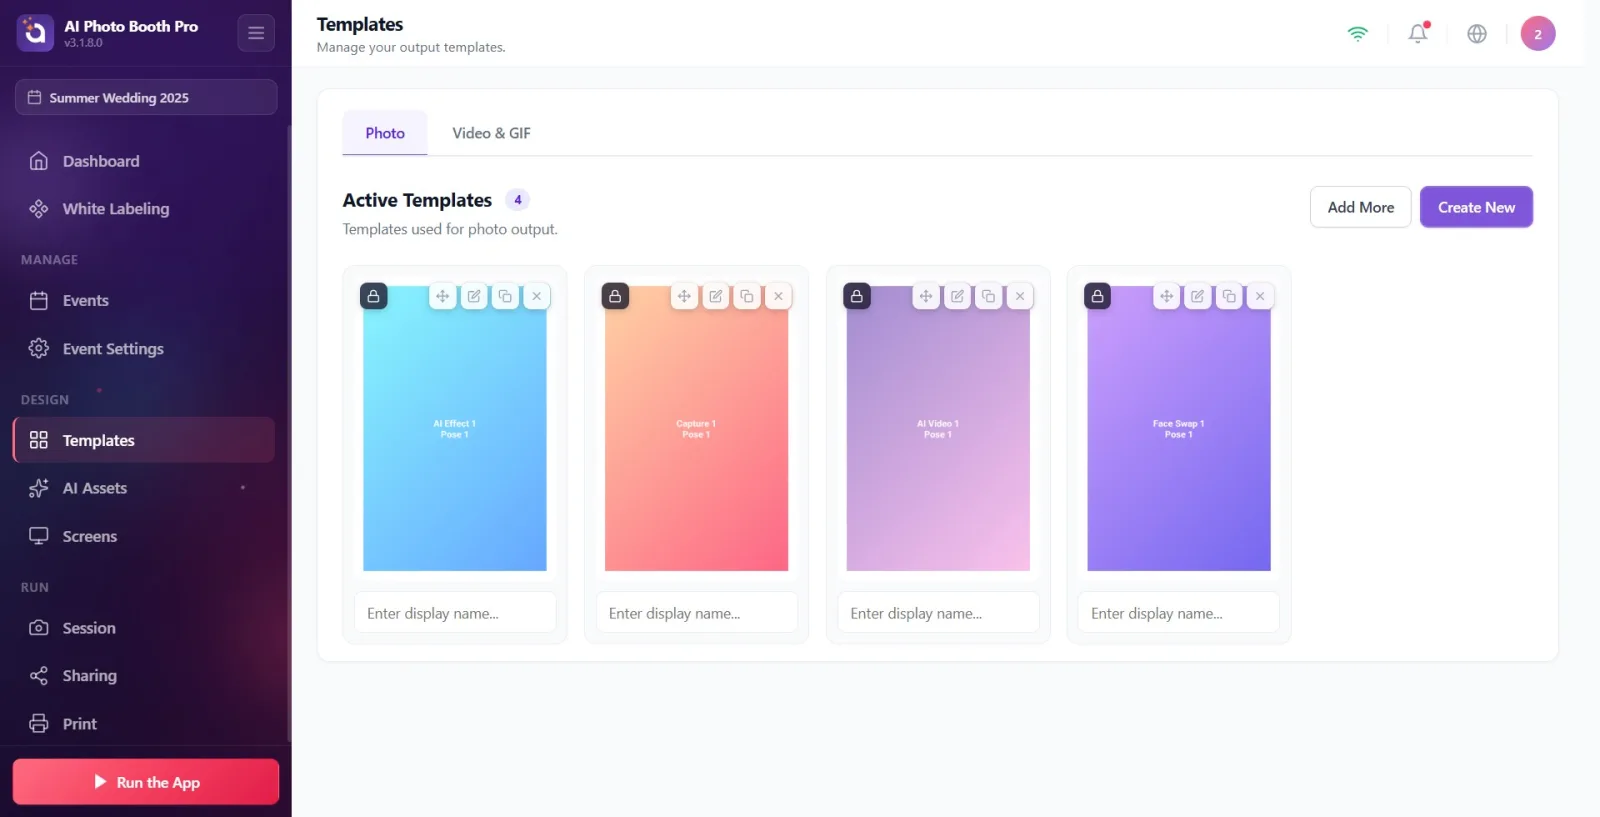
The modal closes and the template(s) you selected drop into the tab's Active Templates grid. If a pull/sync is in progress, an 'Importing...' indicator and an X/Y counter appear in the heading; once ready, the card is fully visible.
🔎 On-screen items: Counter badge (X/Y) in the heading + Importing... label; new template card in the grid
Step 9 · Edit the template (optional)
Templates grid → GalleryItemCard actions / TemplateEditor (/templateeditor)
Hover over a card in the Active Templates grid and tap the Edit (pencil) icon, or tap the card directly → LoadTemplateForEditing is called and you move to /templateeditor. If the template is 'pristine' (default/wizard-generated, never modified), it has a 'Locked' badge and editing actually creates a copy (tooltip Clone & Edit); for modified templates it is directly Edit. The card also has Duplicate and Remove actions.
🔎 On-screen items: Card actions: Clone & Edit / Edit, Duplicate, Remove, move (drag); Locked badge
Step 10 · (Not an alternative import) Creating from scratch
Templates (/templates) → CreateNewTemplateModal wizard
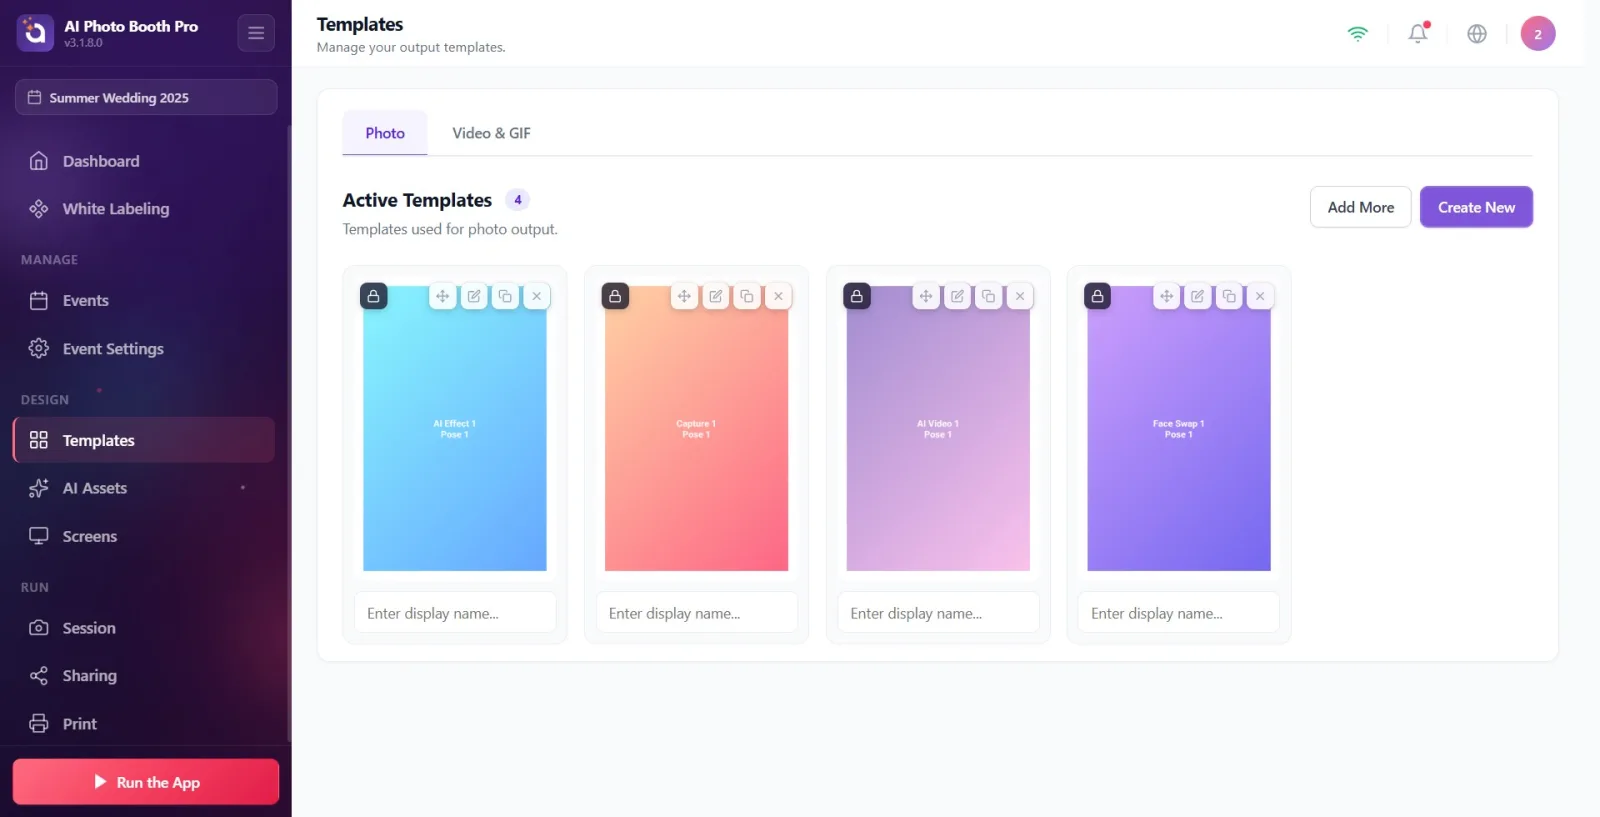
Instead of a ready-made import, the Create New button opens a wizard (CreateNewTemplateModal: type → format → layout → style) and builds the template from scratch. This is NOT an import but a new-template creation flow; it is separate from importing from the ready-made library.
🔎 On-screen items: Create New button; wizard steps (Type/Format/Layout/Style)
The modal allows multiple selection: you can check several cards and import them in bulk with a single Add.
The number on the 'Add (N)' button counts only selected cards that have not yet been added (those without the Added badge); an already-added card cannot be selected.
From the same modal, the red 'Delete (N)' button at the bottom left lets you completely delete the selected templates from the library (event junction + library record) — this requires a confirmation dialog.
Editing a pristine (Locked) ready-made template does not alter the original; it automatically creates a copy and edits that (Clone & Edit).
After a template is added, saying Yes to the 'shall we enable the mode?' suggestion that appears when the output mode is disabled instantly enables the corresponding switch on the kiosk welcome and the Mode settings page.
Expecting import from a file (.aktemplate): the code exists (TemplateFileService.ImportFromFileAsync/ExportToFileAsync and the wwwroot/templates bundled loader) but is not wired to any interface button — there is NO import from a file for the user; the only way is adding from the ready-made library.
Trying to add when no event is selected: when currentEventInfo is null, AddTemplateToCurrentEvent silently returns Success=false and the template is not added.
Adding from the wrong tab: the modal on the Photo tab shows the photo library, and the modal on the Video & GIF tab shows the video library; the template you are looking for may be on the other tab.
Mistaking Create New for import: it builds a template from scratch with a wizard, it does not import a ready-made template.
