













Before this: How to Create an Event?
Every photo and video you take is first saved in the app's own data area; while the device is connected to the internet, it is also uploaded to your account (the cloud) and appears in the event's gallery on the web panel. On Windows, a copy is also placed in a folder you can open and use on your computer: by default C:\MyPhotoBooth\Photos\001-EventName. Mac, iPad, iPhone and Android have no such folder; you download the files from the web panel.
- Windows, this computer: the event's folder under
C:\MyPhotoBooth\Photos. It contains thePhotos(original shots) andResults(results with the template applied) subfolders. - Any device, cloud: activationking.com → Dashboard → Events → open the event → Download Media.
- Mac, iPad, iPhone, Android: there is no folder you can open on the device; download the files from the web panel. To view them at the booth, use the app's Gallery screen.
The app does not copy photos to the Photos / Gallery app of the phone, tablet or Mac.
Choosing a save folder (Save Directory) exists only on Windows. On Mac, iPad and Android you cannot choose a folder.
Deleting from the booth's gallery does not delete the photo from the web gallery or from the folder on the computer; it does not free up disk space either.
The app does not delete old events by itself. There is no setting that puts an expiry on share links or turns them all off at once.
Which folder are the files in on Windows?
Step 1 · Open the default folder
File Explorer → C:\MyPhotoBooth\Photos
A separate folder is created for each event: C:\MyPhotoBooth\Photos\001-EventName. The three-digit number at the start is the event's sequence number on this computer; the rest is the event's name. The folder contains two subfolders:
Photos: the original shots from the camera (as they were before processing such as AI effect or Face Swap).Results: the result photos and videos with the template applied, the ones that go to the guest.
Files are copied when a session's result is ready; file names start with the date and time of the shot. This folder is a copy: the app does not read from it, so moving or deleting the files does not break the app.
🔎 Items on the screen: event folders under C:\MyPhotoBooth\Photos; inside each one Photos and Results
Step 2 · Change the folder: Save Directory
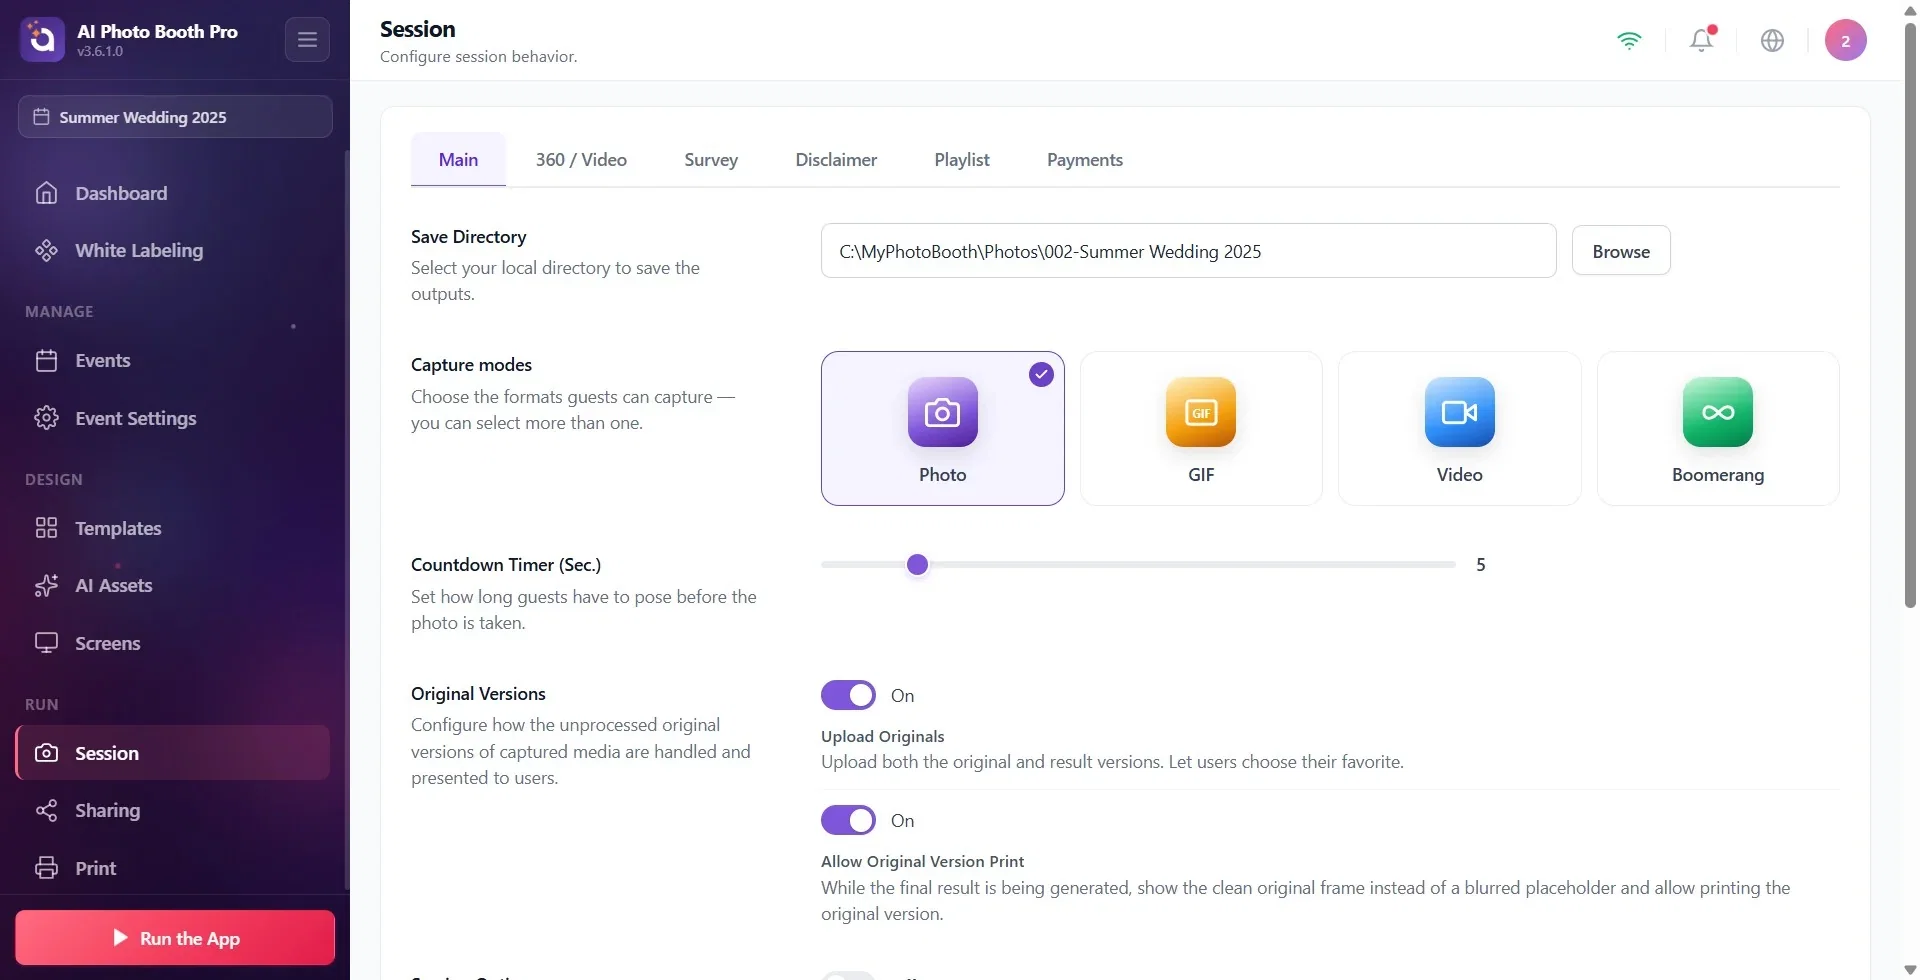
Session → General
To change the save location, use the Save Directory section at the top of the Session → General page (its description: Select your local directory to save the outputs.). Type the path into the box or pick a folder with Browse. The setting is per event; you set it separately for each event. The section is shown only on Windows.
If you choose your own folder, Photos and Results are created directly inside that folder; no extra subfolder with the event name is created. Choose a separate folder for each event so that events don't get mixed up. If you leave the box empty, the app again uses an automatic folder named after the event.
🔎 Items on the screen: Save Directory heading and description; path box (example C:\MyPhotoBooth\Photos); next to it the Browse button
The app's own data folder: do not touch it
The app keeps its database and its own copy of all photos and videos (together with small preview versions) in the Windows app data area: %LOCALAPPDATA%\Packages\com.activationking.photobooth_…\LocalState\prod. The version installed from the Microsoft Store uses a different folder. Do not delete or move the files in this folder by hand; the app's records get corrupted. If you need your files, use the save folder (Step 1) or the web panel.
Where are the files on Mac, iPad, iPhone and Android?
There is no folder you can open on the device
On these devices, photos and videos are stored in the app's own protected data area. The Save Directory section is not shown, you cannot choose a folder, and the app does not copy the files to the device's Photos or Gallery app. The way to get the files is the web panel (next section). To view them at the booth, you use the app's Gallery screen.
Photos are uploaded to the web panel while the device is connected to the internet and the event is in Online Mode. If the internet is down for a while, pending files are sent when the connection returns. If the upload gets stuck, see Sharing, Sync & Login Issues, Symptom, Cause, Solution.
In the cloud: viewing and downloading from the web panel
Step 3 · Open the event in the web panel
activationking.com → Dashboard → Events
From any computer or phone, sign in to activationking.com with the account you use at the booth. Go to Dashboard → Events and click the event. The gallery that opens shows the photos and videos uploaded to the cloud for that event, no matter which device they were taken on.
Step 4 · Download all media (ZIP)
Dashboard → Events → event → Download Media
Press the Download Media button. Because the gallery can be large, the ZIP is prepared in the background and the download link is sent to your email (Email me). The link is valid for 7 days, after that the file is deleted; if needed, request the download again.
The ZIP contains two folders: media: branded result photos and videos, originals: original shots without effects. Originals go to the cloud only while Upload Originals is on in the Sharing → Activation Share page (on by default); if it is off, the ZIP contains only the results.
What does Export in the app give you?
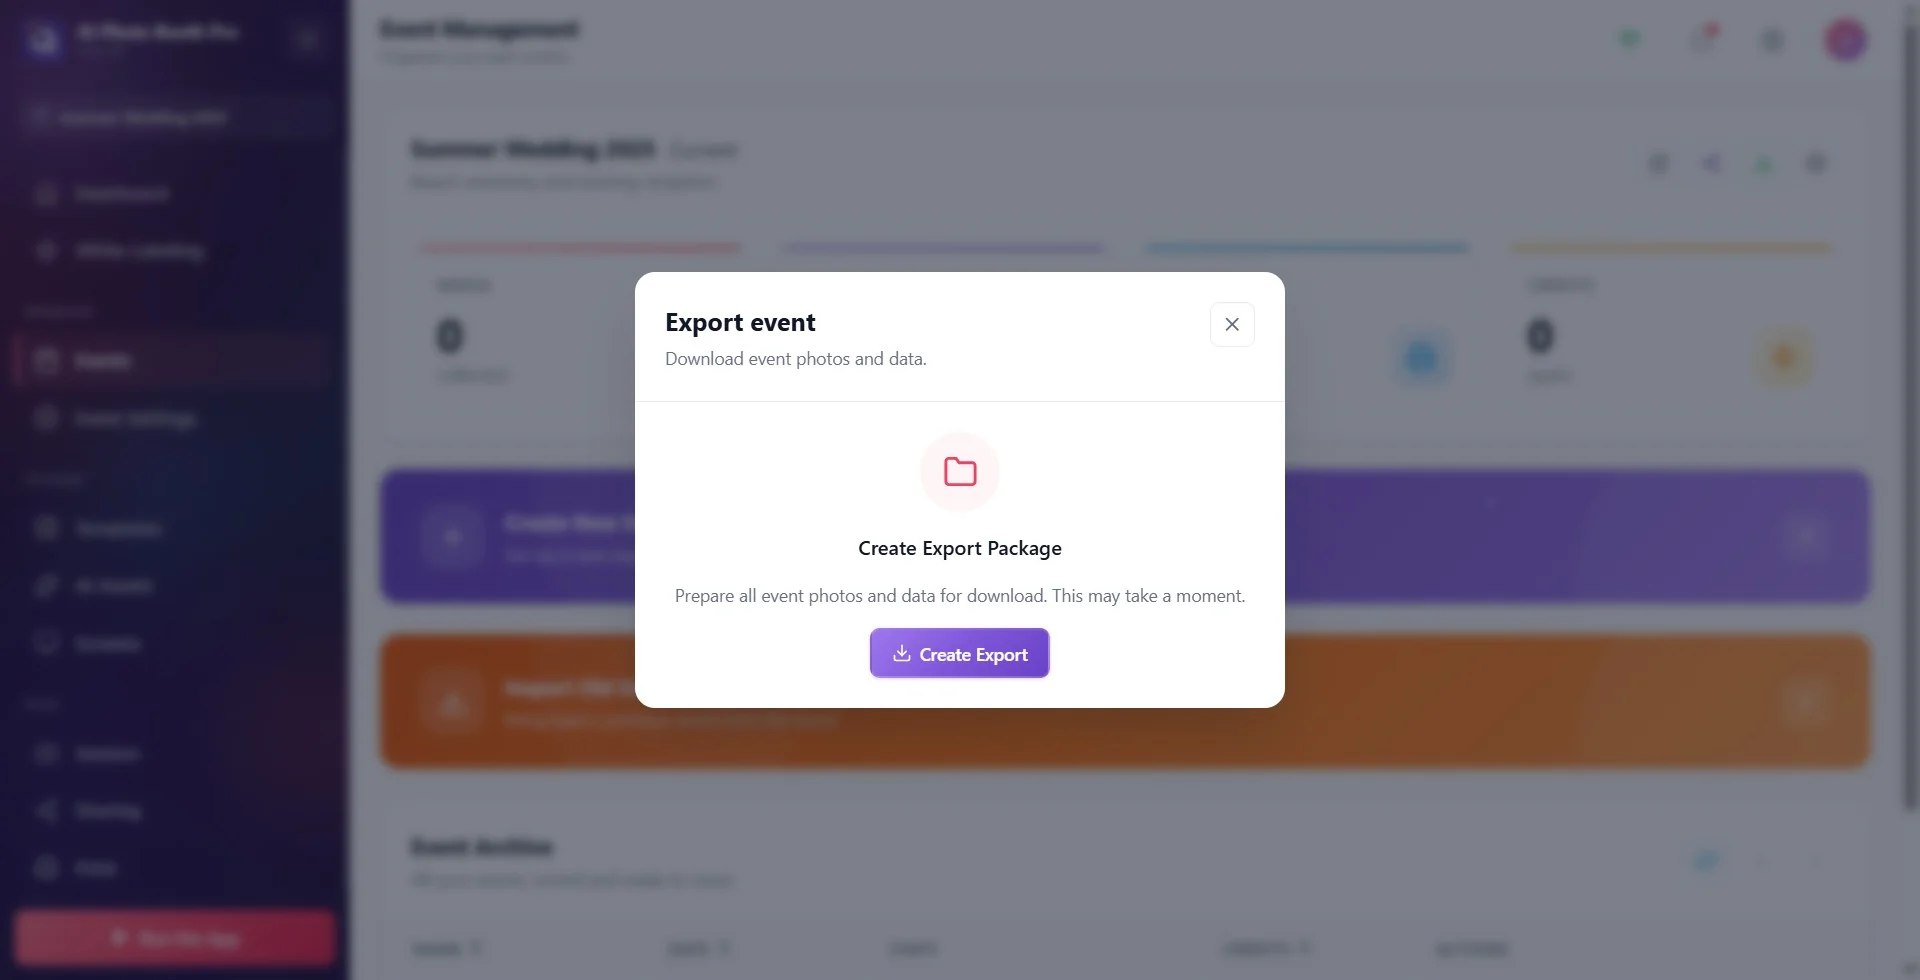
Event Management → current event card → Export
In the app, the event card on the Event Management page has an Export icon: in the Export event window, press Create Export, then Download, and choose where to save the ZIP. This ZIP contains only the result photos and videos of the successful sessions that are on this device; the camera's raw shots (those in the Photos folder) and the survey answers are not included. Shots taken on other devices and photos that were never downloaded to this device are not included either. For the whole event, use the web panel.
To give the gallery link to your client, press the Share icon on the same card: copy the Gallery URL in the Share Event window with Copy. In the web panel, you do the same with the Share with Client button.
🔎 Items on the screen: on the event card the Edit, Share, Export and Event Settings icons; in the Export event window Create Export Package and Create Export
Deleting from the gallery and turning off guest access
Step 5 · Remove from the booth's gallery
Booth → Gallery
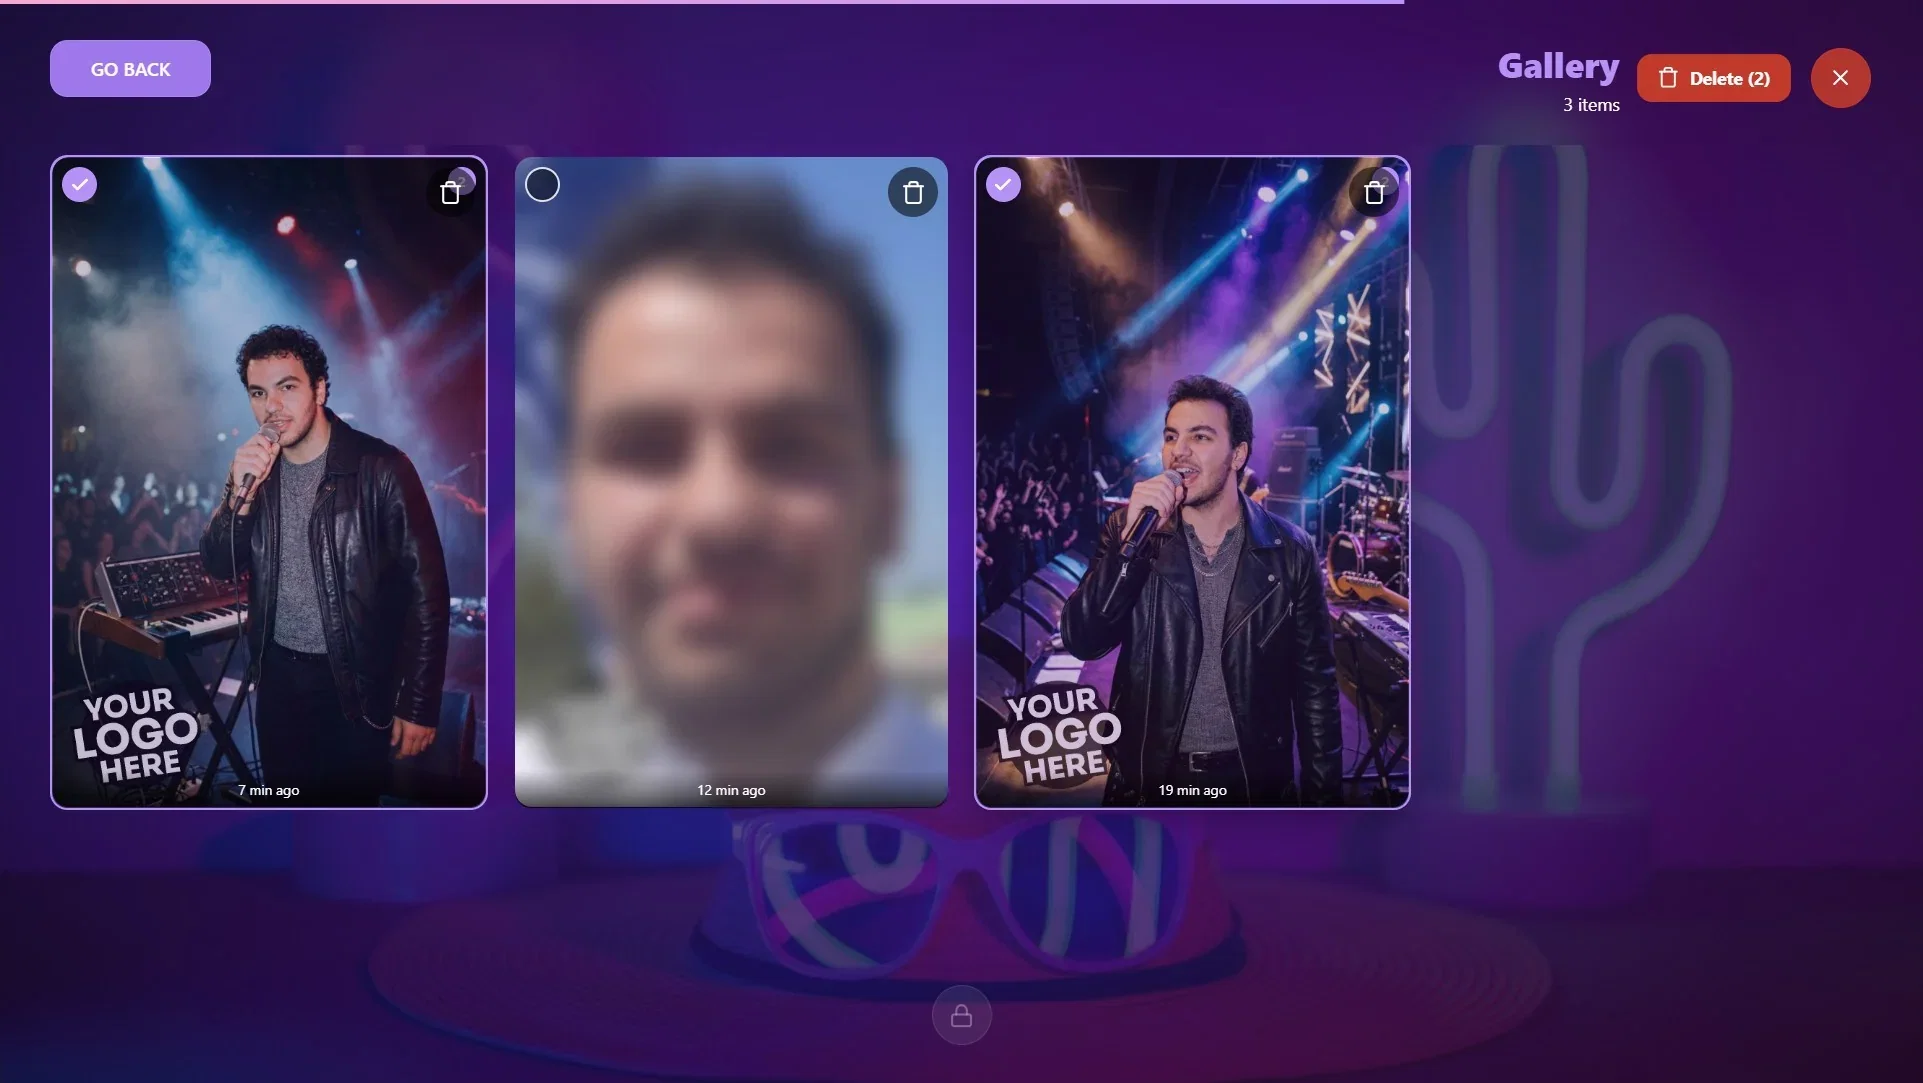
While the booth is running, open the gallery with the Gallery button on the welcome screen and tap the trash can icon at the top right. If a Dashboard PIN is set for the event (Event Settings → Kiosk), the Operator Access window asks for the PIN. In delete mode, tap cards to select them, press the Delete button at the top (the number of selected items is shown next to it) and confirm in the Are You Sure? window. You can also remove a single card with the trash icon on the card. To leave the mode, tap the X.
This only removes the photo from the booth's gallery; the window also says This item will be removed from this device and can't be restored. It is not deleted from the web gallery or from the save folder on Windows, and no disk space is freed. You need to delete it from the web gallery separately (Step 6).
🔎 Items on the screen: trash icon next to the Gallery heading; in delete mode, selection circles at the top left of the cards; red Delete at the top (with the selection count); confirmation window Are You Sure?
Step 6 · Delete from the web gallery
Dashboard → Events → event
In the web panel, open the event's gallery. For a single photo, use Remove photo on the card. For several photos, select them with More → Select and press Delete selected. To delete all of them, use More → Delete all media: you type the event name to confirm; deleted media can be restored within 72 hours, after that it is permanently lost. The event itself is not deleted from the web panel.
First get the files you need with Download Media. If you collect a survey, download the survey data first as well: the survey answers of deleted sessions do not appear in the export (see How Do I Download Survey and Customer Data (CSV)?).
Step 7 · Stop guests from browsing the whole gallery
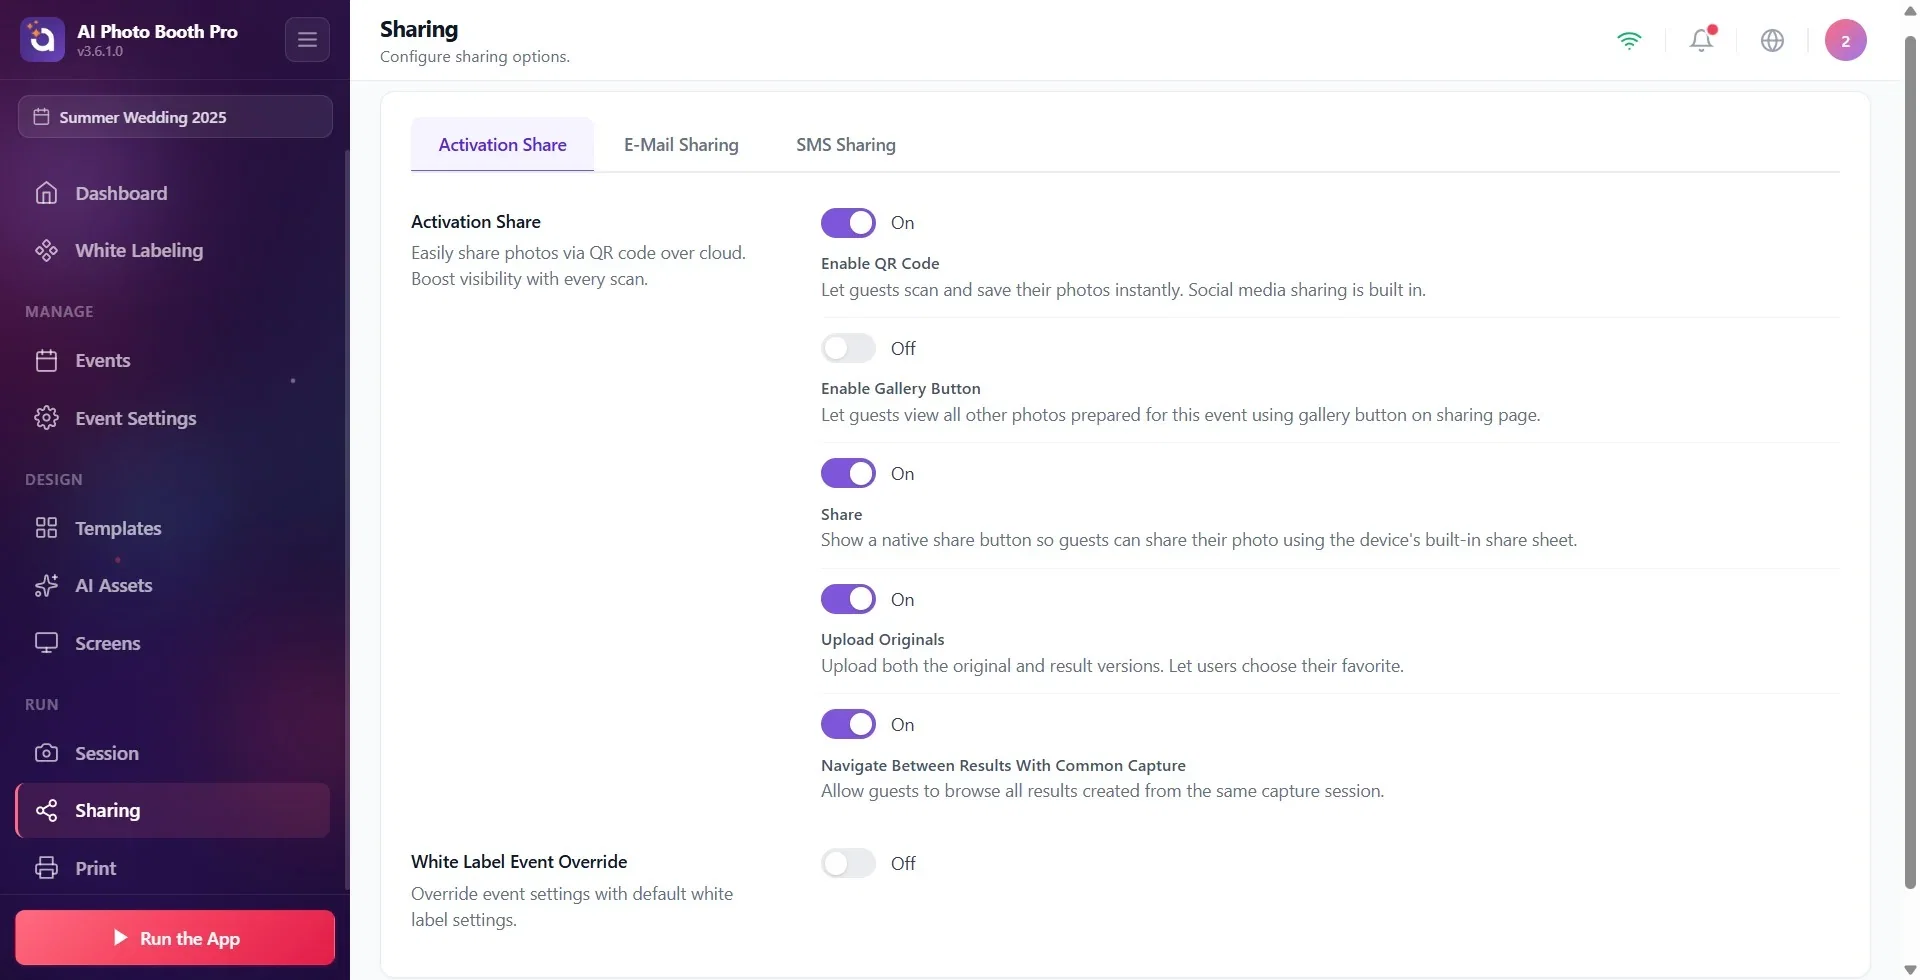
Sharing → Activation Share
The gallery button on the share page that the guest opens with the QR code also shows the other guests' photos. You turn this off with the Enable Gallery Button switch on the Sharing → Activation Share page (its description: Let guests view all other photos prepared for this event using gallery button on sharing page.). In new events, this switch is off by default. To hide the Gallery button on the booth screen, turn off the switch in the Screen Design → Welcome → Gallery section.
There is no setting that puts an expiry on share links or turns them all off at once. The Gallery URL in the Share Event window opens the event's entire gallery; share this link only with your client.
Deleting an event in the app
Deleting an event in Event Management → Event Archive only removes it from this device. Its copy in the cloud and the web gallery remain; if needed, you can import the event from the cloud again.
What to do when the disk is full?
The app does not delete old events by itself. On Windows, each photo takes up space in two places: in the app's own data folder and in the Save Directory folder.
- First check in the web panel that the event's photos are visible; this way you make sure they have reached the cloud.
- On Windows, move the old event folders under
C:\MyPhotoBooth\Photosto an external drive or delete them. This is safe, because the app does not read from these folders. - To put the save folder on another drive from the start, choose a folder on that drive in Save Directory (Step 2).
On Windows, Clear Local Data in the user menu (3.5.4 and later) permanently deletes all photo, video and event data on this computer; anything not yet uploaded to the cloud is lost and cannot be recovered. It does not touch the Save Directory folder. Check the web panel before using it; for when it is needed, see Sharing, Sync & Login Issues, Symptom, Cause, Solution.
Related topics
What is Session Settings, How to Use General (Main) Tab? How to Install and Use 'ActivationShare'? Sharing, Sync & Login Issues, Symptom, Cause, Solution How Do I Download Survey and Customer Data (CSV)? Installation Errors on Windows: 0x80073D0D, 0x80070005 and Others
