
Before this: How to Create an Event?
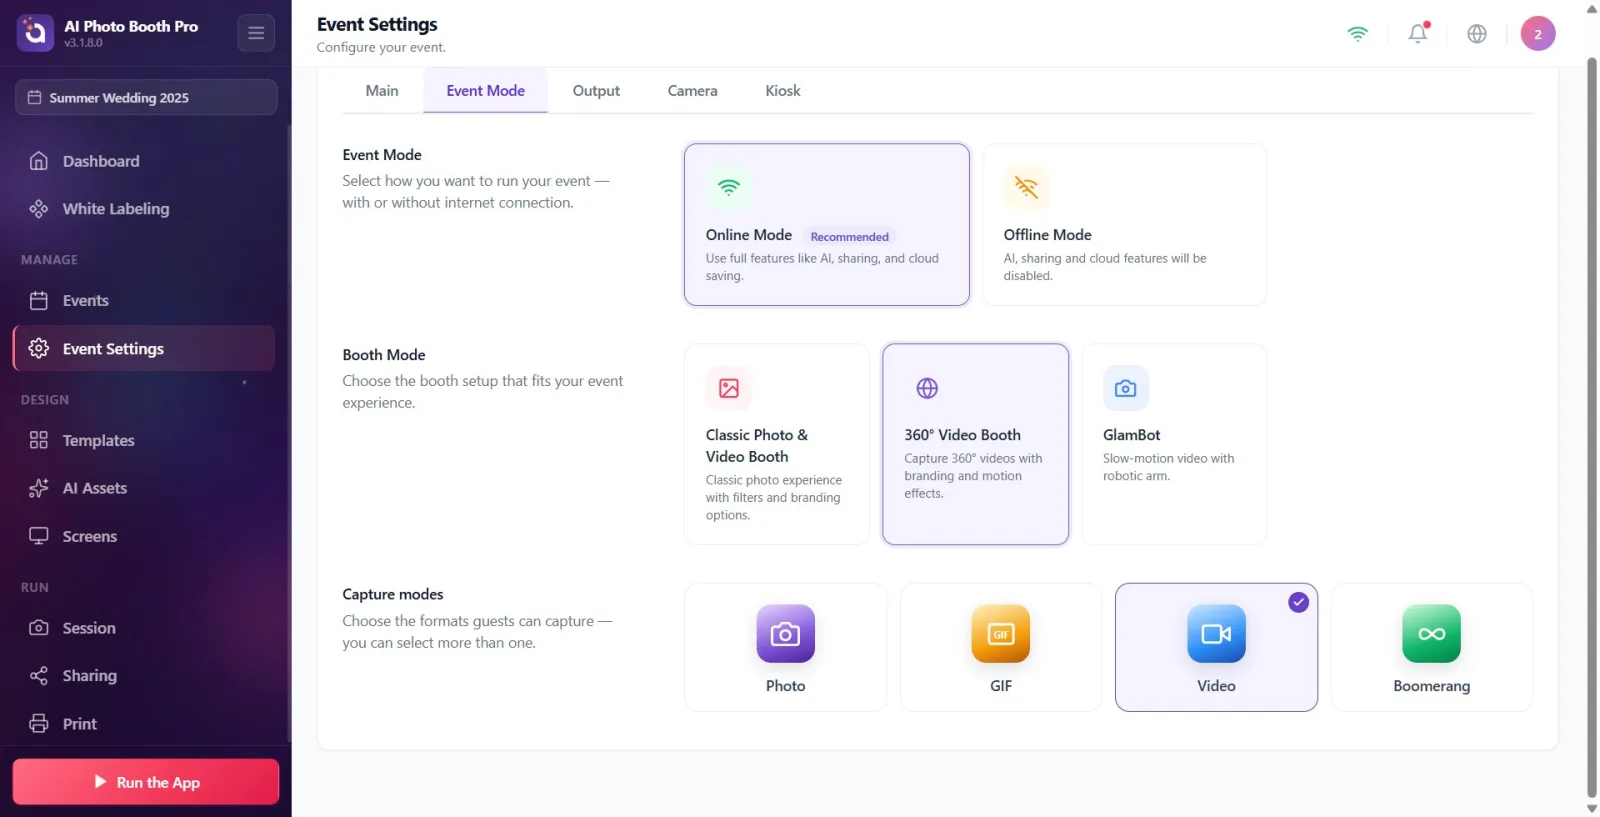
The Event Settings 'Event Mode' tab brings three decisions together in one place: whether the event runs online or offline (Event Mode), the booth layout (Booth Mode: Classic / 360° / GlamBot) and the output formats guests can capture ('Capture modes': Photo / GIF / Video / Boomerang). Selecting 360° Video Booth or GlamBot automatically changes the capture formats below and the auto-approval. Changes are saved to the active event instantly; there is no separate Save button.
- An event must be created and selected (active) — all settings on this tab are written to the active event.
- You must have access to the Settings section, from which you can open the Event Settings page.
- Only if you will use that mode: a robotic arm for GlamBot, a rotating-platform for the 360° Video Booth (optional).
Step by step
Step 1 · Open the Event Mode tab
Settings → Event Settings
In Settings, open the Event Settings page and tap the 'Event Mode' tab in the tab strip at the top. From left to right, the tab strip contains: General, Event Mode, Output, Camera, Kiosk. (Direct link: /eventsettings?tab=mode opens this tab.)
🔎 On-screen elements: Top tab strip: General / Event Mode / Output / Camera / Kiosk buttons.

Step 2 · Get to know the tab's three sections
Settings → Event Settings → Event Mode
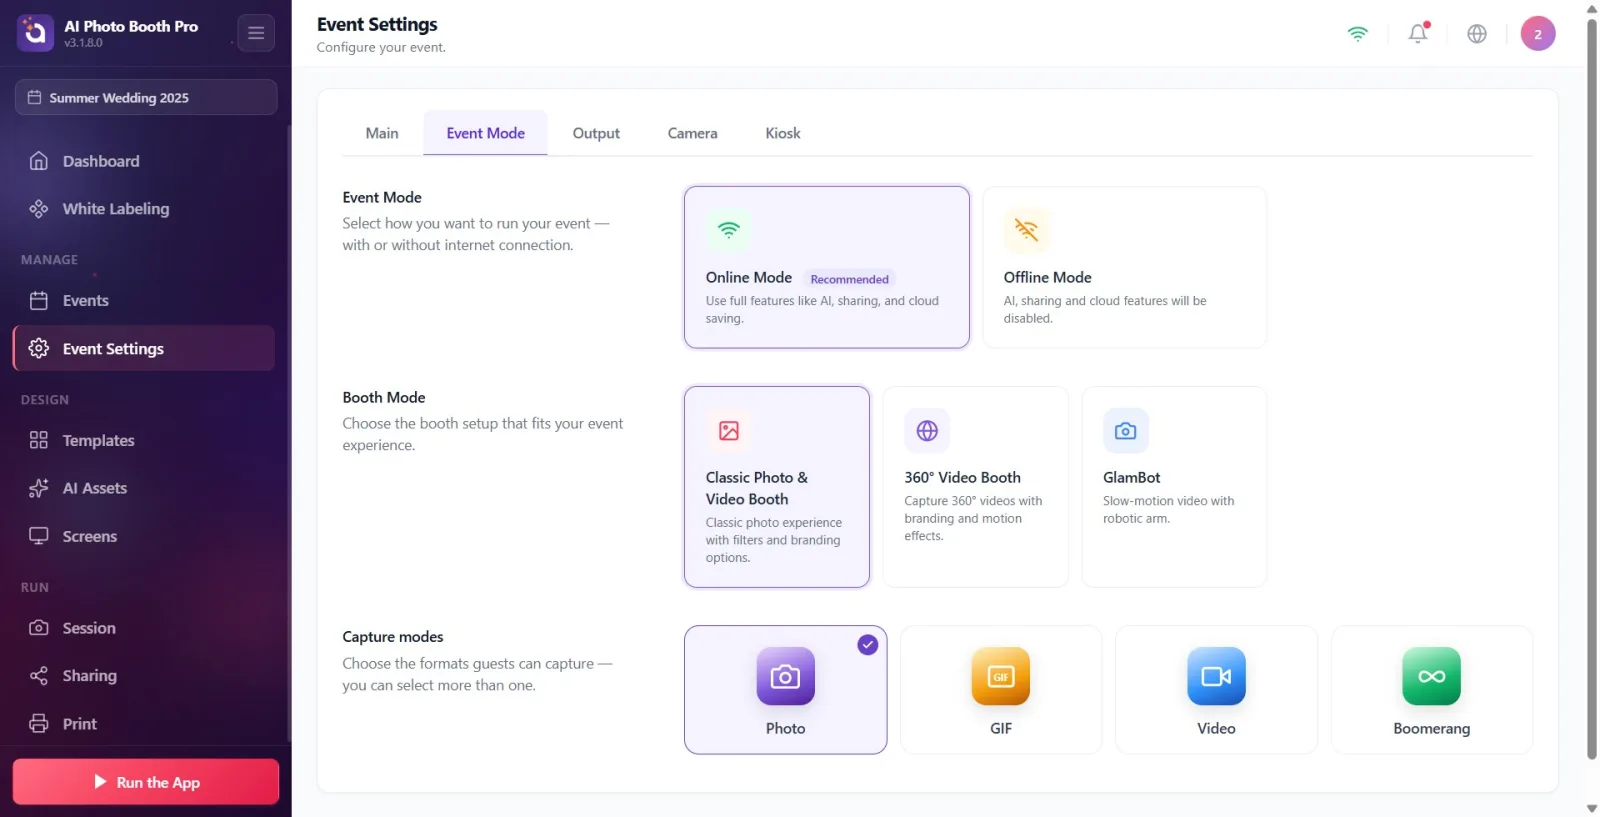
From top to bottom, the tab has three sections: (1) Event Mode — the online/offline choice; (2) Booth Mode — the booth layout (Classic / 360° / GlamBot); (3) Capture modes — the format(s) guests can capture. NOTE: the tab's name (Event Mode) is exactly the same as the first section's title (Event Mode); the first section is only the online/offline choice, not the booth layout.
🔎 On-screen elements: Three section titles: Event Mode (description: 'Choose how you want to run your event — with or without an internet connection.'), 'Booth Mode', 'Capture modes'.
Step 3 · Event Mode — select Online Mode (recommended)
Settings → Event Settings → Event Mode
Of the two cards in the first section, tap the Online Mode card — it carries a Recommended badge. Its description: 'Use all features such as AI, sharing and cloud saving.' This is the default choice for newly created events. At venues with an internet connection, leave this selected.
🔎 On-screen elements: Online Mode card + a Recommended badge next to it; the Offline Mode card to its left/right. The selected card's frame is highlighted.
Step 4 · Event Mode — Offline Mode (features are restricted)
Settings → Event Settings → Event Mode
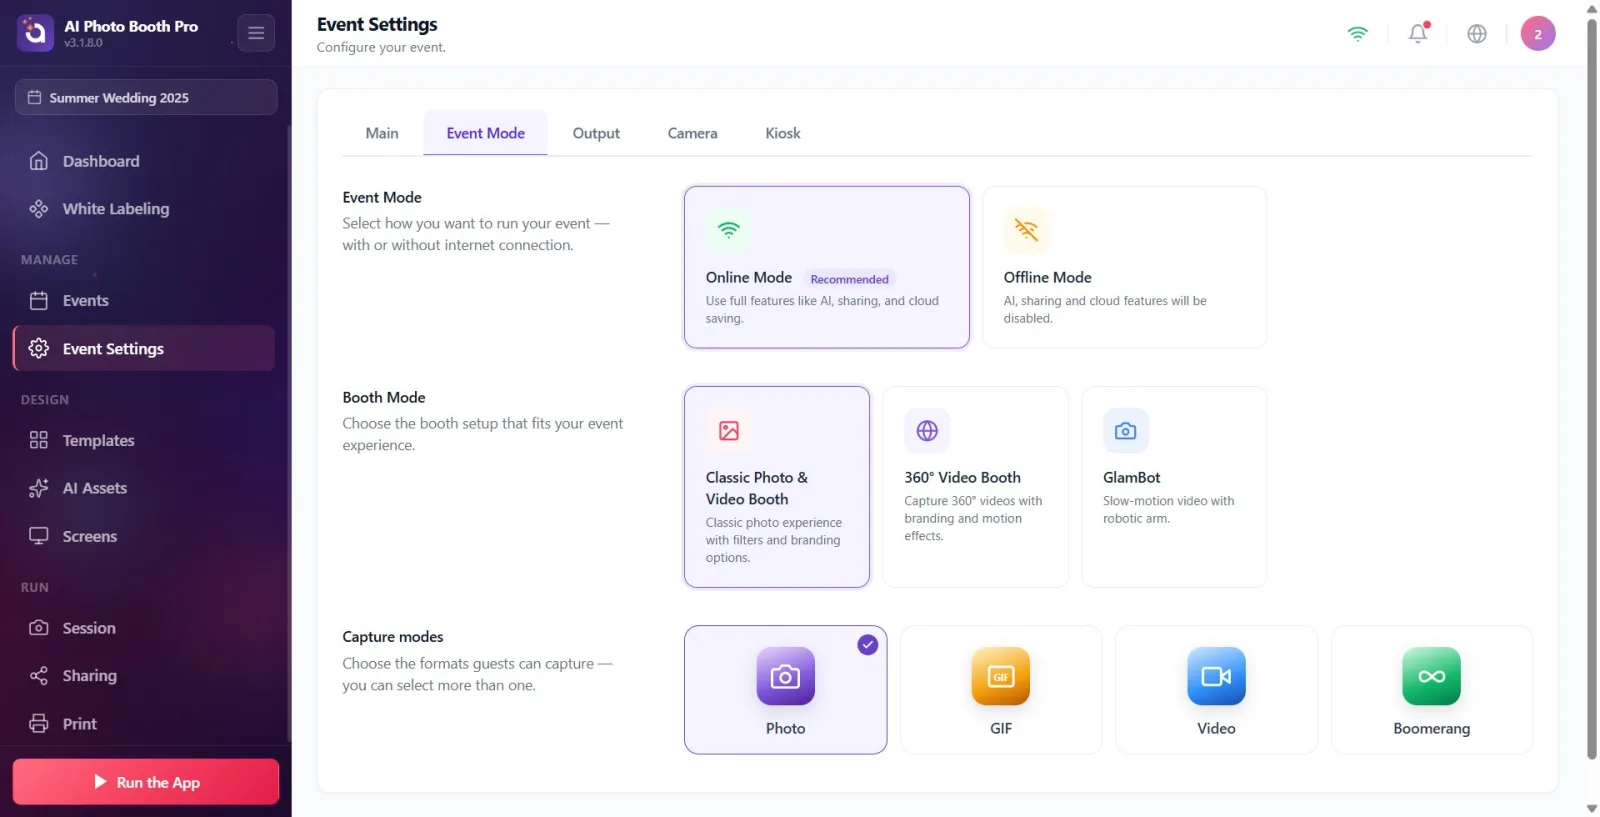
If you will operate at a venue without internet, tap the Offline Mode card. Its description: AI, sharing and cloud features will be disabled. In this mode, AI effects, FaceSwap, AI video, email/SMS/QR sharing and cloud saving do not work. If you have internet, stay in Online Mode.
🔎 On-screen elements: Offline Mode card (with its description line). There is no badge.
Step 5 · Booth Mode — Classic Photo & Video Booth
Settings → Event Settings → Event Mode
The second section, Booth Mode, offers three cards (description: Choose the booth setup that fits your event experience.). For a standard photo/video booth, tap the Classic Photo & Video Booth card. Its description: 'A classic photo experience with filters and branding options.' In this mode, your 'Capture modes' choices below (Photo/GIF/Video/Boomerang) stay as they are — they do not change automatically.
🔎 On-screen elements: Booth Mode title; three cards: Classic Photo & Video Booth / 360° Video Booth / GlamBot. (On a narrow screen the three cards wrap into two columns.)
Step 6 · Booth Mode — 360° Video Booth (automatic side effects)
Settings → Event Settings → Event Mode
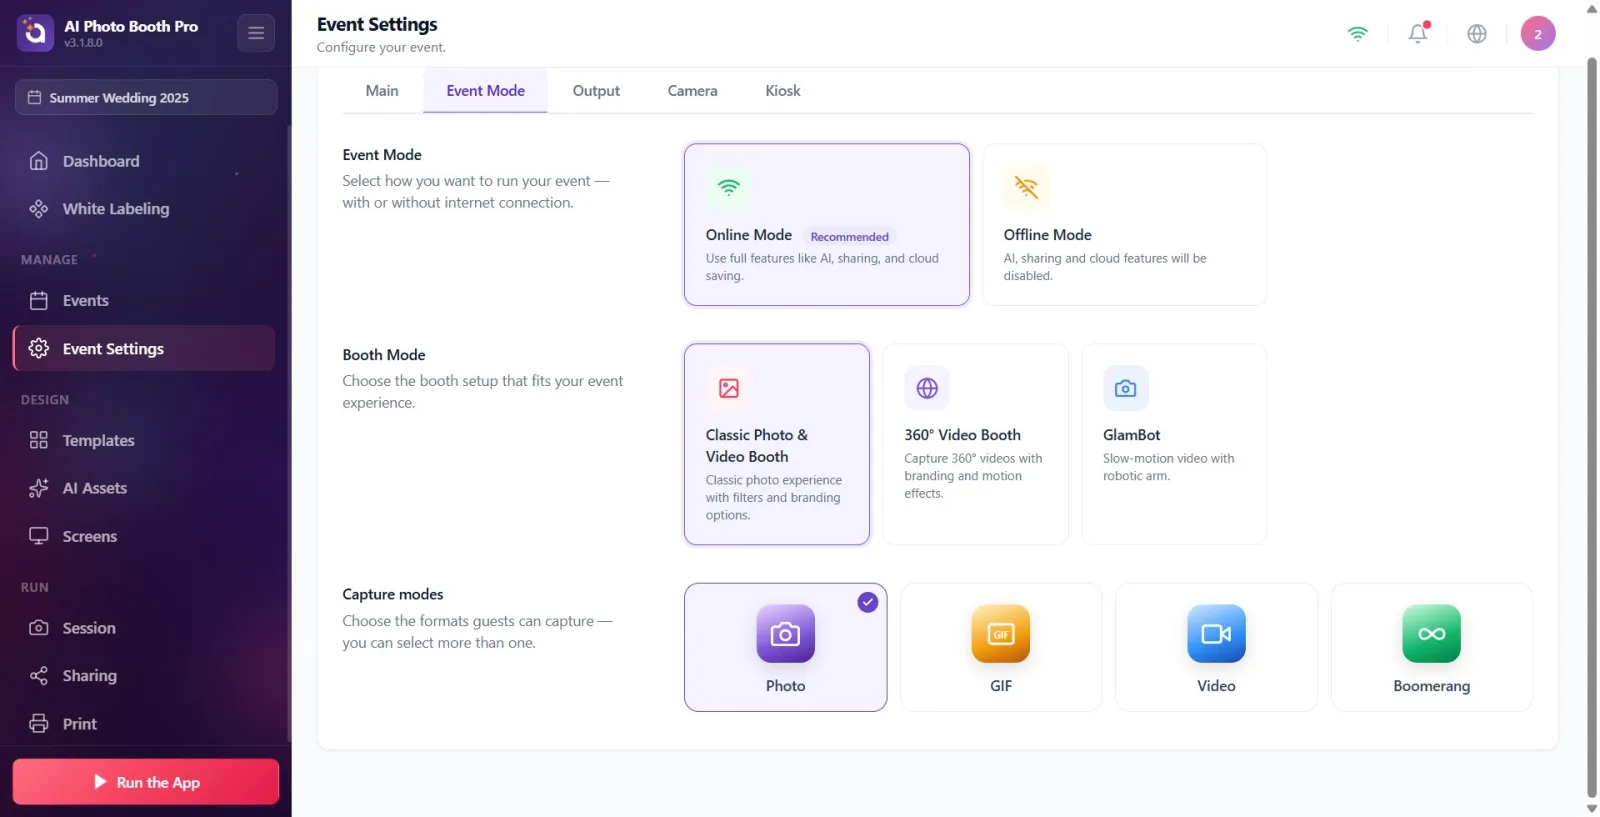
If you use a 360° rotating platform, tap the 360° Video Booth card. Its description: Capture 360° videos with branding and motion effects. The moment you select this card, the app AUTOMATICALLY: turns Photo OFF, turns Video ON in the 'Capture modes' section below, and enables auto-approval (skipping the post-capture review/approval step). You do not need to adjust the cards by hand.
🔎 On-screen elements: 360° Video Booth card; then, in the 'Capture modes' section below, the Photo (turns off) and Video (turns on) cards that change by themselves.
Step 7 · Booth Mode — GlamBot (robotic arm)
Settings → Event Settings → Event Mode
For a slow-motion rig with a robotic arm, tap the GlamBot card. Its description: Slow-motion video with robotic arm. As with 360° mode, Photo is turned off automatically, Video is turned on, and auto-approval is enabled. GlamBot requires robotic-arm hardware; the robot's IP address must be defined in Settings (default 192.168.5.1).
🔎 On-screen elements: GlamBot card; the Photo/Video cards that change automatically in the 'Capture modes' section below.
Step 8 · Capture modes — select the output formats (multiple)
Settings → Event Settings → Event Mode
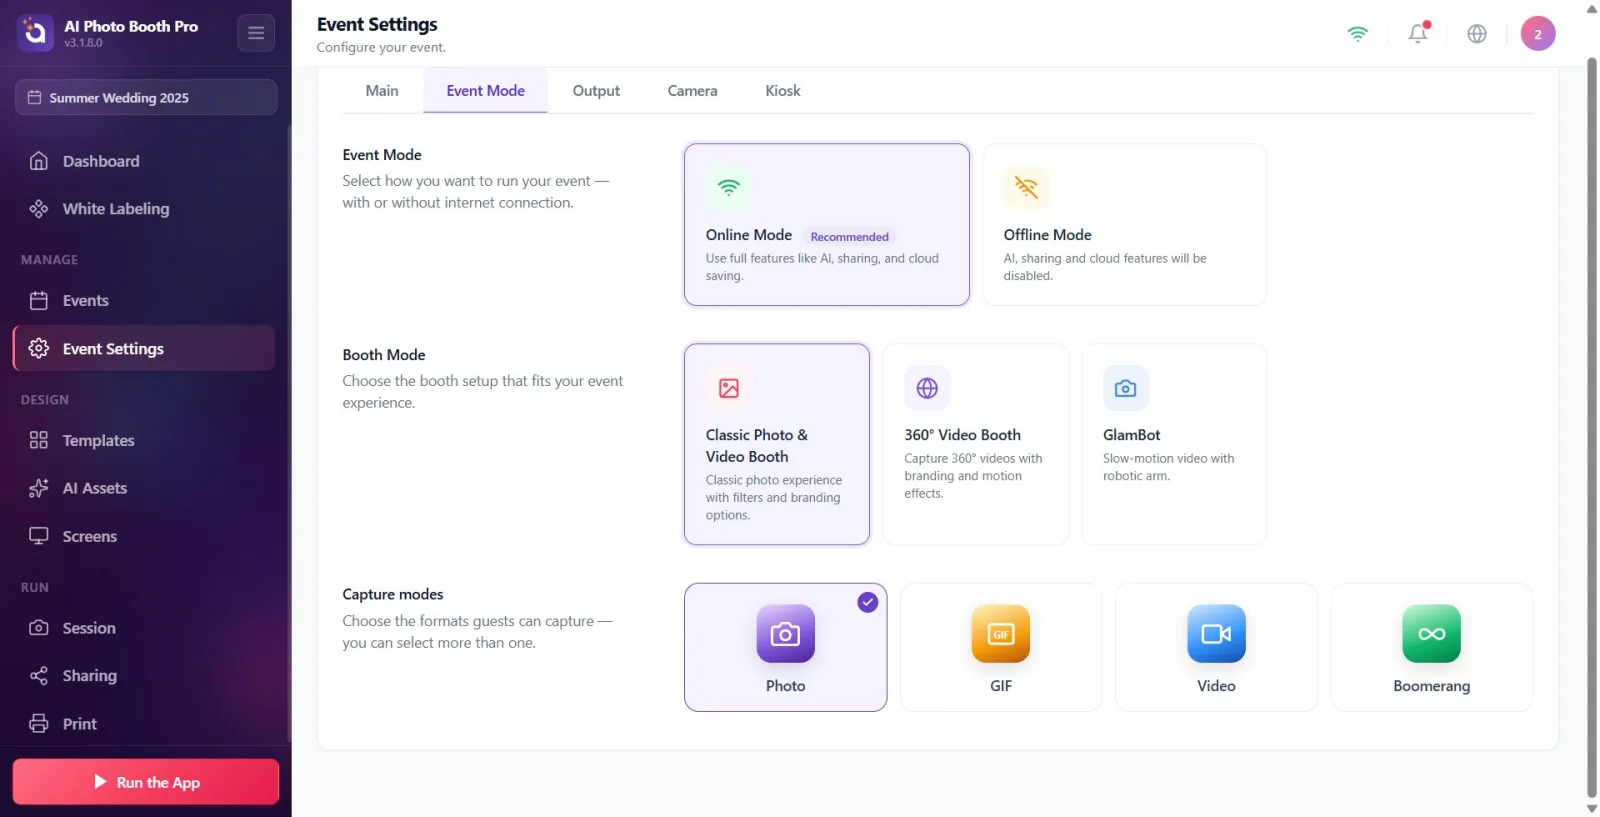
The third section, Capture modes, defines the formats guests can capture: Photo, GIF, Video, Boomerang. These cards support MULTIPLE selection — you can leave as many as you like on at the same time. A check (tick) badge appears in the top-right corner of a selected card. Its description: 'Choose the formats guests can capture — you can select more than one.' By default, only 'Photo' is on.
🔎 On-screen elements: Four cards: Photo / GIF / Video / Boomerang; a purple check (tick) badge in the top-right of each selected card.
Step 9 · At least one format must stay on
Settings → Event Settings → Event Mode
To turn a format on/off, tap its card (toggle). You cannot turn all formats off — if you try to turn off the last remaining format, the app reverses the action and shows this warning: At least one output format must be active. So at least one output format always stays selected.
🔎 On-screen elements: The info toast that appears when you try to turn off one of the cards (the last active one): 'At least one output format must be active.'
Step 10 · Confirm that the capture cards change by themselves when you pick an auto mode
Settings → Event Settings → Event Mode
If you selected 360° Video Booth or GlamBot above, look at the 'Capture modes' section again: Photo should have turned off automatically and Video turned on automatically. This is a source-independent rule (it applies no matter which screen you change it from). If you like, after this automatic setting you can also turn on GIF or Boomerang by hand — the automatic change only touches Photo and Video.
🔎 On-screen elements: In the 'Capture modes' section, the Photo card's selection mark is cleared and the Video card is selected (ticked).
Step 11 · When returning to 'Classic', turn Photo back on manually
Settings → Event Settings → Event Mode
If you return from the 360° Video Booth or GlamBot to the Classic Photo & Video Booth, the Photo format that was turned off automatically is NOT turned back on by itself (the automatic change only runs when SWITCHING to 360°/GlamBot). If you want photos in the classic booth, tap the 'Photo' card in the 'Capture modes' section and turn it on manually.
🔎 On-screen elements: In Booth Mode, Classic Photo & Video Booth is selected; in 'Capture modes', Photo is still off (must be turned on manually).
The tab's name is the same as the first section's title (Event Mode); the first section is only the Online Mode/Offline Mode choice, while the booth layout (Booth Mode) is in the second section.
AI effects, FaceSwap, AI video, email/SMS/QR sharing and cloud saving only work in Online Mode; at a venue without internet, select Offline Mode.
When 360° Video Booth and GlamBot are selected, Photo turns off automatically, Video turns on automatically and the post-capture review step is skipped (auto-approval). GIF/Boomerang are left untouched.
'Capture modes' cards support multiple selection; for example, both Photo and GIF can be on at the same time. At least one format must always stay on.
GlamBot requires a robotic arm and the 360° Video Booth requires rotating-platform hardware; simply selecting the card does not set up the hardware — for GlamBot, the robot's IP (default 192.168.5.1) must be defined.
Selecting 360°/GlamBot on this tab does NOT automatically turn off the Print button — the printer is only assigned by default when the event is first created; after that it is managed from the Output/Print settings.
Changes are saved to the active event instantly; there is no separate Save button.
Assuming that Photo will come back automatically after you select 360°/GlamBot and then return to the Classic Photo & Video Booth: it will not — you must turn Photo on manually from the 'Capture modes' section.
Staying in Offline Mode when you have internet: AI/sharing/cloud turn off and guests cannot share their results. Unless there is a reason not to, stay in Online Mode.
Trying to turn off all 'Capture modes' formats: at least one must stay on; otherwise the At least one output format must be active. warning appears and the last toggle-off is undone.
Confusing the tab name Event Mode with the first section Event Mode and looking for the booth layout there: the booth layout is in the second section, Booth Mode.
Selecting GlamBot or the 360° Video Booth without the robotic-arm/rotating-platform hardware and IP setup, and expecting it to work.
Related topics
Event Settings → Output tab Event Settings → Camera tab Print Settings Event Creation Wizard
