
Before this: How to Create an Event? · How to Create a Photo Template?
A Video / GIF template is the frame/layout applied to the output of a video or animated GIF session (labeled GIF / Video, described as Animated GIF or video output). The creation flow uses the same 4-step wizard as the photo template (Type → Size → Layout → Style), but there are three important differences: (1) in Step 1 you select GIF / Video as the type; (2) in the editor only the layers allowed for this type appear — a Video layer CAN be added, but AI capture layers such as Face Swap / AI Effect / AI Video / AI BG Removal / Green Screen are NOT SHOWN (there is only plain Capture); (3) italic formatting is not supported in text for video/GIF templates. The same GIF / Video template is used for both GIF and video output; whether a GIF or a video is produced is not determined by the template but by the session/output setting. There is also a third type in the code, Video Print (a print frame with an embedded video), but in the current interface it is hidden both in the tab bar and in the type selection.
- There must be a selected (active) event — templates are listed and added tied to the current event.
- Access to the Templates page (Settings → Templates / /templates).
- If you want to add a Video layer, a video file to embed (e.g. .mp4) must be ready on the device. The Video layer is not mandatory; it is used for a decorative embedded clip.
- Note: Green screen (Clear Background / chroma key) on the Video layer is hidden on Android; it is visible on iOS / Mac / Windows.
Step by step
Step 1 · Open the Templates page
Templates page (/templates)
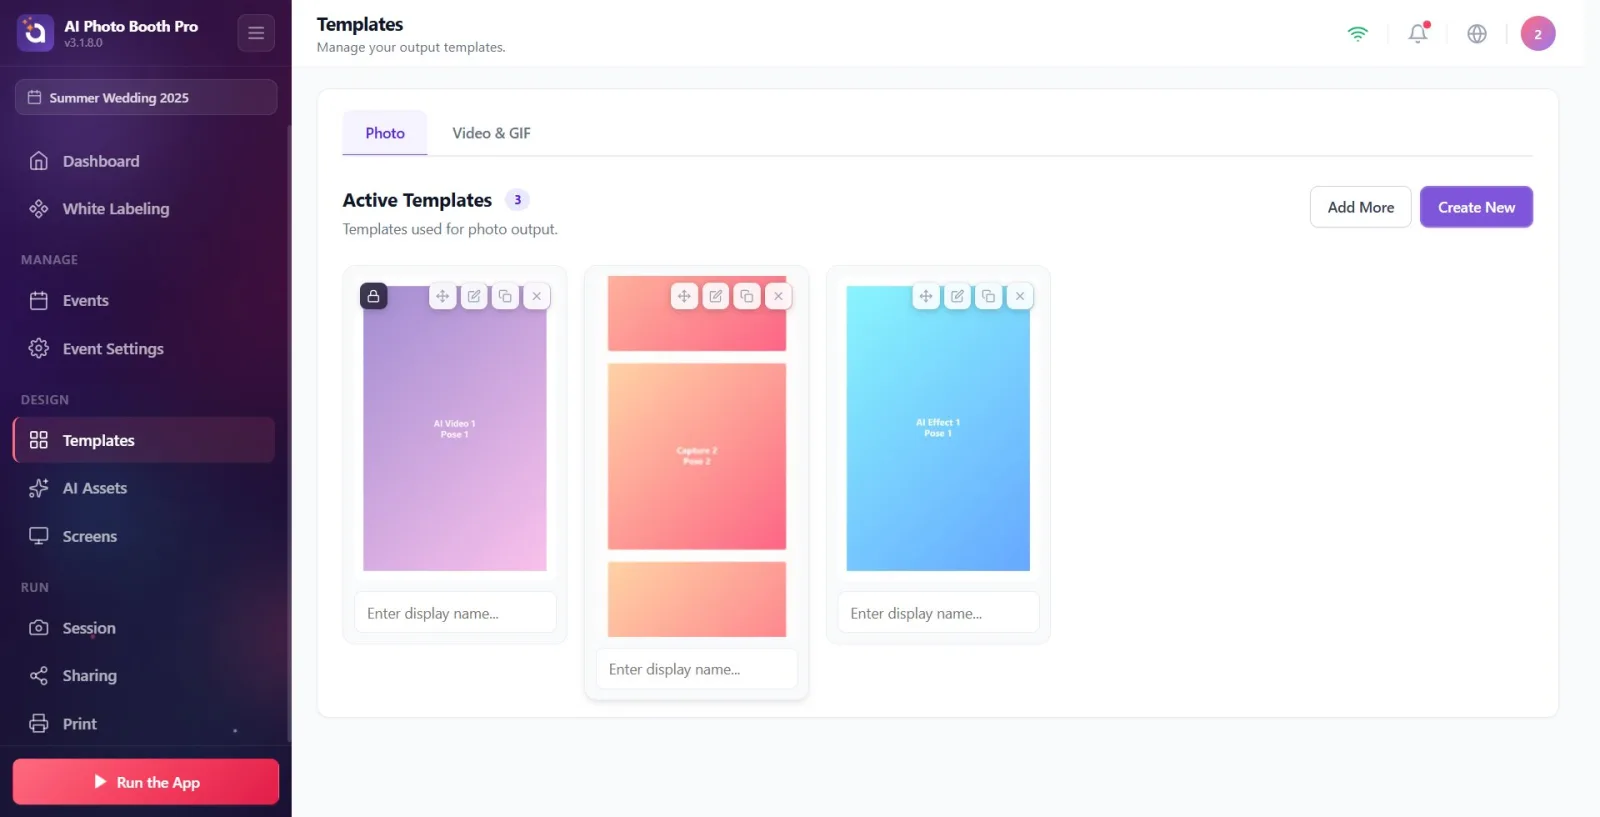
Open the Templates page (/templates) from Settings. The page opens on the Photo tab by default.
🔎 On-screen elements: Two tabs at the top: Photo and Video & GIF.
Step 2 · Switch to the Video & GIF tab
Templates → Video & GIF tab
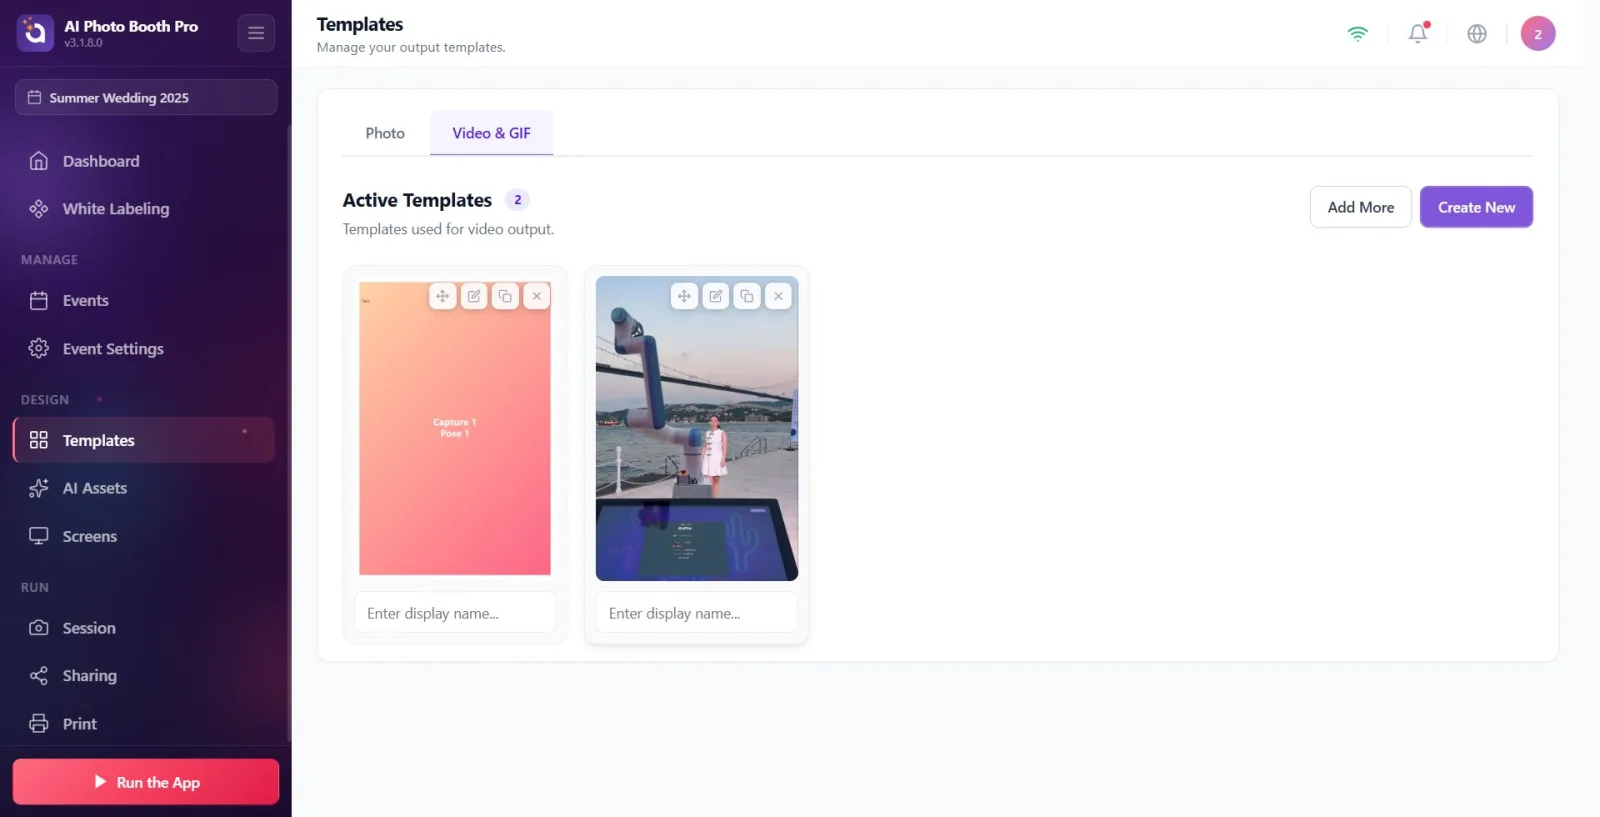
Click the Video & GIF tab. This tab lists video/GIF templates; at the top right there are the Add More (add from library) and Create New (wizard) buttons.
🔎 On-screen elements: Video & GIF tab, section heading Active Templates and its description Templates used for video output., Add More and Create New buttons. If there are no templates, the empty state: No templates yet + Create a template for video output.
Step 3 · Open the wizard
Templates → Video & GIF tab
Open the New Template wizard by clicking the Create New button. (Alternatively: with Add More you can select ready-made video/GIF templates from the library.)
🔎 On-screen elements: the Create New button; the New Template modal that opens has 4 steps (narrow/480px in Step 1, wide/680px in the following steps).
Step 4 · Step 1 — Select the template type GIF / Video
New Template wizard — Step 1 (Type)
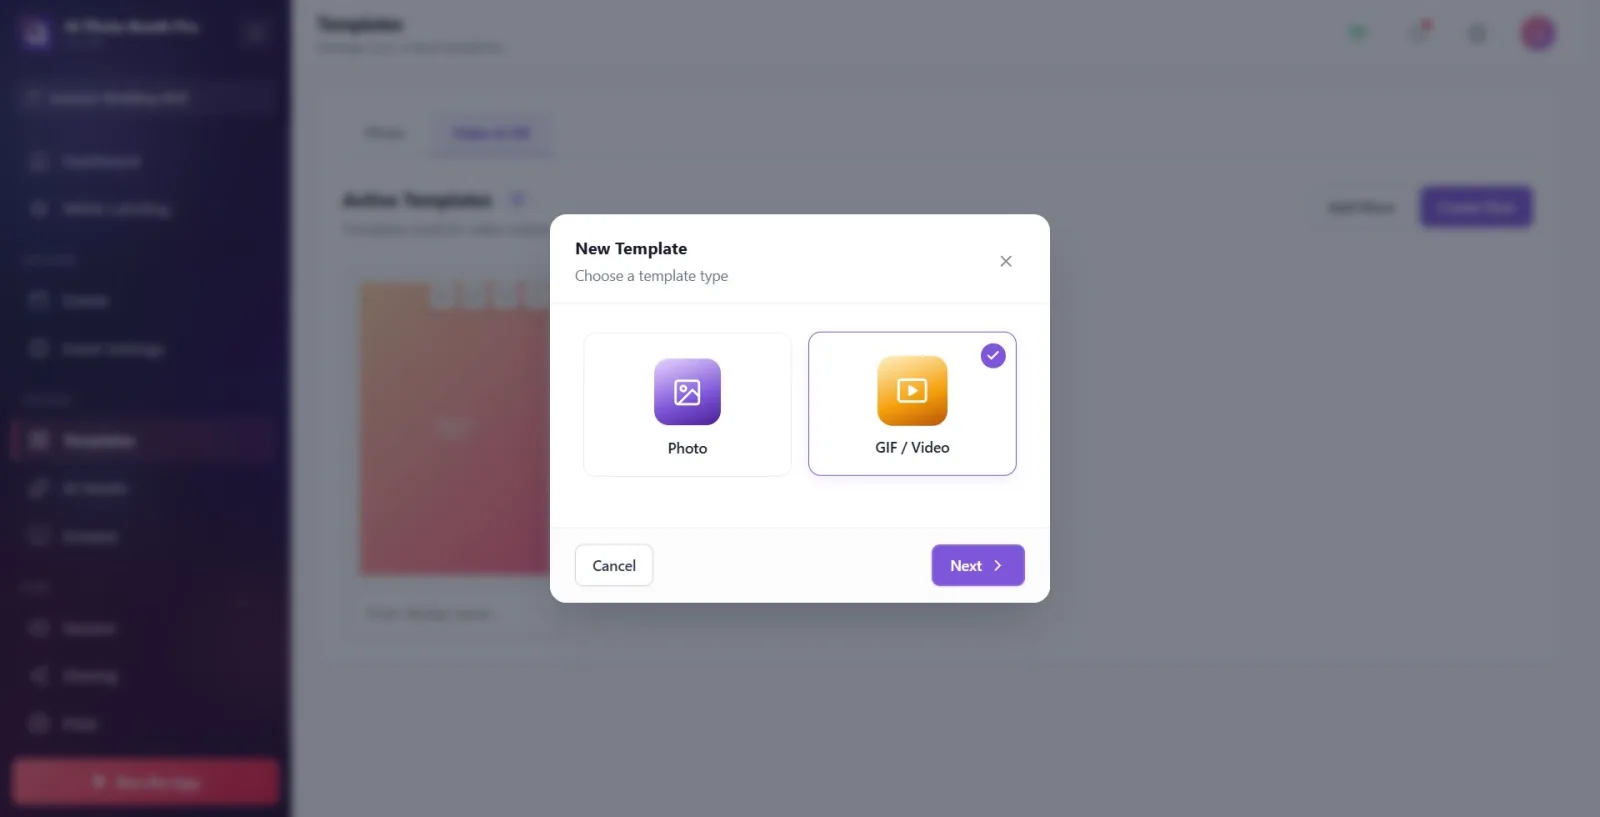
In the type selection, click the GIF / Video card. CAUTION: Even if you came from the Video & GIF tab, the wizard resets the type to Photo every time it opens; so you must manually select the GIF / Video type here. Then press Next.
🔎 On-screen elements: modal title New Template, subtitle Choose a template type. Visible cards: Photo (Printable photo layouts) and GIF / Video (Animated GIF or video output). The Video Print card is hidden in the interface. At the bottom, the Cancel and Next buttons.
Step 5 · Step 2 — Select the size (format)
New Template wizard — Step 2 (Size)
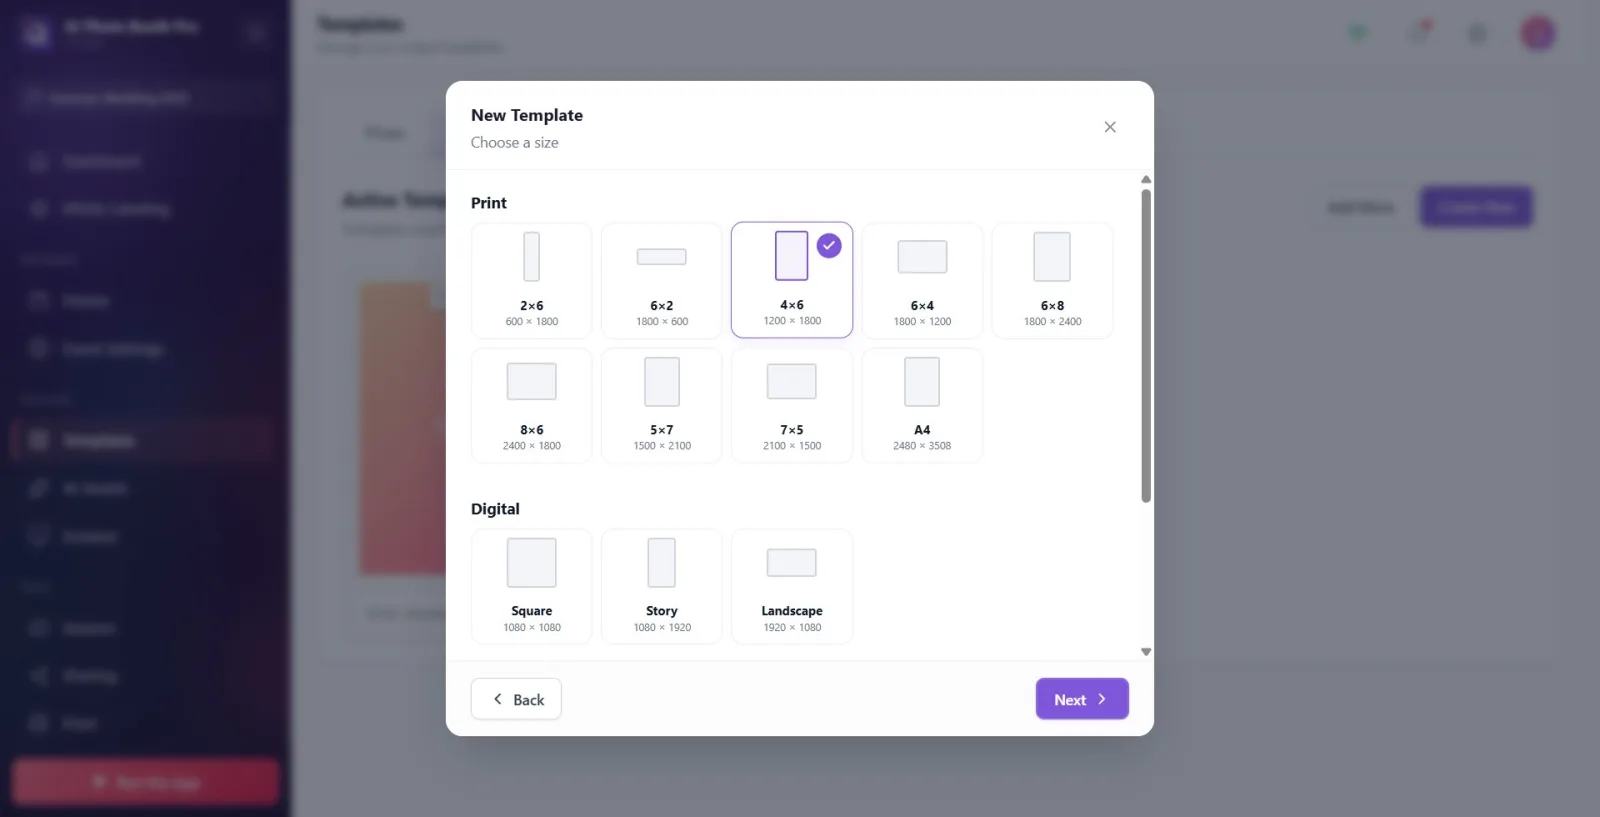
Select the template size: Print (2×6, 4×6, 6×4, 6×8, 5×7, A4, etc.), Digital (Square, Story, Landscape) or Custom (your own width/height). The default is 4×6. Without a size selected, 'Next' is disabled. Select one and press 'Next'.
🔎 On-screen elements: subtitle Choose a size. Size cards are grouped into categories; if Custom is selected, a width/height input. Back and Next buttons.
Step 6 · Step 3 — Select the layout
New Template wizard — Step 3 (Layout)
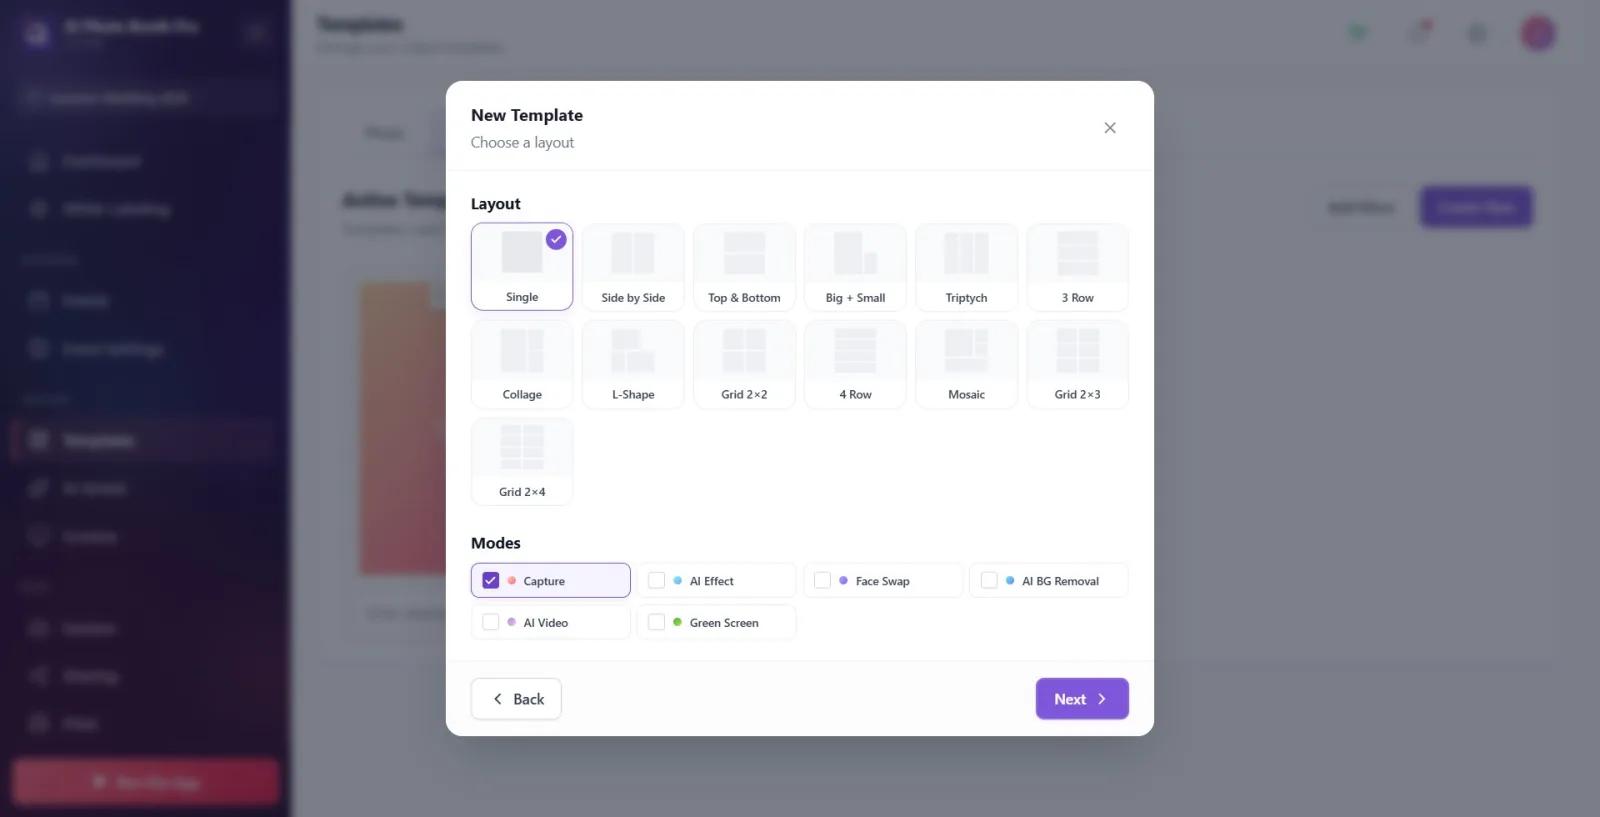
Select the layout that determines the arrangement of the capture/photo slots (Single, Side by Side, Top & Bottom, Large+Small, 2×2 Grid, etc.). The default is 'Single'. Without a layout selected, Next is disabled. Select one and press Next.
🔎 On-screen elements: subtitle Choose a layout. Layout preview cards (by slot count: 1, 2, 3, 4, 6, 8). Back and Next buttons.
Step 7 · Step 4 — Select the style and Create
New Template wizard — Step 4 (Style)
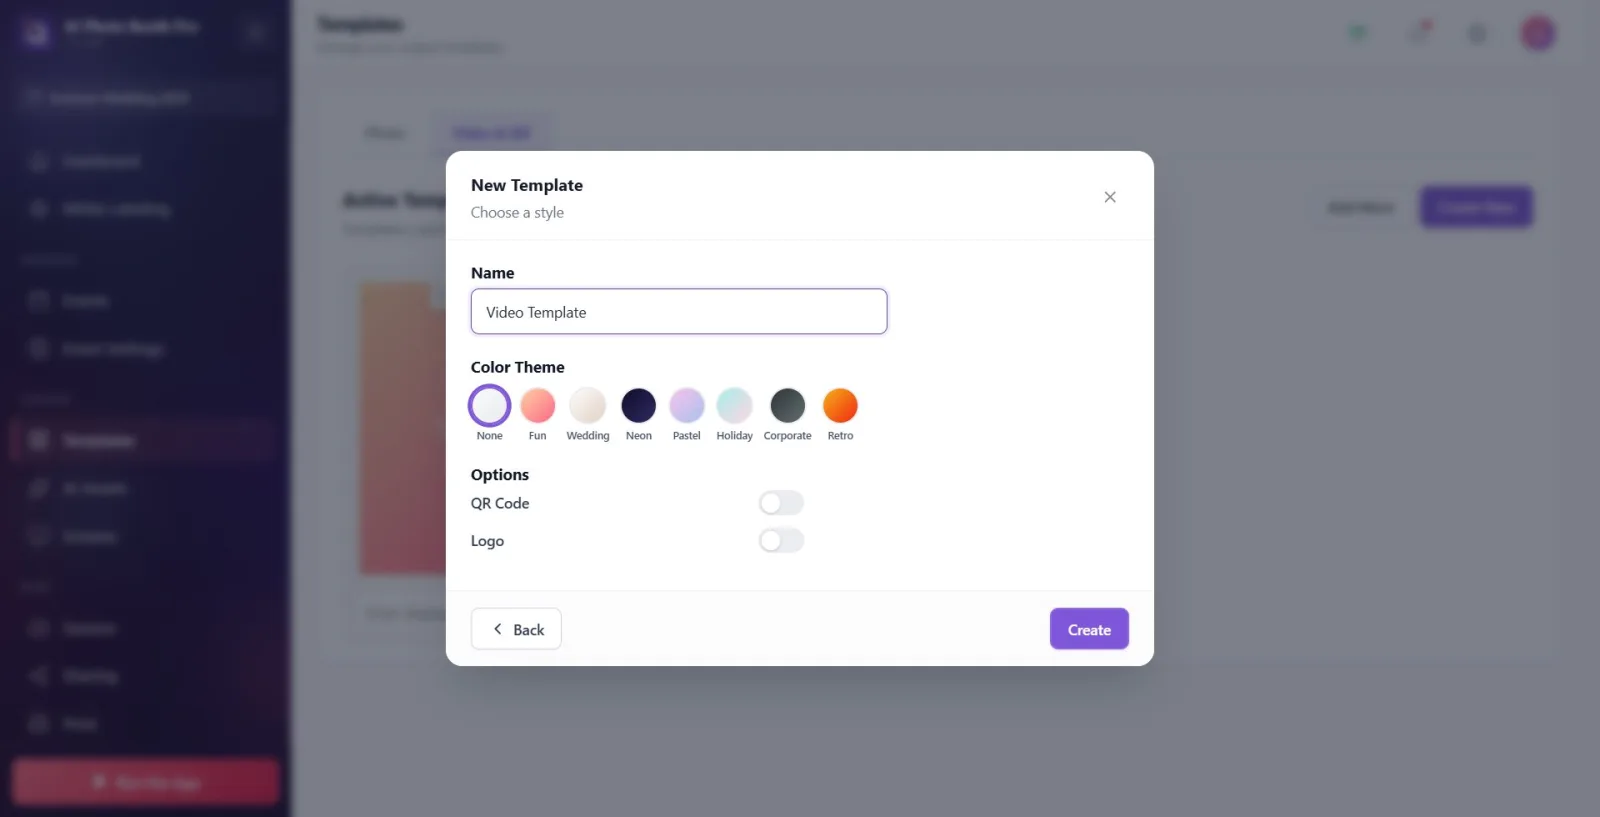
Select a style theme (None, Fun, Wedding, Neon, Pastel, Holiday, Corporate, Retro). This step is optional (you can leave it None). Press the Create button; the template is created and you are directed to the editor.
🔎 On-screen elements: subtitle Choose a style. Color/gradient style cards. At the bottom, the Back and Create buttons (in Step 4, Create instead of Next).
Step 8 · The editor opens
Template Editor (/templateeditor)
The template editor (/templateeditor) opens. The size/layout you selected is ready on the canvas; from here you add, move, and format layers.
🔎 On-screen elements: a floating toolbar at the top (Undo/Redo, the Add Layer menu), the canvas, a bottom bar (tools, Layers/Properties panels, grid, safe area, zoom). In the left panel, a layer list + Canvas.
Step 9 · Which layers the Add Layer menu offers
Template Editor — Add Layer menu
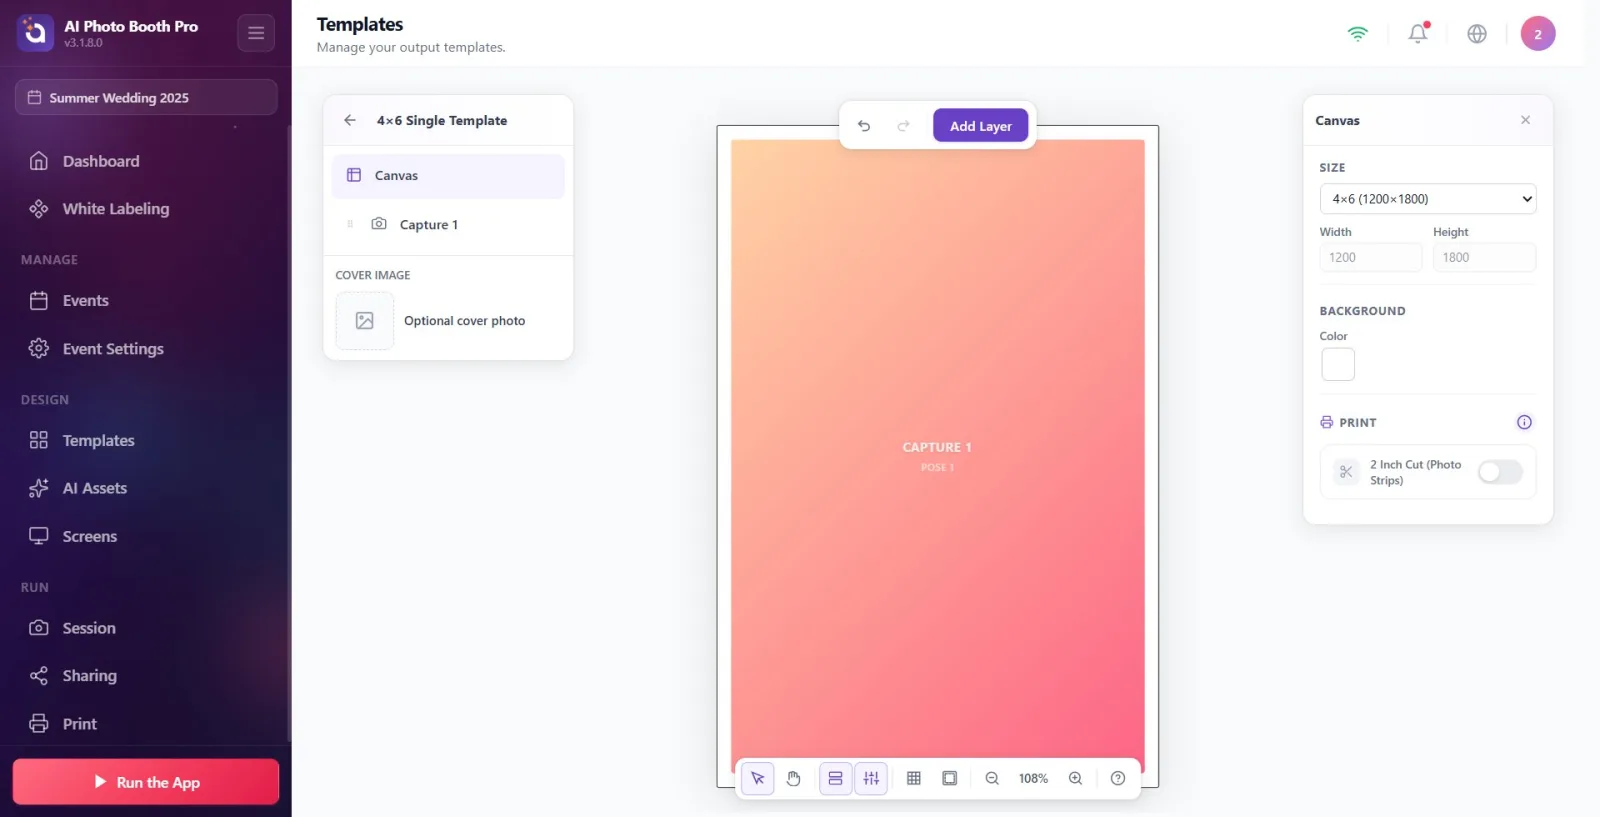
Click the Add Layer button at the top; the menu depends on the template type. The recorded video lands in the Capture slot of the layout — that is the layer carrying the template's output, and you do not need to attach a video file. The Video layer in the menu is optional: it is meant for an embedded clip (e.g. a brand intro) and is burned into every render. It works exactly like the Image layer — for adding a layer, positioning it and the properties panel, see Layer types in How to Create a Photo Template?.
🔎 On-screen elements: the Add Layer dropdown menu. Layers shown in the menu for the GIF / Video type: Capture, Video to AI Video, Video, Image, QR Code, Text, Shape, Color, Lead Answer. NOT shown in the menu (only in the Photo type): Face Swap, AI Effect, AI Video, AI BG Removal, Green Screen.
Step 10 · Add decorative layers (Text / Image / QR / Shape)
Template Editor — Text layer Properties panel
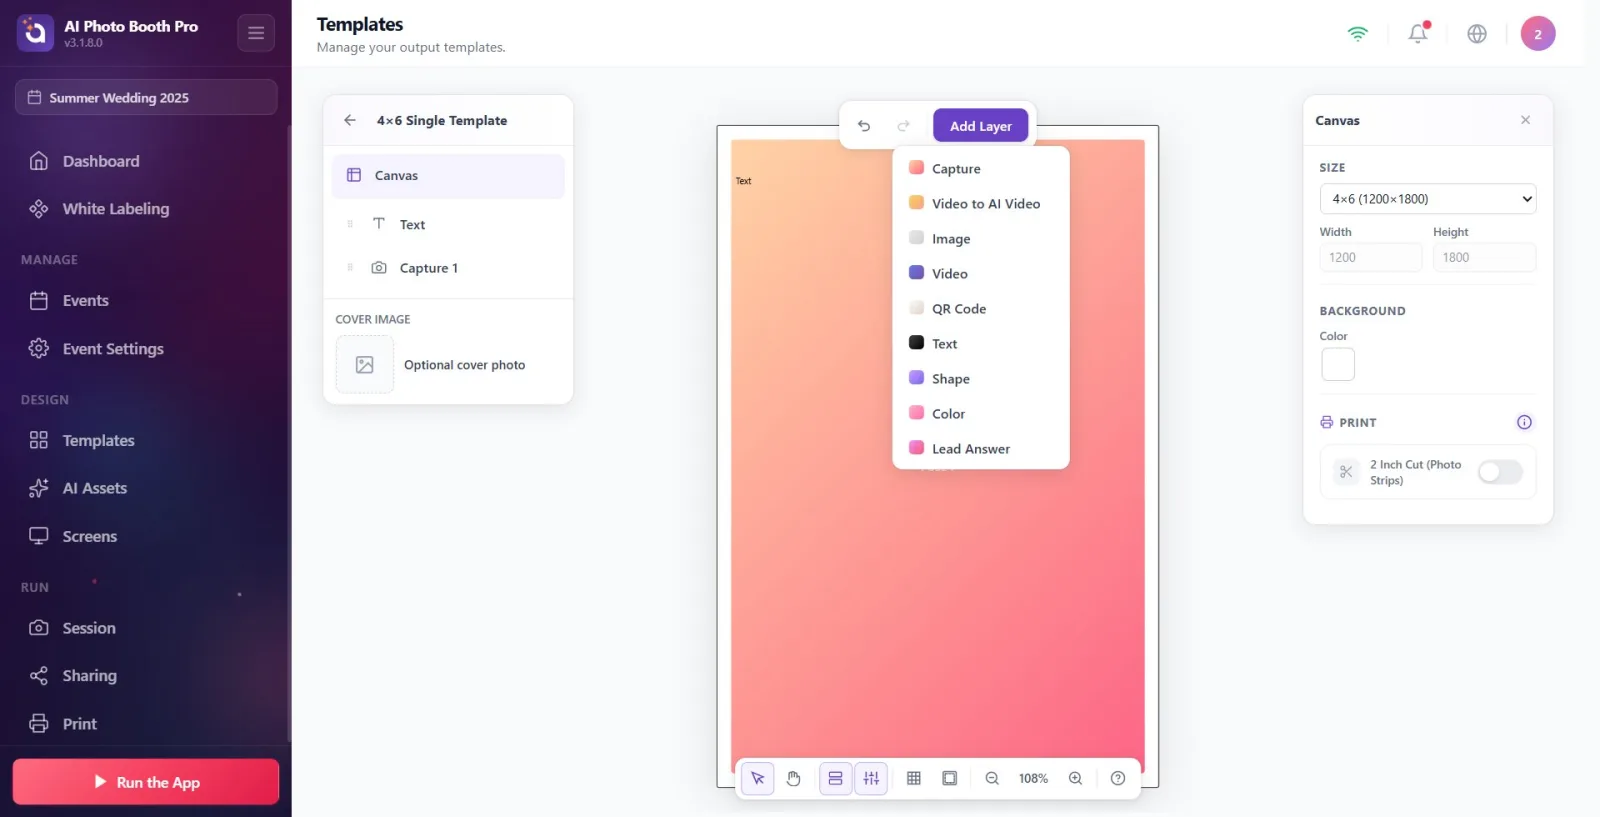
Add other layers if needed: Text, Image, QR Code, Shape, Color, Lead Answer. In text layers, bold (B) and underline formatting work, BUT the italic (I) button is disabled in video/GIF templates — hovering over it shows the Italic is not supported in video templates tooltip.
🔎 On-screen elements: the Add Layer menu (Text/Image/QR/Shape/Color/Lead Answer). Formatting buttons in the text properties; the italic (I) button is disabled (enabled only in the Photo type).
Step 11 · Name and save, return to templates
Template Editor → Templates → Video & GIF tab
Click the template name in the left panel and rename it. Changes are saved automatically (autosave); you can also exit with the back arrow at the top or with Back to Templates. The template is added to the list on the Video & GIF tab.
🔎 On-screen elements: a clickable template name in the left panel (Click to rename), a back button / Back to Templates. On exit, a new card in the Video & GIF list.
The same GIF / Video template is used for both animated GIF and video output — whether a GIF or a video is produced is not determined by the template but by the session/output setting.
The Video layer is not mandatory. The main content of the template is the capture slots in the layout + decorations; the Video layer is for an optional embedded clip (e.g. a brand animation/intro).
For a quick start, instead of the wizard you can add ready-made video/GIF templates from the library with Add More and edit them afterward.
When you want to edit a locked (default/pristine) template, it is automatically copied (Clone & Edit); the original is preserved.
If you are going to use green-screen video, prefer iOS/Mac/Windows; on Android the video layer chroma (Clear Background) is not applied in the render and the option is hidden.
You can reorder by dragging a card, and create a quick variation with Duplicate.
Forgetting to change the type in Step 1: Even if you press Create New from the Video & GIF tab, the wizard resets the type to Photo. If you don't manually select the GIF / Video card, you will create a photo template.
Looking for a Face Swap, AI Effect, AI Video, AI BG Removal or Green Screen layer in the video/GIF editor — these appear only in the Photo type; for capture in the GIF / Video type there is only plain Capture.
Trying to apply italic to text — italic is not supported in video/GIF templates, the button is disabled.
Looking for the Video Print type — although it is a separate type in the code (a print frame with an embedded video), it is currently hidden both in the tab bar and in the wizard's type selection; it cannot be created from the user interface.
Not noticing that the video layer stays empty (blue slot) without selecting a video file — the video is assigned with the file picker in the Properties panel after the layer is added.
Trying to add a template while no active event is selected — templates are tied to the current event.
Related topics
sablon-olusturma sablon-duzenleme sablon-arkaplan
