













Canvas surface sets the paper patterns guests can pick from the Background section of the drawing screen; Canvas cover frame is an image that sits on top of the canvas as decoration. Both are on the Drawing Settings page, and changes show up in the preview at the top immediately.
This guide covers AI Drawing Screen 2.2.2. Available controls may vary by platform and version; platform-specific limitations are noted below.
- An event must be created.
- If you are going to add your own background or frame, have the image file ready on your computer (a transparent PNG for the frame).
Step by step
Step 1 · Go to the Canvas surface section
Drawing Settings → Canvas surface
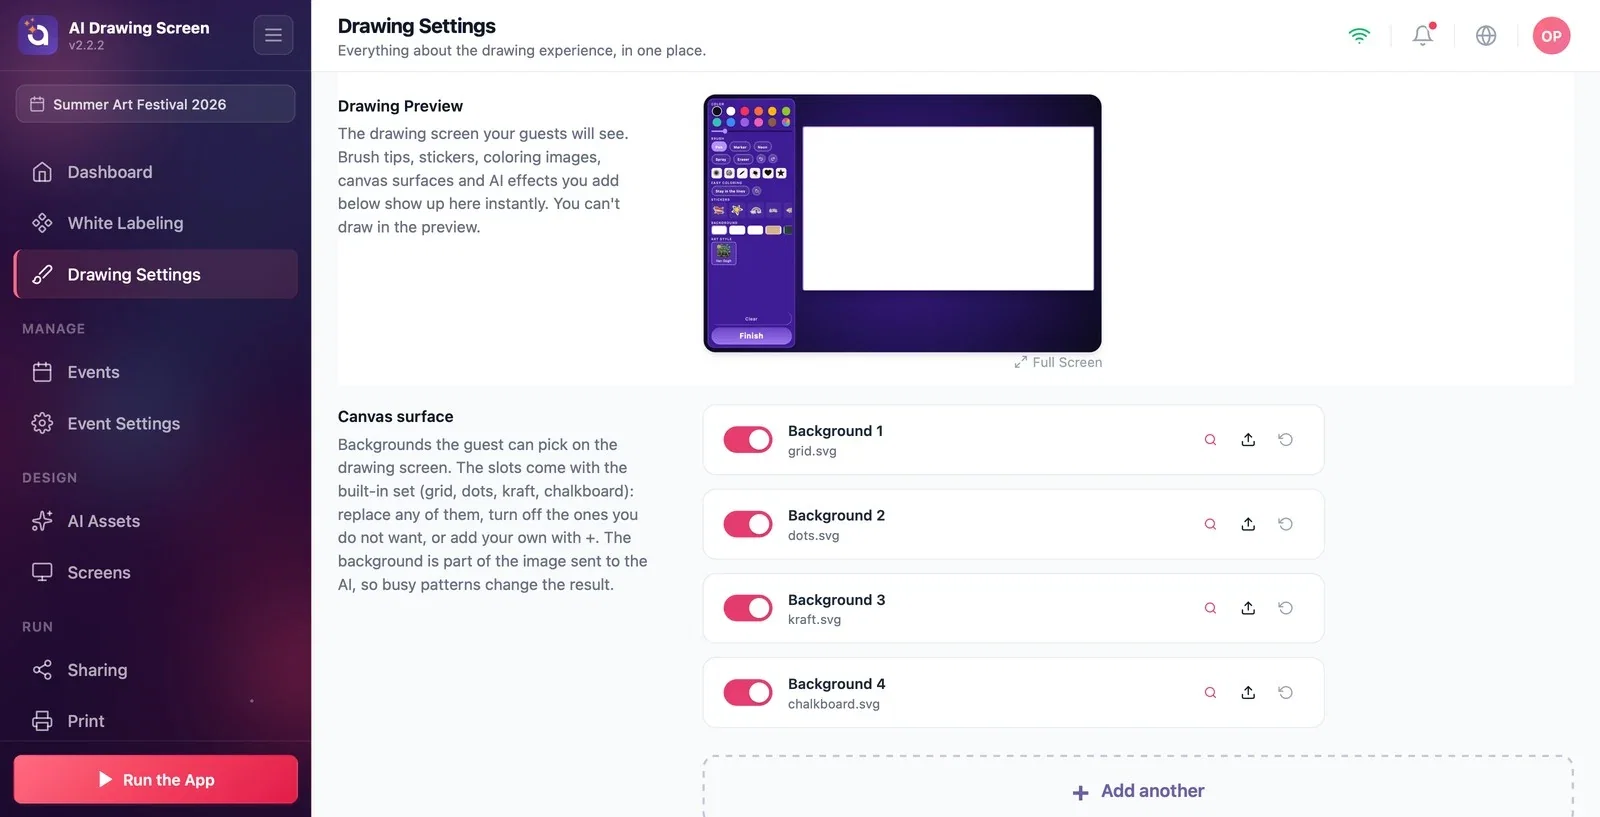
On the Drawing Settings page, scroll down to find the Canvas surface section. The slots come filled with the built-in set: Background 1 grid, Background 2 dots, Background 3 kraft paper, Background 4 chalkboard. Each slot has an on/off toggle on the left, the file name in the middle, and three icons on the right: Preview (magnifying glass — shows the image large), Upload (up arrow — uploads your own image), and Reset (back arrow — goes back to the built-in image).
Step 2 · Edit the backgrounds
Drawing Settings → Canvas surface
Turn off any background you don't want with its toggle; it is removed from the guest's Background list. To replace a slot with your own image, click the Upload icon and choose the file; if you change your mind, Reset brings back the built-in image. To add a new background, click Add another at the bottom of the section and upload your image to the empty slot that appears.
Step 3 · (Optional) Add a Canvas cover frame
Drawing Settings → Canvas cover frame
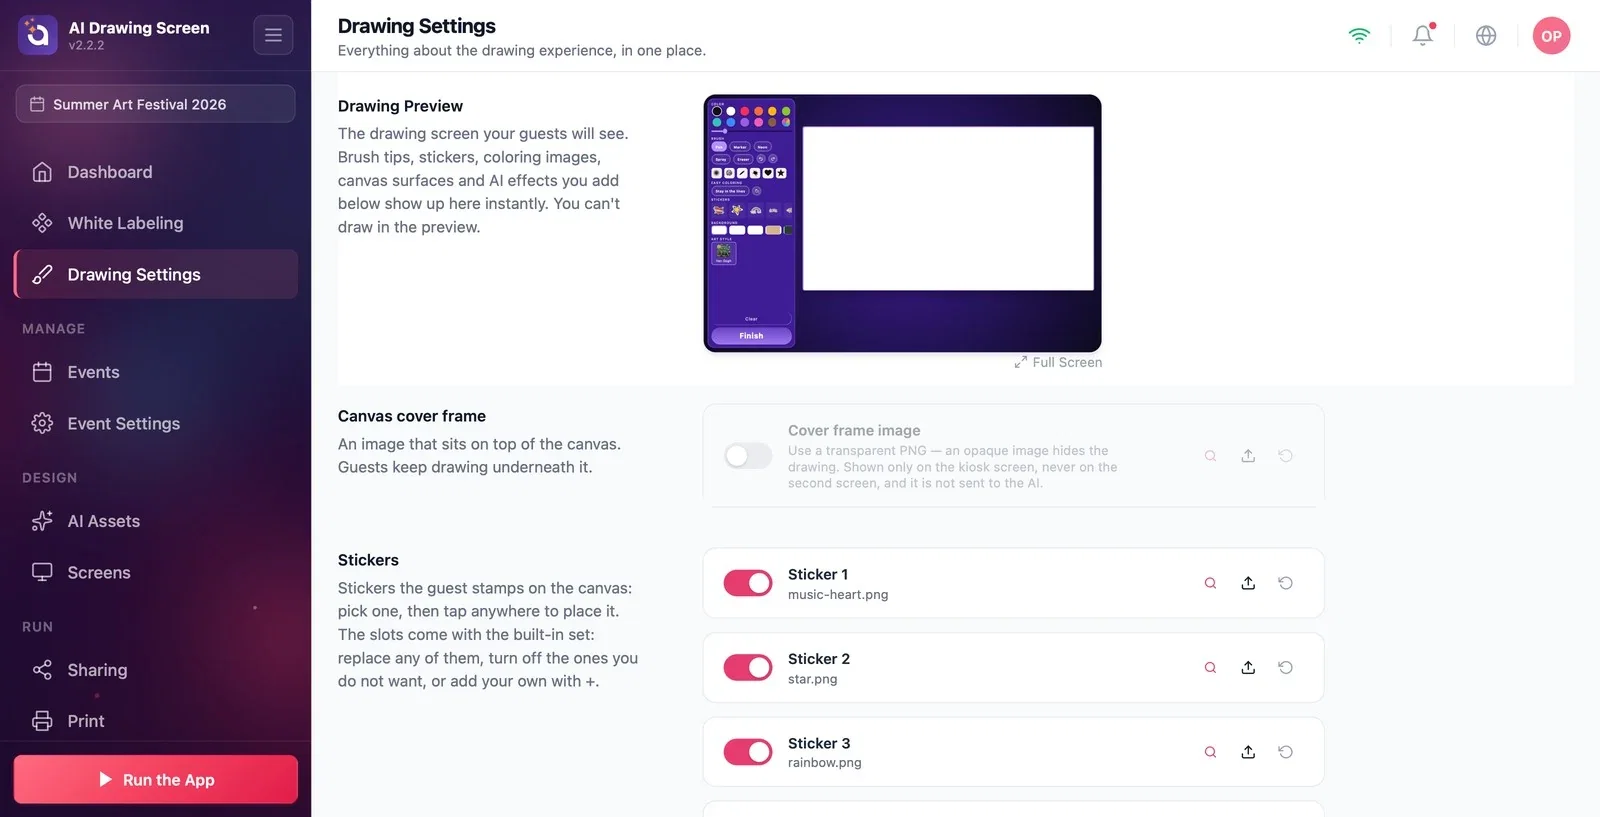
Upload an image to the Cover frame image slot with Upload and turn on its toggle. The image sits on top of the canvas; guests keep drawing underneath it. Use a transparent PNG — an opaque image hides the drawing. The frame is shown only on the kiosk screen: it doesn't appear on the second screen and isn't sent to the AI, so it is not part of the artwork.
The background is part of the image sent to the AI; plain backgrounds (white, grid) affect the AI result less.
For a branded event, add your own pattern as a background and your logo decoration as a transparent PNG frame.
Choosing a busy background and being surprised that the same texture shows up in every artwork — the AI interprets the background too.
Uploading the frame as an opaque image (with a filled background) — the guest's drawing becomes invisible; use a transparent PNG.
Expecting the frame to show up in prints or in the AI artwork — the frame is only a decoration on the kiosk screen.
Related topics
Drawing SettingsStickers and Brush TipsColoring Pages
