













Product customization lets guests paint a product — e.g. a sneaker or a T-shirt — instead of a blank canvas. Each product is made of two images: the Product image, which sits on top and can't be painted, and the Paintable area, which defines where guests can paint. You can add as many products as you like and turn on the one you want for the event with Use.
This guide covers AI Drawing Screen 2.2.2. Available controls may vary by platform and version; platform-specific limitations are noted below.
- An event must be created.
- For each product, prepare two images of the same size: the product photo (a light-colored one — white/gray — works best) and a black-and-white paintable area image.
Step by step
Step 1 · Open the Product customization section
Drawing Settings → Product customization
On the Drawing Settings page, go to the Product customization section below Canvas size. The first product slot (Product 1) is waiting, empty; the Use toggle in its top right corner stays dimmed until the files are uploaded.
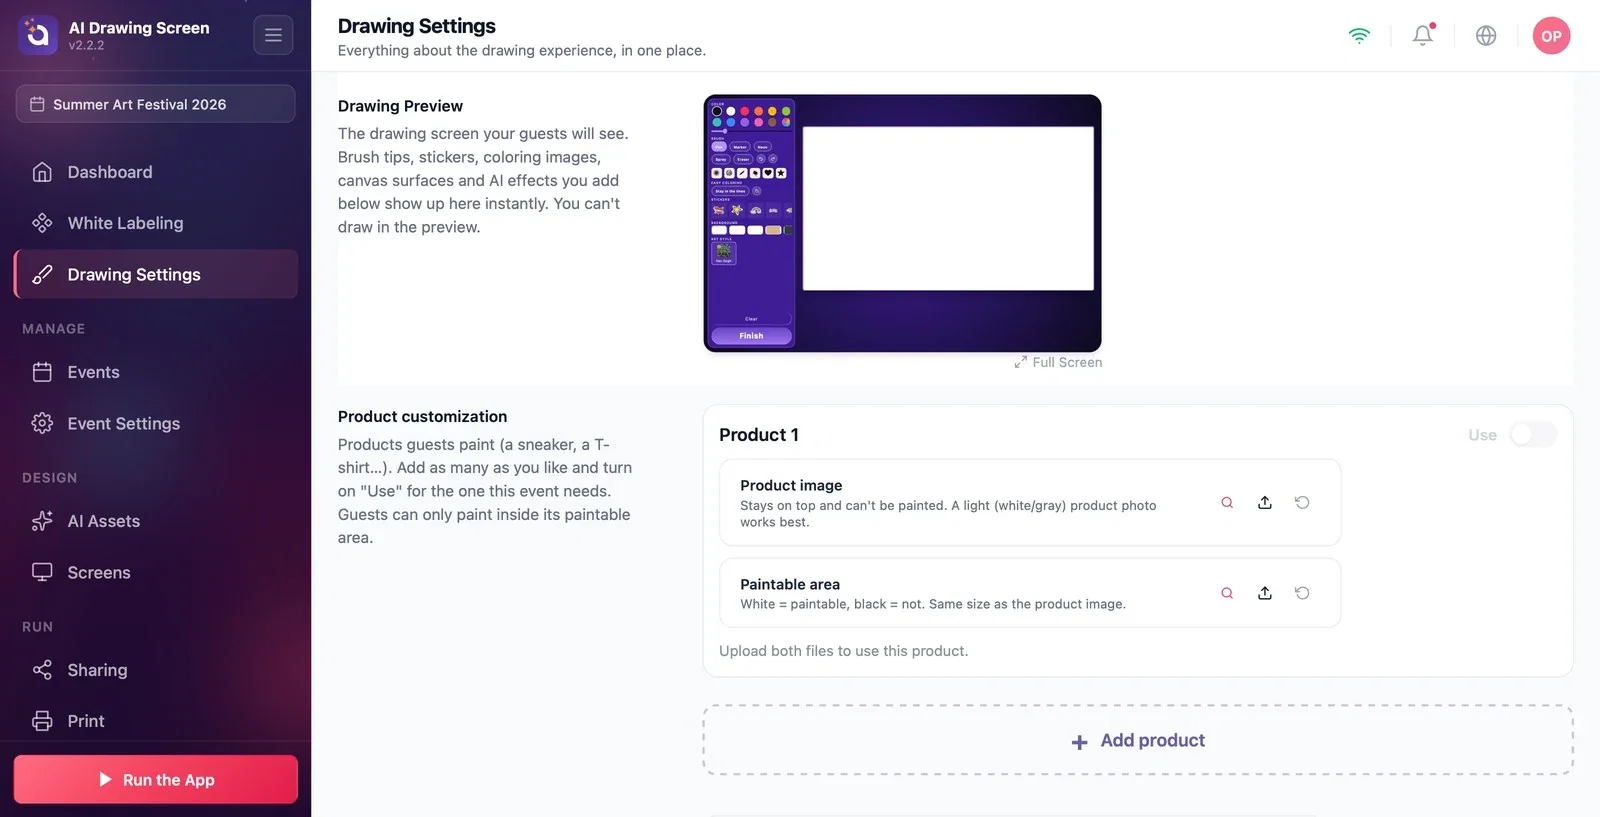
Step 2 · Upload the Product image
Product customization → Product 1 → Product image
Upload the product photo with the Upload icon on the Product image row. This image sits on top of the guest's drawing and can't be painted, so product details such as stitching, logos, and shadows always stay visible. A light-colored (white/gray) product photo gives the best result.
Step 3 · Upload the Paintable area
Product customization → Product 1 → Paintable area
On the Paintable area row, upload a black-and-white image that is the same size as the product image: white areas can be painted, black areas can't. Guests can only paint in the white area; paint that goes outside the product doesn't show.
Step 4 · Use the product in your event
Product customization → Use
Once both files are uploaded, the Use toggle becomes active; turn it on. The canvas in the preview now appears in the shape of the product. To add more products, click Add product; each product has its own card, and you turn on the one you want to use in the event with Use.
Prepare the paintable area image by working on top of the product photo (same canvas size); the edges then line up exactly.
For branded events (a sneaker store, a T-shirt launch), also assign a suitable AI style so the AI turns the guest's design into a finished product image.
Uploading only one file and wondering why Use won't turn on — both files are required (Upload both files to use this product.).
Preparing the paintable area image in a different size — the painted area won't line up with the product.
Using a dark product photo — the guest's paint stays under the image on top and is hard to see.
Related topics
Drawing SettingsColoring PagesAI Assets
