













Activation Share lets the guest get their artwork through the cloud with a QR code: the guest scans the QR on the result screen with their phone, downloads the artwork and shares it on social media. The settings are on the Activation Share tab of the Sharing page in the left menu. The E-Mail Sharing tab on the same page sets up sending by email.
This guide covers AI Drawing Screen 2.2.2. Available controls may vary by platform and version; platform-specific limitations are noted below.
- An event must be created and selected.
- The kiosk must be connected to the internet — artworks are uploaded to the cloud.
Step by step
Step 1 · Open Sharing → Activation Share
Left menu → Sharing → Activation Share
Click Sharing in the Run group of the left menu; the Activation Share tab opens. Each setting has a switch with a description below it.
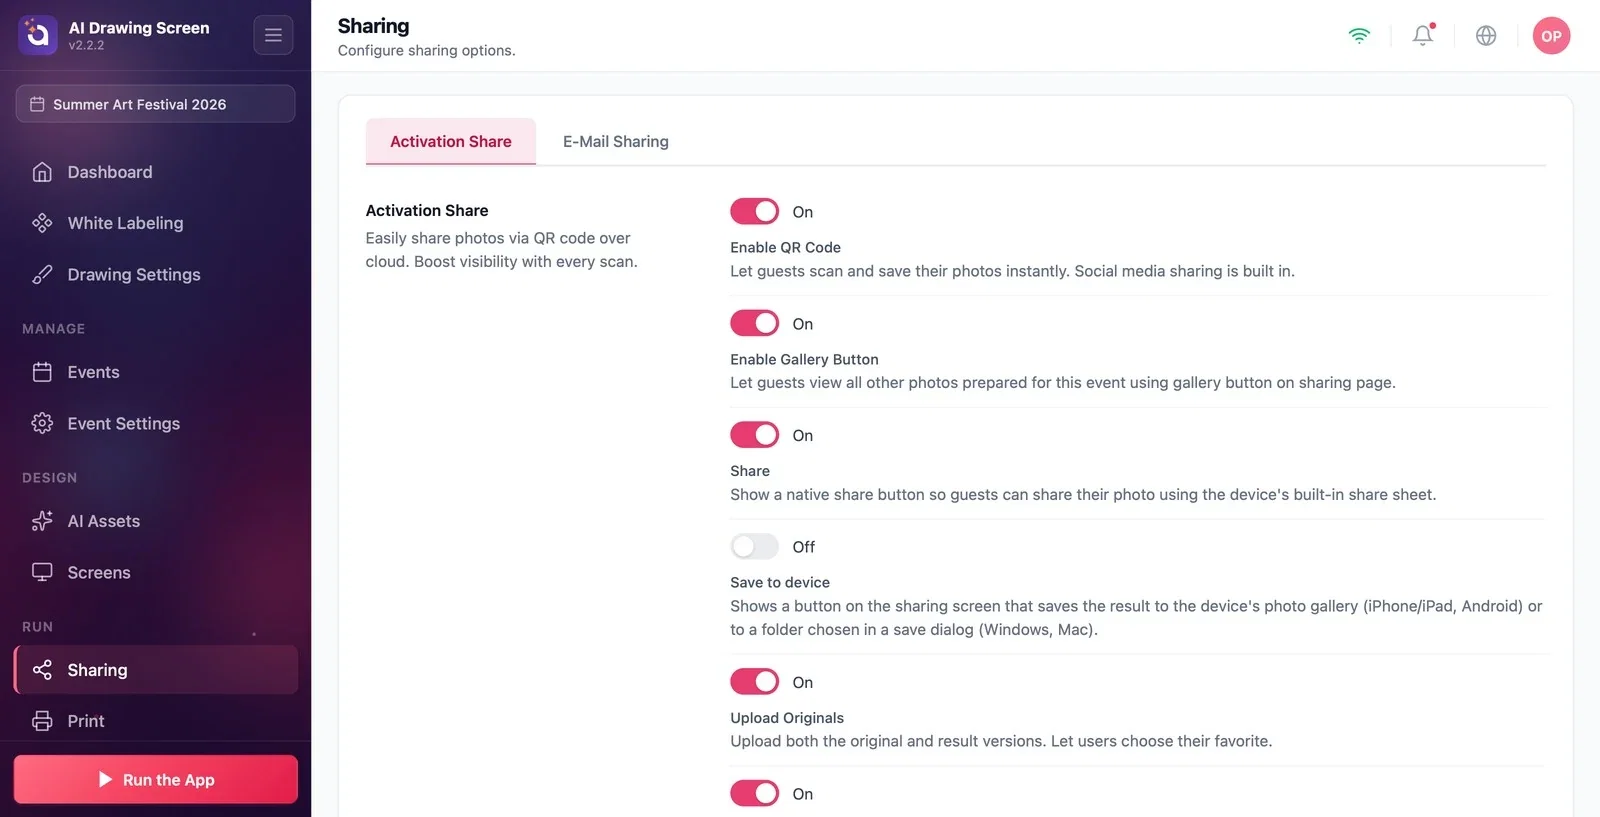
Step 2 · Set the switches
Sharing → Activation Share
With the defaults for new events:
- Enable QR Code (on): a sharing setting carried over from the photo products; it does not turn the QR on the kiosk's result screen on or off. The kiosk QR is managed in Screens → Result → QR code (see Step 3). - Enable Gallery Button (on): the guest can see this event's other artworks with the gallery button on the sharing page. - Share (on): shows the Share button on the kiosk's result screen; the button opens the artwork in the kiosk operating system's share menu (the Windows share window, the Android share list). On Mac kiosks the menu may not appear; turn it off there and direct guests to the QR. - Save to device (off): an option carried over from the photo products; it does not add a button to the AI Drawing result screen. To have artworks copied to a folder on the computer, use Session → Drawing → Result copy folder. - Upload Originals (on): both the guest's own drawing and the AI artwork are uploaded to the cloud; the guest sees both on the sharing page. It is the same setting as Also serve the original drawing in Drawing Settings. - Navigate Between Results With Common Capture (on) and White Label Event Override (off): options carried over from the photo products; in AI Drawing, they are usually left at their defaults.
Step 3 · Where the QR sits on the result screen
Screens → Result → QR code
You set the QR's position and size on the result screen on the Screens → Result tab; that is also where you turn the QR off (see Result Screen). On the sharing page, the guest gets both their own drawing and the AI artwork; to give only the artwork, turn off Drawing Settings → Also serve the original drawing.
Before the event, scan a QR with your own phone and try the sharing page.
Turning off Enable Gallery Button only hides the gallery button on the sharing web page; it does not by itself block all gallery access. Separately check the kiosk gallery shortcuts for the welcome, drawing and result screens under Screens.
Expecting a QR on a kiosk without internet — the QR link doesn't work until the artwork is uploaded to the cloud.
Trying to turn off the kiosk QR with Enable QR Code — the kiosk QR is managed in Screens → Result → QR code.
Related topics
Email SharingResult ScreenDrawing Settings
