













Additional supported Canon cameras
AI Drawing Robot also supports the following Canon models.
| Model | Canon EDSDK |
|---|---|
| Canon PowerShot V10 | 13.17.10 |
| Canon EOS R5 Mark II | 13.18.30 |
| Canon EOS R1 | 13.18.40 |
| Canon EOS R50 V (EOS R50V) | 13.19.0 |
| Canon EOS R6 Mark III | 13.20.10 |
| Canon EOS R6 V (EOS R6V) | 13.20.20 |
EDSDK versions below identify the Canon SDK reference, not the AI Drawing Robot app version. Use the current app and camera firmware; available controls depend on the model and platform. Support does not mean every device has been physically tested by our team.
EOS R6 V: Canon added EDSDK/CCAPI support in firmware 1.1.0. Use firmware 1.1.0 or later. Canon
On Windows, the Canon SDK needed to support these models was added to the app in version 3.6.1. In older versions these cameras may fail to connect even if they appear in the camera list — update your app.
Cameras seen in use in the field
The following models were connected in our customers' booths and used in the app in the last 30 days (September 2026). A model missing from this list is not necessarily unsupported; if you use a Canon or Nikon that is not listed, do a test shot before the event.
| Model | Platform seen on |
|---|---|
| Canon EOS 5D Mark IV | Windows |
| Canon EOS 5DS | Windows |
| Canon EOS 7D Mark II | Windows, Mac |
| Canon EOS 60D | Windows |
| Canon EOS 70D | Windows |
| Canon EOS 77D | Windows |
| Canon EOS 80D | Windows |
| Canon EOS 200D | Windows |
| Canon EOS 250D (Rebel SL3) | Windows |
| Canon EOS 500D | Windows |
| Canon EOS 550D | Windows |
| Canon EOS 600D | Windows |
| Canon EOS 650D | Windows |
| Canon EOS 700D | Windows |
| Canon EOS 750D | Windows |
| Canon EOS 800D (Rebel T7i) | Windows |
| Canon EOS 850D | Windows |
| Canon EOS 1100D | Windows |
| Canon EOS 1200D | Windows |
| Canon EOS 1300D (Rebel T6) | Windows, Mac |
| Canon EOS 2000D | Windows |
| Canon EOS 4000D | Windows |
| Canon EOS M6 Mark II | Windows |
| Canon EOS M50 | Windows |
| Canon EOS M50 Mark II | Windows |
| Canon EOS R6 Mark II | Windows |
| Canon EOS R6 Mark III | Windows |
| Canon EOS R8 | Windows |
| Canon EOS R10 | Windows |
| Canon EOS R50 | Windows |
| Canon EOS R100 | Windows |
| Canon EOS RP | Windows |
| Nikon D3400 | Windows |
| Nikon D3500 | Windows |
| Nikon D5100 | Windows |
| Nikon D5200 | Windows |
| Nikon D5300 | Windows |
| Nikon D5600 | Windows |
| Nikon D7000 | Windows |
| Nikon Z 6II | Windows |
| Nikon Z 50 | Windows |
Sony cameras may appear in the camera list, but they currently do not work over USB.
- An event must be created and open for editing (the Event Settings screen should appear)
- Camera permission may be requested on first use (Mac; in 3.4.2 and later also in the installed Windows app — on Windows a webcam needs both Camera and Microphone permission) — if permission is not given, the camera cannot be turned on
- A supported DSLR (Canon / Nikon) must be connected for DSLR advanced settings and Set Settings with AI. Sony cameras may appear in the list but currently do not work over USB (no live image, no photos are taken); Fujifilm (Fuji) and Kodak cameras are not supported
Step 1 · Open Camera tab
Settings → Event Settings → 'camera'
🔎 Elements on the screen: Top tab strip: Camera tab (label: Camera); two main sections: Add Camera and Camera Settings.
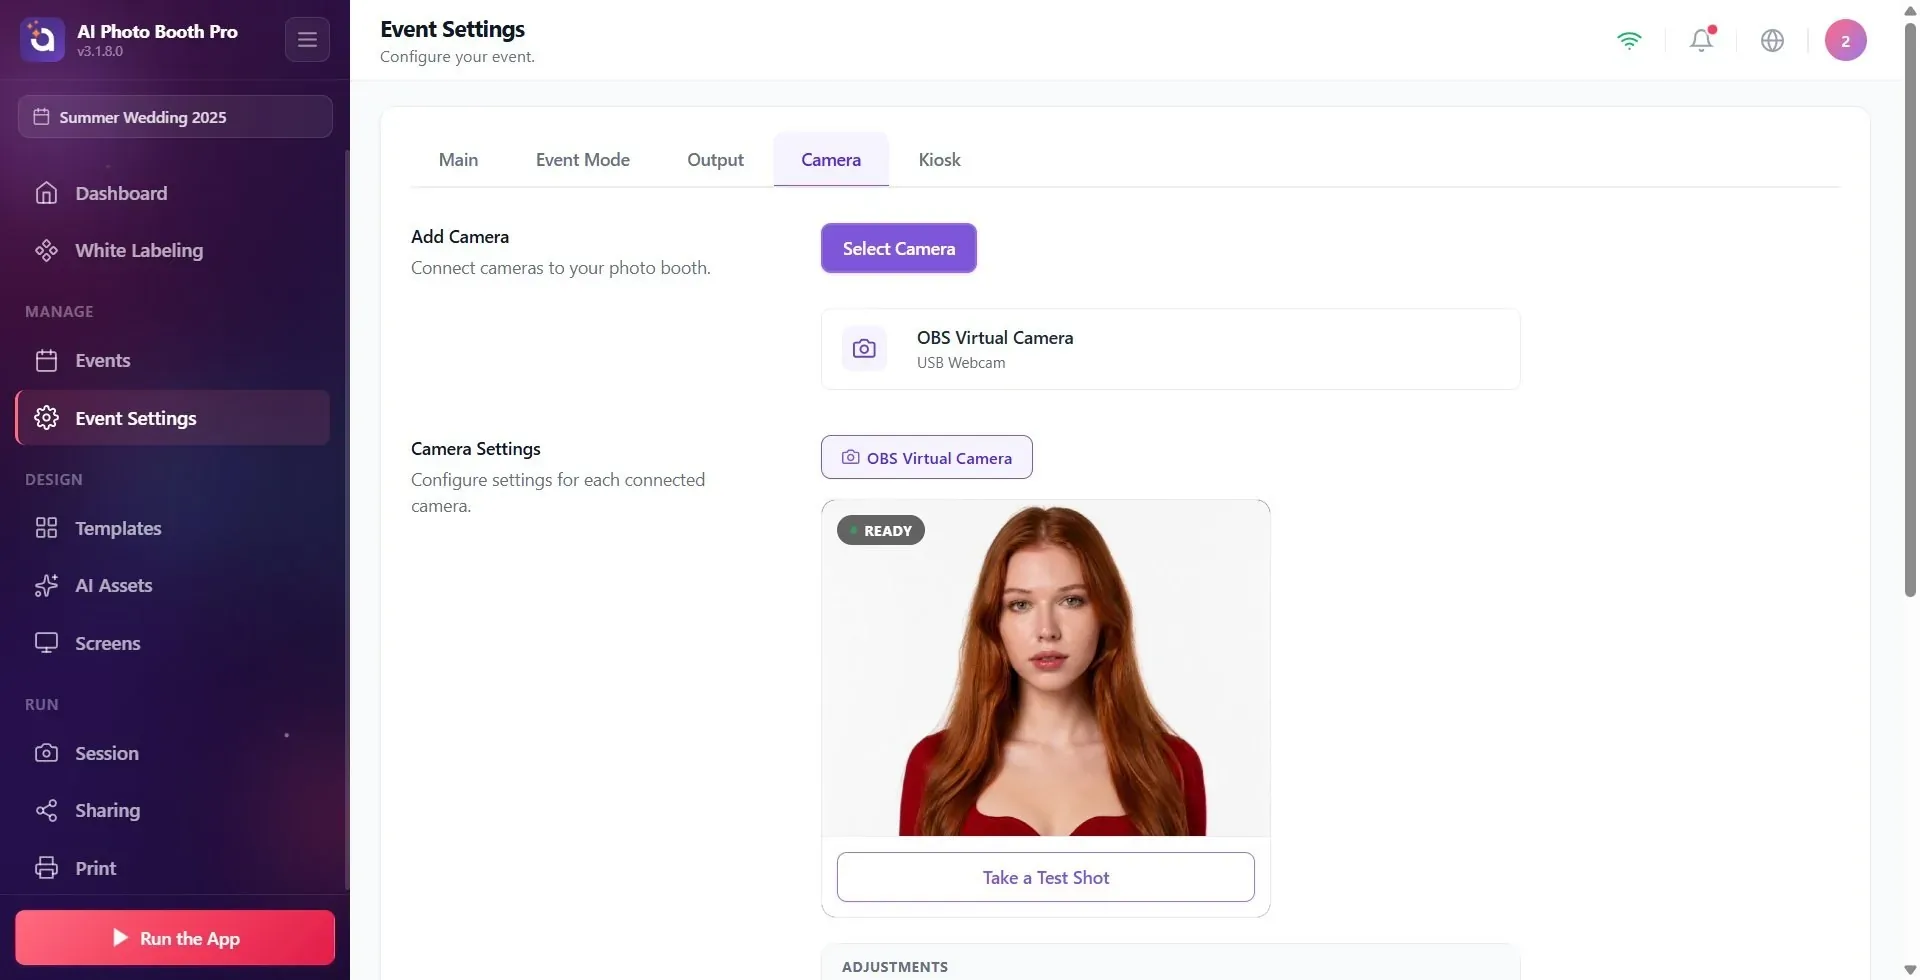
If camera permission is requested · Camera Permission window
Settings → Event Settings → 'Camera' (Camera Permission window)
The app checks camera permission when you open the Camera tab, when you select a webcam from the list, and at the start of every shot. If permission has not been granted, a window titled Camera Permission opens. If permission was only denied, the message is Camera access was not allowed, so the camera will not work. Please allow camera access to take photos. and the window closes with OK; permission is asked again on the next attempt. If permission is permanently blocked, the message is Camera access is blocked for this app, so the camera will not work. Open Settings and turn on Camera and Microphone access for this app — the camera does not start unless both are allowed. and the Open Settings button opens the app's own permission settings (on Windows: Settings → Apps → Installed apps → the app → Advanced options; on Mac: System Settings → Privacy & Security → Camera). After turning on Camera and Microphone permission there, select the camera again in this tab. If you are not going to use a camera (e.g. you will only work with Desktop Editing), you can close the window with the ✕ in the corner.
This window and the Open Settings button arrived with version 3.4.2; this is also the first version that checks camera permission on Windows. In older versions there was no way back from inside the app once permission was denied, and the camera might not open at all while the wrong cause was shown (e.g. as if it were a cable error) — update your app.
🔎 Elements on the screen: Camera Permission title; permission message; OK or Open Settings button; ✕ in the corner.
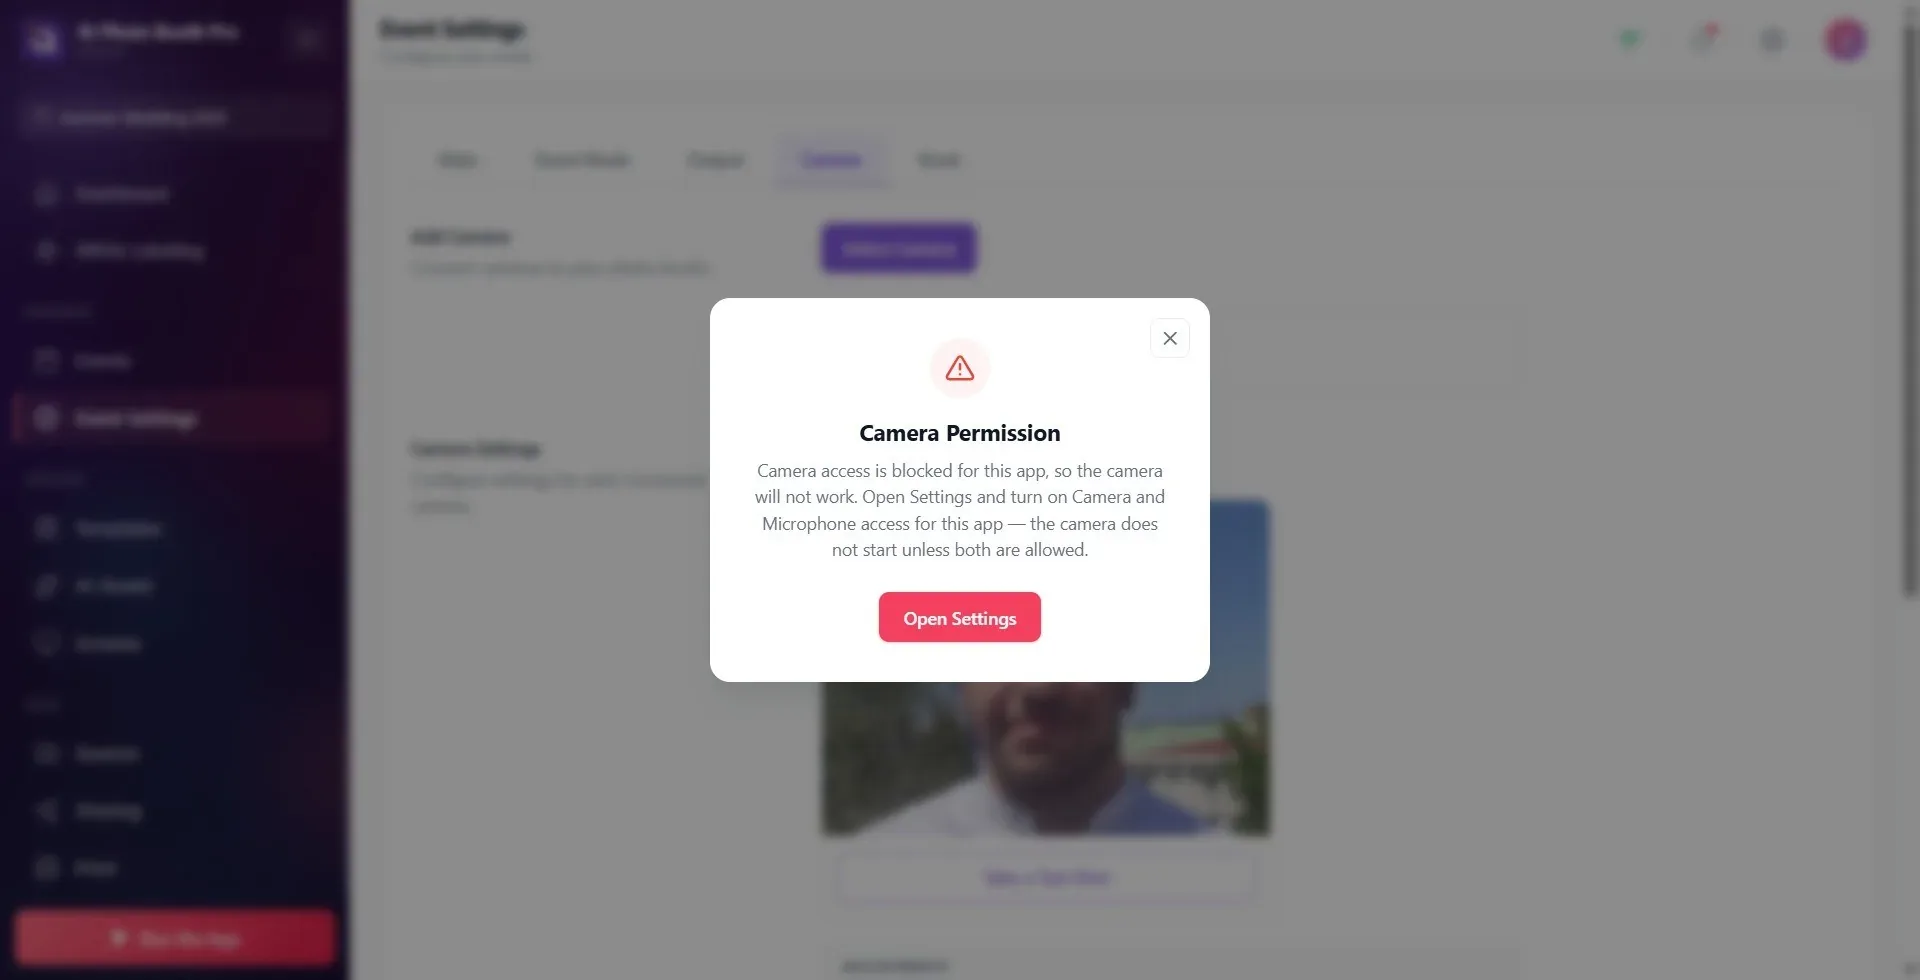
Step 2 · Open the camera adding window with Select Camera
Settings → Event Settings → 'Camera' (Add Camera window)
Click the purple Select Camera button in the Add Camera section. A window titled Add Camera opens; The subtitle is Select a camera to add to your connected devices.. The window lists all connected cameras, grouped by type.
🔎 Elements on the screen: title Add Camera + description Connect cameras to your photo booth.; Select Camera button; opened modal title Add Camera, subtitle Select a camera to add to your connected devices.
Step 3 · Select camera from the list and add
Settings → Event Settings → 'Camera' (Add Camera window)
Click on the camera row you want from the groups in the window. Clicking both adds that camera to the list and makes it active (shown in the live preview). Groups: Built-in Cameras (detail Built-in Camera), USB Cameras (webcams with detail USB Webcam, DSLRs with detail USB Camera (DSLR)), Virtual Cameras (OBS/ManyCam etc., detail with Virtual camera (OBS, etc.)) and Desktop Editing (detail with Import from file — camera import from file instead). The badge to the right of each row indicates the status: Active (currently used), Added (listed but not active), or Add (not yet added).
🔎 Items on the screen: Groups: Built-in Cameras / USB Cameras / Virtual Cameras / Desktop Editing; row badges: Active, Added, Add; Remove button on added rows.
Step 4 · Close window / refresh list
Settings → Event Settings → 'Camera' (Add Camera window)
If a newly installed device does not appear in the list, press the Refresh button at the bottom — the cameras will be scanned again and the Added/Active badges will be updated (while the scan is running, the Refresh button appears inactive; you can press it again once the scan finishes). To remove a camera from the list, use the Remove button in its row (if you remove the active camera, it will automatically switch to the next camera). When finished, close the window with Cancel (when you select a camera, the window closes automatically).
🔎 Items on the screen: Cancel and Refresh buttons under the window; Remove button on added rows.
Step 5 · Read connected camera status (offline / search — fixed camera)
Settings → Event Settings → 'Camera' (Add Camera · connected camera)
🔎 Items on the screen: Connected camera card: type icon + camera name + detail; No Camera Selected if empty; offline orange dot + Offline; spinner + Searching for camera... during search
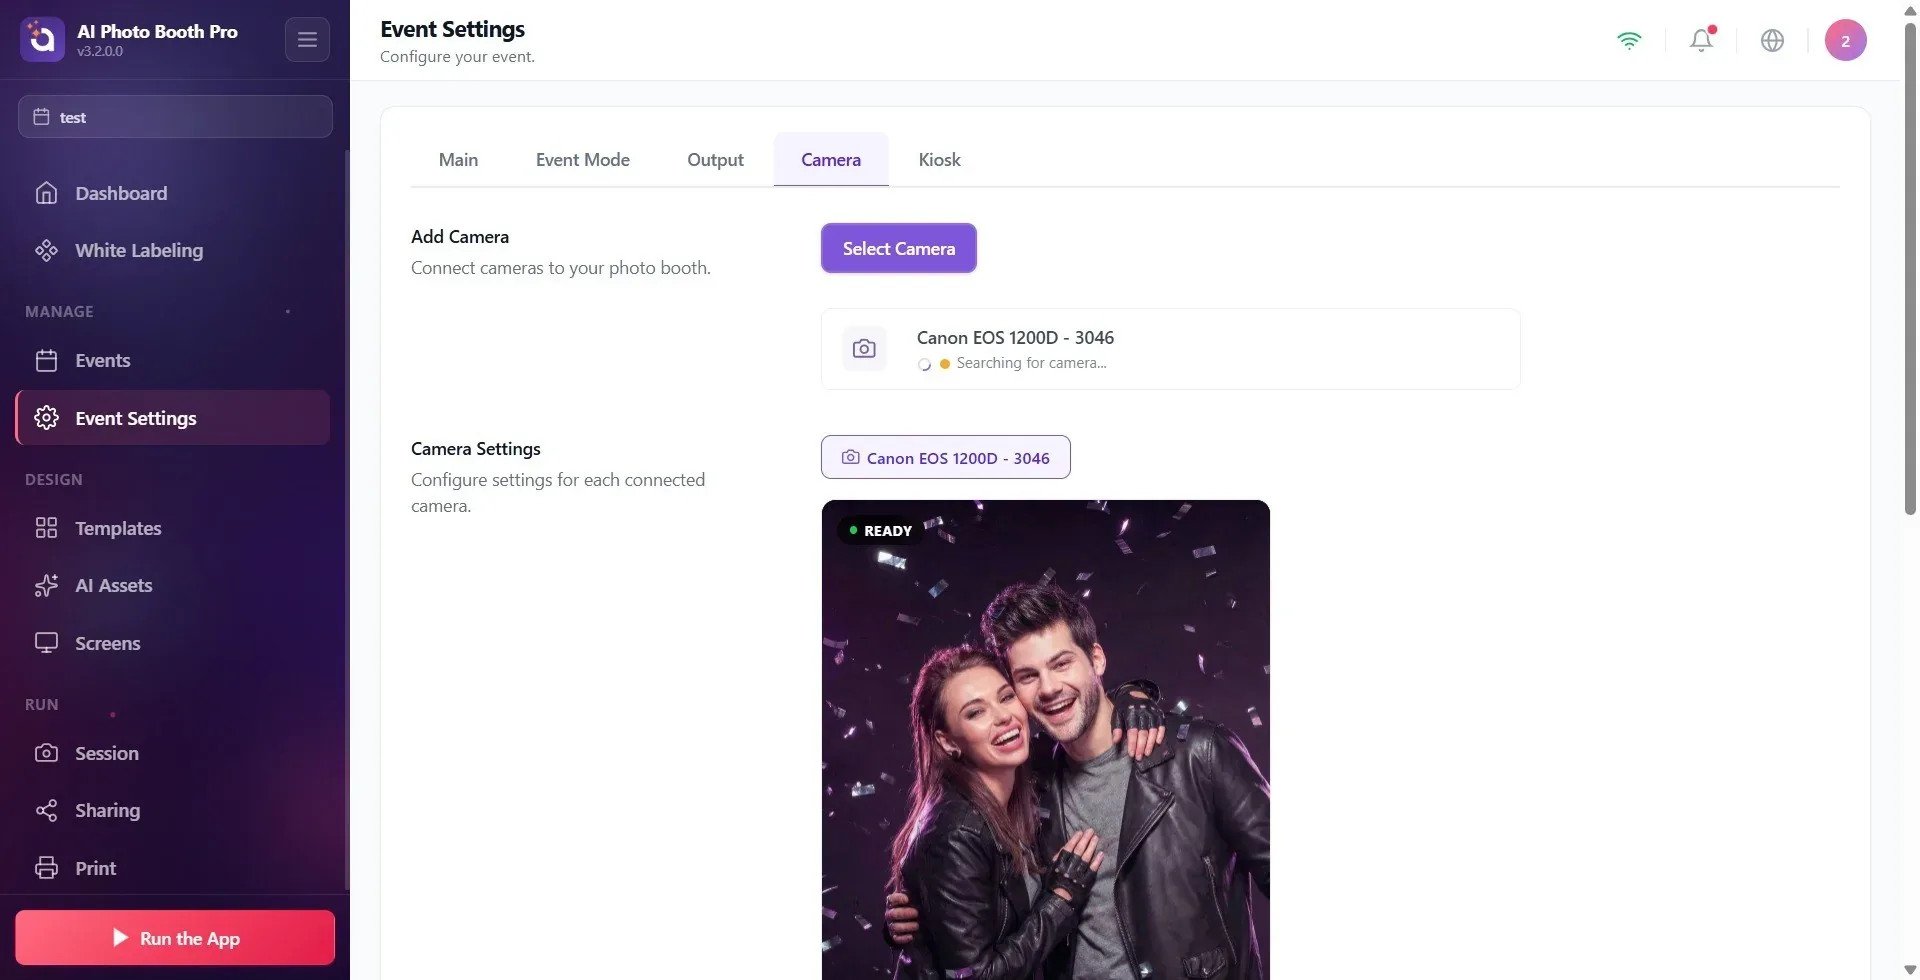
Step 6 · Examine the live preview and camera tab
Settings → Event Settings → 'Camera' (Camera Settings)
The Camera Settings section (description: Configure settings for each connected camera.) shows a tab with the name of the active camera and the live preview card below it. The Ready badge with a green dot in the corner of the card indicates that live streaming is running. If you added multiple cameras, to change the active camera, you open the Select Camera window in step 2 and click on another camera (the preview switches to the new camera).
🔎 Elements on the screen: Camera Settings title + description; camera tab (active camera name); live preview card; Ready badge (green dot).
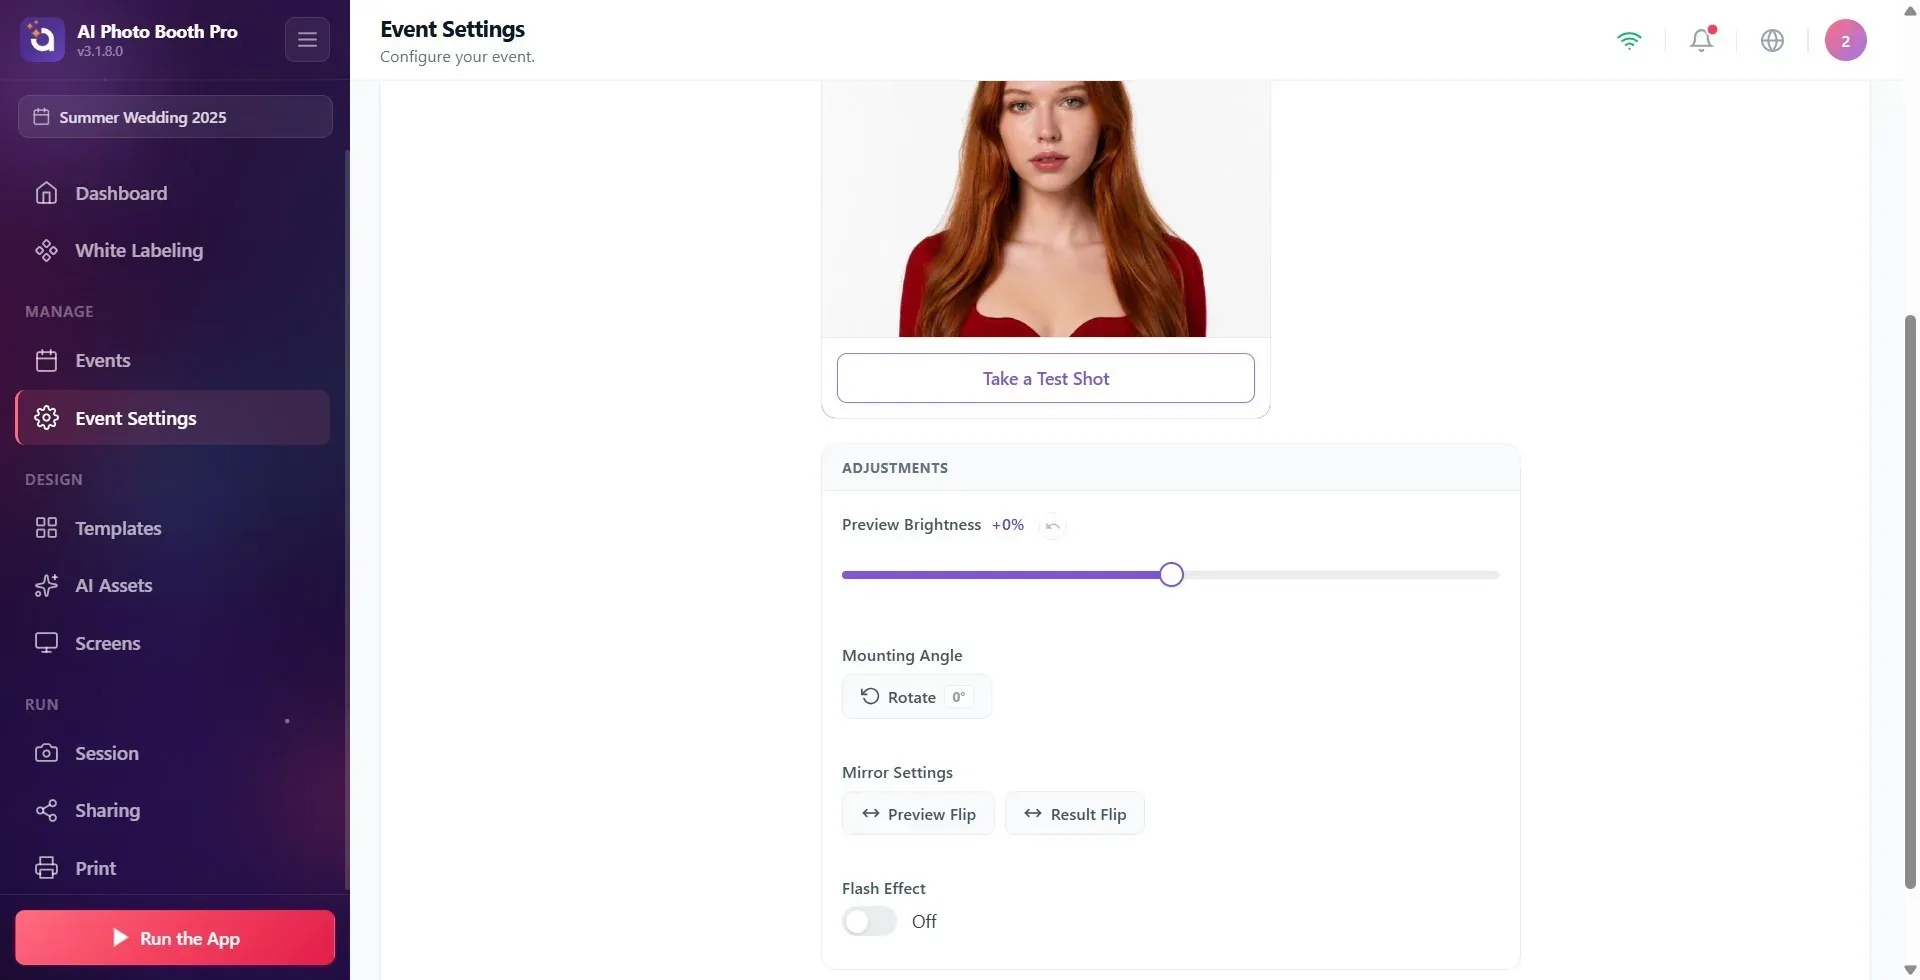
Step 7 · Take a test photo
Settings → Event Settings → 'Camera' (Camera Settings)
🔎 On-screen items: Take a Test Shot button (inactive while shooting); countdown ring + digit; Retake button after shooting.
Step 9 Adjustments — Preview Brightness
Settings → Event Settings → 'Camera' (Adjustments)
Lighten/darken the preview by dragging the Preview Brightness slider in the Adjustments panel. The percentage value next to the label is displayed instantly (e.g. '+0%'). The Reset button with the refresh circle icon returns the value to 0 (inactive if the value is already 0). Brightness is stored separately and permanently for each camera; It doesn't reset when you switch tabs/camera.
🔎 Elements on the screen: Adjustments panel title; Preview Brightness label + percentage indicator; slider; Reset button (round, with arrow icon).
Step 8 · Adjustments — Flash Effect
Settings → Event Settings → 'Camera' (Adjustments)
If you set the switch in the Flash Effect line to On, a soft edge-light will appear on the preview edge at the time of shooting; If you set Off this effect will be disabled. This screen-flash effect is applied both in the test shot here and in the real shot.
🔎 Elements on the screen: Flash Effect label; On/Off switch (On / Off).
Step 9 · DSLR Advanced Settings (only on supported DSLR)
Settings → Event Settings → 'Camera' (Advanced Settings)
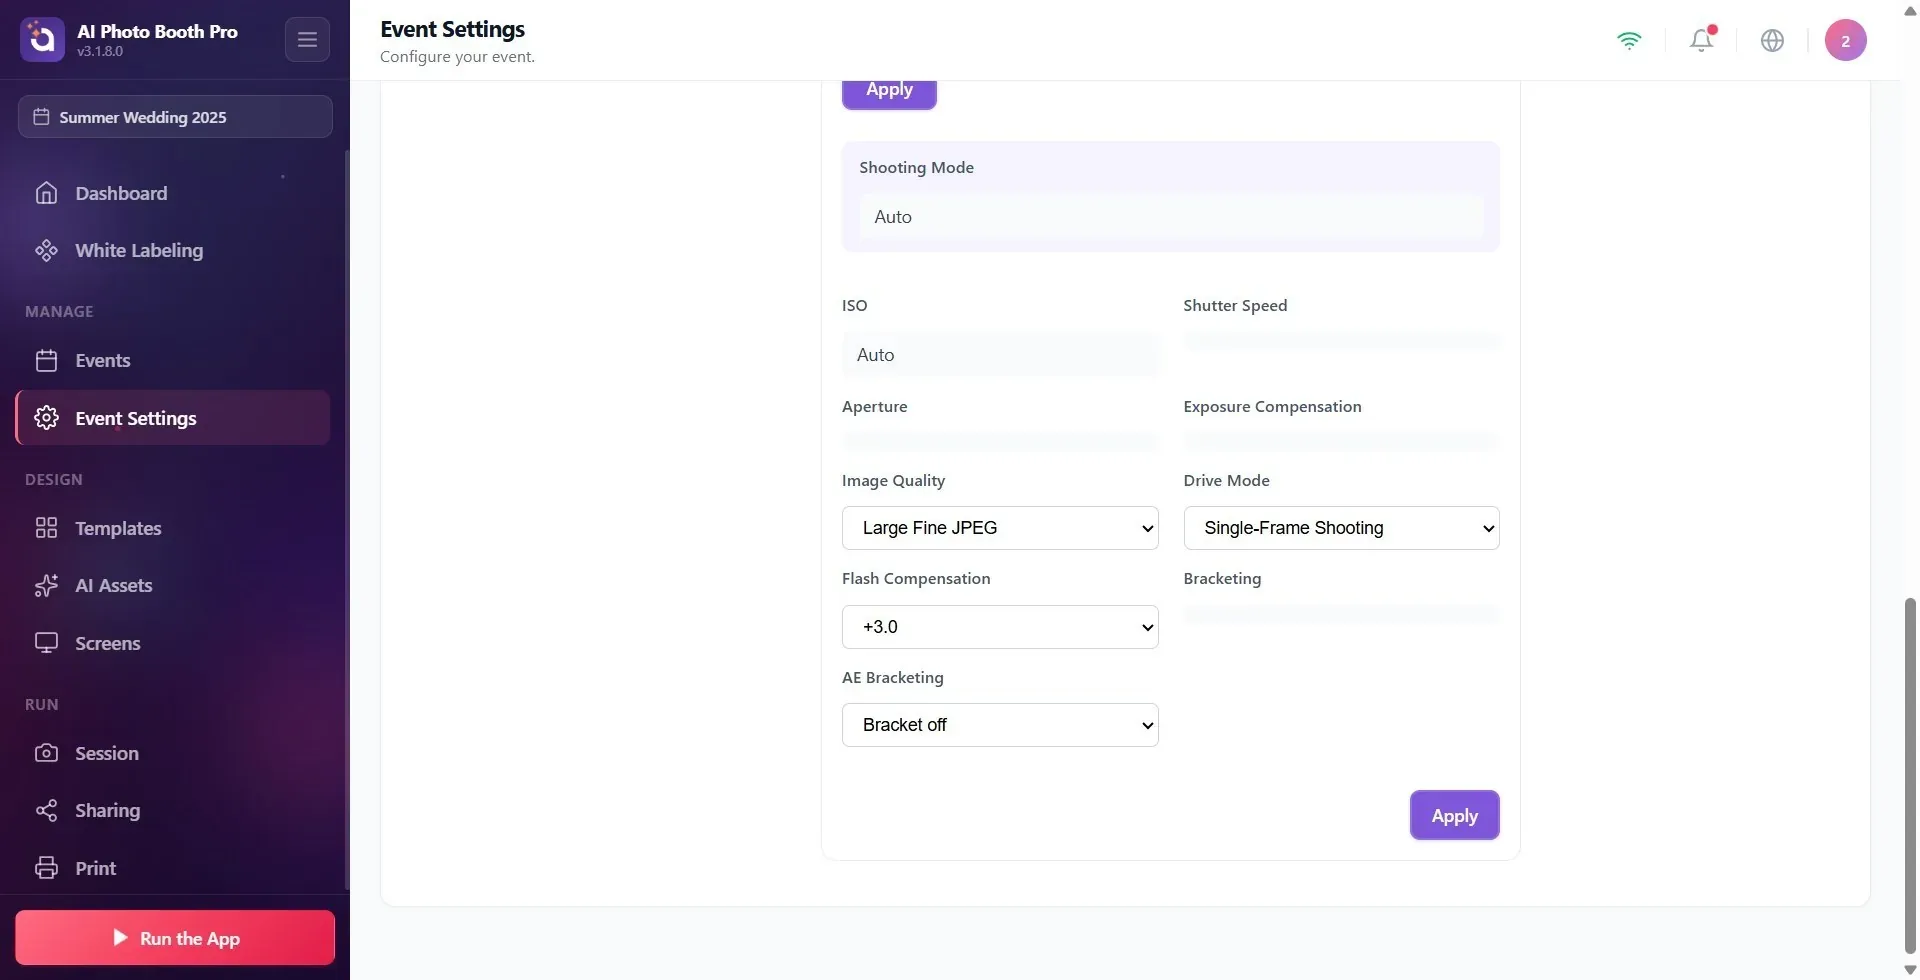
If the active camera is an adjustable DSLR, the Advanced Settings panel appears under Adjustments (the battery percentage may also appear in the header). From here, you select values such as Shooting Mode, ISO, Shutter Speed, Aperture, White Balance, Exposure Compensation, Focus Mode, Image Quality and Metering Mode from drop-down menus. Any value you select is first a 'draft' (the menu shows its difference from the current value in the camera with an orange border and a 'camera: X' label); press Apply to write to the camera — the button shows the number of pending changes (e.g. 'Apply (3)') and shows Applying settings... while they are being applied. With some cameras (e.g. consumer Nikon bodies) physical changes made on the camera are not reflected automatically; in this case, refresh the values from the camera with the Read Status button, or turn on the Auto Read switch to refresh them automatically every few seconds.
🔎 On-screen elements: Advanced Settings title + battery badge (Camera battery); mode drop-down (highlighted row); ISO/Shutter Speed/Aperture/White Balance etc. drop-down menus; Read Status button; Auto Read switch; Apply button (with the pending count); Applying settings... indicator.
Step 10 · DSLR — Set Settings with AI (optional, 2 credits)
Settings → Event Settings → 'Camera' (Camera Settings DSLR)
After first taking a test photo on the DSLR camera, the Set Settings with AI button appears under Retake (next to it the '2 Credits' label). This button makes the artificial intelligence analyze the frame you took (Analyzing settings…) and automatically writes the values it recommends, such as ISO / shutter / aperture, into the draft; also shows a general comment (light/composition) at the top. Suggestions don't apply directly — inspect, leave what you want, and type into the camera with Apply. If the credit is not enough, the credit purchasing screen opens.
🔎 On-screen elements: Set Settings with AI button + '(2 Credits)' label; Analyzing settings… during analysis; AI hint icon in menus; AI comment strip at the top (closed by Dismiss).
If you don't like the values suggested by the AI after applying them, you can return to the values from before the analysis with the Revert to settings before AI button (3.8.0 and later). The AI no longer suggests a scene or automatic shooting mode; it suggests values only in modes such as M, Av, Tv and P.
Step 11 · DSLR — Restore your previous settings? window
Settings → Event Settings → 'Camera' (when a DSLR is connected)
When you connect a DSLR (plugging it into USB, selecting it from the list, or turning the body off and on), the Restore your previous settings? window opens if the settings on the camera differ from the ones you last used with this camera; the subtitle shows the camera name and This camera's settings are different from the ones you last used. If the settings are the same, the window does not appear at all. The See what changed button (with the number of differences next to it) opens the list of differences: Setting · Previous · On camera. Use my previous settings writes the old values to the camera; Keep camera's settings continues with the camera's current settings. The window has no close button (✕) — you have to choose one of the two options.
This window arrived with version 3.3.0; in older versions you are not asked about previous settings when the camera is connected.
🔎 Elements on the screen: title Restore your previous settings?; subtitle (camera name — This camera's settings are different from the ones you last used.); See what changed button + number of differences; difference table (Setting / Previous / On camera); Keep camera's settings and Use my previous settings buttons.
The logic of each line in the tab: first ADD + ACTIVE the camera from the Select Camera window, then preview + fine-tune with the settings in the Camera Settings at the bottom.
Take a Test Shot is the fastest way to verify framing/lighting/color before actually shooting; In DSLR it is also a prerequisite for AI recommendation (test shooting required first).
The camera is 'fixed': if the selected camera temporarily disconnects, the application does not jump to another camera, it displays Offline + Searching for camera... and tries to reconnect automatically.
Brightness is stored separately for each camera and is persistent; It doesn't disappear when you change tab/camera.
On a DSLR, the values you choose are sketch first (orange edge + 'camera:X'); You must press 'Apply' for it to be processed into the camera.
On some DSLRs, such as the consumer Nikon, physical translations on the body are not immediately reflected on the screen — refresh with Read Status or turn on Auto Read.
If high resolution/RAW is selected on a DSLR, a yellow warning card appears (transfer slows down); lower resolution (Small) or JPEG is recommended for faster streaming. Other red or yellow warning cards may also appear below the preview (camera in automatic mode, camera refused to save to the card, camera refused live view); follow the instructions in the text — details in the Camera Problems article.
For virtual camera (OBS), first start streaming with Start Virtual Camera in the source app; Otherwise, the camera appears connected but no image appears.
Desktop Editing is not a camera; mode to import photos from file instead of camera (Import from file).
Only adding the camera from the Select Camera window but not activating it: clicking on the line both adds and activates it; A camera with a Added badge is inactive and will not appear in the live preview.
Deny when camera permission is requested: without permission the camera does not open; the app may switch to Desktop Editing so that the booth keeps running, and the warning Camera permission denied — the camera will not work. Allow camera access for this app, then pick your camera again under Settings → Camera. appears (in versions older than 3.4.2: 'Camera permission denied. Switched to Desktop Editing mode.'). On Windows, a webcam also needs Microphone permission turned on along with Camera.
Ignoring 'Camera unavailable' error: camera must be connected and not disconnected (check cable/USB).
'Another app is using the camera' error: trying again without closing the other app holding the webcam (Zoom, camera app, etc.).
Trying to connect without starting the broadcast on OBS/virtual camera: 'Virtual camera is installed but not broadcasting' warning appears; Launch the virtual camera in the source application and try again.
On a DSLR, changing the value from the drop-down menu and not pressing 'Apply': the change remains in the draft, not written to the camera.
Calling Set Settings with AI without taking a test shot: the button is activated only after a test shot and costs 2 credits; suggestions are not automatically applied, Apply is required.
