













Control Panel is the main screen that opens after logging in; From here you see your subscription/credit/event summary, go to all sections of the application with the left menu, launch the cabin and log out.
- You must be logged in to the application — Control Panel is only visible while logged in
- Internet connection is recommended to keep metrics (AI Credits, subscription) up to date — if there is no connection, values may remain '—' or old
Step 1 · Control Panel overview
Dashboard
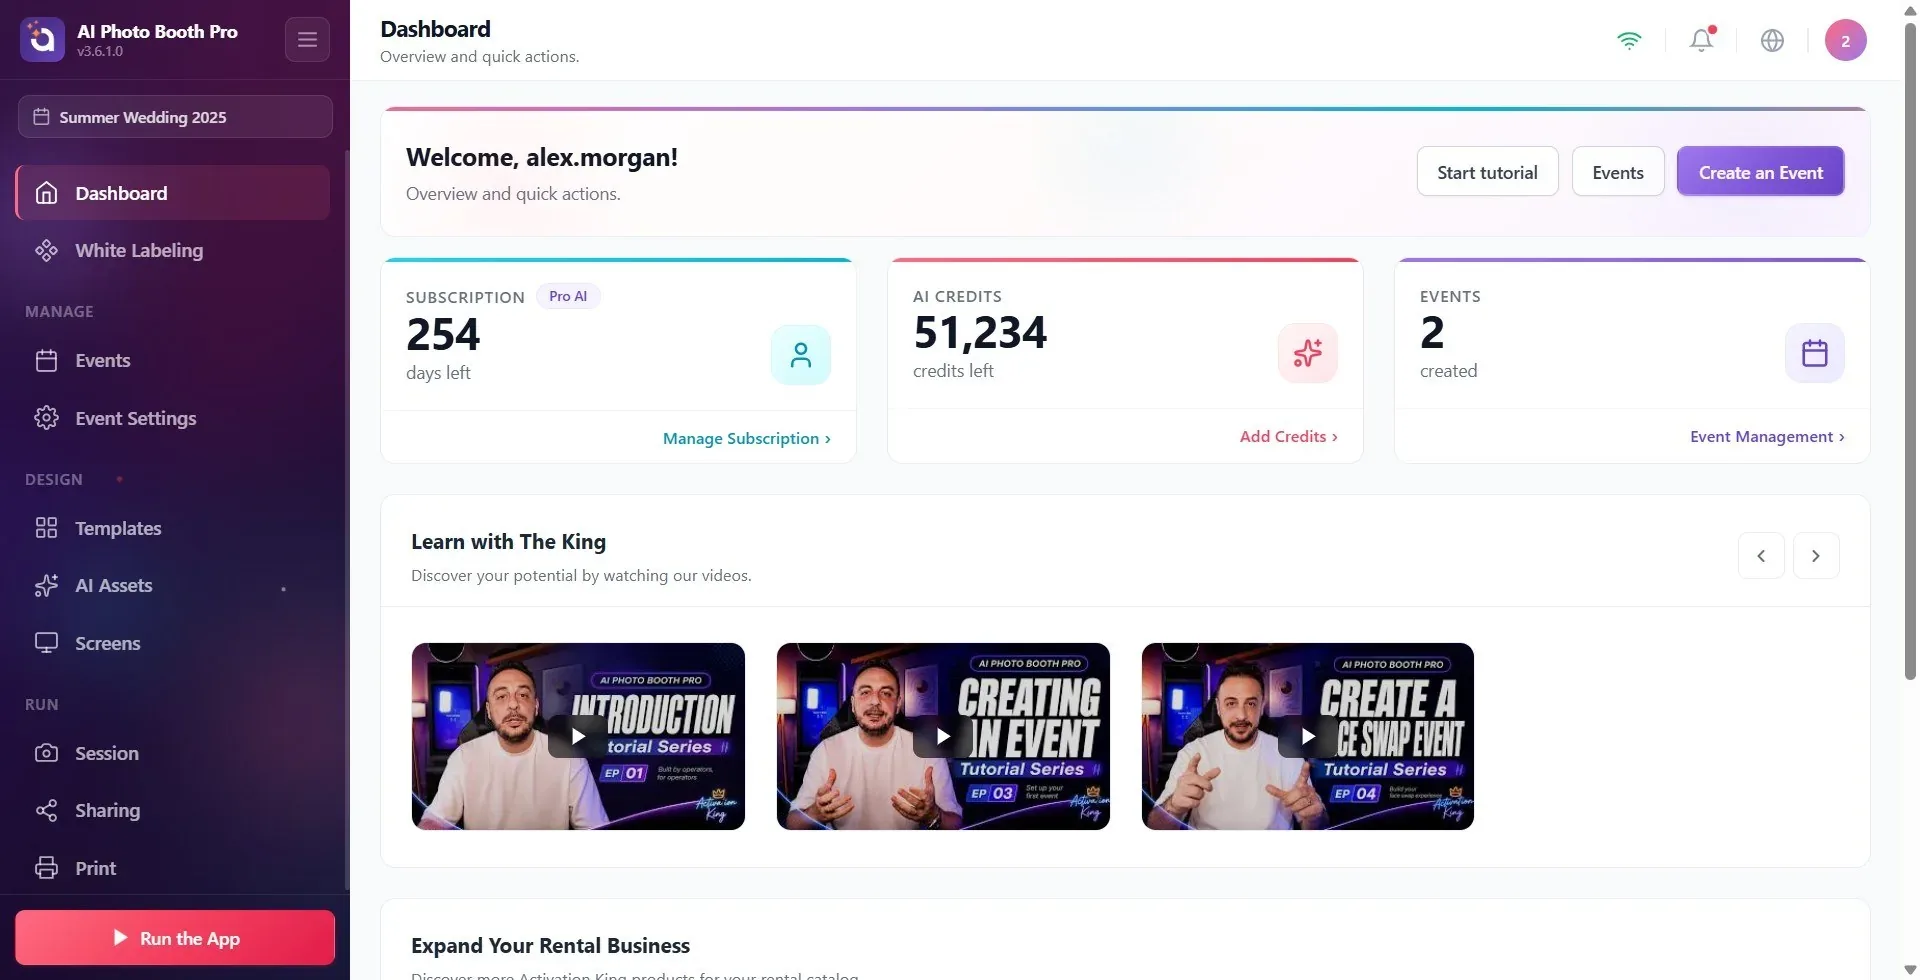
After logging in, the Control Panel opens directly (main screen). At the top is the welcome banner, below it are the information banners (trial/update), then the three metrics cards (Subscription, AI Credits, Event), below them the Learn with The King training videos, and at the bottom is the product section Expand Your Rental Business. On the left is the sidebar (menu), and at the top is a top bar (WiFi status, notifications, language, user menu).
🔎 On-screen elements: Welcome banner + 3 metrics cards + training videos + product section; sidebar on the left, top bar on the top
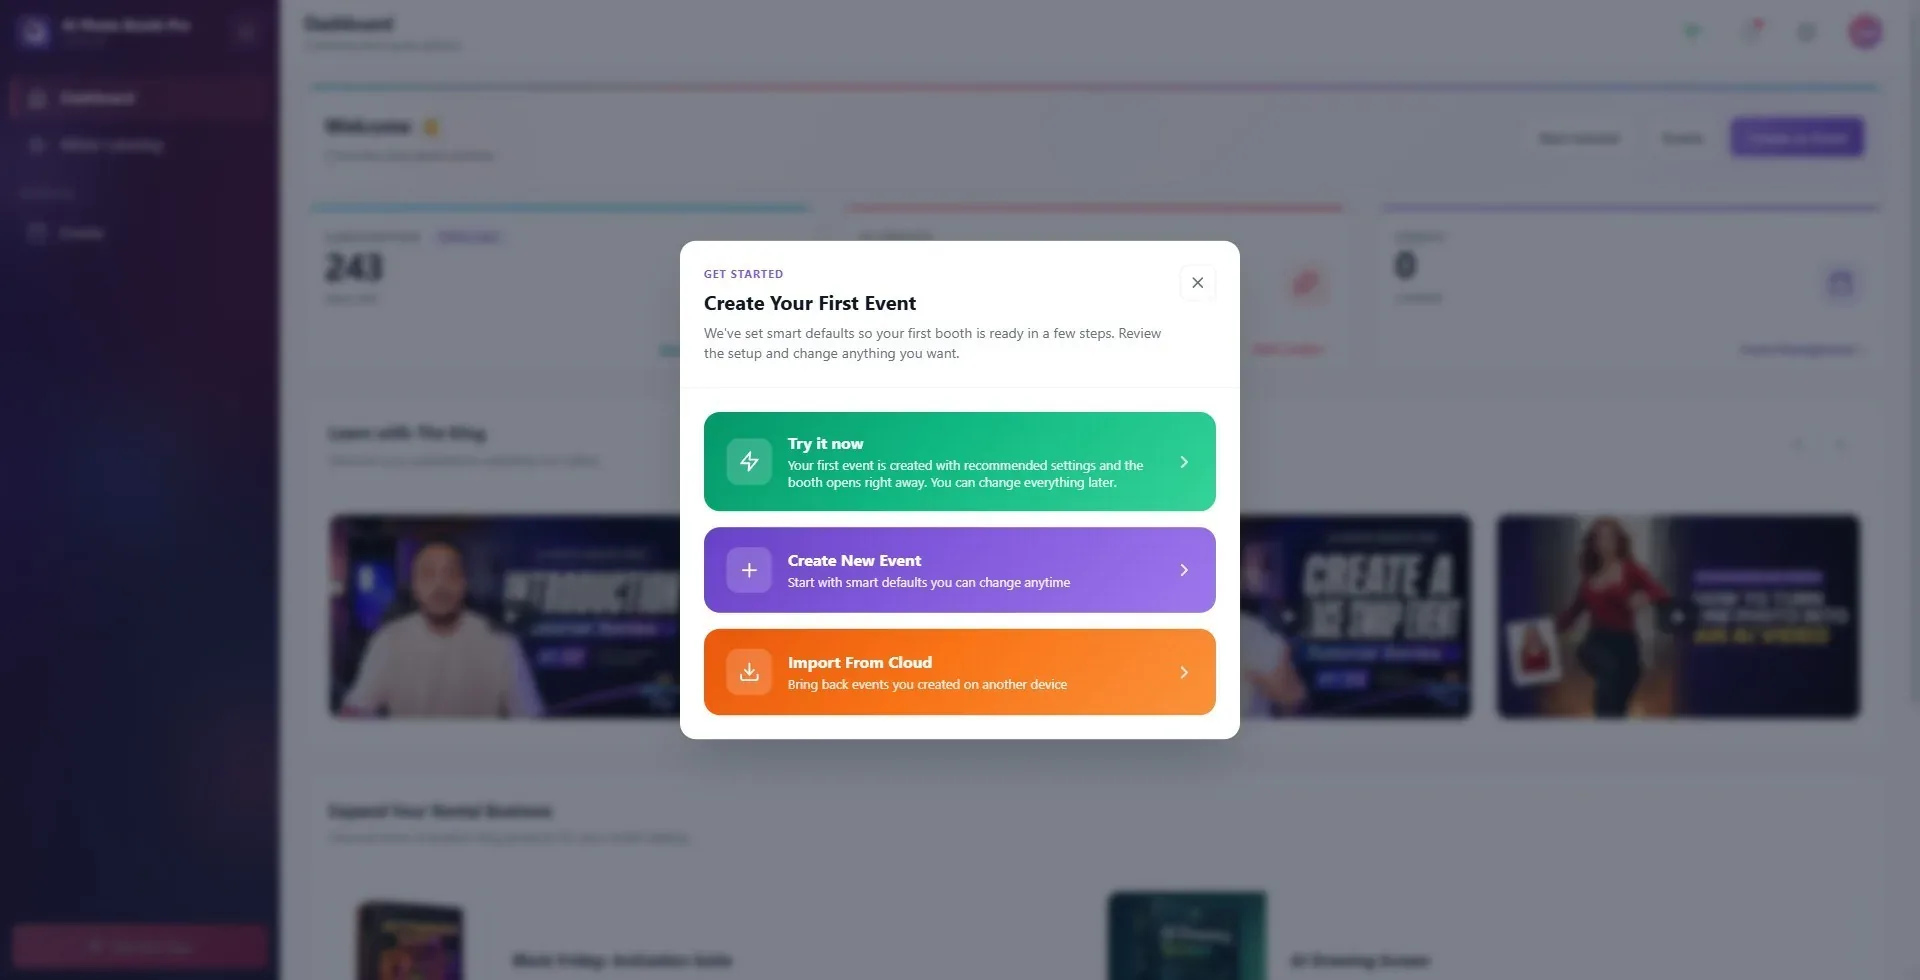
Step 2 · First-time entry: the "Create Your First Event" welcome window
Dashboard → Welcome Window
3.9.0 and later: there is also a Try it now card at the top (three cards). In 3.4.0–3.8.x there were two cards (Create New Event / Import From Cloud). In older versions the heading was Welcome! Let's get started and there were three cards: Start New Event, Import Old Cloud Events, Start tutorial.
🔎 On-screen elements: GET STARTED label + modal heading Create Your First Event + subtitle; three cards: Try it now (green) / Create New Event (purple) / Import From Cloud (orange); close (X) in the top right
Step 3 · Welcome banner and quick action buttons
Dashboard
The top banner welcomes you with the title Welcome ('Welcome, {name}!' if your name is registered); It says Overview and quick actions. under it. There are three buttons on the right: 'Start tutorial' (starts the guided demo tour), 'Event' (opens the Event Management screen) and the purple 'Create an Event' button (directly opens the new event creation flow).
🔎 Elements on the screen: Welcome title + 'Launch tutorial' | 'Event' | 'Create an Event' buttons
Step 4 · Information banners: Trial and Update
Dashboard
Two conditional banners may appear under the welcome banner. If you are in a trial period, the 'Free Trial — {days} days left' banner appears; the Get Full Access button opens the subscription purchase screen. If a new version of the app is available, the 'Update Available — {version}' banner appears (on a test account, if it is a version still in testing, (Test version) is shown next to it); tapping the banner or the View Update button opens the Changelog window, and Update Now there opens the store or download page. While a new version is available, an Update Available card also appears at the bottom of the sidebar. Details: Document 69 (App update). These banners appear only when the relevant condition is met (they are not shown if there are no trial days left or no update is available).
🔎 On-screen elements: 'Free Trial … days left' banner + Get Full Access; Update Available banner + View Update
Step 5 · Metric cards: Subscription, AI Credit, Event
Dashboard
Three summary cards show your status. Subscription card: plan badge (e.g. Trial/Pro/Ultimate) + days left with number of days remaining, Manage Subscription link below (opens subscription/purchase screen). AI Credits card: remaining credit + credits left, below which is the Add Credits link (opens the credit purchase screen). Event card: number of events you created + created, below which is the link to Event Management (opens the Events screen). All cards are clickable: tapping anywhere on a card opens the same screen as the link below it. The AI Credit value appears as '—' until it arrives from the server.
🔎 Items on the screen: Subscription + Manage Subscription | AI Credits + Add Credits | Event + Event Management

Step 6 · Learn with The King training videos and the Expand Your Rental Business product section
Dashboard
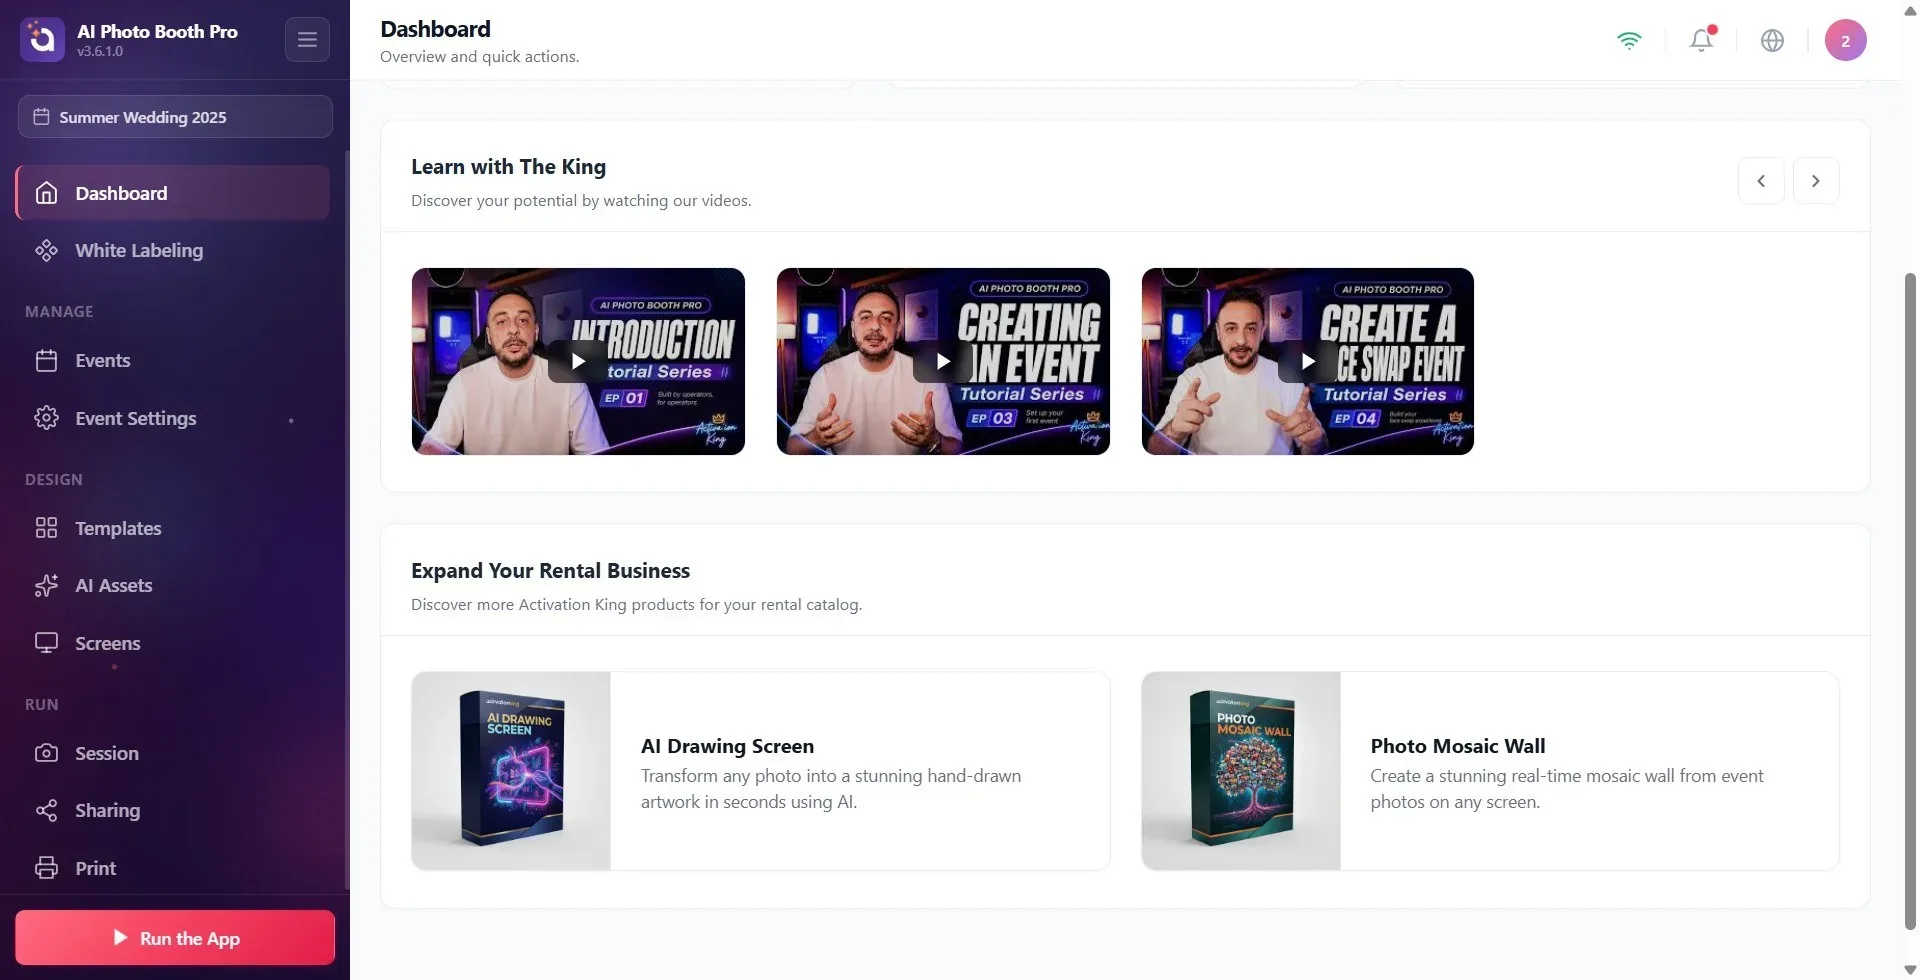
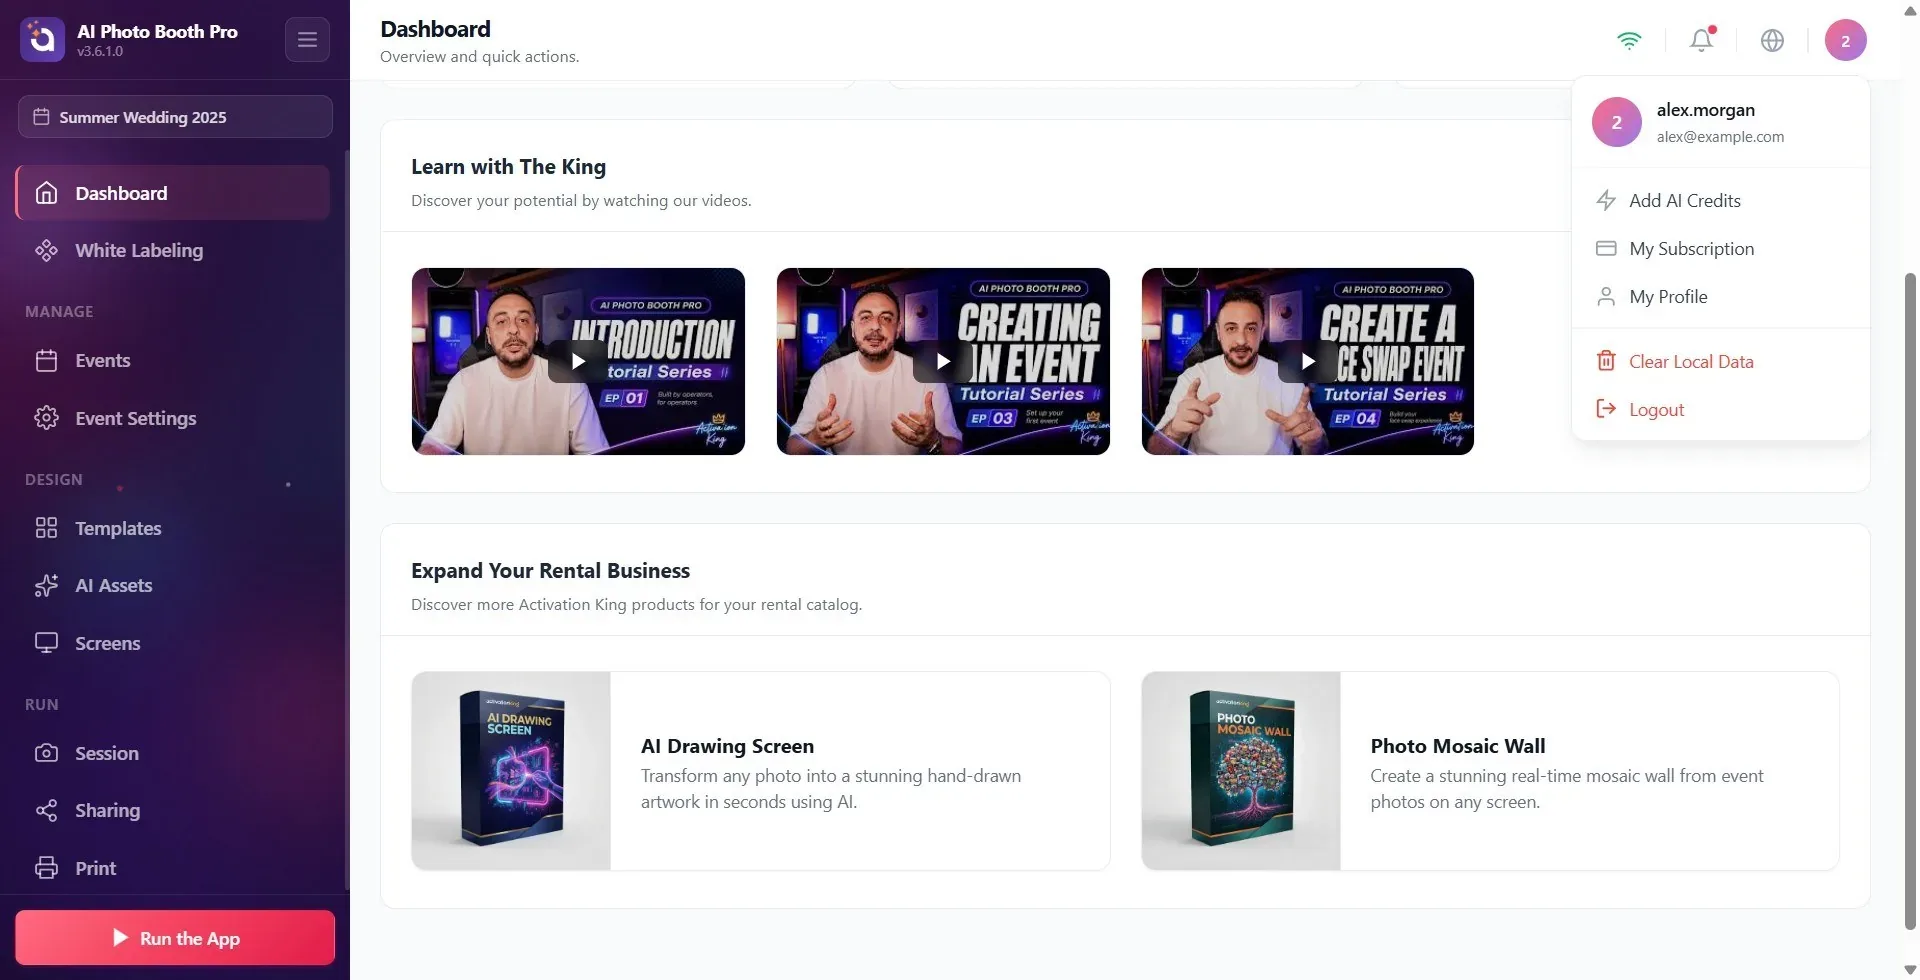
The Expand Your Rental Business section at the very bottom of the page (with the description 'Discover more Activation King products for your rental catalog.') introduces additional Activation King products (e.g. 'AI Drawing Screen', 'Photo Mosaic Wall'). Tapping a product card does not open a feature within the app; it opens the relevant product page (activationking.com) in the device's browser. The product list also comes from the website; the app you are using is not included in the list.
You can hide both sections: turn on the Hide Promotional Sections switch in White Labeling → App tab. This setting only takes effect while your plan includes white labeling; if the plan is downgraded, the sections appear again.
🔎 On-screen elements: Learn with The King title + ‹ › arrows + video cards; Expand Your Rental Business title + product cards ('AI Drawing Screen', 'Photo Mosaic Wall')
Step 7 · Navigating via sidebar (left menu)
Dashboard
🔎 Elements on the screen: Sidebar groups: Manage | Design | Run; active event name label at the top; the collapse-menu button at the top, to the right of the logo
Step 8 · Top bar: connection status, notifications, language and user menu
Dashboard
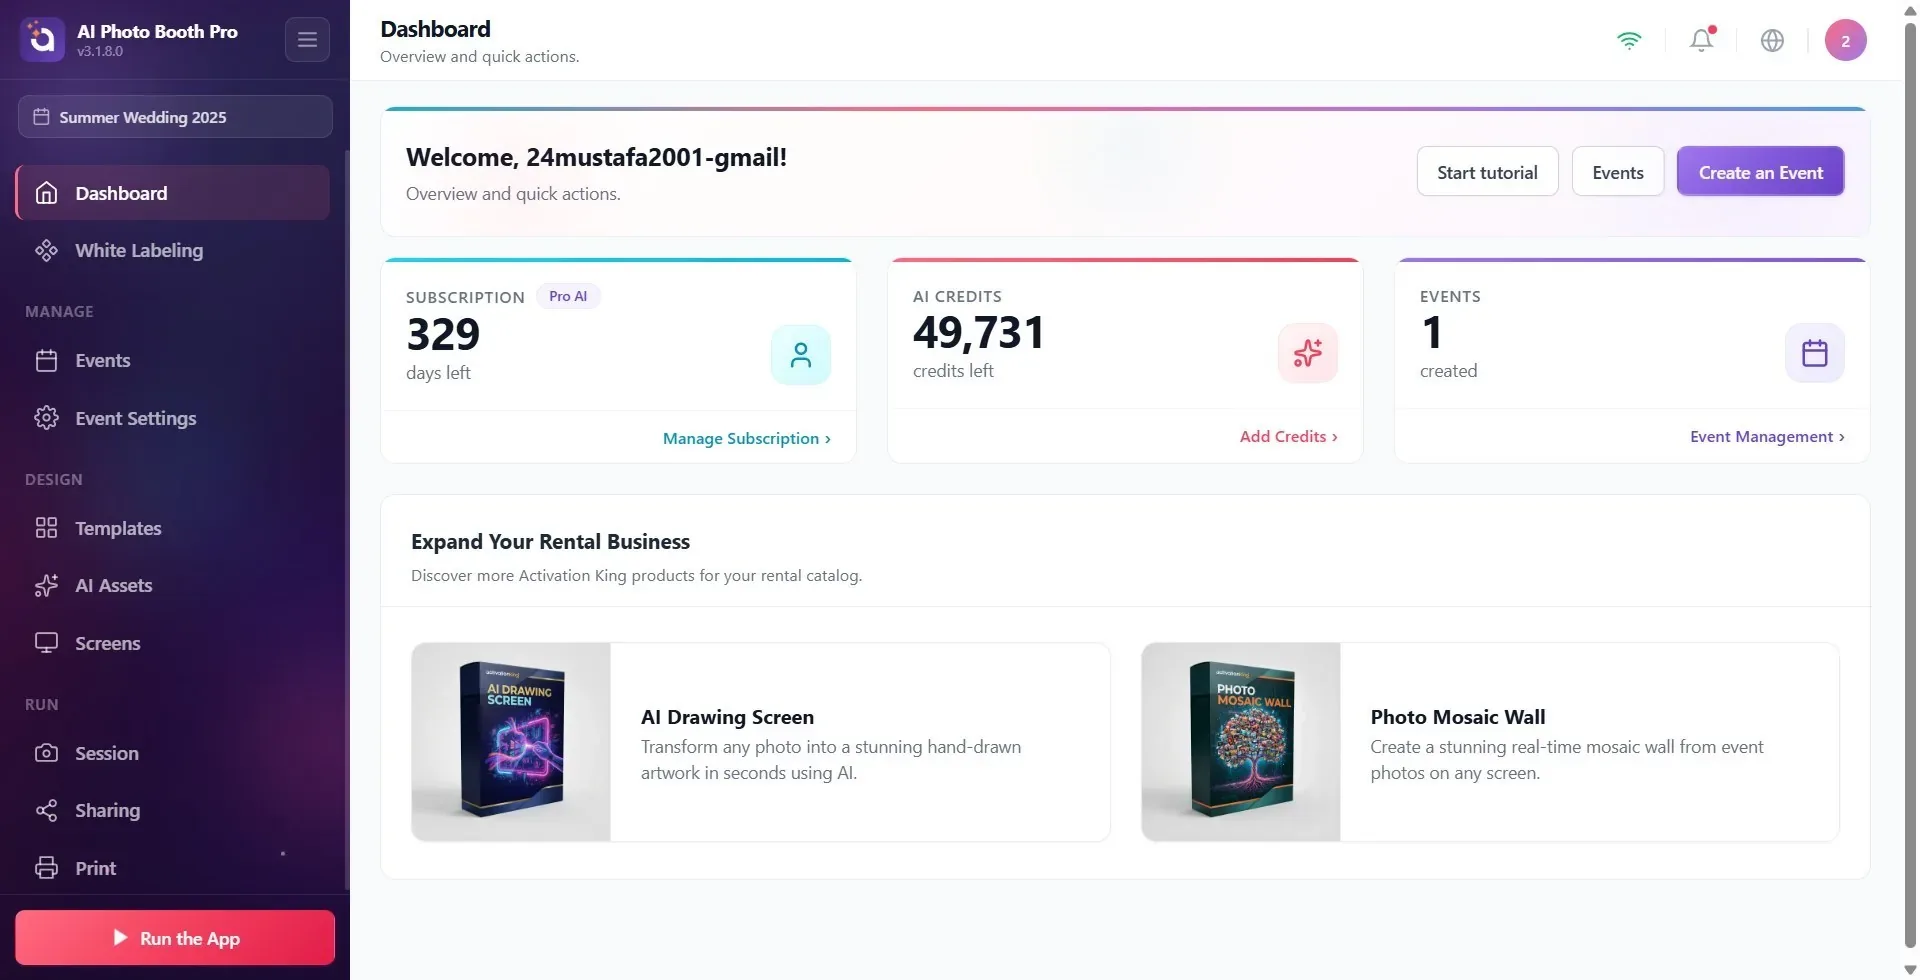
In the top bar at the top right: the WiFi icon shows the online/offline status (Connected / No Internet); the bell icon opens the Notifications list (a red dot appears if there are unread ones); the globe icon opens the language selector (11 languages including Turkish); the badge (avatar) at the far right opens the user menu; if you signed in with an account that has a profile photo, such as Google, the badge shows your photo, otherwise your initials. The user menu has Add AI Credits, My Subscription, My Profile and, at the bottom, the red Clear Local Data (Windows only), Delete Account (Mac only; Document 70) and Logout. On iPad and Mac, My Profile is not in the menu (3.5.2 and later). Clear Local Data (3.5.4 and later) permanently deletes all photo, video and event data on this device after asking for confirmation, and restarts the app; content that has not yet been uploaded to the cloud is lost.
🔎 Items on the screen: WiFi status | Notifications | language selector | avatar → user menu (Add AI Credits, My Subscription, My Profile — not on Mac, Clear Local Data — Windows only, Delete Account — not on Windows, Logout)
Step 9 · Logout
Dashboard
To log out, tap the avatar badge in the top right and tap the red Logout option at the bottom of the user menu that opens. Are you sure you want to log out? confirmation window appears; With Yes the logout is completed (you return to the login screen), with No you cancel.
🔎 Items on the screen: User menu → Logout → confirmation window Are you sure you want to log out? (Yes / No)
The Run the App button is inactive (dimmed) without selecting an event — create or select an event first.
If you see '—' on the AI Credit card, the value has not yet been loaded from the server (internet required); When loaded, the real number comes.
Subscription and credit information syncs with the server in the background each time the Control Panel is opened — post-purchase values are updated shortly.
The activity name label at the top of the sidebar indicates which activity you are currently configuring; To avoid trading in the wrong tab, look here.
Trial and update banners are conditional: they will not appear at all if there are no trial days left or if there is no new version.
The "Create Your First Event" welcome modal only appears when the device genuinely has zero events (typically on first setup); there's no way to bring it back deliberately afterward — the same actions (new event, import from cloud) and the tutorial are always reachable from the welcome banner buttons and the left menu as well.
Mistaking missing tabs for error — Event Settings/Templates/Screen Design/AI Assets/Session/Sharing/Print is intentionally hidden without selecting the event.
Pressing the Run the App button and getting no response — the button only works when the event is selected; When passive, the window does not open.
Thinking the credit is zero when the AI Credit is '—' — this is just a 'not loaded yet' indicator.
Mistaking product cards (AI Drawing Screen, Photo Mosaic Wall) for an in-app feature — they redirect to an external promotional site (activationking.com).
The Manage Subscription / Add Credits links on metrics cards are mistaken for informational information — they open the purchase / subscription screen.
Thinking you skipped the confirmation window when logging out — Logout asks for Are you sure you want to log out? confirmation first; The exit is not completed without saying Yes.
Related topics
Creating an Event Event Management (Events) Event Settings → Main Run the Application (Session)
