













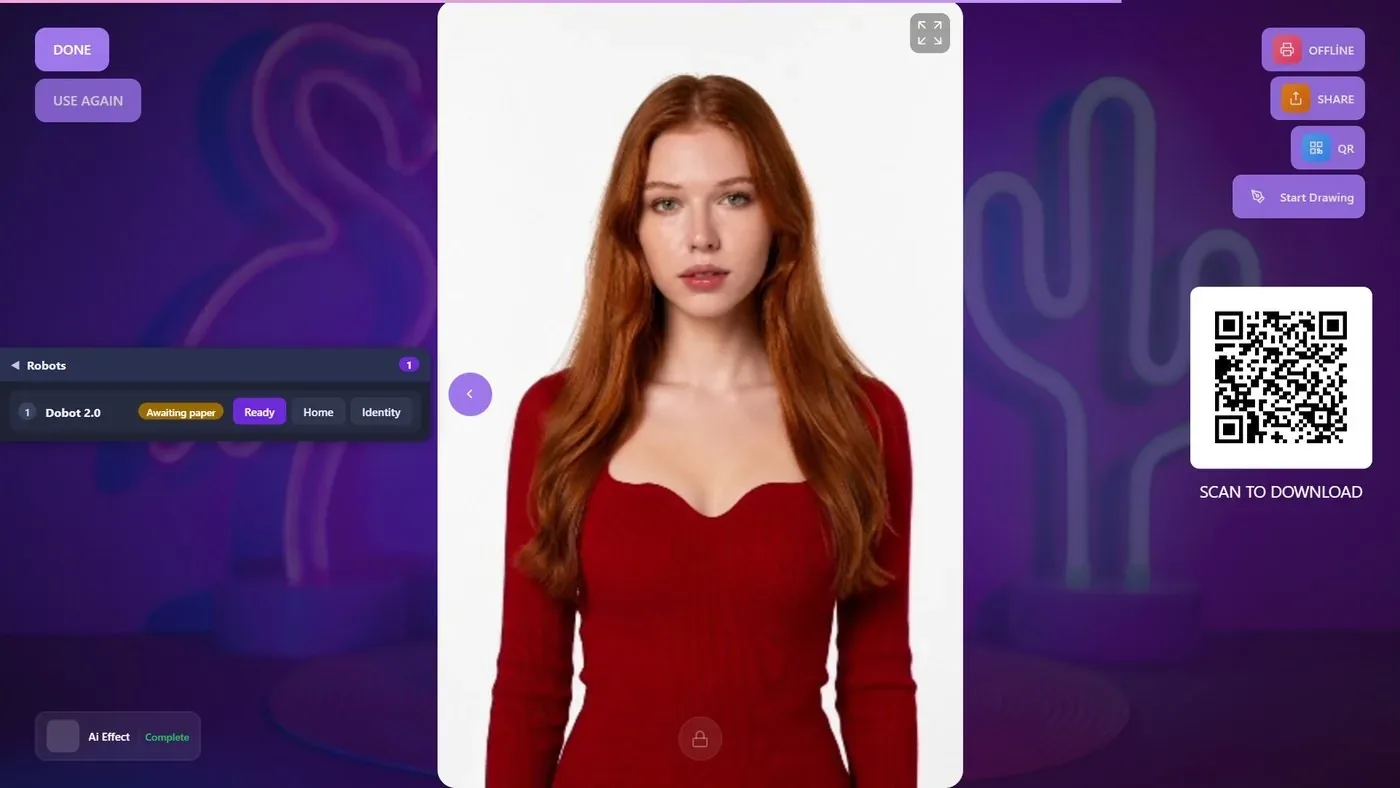
The Robots panel is a small panel on the guest screen that shows every connected robot and its status. During an event you use it for the one job that repeats all day: telling the robot that a fresh sheet of paper is in place. You can also stop a drawing, send the arm home and find out which arm is which, all without leaving the guest screen. This article explains each status and each button.
- The panel sits on the left edge of every guest screen as a thin strip with one coloured dot per robot. Tap the strip to open it, tap again to close it.
- After every drawing the robot shows Awaiting paper. Take the drawing, put in a new sheet, then press Ready.
- Only a robot that shows Ready takes the next drawing. Drawings started while no robot is Ready wait in line.
- While a robot draws, its row shows the progress and one red Cancel button.
- Home sends the arm to its home position; Identity makes the arm swing so you can see which robot the row belongs to.
Where the panel is
Guest screen → left edge
After you press Run the App → Start the Drawing Robot, the panel is on every guest screen, in the middle of the left edge. No PIN is needed to open it.
Closed, it is a thin strip with an arrow, the number of connected robots and one dot per robot. The dot colour tells you the status at a glance:
| Dot colour | Status |
|---|---|
| Green | Ready |
| Blue | Drawing |
| Amber | Awaiting paper or Connecting |
| Red | Not configured or Faulted |
Tap the strip to open the panel. The title Robots appears, with one row per robot. Tap the title again to fold it back into a strip.
If no robot is plugged in, the open panel says No robot connected. On a device that cannot drive a robot (a phone or tablet), it says Robots cannot be driven from this device (no serial port support on this platform). Robots are found automatically within a few seconds of being plugged in.

What a robot row shows
Each row has, from left to right: a number, the robot's name, its status, and its buttons.
- Number: the order in which the robots were connected.
- Name: the name you typed on the robot's card in Drawing Robot settings. If you left it empty, the model name is shown.
- Status: one of the six below.
| Status | What it means | What you do |
|---|---|---|
| Connecting | The robot was just plugged in and is being recognised. | Wait a few seconds. |
| Not configured | This robot has no Pen touch Z (mm) saved yet. It takes no drawings. | Leave the guest screen and calibrate the robot. Details: How Do I Calibrate the Robot? article. |
| Awaiting paper | The robot is calibrated and waiting for you to confirm the paper. | Place a fresh sheet, then press Ready. |
| Ready | The robot takes the next drawing. | Nothing. |
| Drawing | The robot is drawing. | Wait, or press Cancel to stop it. |
| Faulted | The last drawing or movement failed. | Fix the cause, then press Ready. |
A robot never becomes Ready by itself. The app cannot see the paper, so it always waits for you.
The buttons
Ready
Press Ready when the paper is in place and the pen is on the arm. The status turns to Ready and the robot takes the next drawing. If a drawing is already waiting, the robot starts it at once, so press Ready only when the paper really is in place.
Pressing Ready on a Faulted robot clears the fault. Pressing it on a robot without calibration does nothing useful: the row stays Not configured. The button is greyed out while the robot is already Ready.
Home
Home sends the arm back to its home position. Use it when the arm was moved by hand or stopped in an odd position. The status does not change. Every drawing starts with a home movement and ends with the arm parked at home, so you do not need to press it between drawings.
Identity
Identity makes the arm swing twice from side to side on the spot. It draws nothing and needs neither paper nor calibration. Use it to see which arm belongs to which row.
Cancel
While a robot is drawing, Ready, Home and Identity disappear from its row and a single red Cancel button takes their place. Cancel stops the arm at once, empties the rest of the drawing from the robot and sends the arm home. The drawing is not continued or repeated. The robot then shows Awaiting paper: replace the sheet and press Ready. To draw it again from the beginning, press Start Drawing on the guest's sharing screen.
While a robot draws
The row of a drawing robot shows three extra things:
- A progress bar with a percentage.
- An eye icon. Tap it to open a large Preview of the line picture the robot is drawing; tap outside the picture or the ✕ to close it.
- The red Cancel button.
The panel is the only place that shows the robot's progress. When the drawing is finished, the arm parks at home and the status turns to Awaiting paper.
The routine after every drawing
- Wait until the status turns to Awaiting paper and the arm is parked.
- Take the finished drawing off the table and hand it to the guest.
- Put a new sheet in the same place. If you marked the paper corners during calibration, seat the sheet in the four corner marks.
- Check that the pen still writes.
- Open the panel and press Ready.
If you change to a different paper size during the event, go back to Drawing Robot settings, choose the new Paper size and check the position with Go to center before pressing Ready. Details: Which Paper Sizes Can I Use and How Do I Place the Paper? article.
With two robots
Each robot has its own row and waits for its own paper change, so two guests can be drawn at the same time. A new drawing goes to the first robot in the panel that shows Ready. To send the next drawing to a specific robot, press Ready only on that one.
The numbers in the panel follow the order in which the robots were connected, which may differ from the card order you arranged in settings. Give each robot a name on its card, or press Identity, so you always know which row is which arm.
When no robot is ready
A guest can press Start Drawing (or the drawing starts by itself when Auto-start drawing when ready is on) while no robot shows Ready. Nothing is lost: the drawing waits in line. The moment you press Ready on a robot, the oldest waiting drawing starts on it.
If three guests started drawings while the robot was waiting for paper, the next three sheets go to those portraits, in the order they were started. The waiting line is not shown anywhere and is kept only while the app is open. A drawing whose guest has already left can be stopped with Cancel as soon as it starts.
Forgetting Ready after changing the paper: the robot stays in Awaiting paper and the next guest's drawing does not start.
Pressing Ready before the finished drawing is taken away: a waiting drawing starts at once, on top of the previous one.
Pressing Ready on the wrong row with two robots: use Identity first, or give the robots names.
Closing the app while drawings are waiting: the waiting line is emptied; start those drawings again from the guests' sharing screens.
