













The Drawing Robot page has one card of options that belong to the event: whether guests pick an AI effect, whether the robot starts by itself, whether the guest's name is written on the paper, and which extras guests get on the sharing screen. This article explains what each one changes for the guest. Paper size, the first option on the card, has its own article: Which Paper Sizes Can I Use and How Do I Place the Paper?
- Select your event, then open Drawing Robot in the sidebar (right under Dashboard).
- Leave AI effect step on On if guests should pick a style before the photo; add the styles in AI Assets.
- Turn on Auto-start drawing when ready if the robot should start without anyone pressing Start Drawing.
- Turn on Write the guest's name on the paper if you ask for the name in the survey at the start.
- Choose what guests get next to their photo: Drawing image in sharing and Add drawing video to sharing.
Where the options are
Drawing Robot → Drawing Settings
The Drawing Settings card is the second card on the page, below Paper size and the robot cards. There is no save button: each change is saved the moment you make it, and Saved ✓ appears. The options are stored on the selected event, so every event can be set up differently. Select the event first, on the Events page; a change made while no event is selected is not kept.
| Option | What it changes for the guest | Default |
|---|---|---|
| Paper size | The shape and size of the drawing on the paper. | 4×6 (portrait) |
| AI effect step | Adds the effect selection screen before the photo. | On |
| Auto-start drawing when ready | The drawing goes to the robot without pressing Start Drawing. | Off |
| Write the guest's name on the paper | The robot writes the first survey answer at the bottom-left of the paper. | Off |
| Drawing image in sharing | Adds a picture of the drawing after the guest's photo. | Robot's drawing plan |
| Add drawing video to sharing | Adds a short video of the drawing being drawn. | On |
| Play drawing video full screen | Plays that video once, full screen, on the sharing screen. | On |
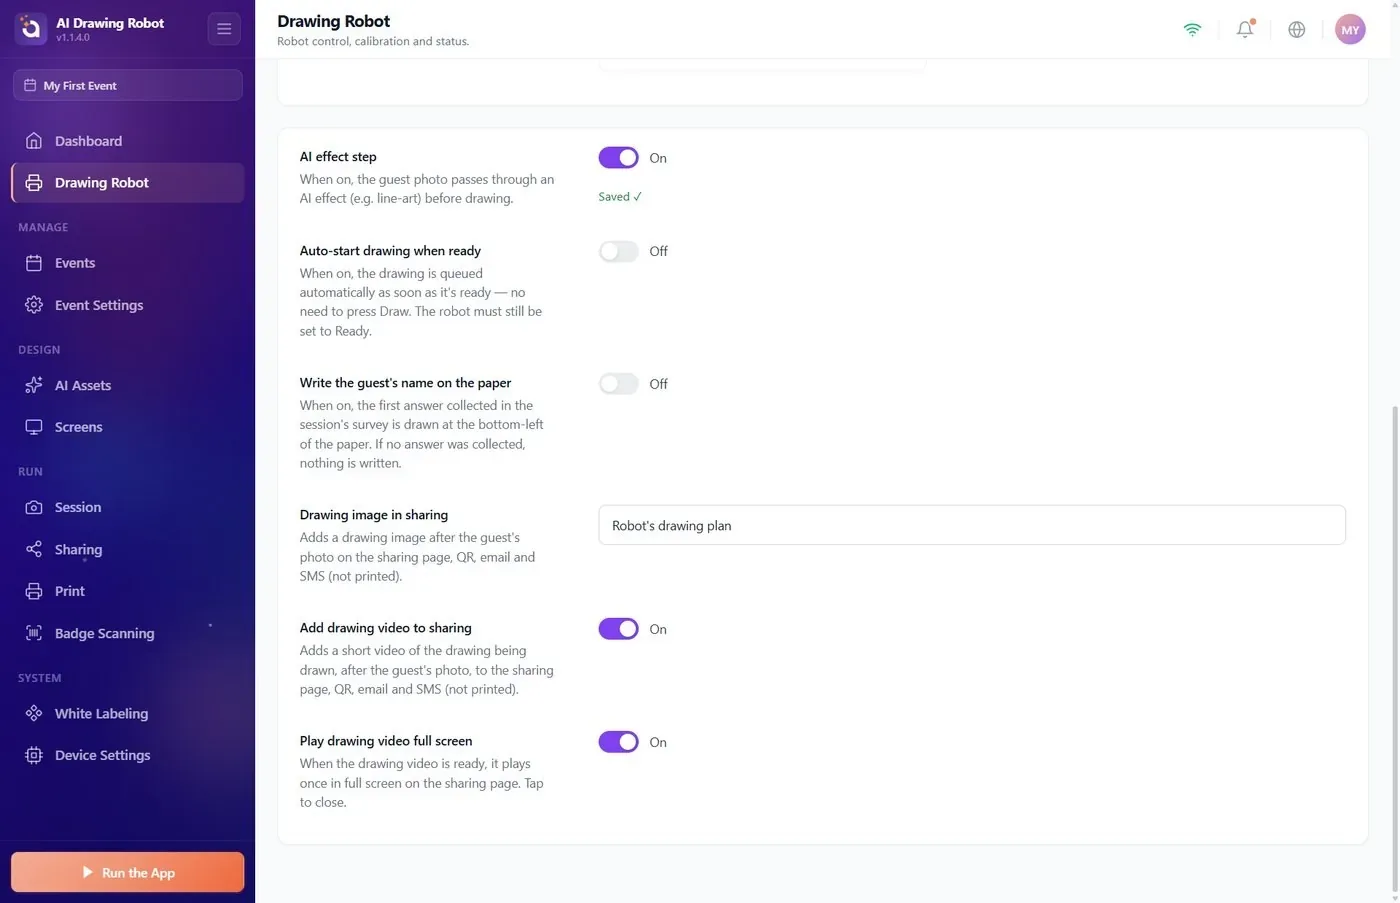
AI effect step
Drawing Robot → Drawing Settings → AI effect step
Every drawing passes through AI, in up to two stages:
- The guest's effect (optional). With AI effect step on On, and at least one effect in the event, the guest picks a style before the photo is taken. The photo is then restyled with that effect.
- Line art (always). The picture from stage 1, or the plain photo, is turned into a line drawing that the robot can follow with a pen. This stage is built in. It cannot be turned off, and it uses AI credits on every drawing.
So AI effect step only controls stage 1. With On, a drawing uses two AI generations; with Off, it uses one, and the wait is shorter. You see your balance on the AI Credits card of the Dashboard.
AI Assets → AI Effects → Active AI Effects
The effects the guest can choose from are the ones in Active AI Effects. Add them with Browse Library, or make your own with Create New. Use effects that appear in Browse Library or effects you created yourself. If the list is empty, the guest sees no selection screen and the plain photo goes straight to the line art, even with AI effect step on On.
Two switches on the same tab change the selection screen:
- Surprise Effect (default Off): guests skip the selection, and a random effect from the list is applied.
- "Original" option (default Off): adds an Original card. A guest who picks it continues with the plain photo, and no credits are used for stage 1.
If your plan has no AI features, the switch is replaced by the note Ultimate plan only with an Upgrade to Ultimate AI button.
Auto-start drawing when ready
Drawing Robot → Drawing Settings → Auto-start drawing when ready
With Off (default), the drawing waits on the sharing screen until someone presses Start Drawing.
With On, the drawing is sent to the robot as soon as it is prepared. The robot must still be Ready: if it shows Awaiting paper, the drawing waits in line and starts the moment you press Ready. After every drawing the robot goes back to Awaiting paper, so you change the paper and press Ready each time. Details: How Do I Use the Robots Panel During an Event? article.
Start Drawing stays on the sharing screen in both cases. Each press sends the same drawing to the robot once more.
Write the guest's name on the paper
Drawing Robot → Drawing Settings → Write the guest's name on the paper
With On, the robot writes the guest's name in small capital letters at the bottom-left corner of the paper, as part of the drawing. The name comes from the survey: the app takes the first answer the guest filled in.
For this to work, the survey must be shown before the photo:
Session → Survey
- Enable Survey must be on. A new event starts with the survey on and one field, Name.
- When to Show Survey must be At Start Screen. With At Sharing Screen the answer arrives after the drawing is prepared, and nothing is written.
- Put the name field first in Form Elements. If another field comes first and the guest fills it in, that answer is written instead.
If the guest leaves the survey empty, nothing is written. At most 24 characters are written. The robot writes Latin letters (including Turkish ones) and digits; any other character, for example a Cyrillic or Arabic letter, is drawn as a question mark.
Drawing image in sharing
Drawing Robot → Drawing Settings → Drawing image in sharing
This adds one extra picture after the guest's photo on the sharing screen. Guests who scan the QR code get it on their download page too. It is never sent to the photo printer.
| Choice | What the guest gets |
|---|---|
| Robot's drawing plan | A preview of the exact lines the robot will draw on the paper (default). |
| AI line-art image | The line drawing as the AI made it, before it was turned into pen strokes. |
| Off | No extra picture; only the photo. |
Drawing video
Drawing Robot → Drawing Settings → Add drawing video to sharing
With On (default), the app makes an animation of about 8 seconds that shows the lines appearing one after another. It is added after the guest's photo on the sharing screen and on the QR download page, and it is not printed. It is an animation, not a camera recording of the robot.
Drawing Robot → Drawing Settings → Play drawing video full screen
This option is visible only while Add drawing video to sharing is On. With On (default), the video plays once, without sound, over the whole sharing screen as soon as the drawing is prepared, usually before the robot starts. A tap closes it. With Off, the video is still added but does not open by itself.
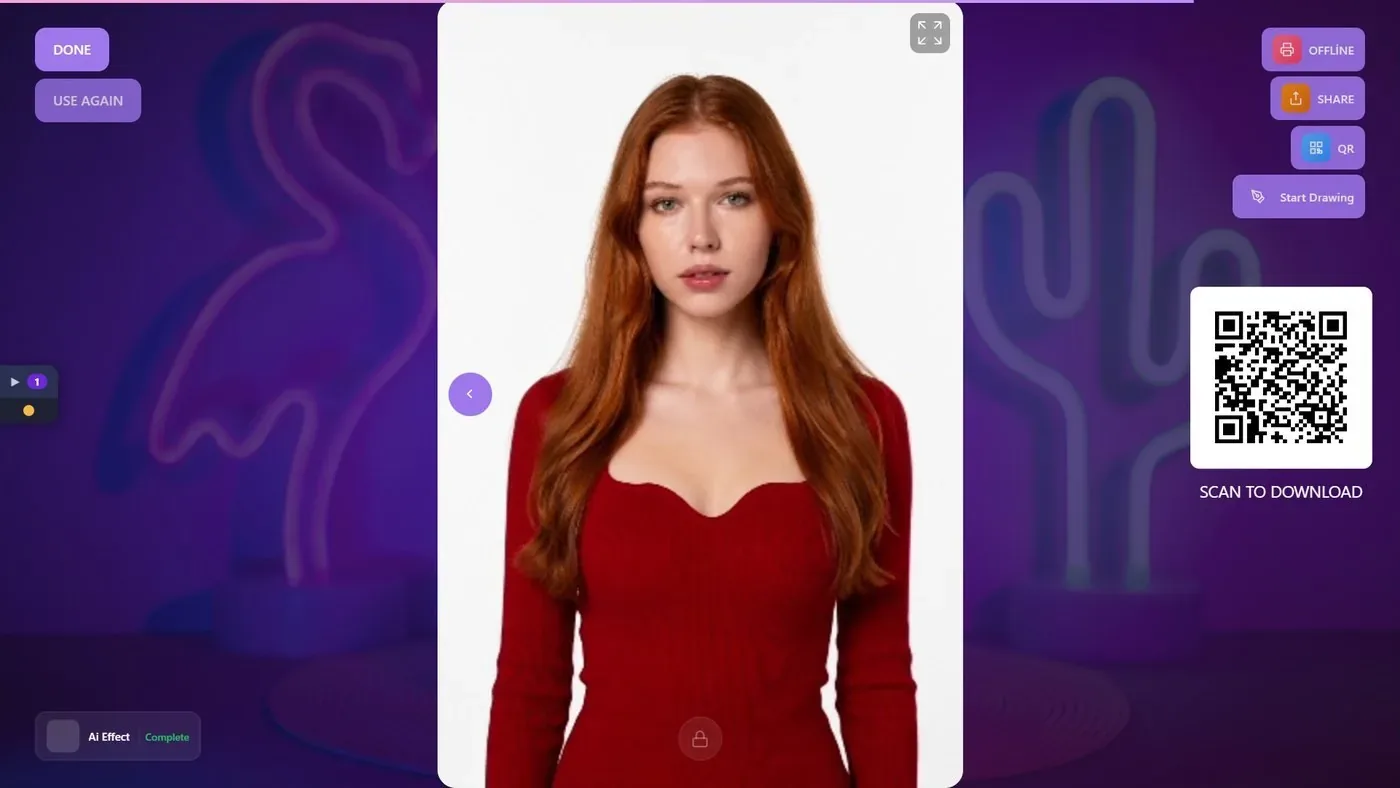
On a trial plan, the robot also draws a repeated TRIAL stamp across every drawing. What guests see, step by step: What Do Guests See, from Photo to Drawing? article.
Turning AI effect step Off to stop using credits: the line art is still made for every drawing and still uses credits.
Turning on Write the guest's name on the paper with the survey set to At Sharing Screen: no name is written.
Turning on Auto-start drawing when ready and forgetting to press Ready after changing the paper: the drawing waits and nothing moves.
Changing the options before selecting an event: the change is not kept for the event you create afterwards.
