













- You must be signed in (logged in) to the app — creating an event depends on account/license information.
- If you are going to start with Copy Previous Event, you must have at least one existing event you can copy.
Step 1 · Open the Event Management page
Settings → Event Management
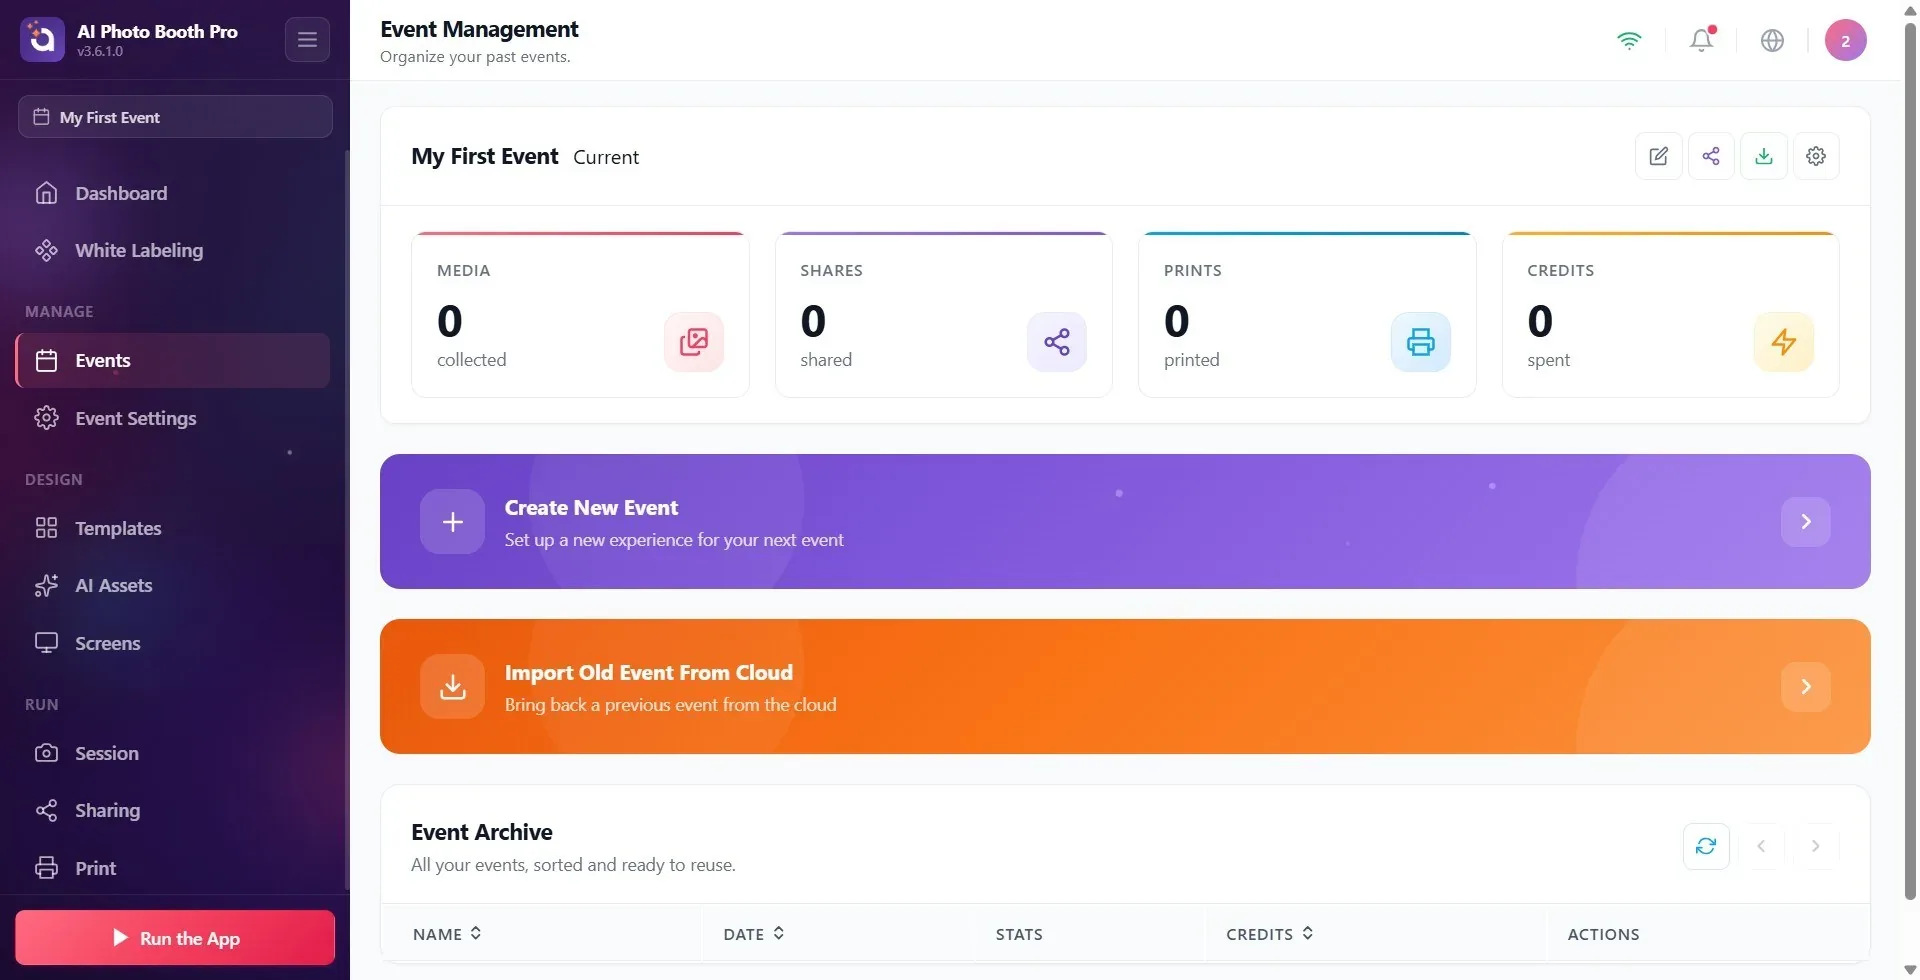
Tap Events in the left menu; the Event Management page opens. (Alternative: you can also reach this page with the Event button on the Dashboard.) On the page you'll find — if present — the current/active event card at the top, the purple Create New Event banner and the orange Import Old Event From Cloud banner in the middle, and the Event Archive below. If you have no events, a No events yet empty-state screen appears instead.
🔎 On-screen elements: left menu Events (page title Event Management); on the page the Create New Event banner, the orange Import Old Event From Cloud banner, the Event Archive table; in the empty state the No events yet heading and the Create First Event button.
Step 2 · Start the creation wizard
Event Management → Create New Event
Click the purple Create New Event banner. If you have no events, press the Create First Event button on the empty-state screen instead. (The Create an Event button on the Dashboard also opens this page and launches the wizard directly.) A wizard window titled Create New Event opens; below the title you see the name of the step you are on and, next to it, a counter in the form Step {0} of {1} (e.g. 'Step 1 of 4'). If your account has at least one event, the wizard has 4 steps; if you select Copy Previous Event, an extra step is inserted in between (5 steps). If your account has no events yet, the wizard has a single step — see the "First event" section below.
🔎 On-screen elements: the Create New Event banner / in the empty state the Create First Event button; on the Dashboard Create an Event; the opened window title Create New Event + step subtitle + 'Step X of Y' counter.
First event · Single-screen shortcut (if the account has no events)
When you have no events, the Try it now card in the welcome window that opens on the Dashboard (3.9.0 and later) creates the first event with the same defaults without showing the wizard and opens the booth right away. If you want to set it up step by step, choose Create New Event; the screen below opens.
Step 3 · Enter event details (wizard step 1)
Create New Event → Event Details
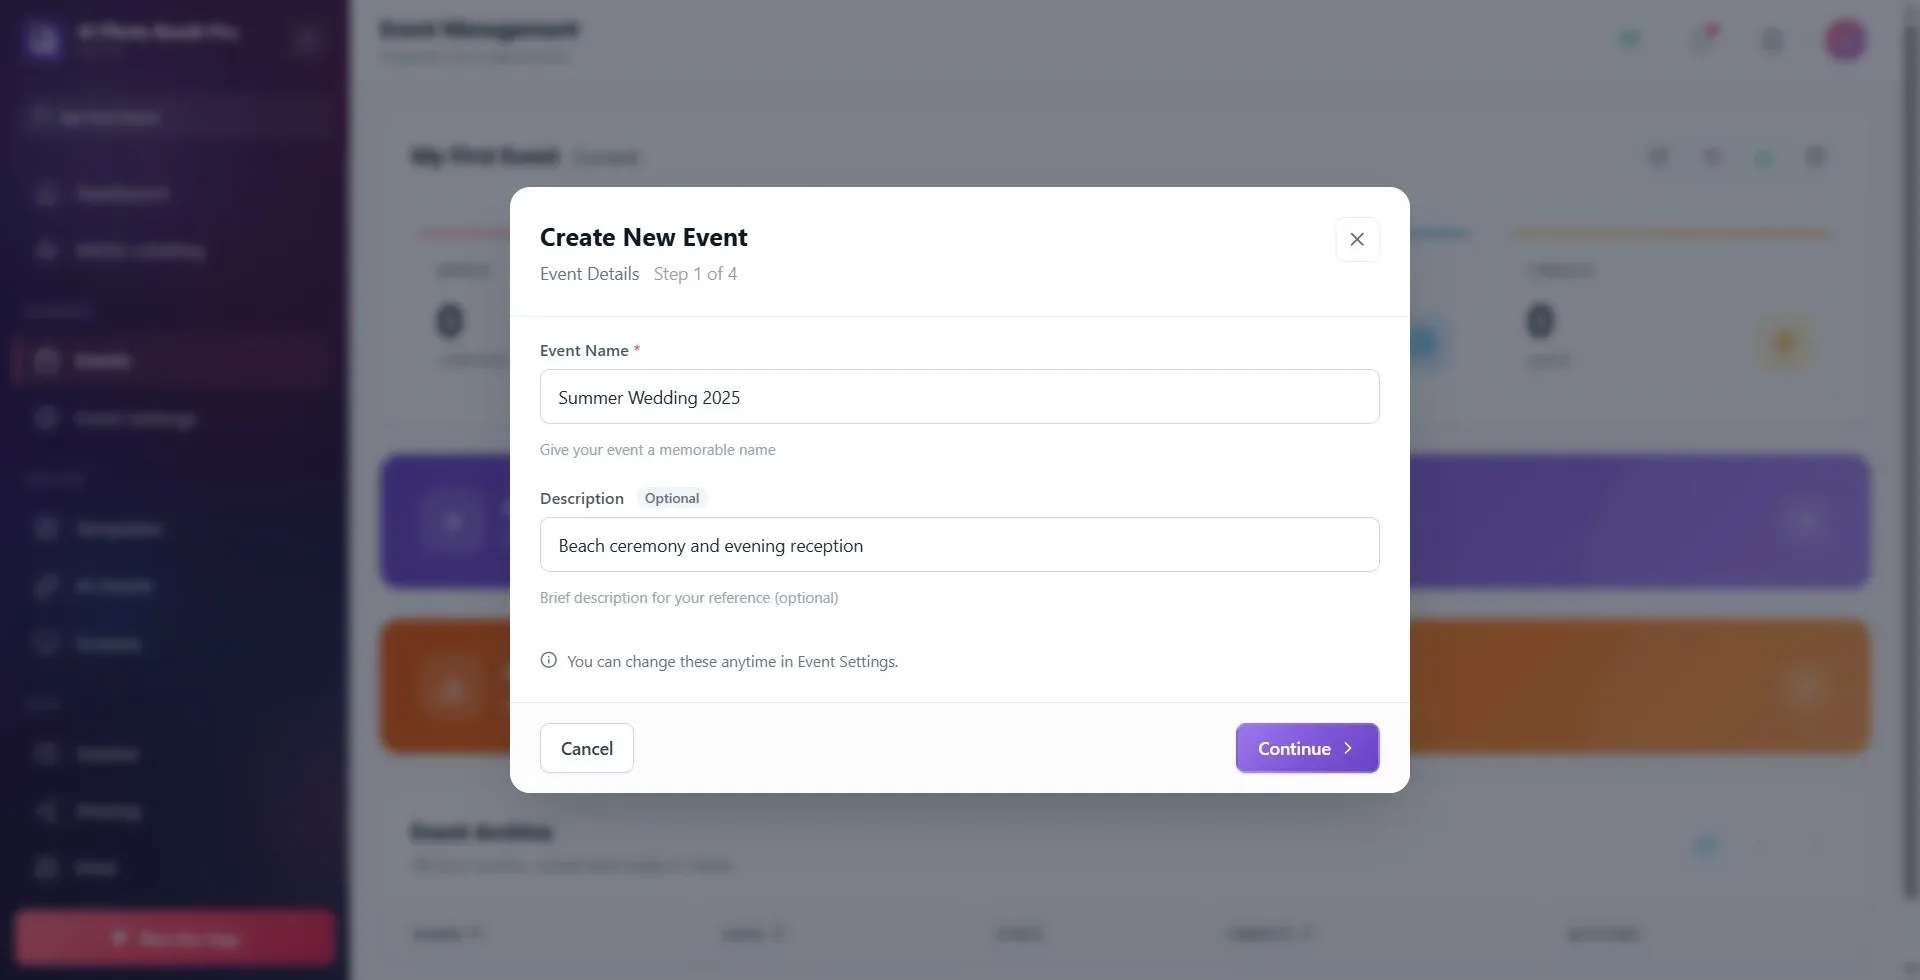
The screens from this step up to Step 6 appear only when your account has at least one event (Step 7 exists in both flows). Type a name in the Event Name field — this is required (there is a red asterisk * next to it; placeholder e.g. Summer Wedding 2025). If you want, enter a short note/motto in the Description field (it carries an Optional tag; placeholder Optional event motto or note). Below the fields is the note You can change these anytime in Event Settings. Press the Continue button at the bottom right. If you press Continue while the name is empty, the wizard does not advance: the field is marked red and shakes, and the warning Event name is required. appears below it.
🔎 On-screen elements: the Event Name (required) input + help text Give your event a memorable name (replaced by Event name is required. when you try to continue with an empty name); the Description input + Optional tag + help text Brief description for your reference (optional); bottom bar: Cancel on the left, Continue on the right.
Step 4 · Choose how you want to start (wizard step 2)
Create New Event → How would you like to start?
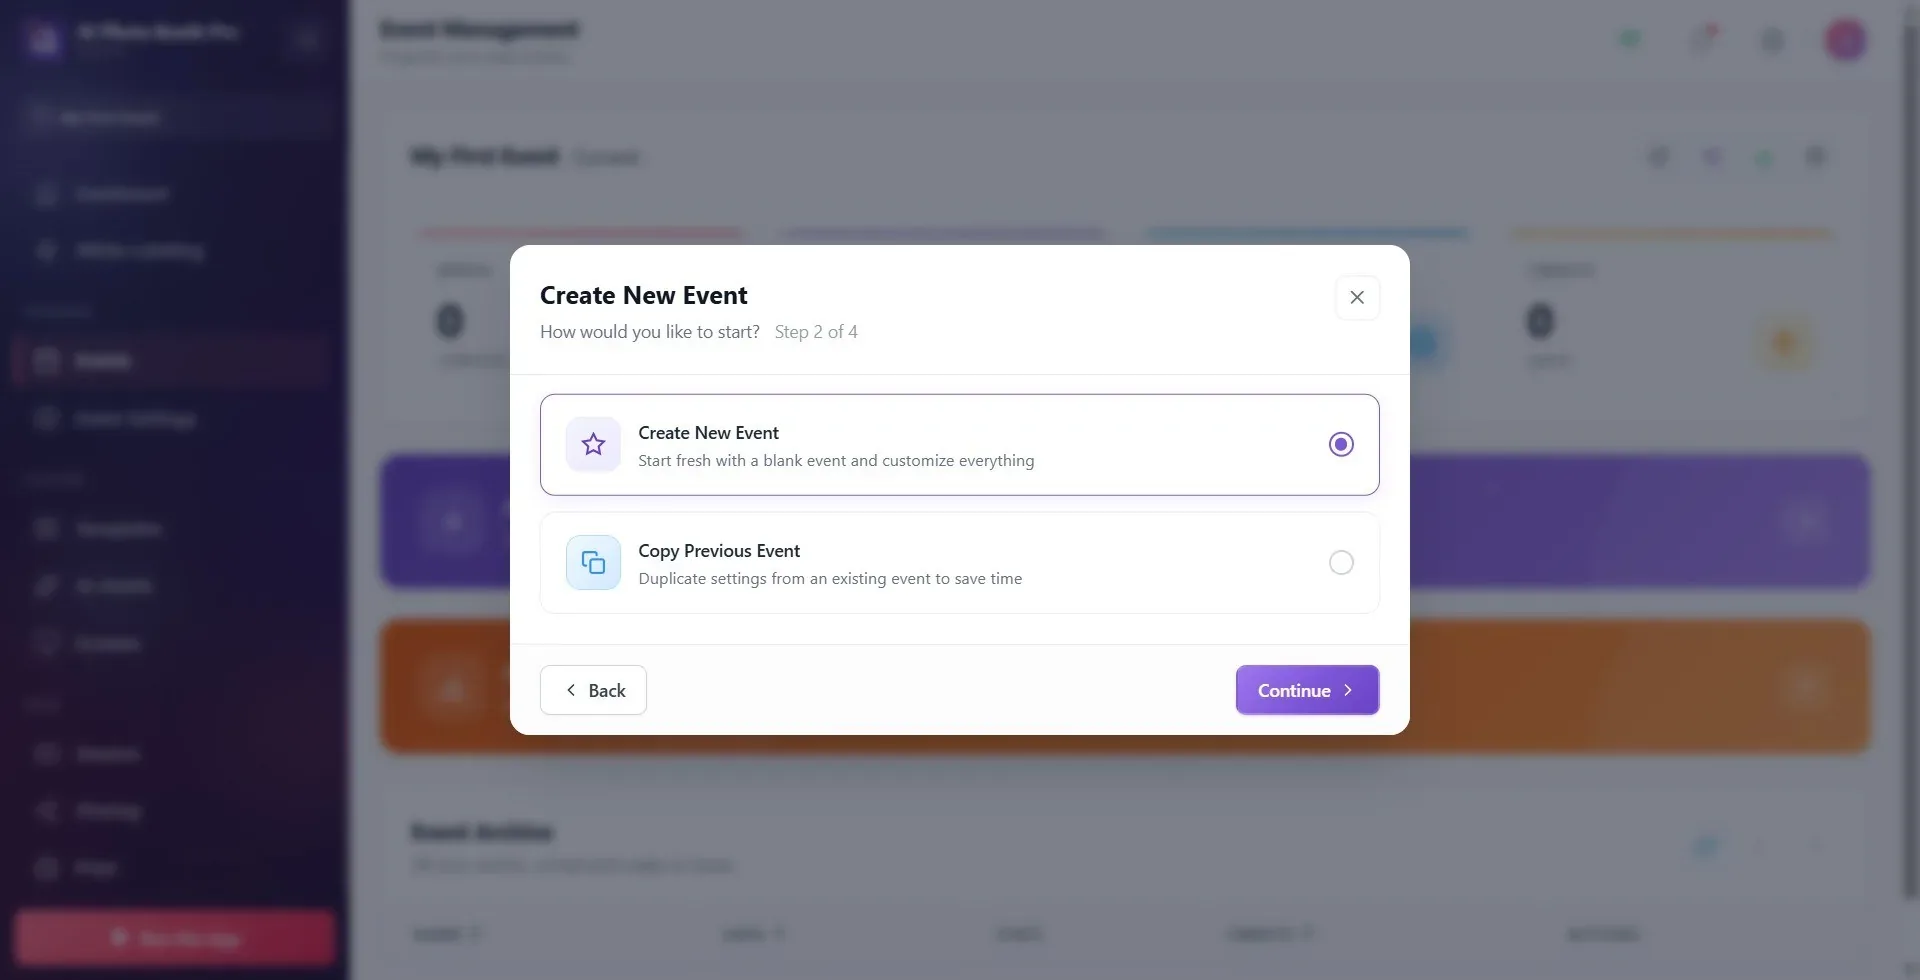
Choose one of the two cards: Create New Event (start from scratch with a blank event, Start fresh with a blank event and customize everything) or Copy Previous Event (copy the settings of an existing event). By default Create New Event is selected. Press Continue. Note: if you select Copy Previous Event, the next screen asks you to pick the event to copy (the counter goes up to 5 steps); with Create New Event this intermediate step is skipped and you go straight to the orientation step.
🔎 On-screen elements: two radio cards: Create New Event and Copy Previous Event; on the bottom bar Back / Continue.
Step 5 · Select the event to copy (only when copying; inserted as wizard step 3)
Create New Event → Select an event to copy from
This step appears ONLY if you selected Copy Previous Event in the previous step. The info box at the top states that all settings, templates, and configurations of the event you select will be copied to the new event (and can be changed later). From the Select an Event dropdown (the menu reading Choose from your events), select the event you want to copy, then press Continue. If you press Continue without selecting an event, the list shakes and the warning Please select an event to copy from. appears.
🔎 On-screen elements: info box ('All settings, templates, and configurations of the selected event will be copied to your new event...'); the 'Select an Event' label + dropdown (placeholder 'Choose from your events'); help text 'Select one of your existing events'.
Step 6 · Select the orientation (wizard step 3; step 4 when copying)
Create New Event → Choose Your Orientation
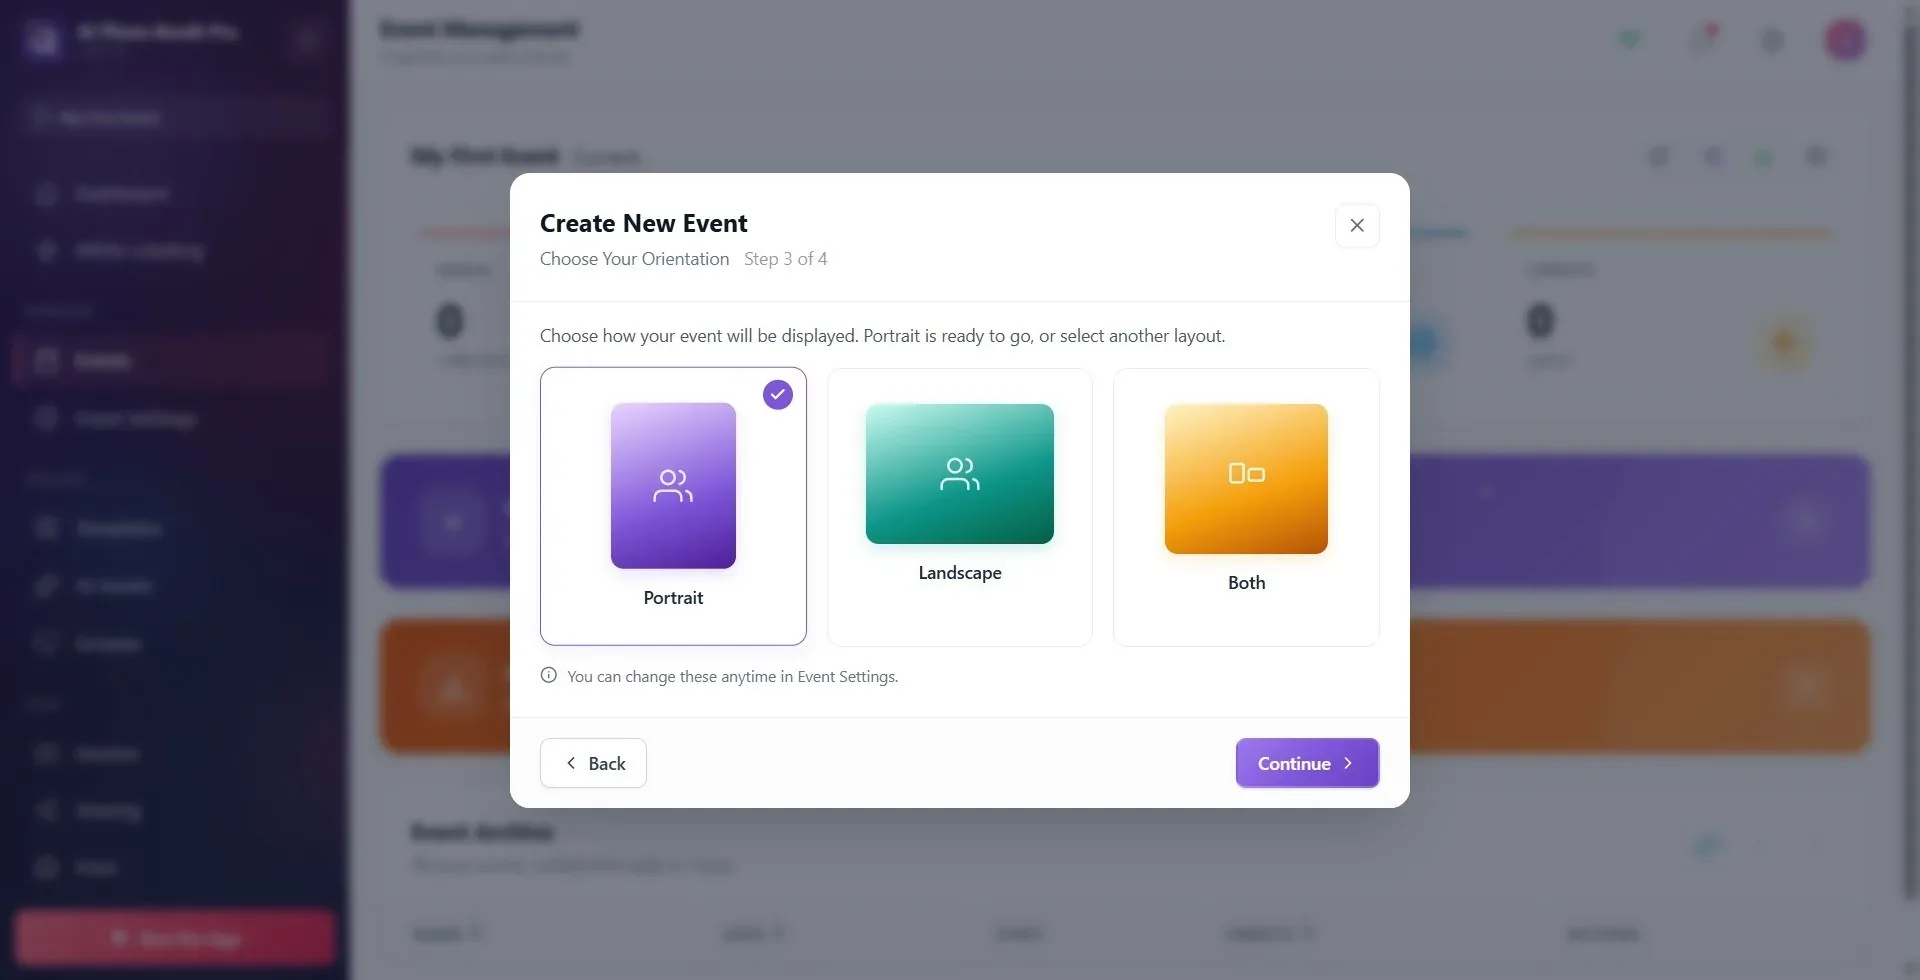
Set the output orientation: Portrait, Landscape or Both. The default is Portrait. Above the cards it reads Choose how your event will be displayed. Portrait is ready to go, or select another layout. Click the card you want (a check mark appears on the selected one) and press Continue. Below the cards there is again the note You can change these anytime in Event Settings.
🔎 On-screen elements: three orientation cards: Portrait / Landscape / Both (each card has a selection check area); the "you can change this later" note below them.
Step 7 · Create the event and wait
Create New Event → creating
When you press Create an Event, a Creating Your Event... loading animation spins in the window, with You can customize every detail after setup written beneath it. Below that, a live progress-phase line now also appears together with a purple dot — first 'Building your event and templates…', then 'Applying default settings and media…'. Wait until the process finishes; do not close the window while it runs.
🔎 On-screen elements: loading screen: spinning ring (spinner) + Creating Your Event... heading + You can customize every detail after setup subtext + status line below with a purple dot.
Step 8 · (Later) Change the active event / reuse from the archive
Event Management → Event Archive
To make an event you created earlier active again, click its row in the Event Archive table or press the Reuse button in that row — that event instantly becomes the Current event. The same row also has Duplicate (create an exact copy), Edit (update name/description), and Delete actions. Delete only removes it from this device; the copy in the cloud is preserved.
🔎 On-screen elements: the Event Archive table (columns: Name, Date, Stats, Credits, Actions); row buttons Reuse / Duplicate / Edit / Delete; at the top, pagination arrows Previous / Next.
Step 9 · (Alternative) Import a ready-made event from the cloud
Event Management → Sync Cloud Events
To bring an event created on another device onto this device, click the orange Import Old Event From Cloud banner or the sync (loop) icon in the Event Archive header and open the Sync Cloud Events window. (If you have no events, the Import from Cloud button on the empty-state screen and the Import From Cloud card in the Dashboard welcome window also open the same window.) In the list, press the Import button in the row of the event you want to bring over; while it downloads, Importing... is shown, and when it finishes it is marked as Imported and the event is added to the archive.
🔎 On-screen elements: the orange Import Old Event From Cloud banner (description Bring back a previous event from the cloud); the Sync Cloud Events window (columns Name/Date/Actions); row button Import → Importing... → Imported; in the empty state the Import from Cloud button.
The only required field is the event name; if you press Continue while the name is empty, the warning Event name is required. appears. Defaults: start Create New Event, orientation Portrait.
As soon as the new event is created, the Run the App button in the left menu becomes enabled; the kiosk can only be run when there is a selected (current) event.
If you choose Delete for an event, it is removed only from this device; the copy in the cloud remains and can be brought back with Sync Cloud Events.
The active event is not listed separately in the archive table; it is shown on the current event card at the top. To switch to a different event, Reuse from the archive is enough.
Pressing Continue without entering the event name: the wizard does not advance, the field shakes and the warning Event name is required. appears; a name must be typed first.
Thinking it is a bug that the name and orientation screens do not appear for the first event, or that AI Effect (on a plan without AI, Classic Photo) comes pre-selected: this is intentional when the account has no events; you can change the modes and correct the name and orientation later in Event Settings.
Trying to close the window while the Creating Your Event... animation is spinning during creation: you must wait until the process finishes.
Re-creating an event made on another device because you cannot see it in the archive on this device: it must first be imported with Sync Cloud Events.
