













Additional supported Canon cameras
AI Drawing Robot also supports the following Canon models.
| Model | Canon EDSDK |
|---|---|
| Canon PowerShot V10 | 13.17.10 |
| Canon EOS R5 Mark II | 13.18.30 |
| Canon EOS R1 | 13.18.40 |
| Canon EOS R50 V (EOS R50V) | 13.19.0 |
| Canon EOS R6 Mark III | 13.20.10 |
| Canon EOS R6 V (EOS R6V) | 13.20.20 |
EDSDK versions below identify the Canon SDK reference, not the AI Drawing Robot app version. Use the current app and camera firmware; available controls depend on the model and platform. Support does not mean every device has been physically tested by our team.
EOS R6 V: Canon added EDSDK/CCAPI support in firmware 1.1.0. Use firmware 1.1.0 or later. Canon
On Windows, the Canon SDK needed to support these models was added to the app in version 3.6.1. In older versions these cameras may fail to connect even if they appear in the camera list — update your app.
Cameras seen in use in the field
The following models were connected in our customers' booths and used in the app in the last 30 days (September 2026). A model missing from this list is not necessarily unsupported; if you use a Canon or Nikon that is not listed, do a test shot before the event.
| Model | Platform seen on |
|---|---|
| Canon EOS 5D Mark IV | Windows |
| Canon EOS 5DS | Windows |
| Canon EOS 7D Mark II | Windows, Mac |
| Canon EOS 60D | Windows |
| Canon EOS 70D | Windows |
| Canon EOS 77D | Windows |
| Canon EOS 80D | Windows |
| Canon EOS 200D | Windows |
| Canon EOS 250D (Rebel SL3) | Windows |
| Canon EOS 500D | Windows |
| Canon EOS 550D | Windows |
| Canon EOS 600D | Windows |
| Canon EOS 650D | Windows |
| Canon EOS 700D | Windows |
| Canon EOS 750D | Windows |
| Canon EOS 800D (Rebel T7i) | Windows |
| Canon EOS 850D | Windows |
| Canon EOS 1100D | Windows |
| Canon EOS 1200D | Windows |
| Canon EOS 1300D (Rebel T6) | Windows, Mac |
| Canon EOS 2000D | Windows |
| Canon EOS 4000D | Windows |
| Canon EOS M6 Mark II | Windows |
| Canon EOS M50 | Windows |
| Canon EOS M50 Mark II | Windows |
| Canon EOS R6 Mark II | Windows |
| Canon EOS R6 Mark III | Windows |
| Canon EOS R8 | Windows |
| Canon EOS R10 | Windows |
| Canon EOS R50 | Windows |
| Canon EOS R100 | Windows |
| Canon EOS RP | Windows |
| Nikon D3400 | Windows |
| Nikon D3500 | Windows |
| Nikon D5100 | Windows |
| Nikon D5200 | Windows |
| Nikon D5300 | Windows |
| Nikon D5600 | Windows |
| Nikon D7000 | Windows |
| Nikon Z 6II | Windows |
| Nikon Z 50 | Windows |
Sony cameras may appear in the camera list, but they currently do not work over USB.
- Troubleshooting is mostly done in Settings → Event Settings → Camera tab (live preview + Select Camera window is here)
- First update your app to the latest version: many of the problems below were fixed in versions 3.4.2–3.6.1 (the version with the fix is noted under each symptom)
Symptom: 'Another app is using the camera. Close to continue.'
Settings → Event Settings → 'Camera' (toast/warning)
Cause: Another application (Zoom, Microsoft Teams, Windows Camera app, Skype, etc.) is keeping the webcam in 'exclusive' mode; Windows gives the camera to only one application (MediaFrameReader status is ExclusiveControlNotAvailable). This error really means 'using another app'. Solution: (1) Completely close the other application using the camera (it may be running in the background — check the taskbar/system tray). (2) Open the Select Camera window and press Refresh or select the camera again. Note: If the webcam gives this error during an active shooting (session), the application keeps the booth alive by moving it to the next camera in the added list, or if it is not available, to the Desktop Arrangement.
🔎 Items on the screen: Warning message 'Another app is using the camera. Close it to continue.'
Symptom: 'Camera unavailable. Make sure it is connected and not removed.'
Settings → Event Settings → 'Camera' (toast/warning)
Cause: The device is inaccessible — physically broken/removed or there is a driver/port problem (MediaFrameReader status is DeviceNotAvailable or UnknownFailure). This is NOT 'using another app'; A different message is deliberately shown. Solution: (1) Check the USB cable and port; try another USB port (back/motherboard port if possible). (2) Unplug it and plug it in again after a few seconds. (3) Connect directly instead of USB hub. (4) Refresh the list with Select Camera → Refresh. If the problem persists, try changing the cable/camera.
🔎 Items on the screen: Message 'Camera unavailable. Make sure it is connected and not removed.'
Symptom: 'Camera could not start — the device ran out of hardware resources.' (Windows, webcam)
Settings → Event Settings → 'Camera' (toast/warning)
Cause: On Windows, the hardware resources the computer reserves for the camera ran out while the webcam was being opened. This is NOT 'another app is using it' — in older versions the same situation was wrongly shown as 'Another app is using the camera', and operators tried to close an app that was not running at all. Solution: (1) Unplug the camera from USB and plug it back in. (2) Select the camera again with Select Camera → Refresh and try again.
🔎 Items on the screen: Message Camera could not start — the device ran out of hardware resources. Unplug and reconnect the camera, then try again.
Symptom: On Windows, photos taken with a webcam come out yellow/orange or pixelated, and the shot is delayed
Shooting screen / Camera tab (Windows, webcam)
Cause: In versions before 3.6.0, on webcams without a separate photo pipeline the photo was taken from the first frame after restarting the camera stream. Because it was taken before white balance and exposure had settled, colors could come out yellow/orange, on some cameras the image stayed at low resolution (pixelated), and the shot was delayed by about 2–3 seconds. The live preview, however, looked normal. Solution: update your app to 3.6.0 or later — from this version on, the photo is taken from the live preview frame, the colors match the preview and the shot happens instantly.
This problem was fixed in 3.6.0; update your app.
Symptom: Virtual camera (OBS/ManyCam/XSplit) is selected but no image appears — 'Virtual camera is installed but not broadcasting.'
Settings → Event Settings → 'Camera' (Virtual Cameras)
Cause: The virtual camera driver appears in the 'Virtual Cameras' list because it is registered in Windows, but the source application is NOT streaming (e.g. 'Start Virtual Camera' is off in OBS). The application cannot open the device (OpenCV/DirectShow does not produce a stream) and reports this specific situation with a separate message. Solution: (1) Open the source application (OBS/ManyCam/XSplit). (2) In OBS, press the 'Start Virtual Camera' button at the bottom right; Enable virtual camera output in ManyCam/XSplit. (3) Make sure the scene/source is selected and there is an image in the preview. (4) In the app, select Select Camera → virtual camera again. Note: The virtual camera still appears in the Windows list even when the source application is closed — so check 'is it streaming' rather than 'is it connected'.
🔎 Items on the screen: Group Virtual Cameras (detail Virtual camera (OBS, etc.)); message 'Virtual camera is installed but not broadcasting. Open the source application (e.g. OBS) and start the virtual camera ("Start Virtual Camera"), then try again.'
Symptom: Camera does not open — Camera Permission window or 'Camera permission denied — the camera will not work…' warning
Settings → Event Settings → 'Camera' (Camera Permission window)
The Camera Permission window and Open Settings arrived with 3.4.2; the permission check on Windows also started with this version. In older versions there was no way back from inside the app once permission was denied, and on Windows the camera might not open while showing a wrong message such as a cable error, even though the real problem was the permission — update your app.
🔎 Items on the screen: Camera Permission window; message Camera access was not allowed, so the camera will not work. Please allow camera access to take photos. (denied, closes with OK) or Camera access is blocked for this app, so the camera will not work. Open Settings and turn on Camera and Microphone access for this app — the camera does not start unless both are allowed. (permanently blocked) + Open Settings; warning when the camera opens Camera permission denied — the camera will not work. Allow camera access for this app, then pick your camera again under Settings → Camera. (in versions older than 3.4.2: 'Camera permission denied. Switched to Desktop Editing mode.')
Symptom: A Sony camera appears in the list but there is no live image / a Fujifilm or Kodak camera does not appear at all
Settings → Event Settings → 'Camera' (Add Camera window)
Cause: The app can recognize the brand of Sony cameras connected over USB and show them in the list, but Sony cameras currently do not work over USB: no live image comes in, the test shot shows the Camera not ready warning and no photo is taken. Fujifilm (Fuji) and Kodak cameras are not supported. Solution: Use a supported Canon or Nikon DSLR or a webcam (for connecting Canon/Nikon, see the DSLR connection guide).
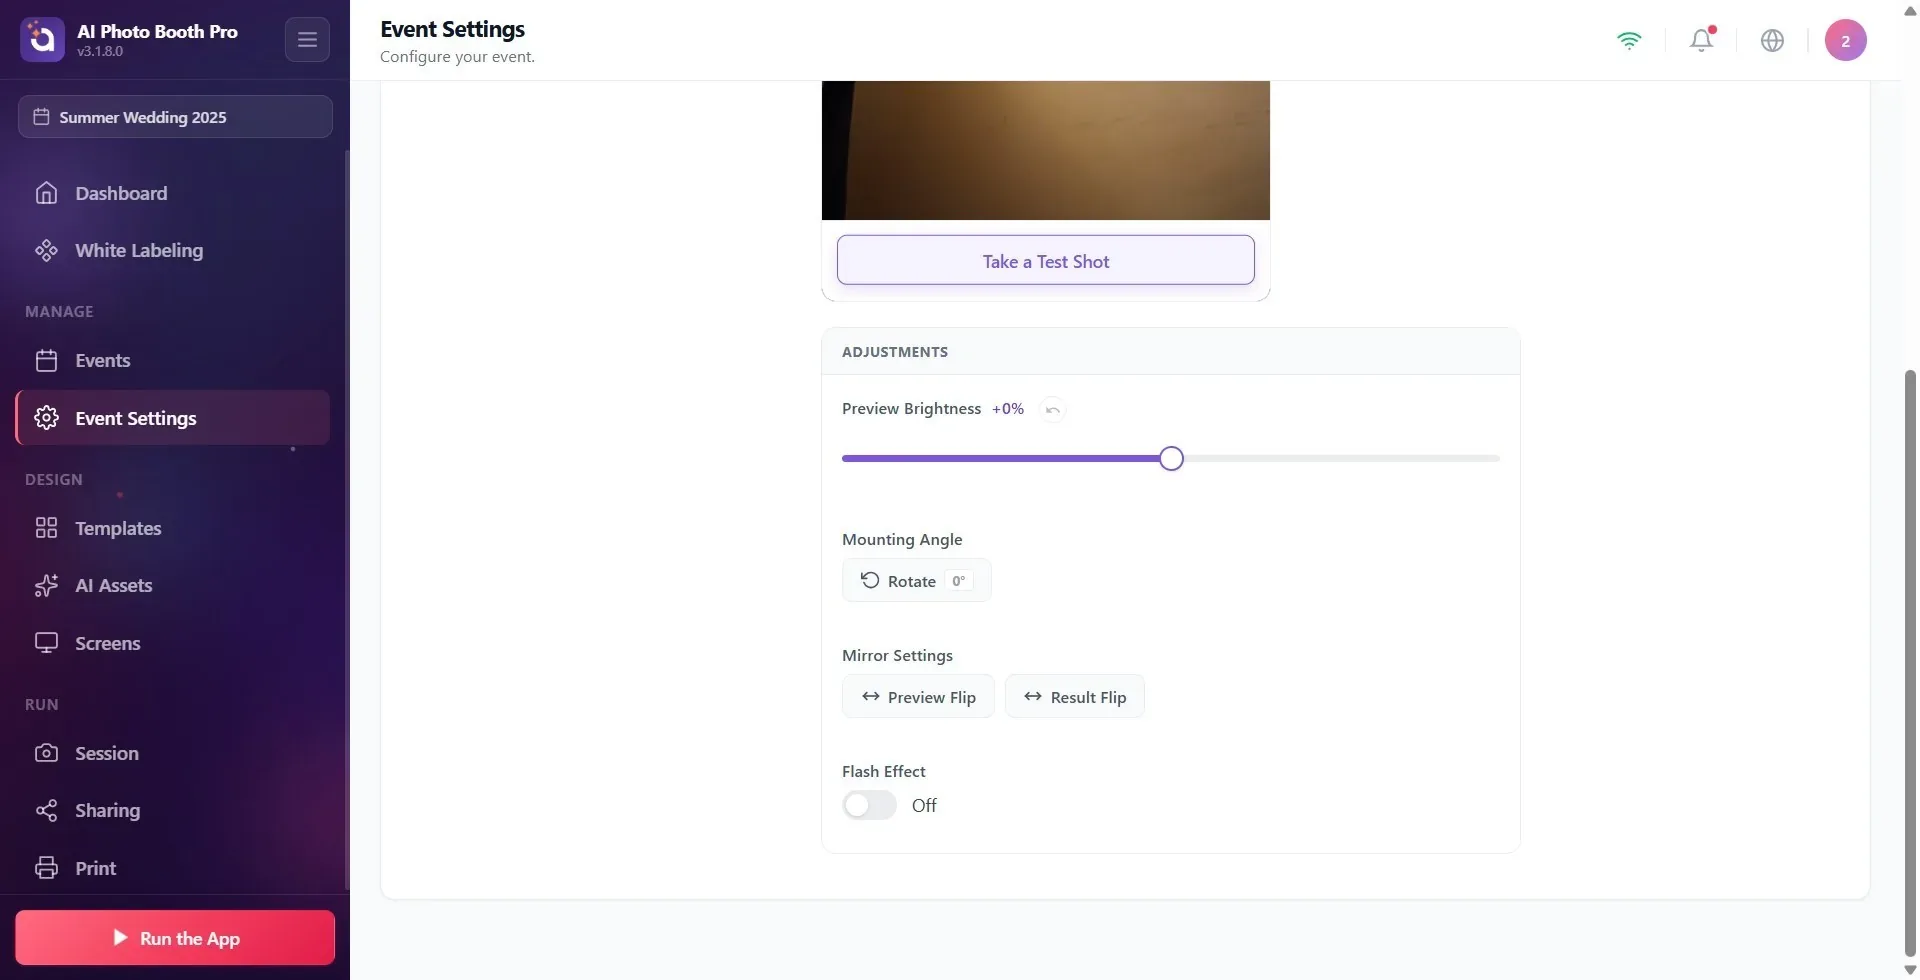
Symptom: Pressing 'Take Test Photo' but no shot is taken — 'Camera not ready' warning or 'No Camera Selected' on the card
Settings → Event Settings → 'Camera' (Camera Settings)
Cause: There is no active (selected + open) camera — no camera has been added yet, or the selected camera is offline. A test shot works only while there is an active camera; if there is no active camera, the button silently does nothing. Solution: (1) In the Add Camera section, press Select Camera. (2) CLICK a camera in the list — the click both adds that camera and makes it active (a camera that only has the Added badge is not active and does not appear in the preview). (3) Take a Test Shot works once the camera name appears on the connected camera card and the Ready badge appears in the preview. If a camera is selected but the live image is not coming in yet (the camera is starting, the connection dropped), the button does not start the shot and shows the Camera not ready warning — try again once the image appears in the preview.
🔎 Items on the screen: No Camera Selected on the card in the empty state; Take a Test Shot button; in the ready state, the Ready badge with a green dot in the preview; while there is no live image, the warning Camera not ready
Symptom: On the shooting screen the live image freezes, turns blurry with a spinning icon on top, or the app restarted by itself
Shooting screen (booth)
Cause: No new frames are coming from the camera — usually the USB cable was pulled out/came loose or the camera is not responding. In 3.6.1 and later the app detects this: if the live image stops unexpectedly, the image turns blurry and a spinning icon appears on top; when the connection recovers, the image comes back by itself. On Windows, if a connection drop leaves a Canon DSLR permanently locked (no response at all for about 20 seconds), the app restarts itself automatically and goes straight back to the booth; if the camera is still not ready at that point, Settings opens directly on the Camera tab. To avoid an endless loop, this automatic restart happens at most once every 3 minutes. Solution: (1) Check the USB cable and the camera, and plug the cable in firmly. (2) If the image does not come back within a few seconds, turn the camera off and on. (3) If the app restarted, check that the camera is on and connected; if Settings opened on the Camera tab, select the camera again and start the booth.
The freeze indicator and the automatic restart arrived with 3.6.1. In older versions, pulling the USB cable during a shoot could lock up the app without any warning on screen — update your app.
Symptom: 'No lens is attached to the camera…', 'The camera's flash is still charging…' or 'The camera won't shoot in its current state. Set the mode dial…' (Canon)
Shooting screen / Camera tab (DSLR)
Cause: The Canon body rejected the shot and reported why: no lens is attached or it is not seated properly; the flash has not finished charging; or the body won't shoot in its current state (mode dial in a scene/auto position, no memory card inserted, etc.; since 3.9.0 a rejection in the video position comes with a separate message — see the symptom below). New 'shot rejected' codes that the camera reports but the app does not recognize are also shown with this last message. Solution: (1) Lens: remove the lens, attach it again and make sure it is fully seated. (2) Flash: wait a few seconds and try again. (3) Shot rejected: set the mode dial to M, Av or Tv (not scene/auto or movie) and check that a memory card is inserted. If you pass the code at the end of the message (e.g. '(kod: 8D0E)') to the support team, the exact cause can be identified.
These three messages were added in 3.4.2. In older versions these situations could show a generic error that did not state the cause ('There was a problem connecting to the camera. Check the USB cable and the camera, then try again.') and wrongly pointed to the cable — update your app.
🔎 Items on the screen: No lens is attached to the camera, or it isn't seated properly. Attach the lens and try again.; The camera's flash is still charging. Wait a few seconds and try again.; The camera won't shoot in its current state. Set the mode dial to M, Av or Tv (not a scene/auto or movie position), make sure a memory card is inserted, then try again.
Symptom: On a Canon R series camera (e.g. EOS R10, R50) the live image never opens
Settings → Event Settings → 'Camera' / Welcome and shooting screen
Cause: In versions before 3.5.4, some Canon R series bodies rejected a focus setting that the app sent when starting the live image; even if the live image opened on the camera's screen, no frames reached the app. Also, once starting the live image had failed, it was not retried, so the preview stayed permanently empty. Solution: update your app to 3.5.4 or later — from this version on, the app no longer forces this setting and retries several times if starting fails. If the problem persists on the current version, turn the camera off and on and check the USB cable.
This problem was fixed in 3.5.4; update your app.
Symptom: DSLR cannot focus / blank frame — 'Camera failed to focus.' or 'The camera failed to take a photo. Remove the lens cap...'
Shooting screen / Camera tab (DSLR)
Cause: Autofocus failed to lock (low light, no contrast/flat surface, subject too close) or the body accepted the shot but did not produce a new image (lens cap attached, lens obstructed, did not hold focus). Solution: (1) Back off a bit and try again; If the environment is dark, increase the light. (2) Remove the lens cover and any obstacles in front of it. (3) If the problem persists, move the lens to MF (manual focus). (4) Adjust the focus distance (move away if the subject is too close).
In versions before 3.5.4 (e.g. 3.5.1), when focus failed on a Canon the camera could lock up and give a 'busy' error on every following shot, and the live image did not come back until the camera was turned off and on. In 3.5.4 the app tries to recover from this state by itself and, if focus fails, tries once to take the photo without focus — update your app.
🔎 Items on the screen: 'The camera could not focus. Please step back a bit and try again; If the environment is dark, increase the light. If the problem persists, move the lens to MF (manual focus).'; 'The camera could not take a photo. Remove the lens cap, remove anything obstructing the lens and make sure it can focus, then try again.'; 'The lens cover is closed. Open the door and try again.'
Symptom: DSLR battery low / shot rejected — 'Camera battery too low.'
Shooting screen / Camera tab (DSLR — Advanced Settings)
Cause: DSLR battery level is critical; 'Camera battery too low' error appears while shooting. In the Advanced Settings heading in the Camera tab, the battery percentage badge blinks red and warns when low. Solution: (1) Charge the battery or replace it with a charged battery. (2) Connect the camera to the power adapter (AC adapter / dummy battery) if possible — recommended for long events. (3) After replacing the battery, refresh the settings/battery status with Read Status. Note: If the camera is connected to a power adapter and the battery badge shows '19%' with a 'Camera battery low' warning, this is a false warning seen on Canon in older versions (before 3.4.1) — it has nothing to do with the battery; update your app. In the current version, the battery badge and warning are not shown for a camera on a power adapter.
🔎 Items on the screen: Error 'Camera battery is too low. Charge it or connect it to the power adapter.'; Battery badge + warning 'Camera battery low (%{0}%) — charge or replace before shooting' in Advanced Settings
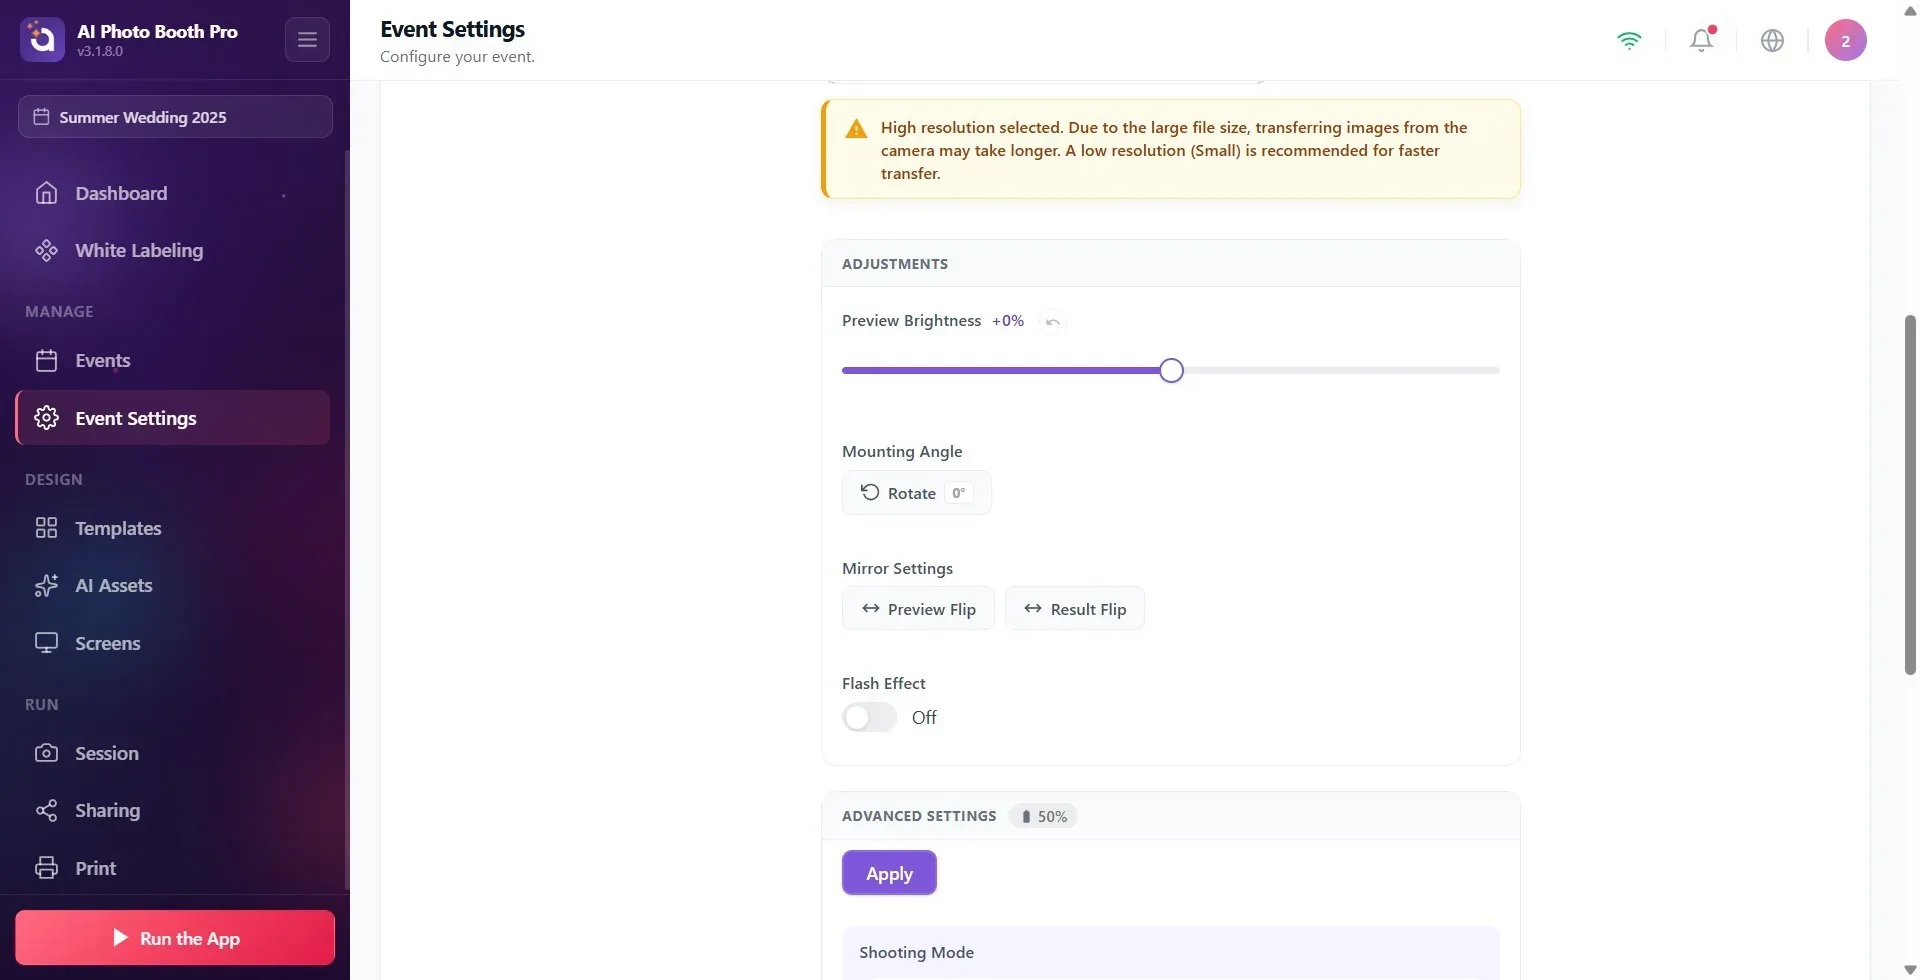
Symptom: High resolution/RAW warning on DSLR and photos are very slow to arrive
Settings → Event Settings → 'Camera' (Camera Settings DSLR)
Cause: High resolution or RAW format is selected on the DSLR; Large files take a long time to transfer from the camera, creating a countdown/inter-shot wait. A permanent yellow warning card appears at the top of the settings panel. Solution: (1) Lower the Image Quality/resolution from Advanced Settings (Small recommended) — then press Apply. (2) Choose JPEG instead of RAW. (3) Don't forget to write the change to the camera with Apply (otherwise it will remain in the draft). The warning card remains visible until low resolution/JPEG is selected.
🔎 Elements on the screen: Yellow warning card: 'High resolution selected. Images may take longer to transfer from the camera due to the large file size. Low resolution (Small) is recommended for faster transfer.'; 'RAW format is selected. ... JPEG format is recommended for faster transfer.'
Symptom: The dial/ISO/mode on the DSLR body is rotated but the value on the screen is not updated (consumer Nikon)
Settings → Event Settings → 'Camera' (Advanced Settings)
Cause: Some consumer-grade DSLR bodies (e.g., entry-level models such as the Nikon D3500) do not report a dial/mode change on the body as an event to the application (MTP does not issue a DevicePropChanged). So when you rotate the value from the body, the drop-down menus on the screen show the old value. Solution: (1) Press the Read Status button on the Advanced Settings toolbar — the values are refreshed from the camera. (2) Turn on the Auto Read switch for continuous sync — auto-refreshes every few seconds. Note: Since professional bodies (Nikon D5/D850/Z9 etc.) broadcast this event, they generally do not need a manual refresh.
🔎 Elements on the screen: Advanced Settings toolbar: Read Status button; Auto Read key; Reading status... layer in preview while reading
Symptom: 'Set Settings with AI' button is inactive or 'Not enough credits for AI analysis'
Settings → Event Settings → 'Camera' (Camera Settings DSLR)
Why: The AI setting recommendation button activates only when (a) a supported DSLR is active and (b) a test photo has just been taken; Additionally, each call costs 2 credits. If the credit is insufficient, the analysis does not start and the credit purchase screen opens. Solution: (1) First take a frame with Take a Test Shot in the preview — the button appears below Retake. (2) If your credit is insufficient, get a loan from the credit paywall. (3) AI recommendations are not automatically applied; It appears as a draft in the menus, review it and write it to the camera with Apply.
🔎 On-screen elements: Set Settings with AI button + '(2 Credits)' label; Analyzing settings… during analysis; warning if credit is insufficient Not enough credits for AI analysis (2 credits needed)
Related topics
Event Settings → camera Camera & OBS Setup Session Settings Event Settings → Kiosk
