













AI Drawing Robot offers six paper sizes, but a robot arm cannot reach all of them equally well. This article lists the sizes, shows how the sheet lies in front of the robot, tells you which sizes fit a Dobot Magician Lite, and explains the two Paper offset fields. It ends with the steps for changing the paper size during an event.
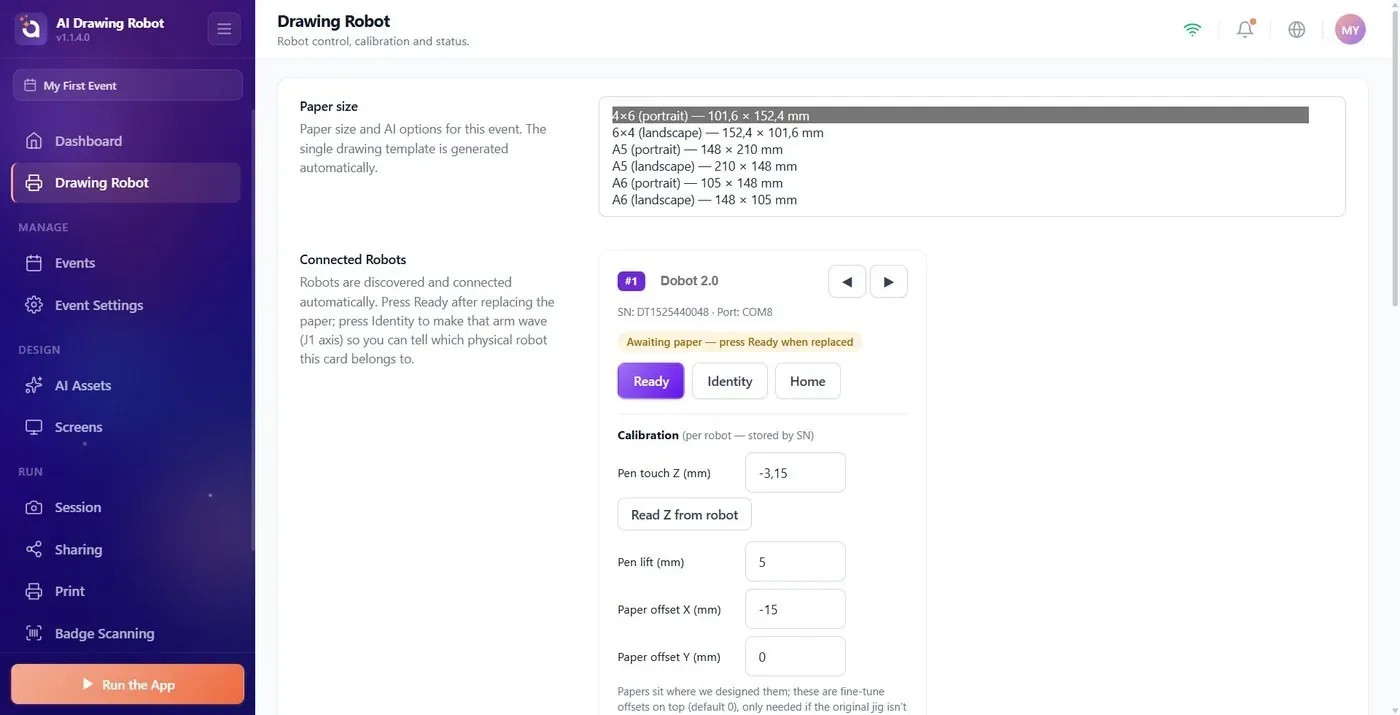
- Choose the paper in Drawing Robot → Paper size. 4×6 (portrait) is the default and the easiest size.
- Portrait: the long side points away from the robot. Landscape: the long side runs from left to right.
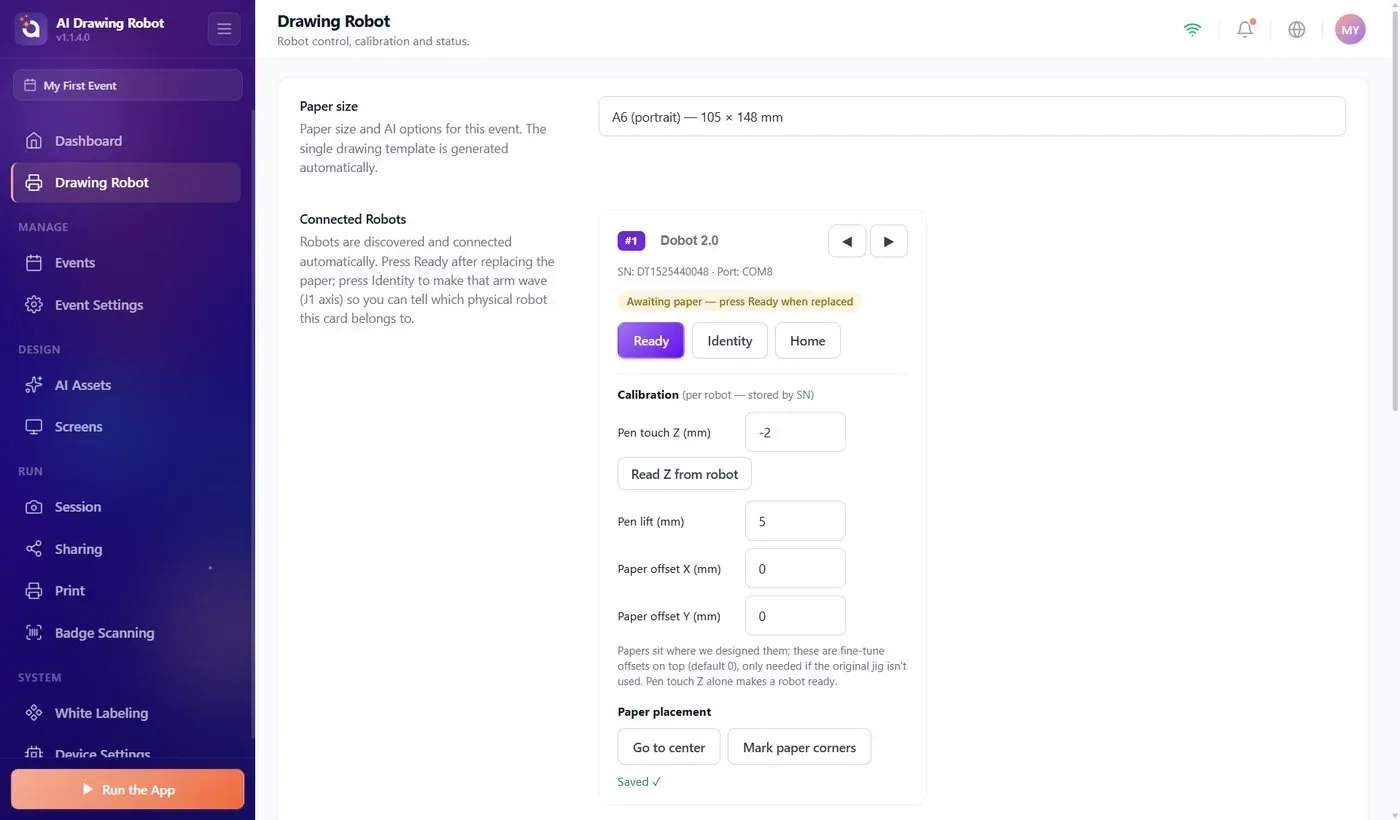
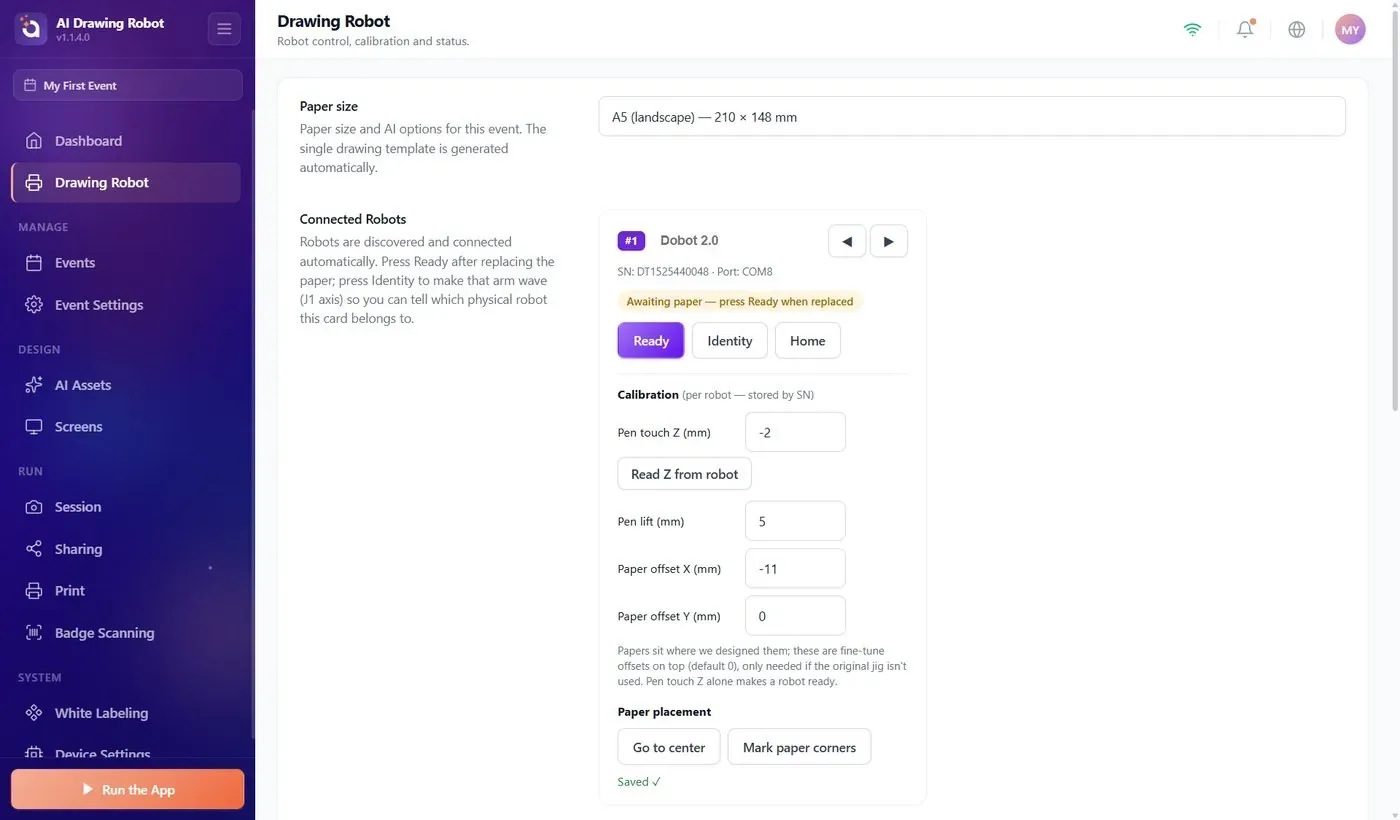
- On a Magician Lite, A5 (portrait) does not fit; A5 (landscape) fits only with Paper offset X (mm) at about −11.
- Leave both Paper offset fields at 0 unless the drawing lands off-centre or the size needs it.
- After changing the size: check the pen height, press Go to center, place the paper and press Ready.
The paper sizes
Drawing Robot → Paper size
Paper size is the first setting on the Drawing Robot page. Each option shows its width × height in millimetres. The choice is saved on the event at once, so select an event first. A new event starts with 4×6 (portrait).
| Option | Width × height | On a Magician Lite |
|---|---|---|
| 4×6 (portrait) | 101.6 × 152.4 mm | Fits. The easiest size to set up. |
| 6×4 (landscape) | 152.4 × 101.6 mm | Fits. |
| A5 (portrait) | 148 × 210 mm | Does not fit. |
| A5 (landscape) | 210 × 148 mm | Fits only with Paper offset X (mm) at about −11. |
| A6 (portrait) | 105 × 148 mm | Fits. |
| A6 (landscape) | 148 × 105 mm | Fits. |
The guest's picture is prepared in the same shape as the paper: a portrait size gives an upright picture, a landscape size a wide one. There is no template to design; the app builds the drawing layout from Paper size by itself.
How the paper lies in front of the robot
The paper lies flat on the table in front of the robot, centred on the line that runs straight out from the middle of the robot's base.
- Portrait sizes: the short side faces the robot, and the long side points away from it.
- Landscape sizes: the long side faces the robot and runs from your left to your right.
You do not have to measure the distance. On the robot's card, press Go to center: the pen stops 5 mm above the centre of the paper. Slide the sheet until its centre is under the pen tip. For quick paper changes, press Mark paper corners with no paper on the table: the robot draws four small L marks on a base sheet, and every new sheet goes inside them. The marks belong to the size selected at that moment. Details: How Do I Calibrate the Robot? article.
Which sizes fit, and at which pen height
Whether a size fits also depends on the height of the paper, the Pen touch Z (mm) value you read during calibration, because the arm's reach changes with height. With the paper at its default position, a Magician Lite needs:
| Paper size | Pen touch Z that works |
|---|---|
| 4×6 (portrait) | −8 to +2 (ideal about −2) |
| 6×4 (landscape) | −22 and above |
| A6 (portrait) | −9 and above |
| A6 (landscape) | −21 and above |
| A5 (landscape) | −4 to +1, with Paper offset X (mm) at about −11 |
| A5 (portrait) | does not fit |
If your value is below the range, the paper is too low: raise it. If it is above the range, the paper is too high: lower it. Then touch the pen to the paper and press Read Z from robot again.
When the paper does not fit, a message appears under Paper size and on the robot card:
- If the paper is too low or too high, it gives the valid Pen touch Z (mm) range for this size, your current value and about how many millimetres to raise or lower the paper.
- If no height works where the sheet is now, it tells you how far to move it with Paper offset X (mm); if the size cannot fit this robot at all, it says so. The message updates as soon as you read or type a new Z.
The sure check is Go to center. If the paper fits, the pen stops over its centre. If not, the robot refuses the move and the card shows Faulted — fix the issue, then press Ready. Moving the arm to a corner by hand proves nothing.
Paper offset X and Y
Drawing Robot → Connected Robots → Calibration
The app expects the paper at a fixed place in front of the robot. Paper offset X (mm) and Paper offset Y (mm) shift that place. Both are 0 by default.
| Field | Positive value | Negative value |
|---|---|---|
| Paper offset X (mm) | The drawing moves away from the robot. | The drawing moves towards the robot. |
| Paper offset Y (mm) | The drawing moves to your right. | The drawing moves to your left. |
Left and right are as you see them with the robot in front of you.
Offsets move the drawing, not the paper. After you change one, press Go to center and slide the paper under the pen again.
When to use them:
- A5 (landscape): set Paper offset X (mm) to about −11. The drawing area moves 11 mm towards the robot, and the paper moves with it.
- The drawing is off-centre on every sheet although the paper sits in its marks: shift it by the millimetres it is off.
- The paper cannot lie at the usual place, for example because of a holder.
Otherwise leave both at 0. The offsets are saved for the robot, not for the paper size: when you go back from A5 (landscape) to another size, set Paper offset X (mm) back to 0 yourself.
Changing the paper size during an event
Do it between two guests, when no drawing is being prepared or drawn.
- Leave the guest screen with the lock icon or F11 / F12 and open Drawing Robot.
- Choose the new size in Paper size.
- Set the Paper offset fields for the new size: about −11 in X for A5 (landscape), otherwise 0.
- Compare Pen touch Z (mm) with the table. If the new paper is thicker or lies on something else, touch the pen to it and press Read Z from robot.
- Press Go to center and place the new paper. If you use corner marks, draw them again on a fresh base sheet.
- Press Ready, then Run the App → Start the Drawing Robot.
With two robots, repeat steps 3 to 6 on each card; both draw the same size, because the size belongs to the event.
Choosing A5 (portrait) for a Magician Lite: no setting makes it fit. Use A5 (landscape) or a smaller size.
Leaving Paper offset X (mm) at −11 after going back from A5 (landscape) to 4×6: every drawing lands 11 mm too close to the robot.
Changing an offset without moving the paper: the drawing moves, the sheet does not, and the drawing runs off one edge.
Keeping the old corner marks after changing the size: they belong to the old size, so the new sheet sits in the wrong place.
