













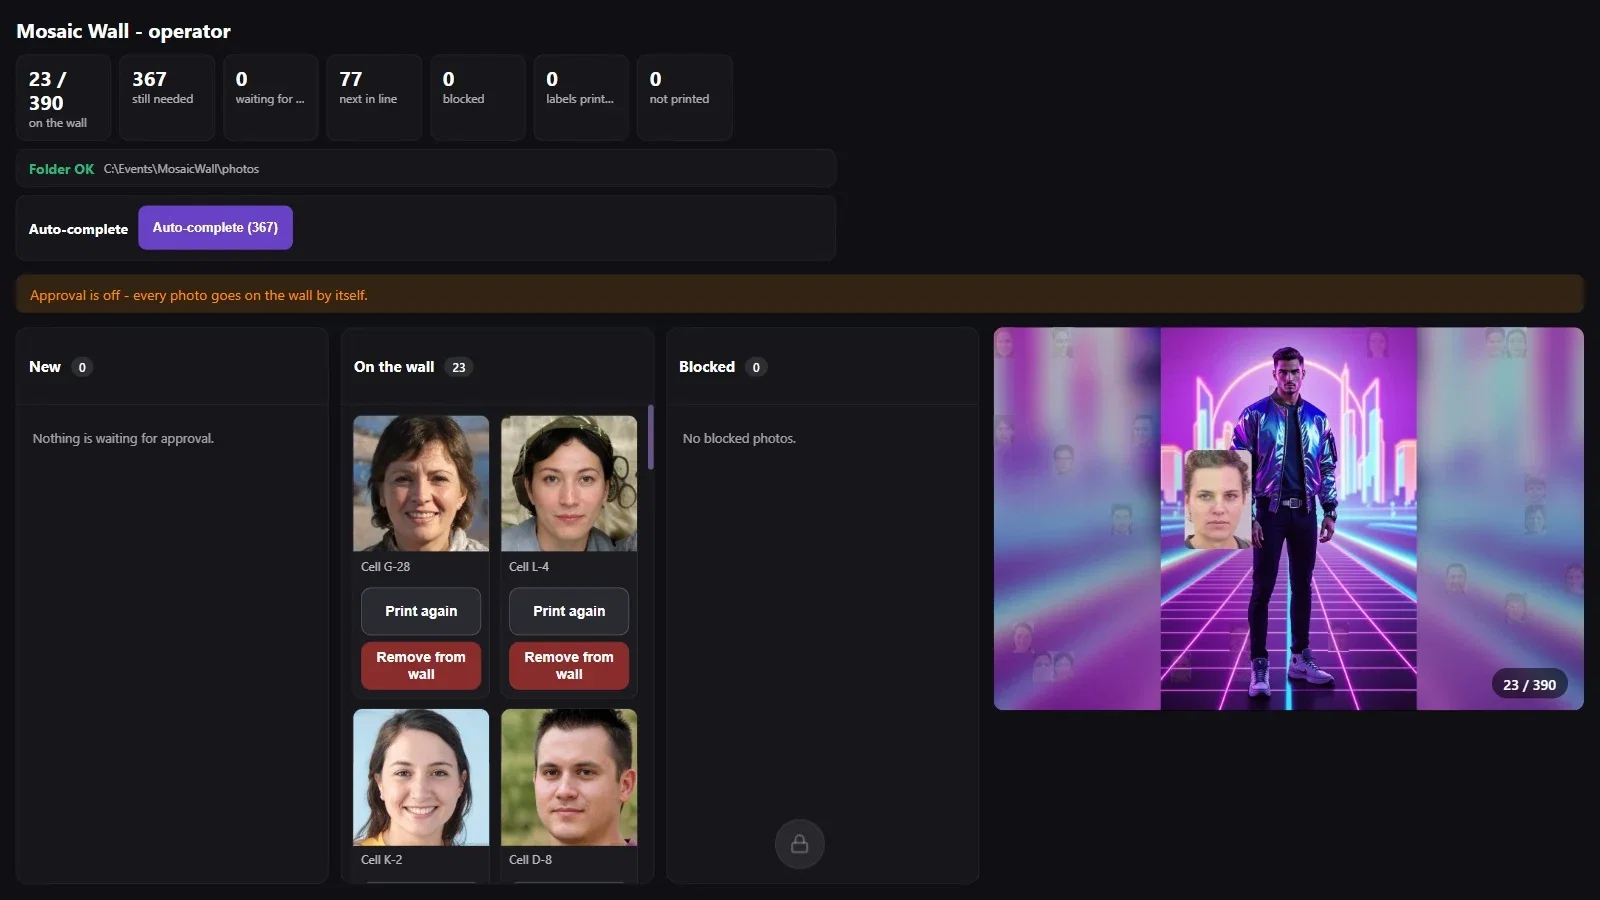
The operator screen opens on the main screen while the wall is running. The counters at the top show the state of the wall, and the columns show where the photos are: New holds the ones waiting for approval, On the wall the ones on the wall, Blocked the blocked ones. The small wall on the right mirrors the real wall screen; click one of its cells to find the photo in that cell.
This guide describes Photo Mosaic Wall 2.1.0 on Windows. Screens and labels may differ in other versions.
- The wall must have been started with Run the App.
- If Photos wait for approval is on, incoming photos wait for your approval in the New column; if it is off, they go straight onto the wall.
Step by step
Step 1 · Approve or block incoming photos
Run the Mosaic Wall → New
New photos drop into the New column and the waiting for approval counter at the top goes up. Under each photo there are Approve (green) and Block (red); Approve all at the top of the column approves them all at once.
The counters: on the wall is filled cells / fillable cells, still needed is the number of photos still needed to fill the wall, next in line is the photos approved and waiting to be placed, blocked is the blocked photos. The line below them shows the folder status and the watched path (Folder OK).

Step 2 · Restore a blocked photo
Run the Mosaic Wall → Blocked
A photo you set aside with Block moves to the Blocked column and doesn't go onto the wall. If you change your mind, Put back under the photo puts it back in the queue for the wall.

Step 3 · Queued photos are placed one by one
Run the Mosaic Wall
The photos you approve go into the next in line counter and are placed on the wall one by one at the Delay between photos (ms) interval; you can watch them being placed live on the small wall on the right.

Step 4 · Find or remove a photo on the wall
Run the Mosaic Wall → On the wall
The On the wall column shows the photos on the wall with their cell codes (such as Cell H-15). To find a particular cell, click it on the small wall on the right: the photo in that cell opens with its cell code and the Remove from wall and Close buttons. Remove from wall takes the photo off the wall.

Step 5 · Label status on a physical wall
Run the Mosaic Wall
In Physical wall (printed photos) mode, the counts of printed and unprinted labels are added to the counters, and a Print again button appears on the On the wall cards. If approval is off, the note Approval is off - every photo goes on the wall by itself. appears at the top.
Block sets aside a photo that hasn't gone onto the wall yet; Remove from wall takes off a photo that is already on the wall.
The cell code (for example H-15) is the row letter and the column number on the wall; on a physical wall, the same code is printed on the labels.
Leaving approval on and not watching the operator screen: photos wait in the New column and don't go onto the wall.
Forgetting a photo blocked by mistake: it can be restored with Put back in the Blocked column.
