













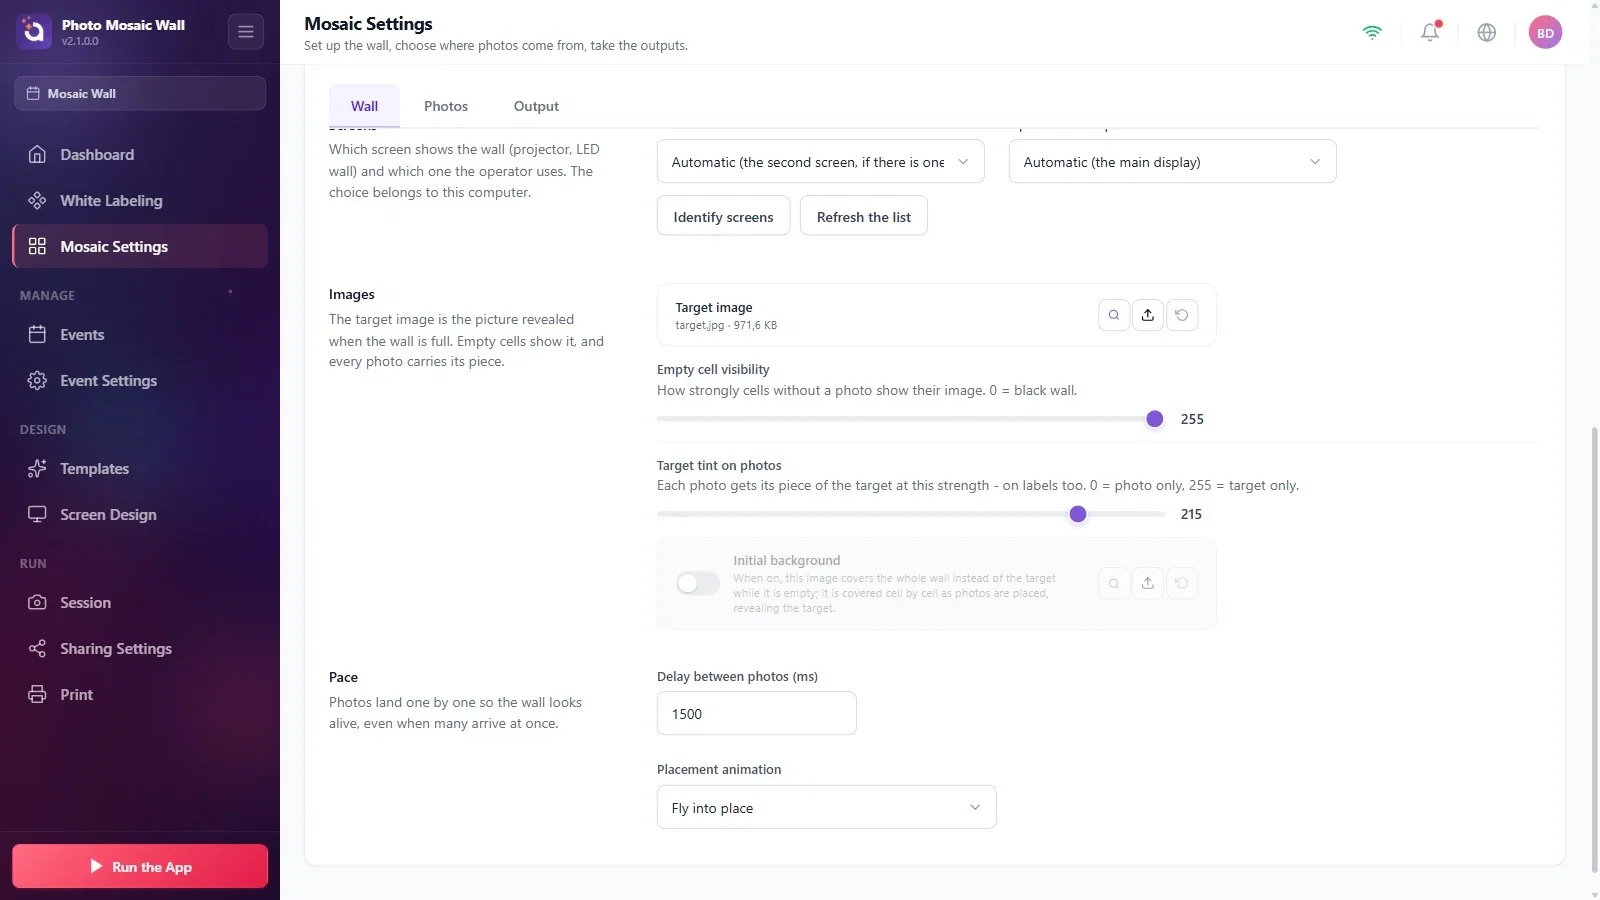
The Target image is the picture that appears when the wall is full: empty cells show it, and every incoming photo gets the matching part of it laid on top. In the Images section you upload the target image and set how strongly the empty cells and the tint over the photos show it; in the Pace section you choose how often and with which animation the photos are placed on the wall.
This guide describes Photo Mosaic Wall 2.1.0 on Windows. Screens and labels may differ in other versions.
- Save the picture you will use as the target image on this computer.
- Open the Mosaic Settings → Wall tab and scroll down to the Images section.
Step by step
Step 1 · Upload the target image
Mosaic Settings → Wall → Images
Press the upload icon with the upward arrow to the right of the Target image row and choose the picture in the Windows dialog that opens. The name and size of the uploaded file appear in the row (target.jpg in the example); the preview at the top of the page shows this picture too.
Step 2 · Set Empty cell visibility
Mosaic Settings → Wall → Images
The slider sets how strongly the cells without a photo show the target image: 255 is fully visible, 0 is a black wall. Keep it high if you want people to see what is taking shape while the wall is still fairly empty.
Step 3 · Set Target tint on photos
Mosaic Settings → Wall → Images
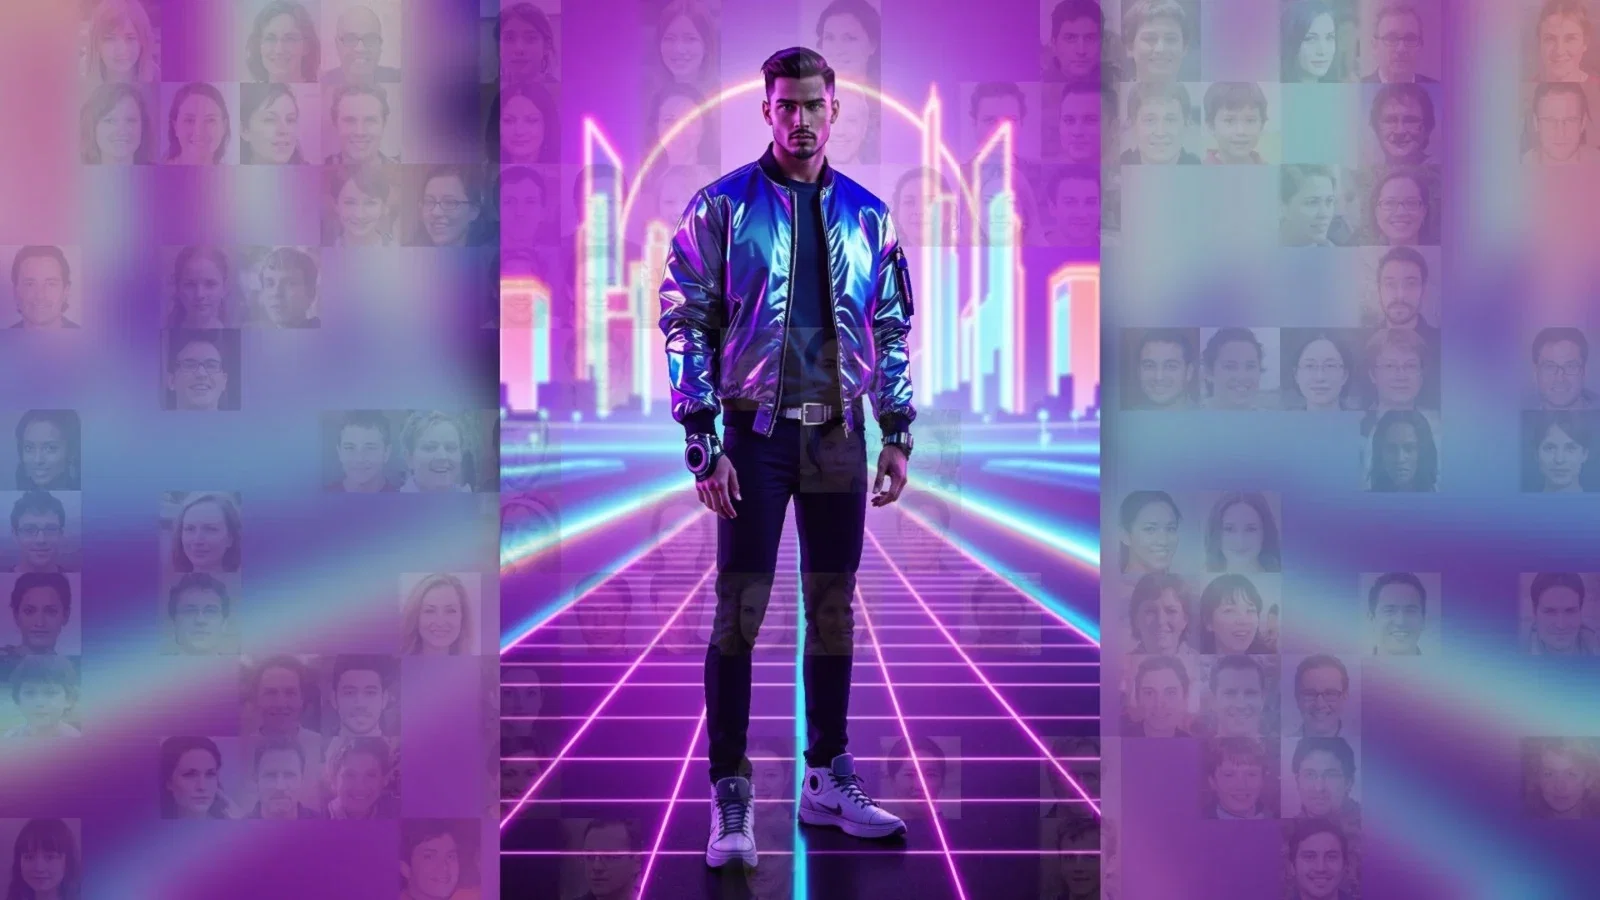
The matching part of the target image is laid over each photo at this strength; on a physical wall, over the labels too. 0 means the photo only, 255 means the target only. With 215, as in the example, you see the target image from a distance and the faces up close.
Step 4 · (Optional) Initial background
Mosaic Settings → Wall → Images
If the switch is on, this picture covers the whole wall instead of the target while the wall is empty; as photos are placed, it is covered cell by cell and the target appears. Use it for events where you don't want to show the target from the start and want a surprise reveal.
Step 5 · Pace: delay and animation
Mosaic Settings → Wall → Pace
Delay between photos (ms) is the time between two photos being placed on the wall (1500 ms, i.e. 1.5 seconds, in the example); even if many photos arrive at once, they are placed on the wall one by one. Choose how photos are placed from the Placement animation list: Fly into place, Fade in, Zoom in, Slide from above, Flip in or No animation.
To make the important area of the target image (a face, a logo) appear early, mark those cells as Fill first with Fill order.
On a physical wall, one more note appears in the Images section: labels are printed from the full resolution of the target image, and the width of the part that falls on each label is shown in pixels. Use a large enough target image for sharp prints.
Setting the tint too high: as it gets close to 255, the photos disappear and guests can't find themselves on the wall.
Setting the delay too long: when many photos arrive at once, they all queue up and reach the wall late.
