













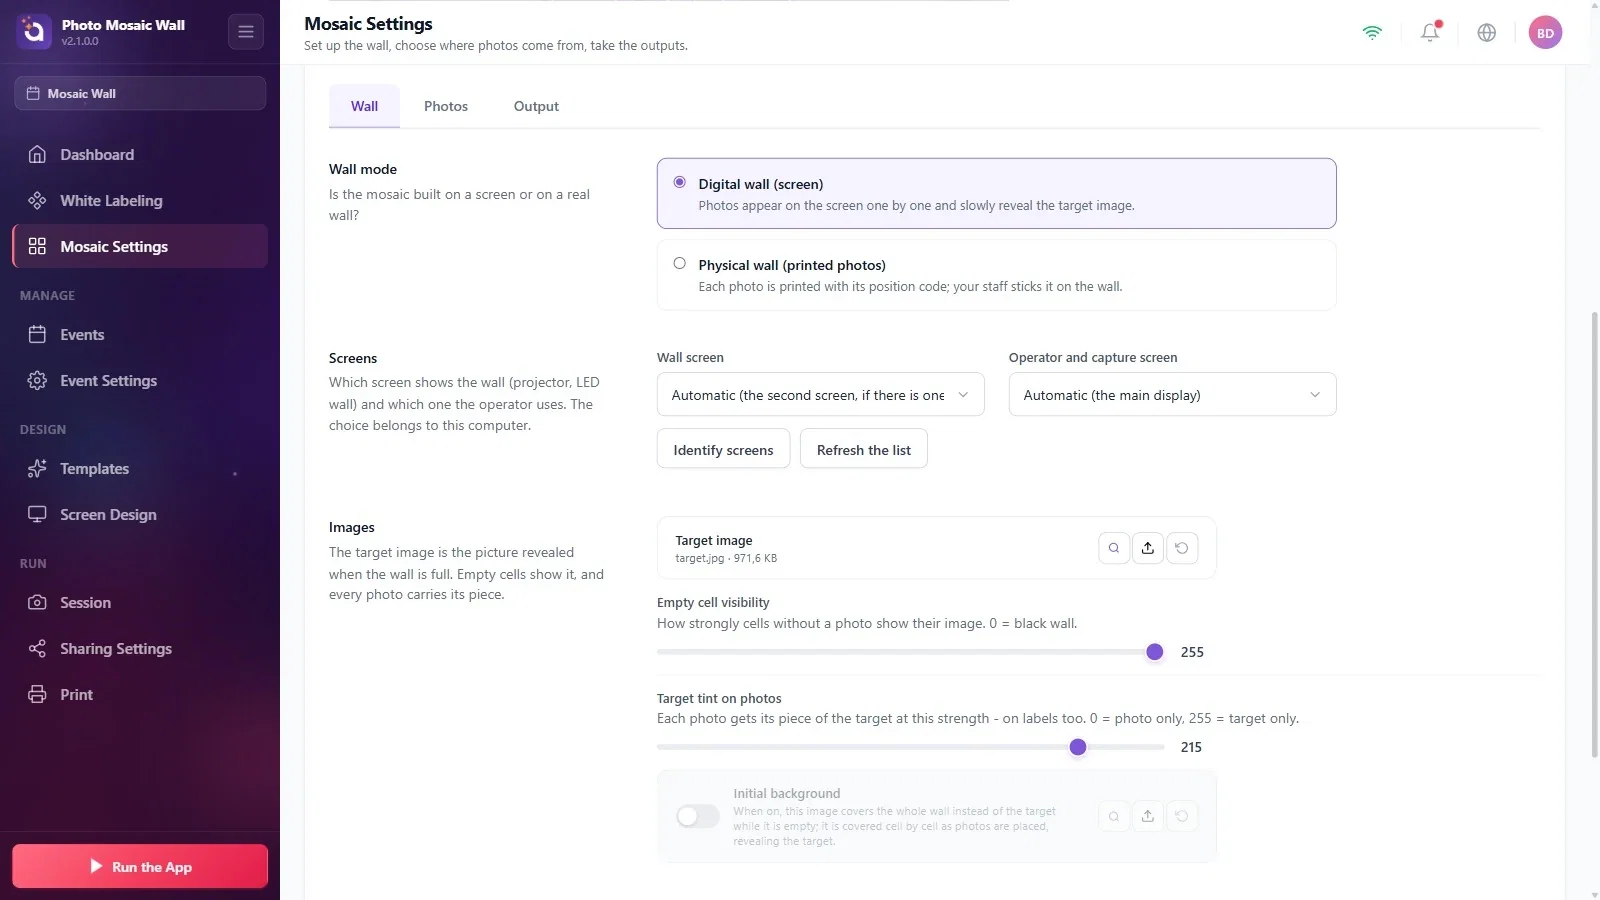
The mosaic can be set up in two ways: Digital wall (screen) places the photos one by one on a screen (projector, LED screen, TV); Physical wall (printed photos) prints each photo with a position code, and a staff member sticks it in its place on a real wall. The Grid section changes with the mode you choose: for a digital wall you enter the number of columns and the photo format, for a physical wall the real dimensions of the wall and the photo.
This guide describes Photo Mosaic Wall 2.1.0 on Windows. Screens and labels may differ in other versions.
- The right event must be selected.
- If you upload the target image first, you will see the grid on top of it (see “How to Set the Target Image and the Look of the Wall?”).
Step by step
Step 1 · Choose the wall mode
Mosaic Settings → Wall → Wall mode
Open the Mosaic Settings page from the left menu, scroll down to the Wall mode section on the Wall tab and click one of the two cards: Digital wall (screen) or Physical wall (printed photos). The selected card gets a purple frame; the Grid fields at the top of the page change with your choice.
Step 2 · Digital wall: enter the number of columns and the photo format
Mosaic Settings → Wall → Grid
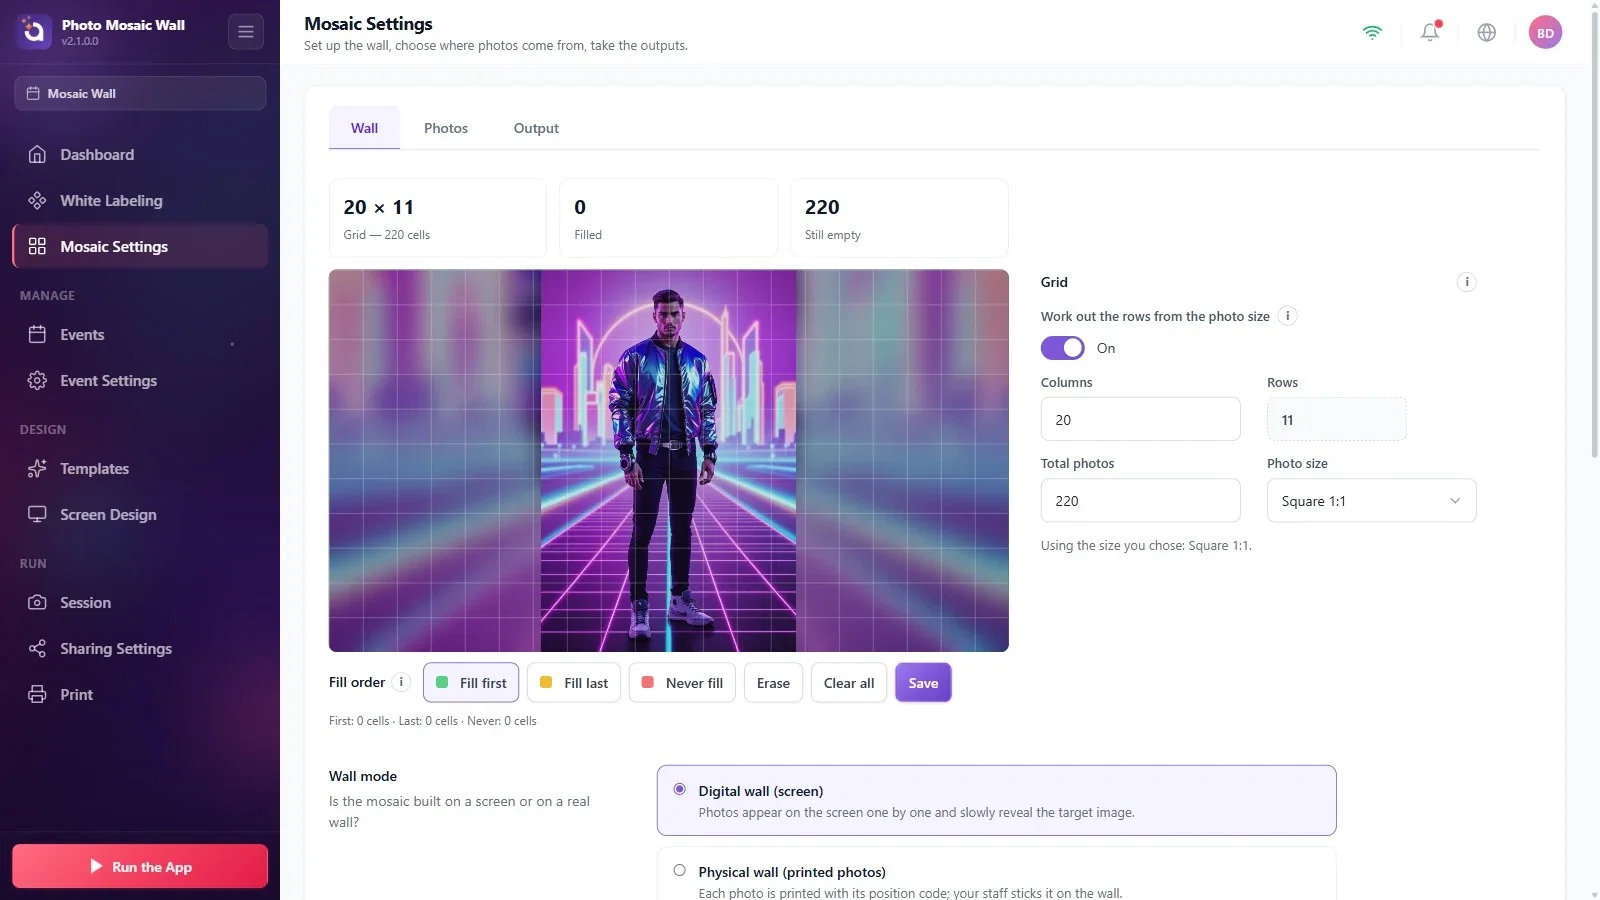
In the Grid section, type the number of columns in the Columns box and choose the photo format from the Photo size list (Square 1:1, Story 9:16, 4×6 portrait and so on; Automatic (from the template) reads the format from the event's template).
While Work out the rows from the photo size is on, Rows is calculated automatically and appears grey and locked, so every cell has the same shape as the photo. As the (i) tip of the section says, you only need to fill in the number of columns or the Total photos box; the other one is calculated.
Step 3 · Physical wall: enter the dimensions
Mosaic Settings → Wall → Grid
In physical mode, the Grid section shows the Wall width (m), Wall height (m), Photo width (mm) and Photo height (mm) fields. As the tip of the section says, you only need to enter the wall size, the number of cells or the photo size; the others are calculated.
A fourth card appears at the top: Leftover strip on the wall shows the margin the photos don't cover. In the example, a 3 m × 2 m wall with 100 × 150 mm photos gives a 30 × 13 grid, and a 50 mm strip of the wall's height stays empty.

Step 4 · Check the grid in the preview
Mosaic Settings → Wall
The preview on the left draws the grid lines over the target image; here you can see how the cells split faces and logos. The cards at the top update the Filled and Still empty counts as the wall runs.
On a physical wall, if Leftover strip on the wall is greater than zero, the photos don't cover the whole wall; you can make this margin smaller by adjusting the wall or photo size.
The wall mode and the grid are saved to the event; when you open the same event again, it comes back with the same settings.
Changing the grid after marking the fill order: the marks are moved proportionally to the new grid, and a note saying so appears under Fill order. If you need an exact match, correct the marks and save again.
Trying to change the Rows box by hand: while Work out the rows from the photo size is on, the number of rows is calculated and the box is locked.
