













Everything on the mosaic wall belongs to an event: the target image, the grid, the photo source and the photos placed on the wall are stored with the selected event. You open a new event with the Create New Event wizard on the Events page; if you like, you can copy an earlier event or import an event created on another device from the cloud. Once the event is created, Guided Setup opens and asks for the camera.
This guide describes Photo Mosaic Wall 2.1.0 on Windows. Screens and labels may differ in other versions.
- You must be signed in to the app with your account. Events are saved to your account, so they can be imported on another device with Import Old Event From Cloud.
- Find the Events item under the Manage heading in the left menu.
Step by step
Step 1 · Open the Events page
Events
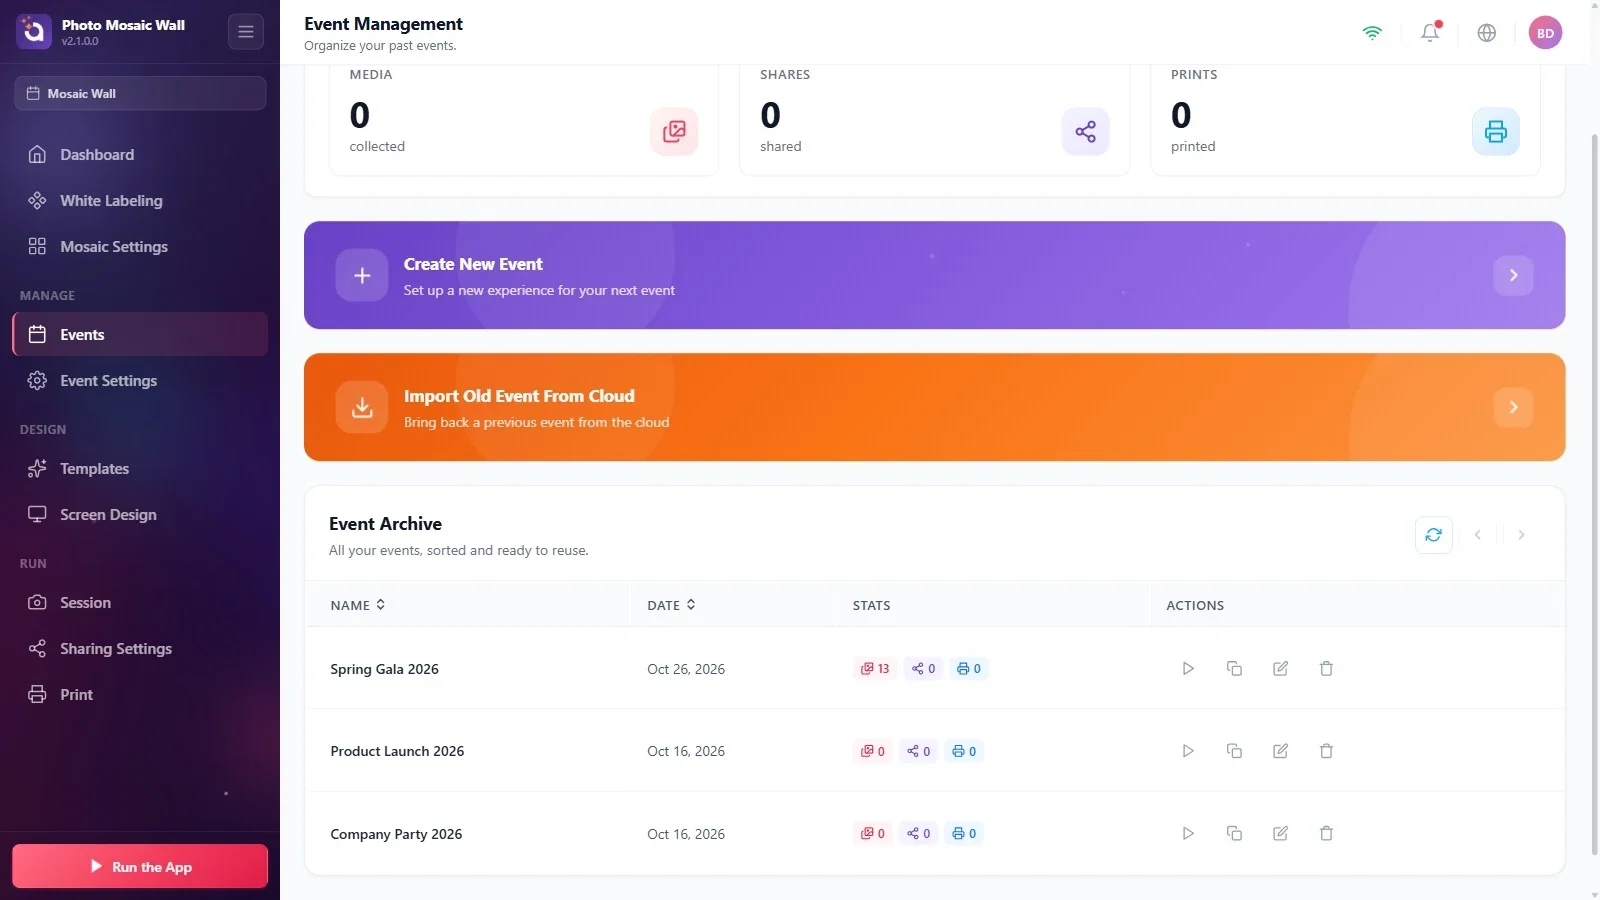
In the left menu, click Events under Manage. The selected event sits at the top of the page with the Current label; the cards below it show the event's Media, Shares and Prints counts. Below them are the Create New Event (purple) and Import Old Event From Cloud (orange) cards, and at the bottom the Event Archive table.
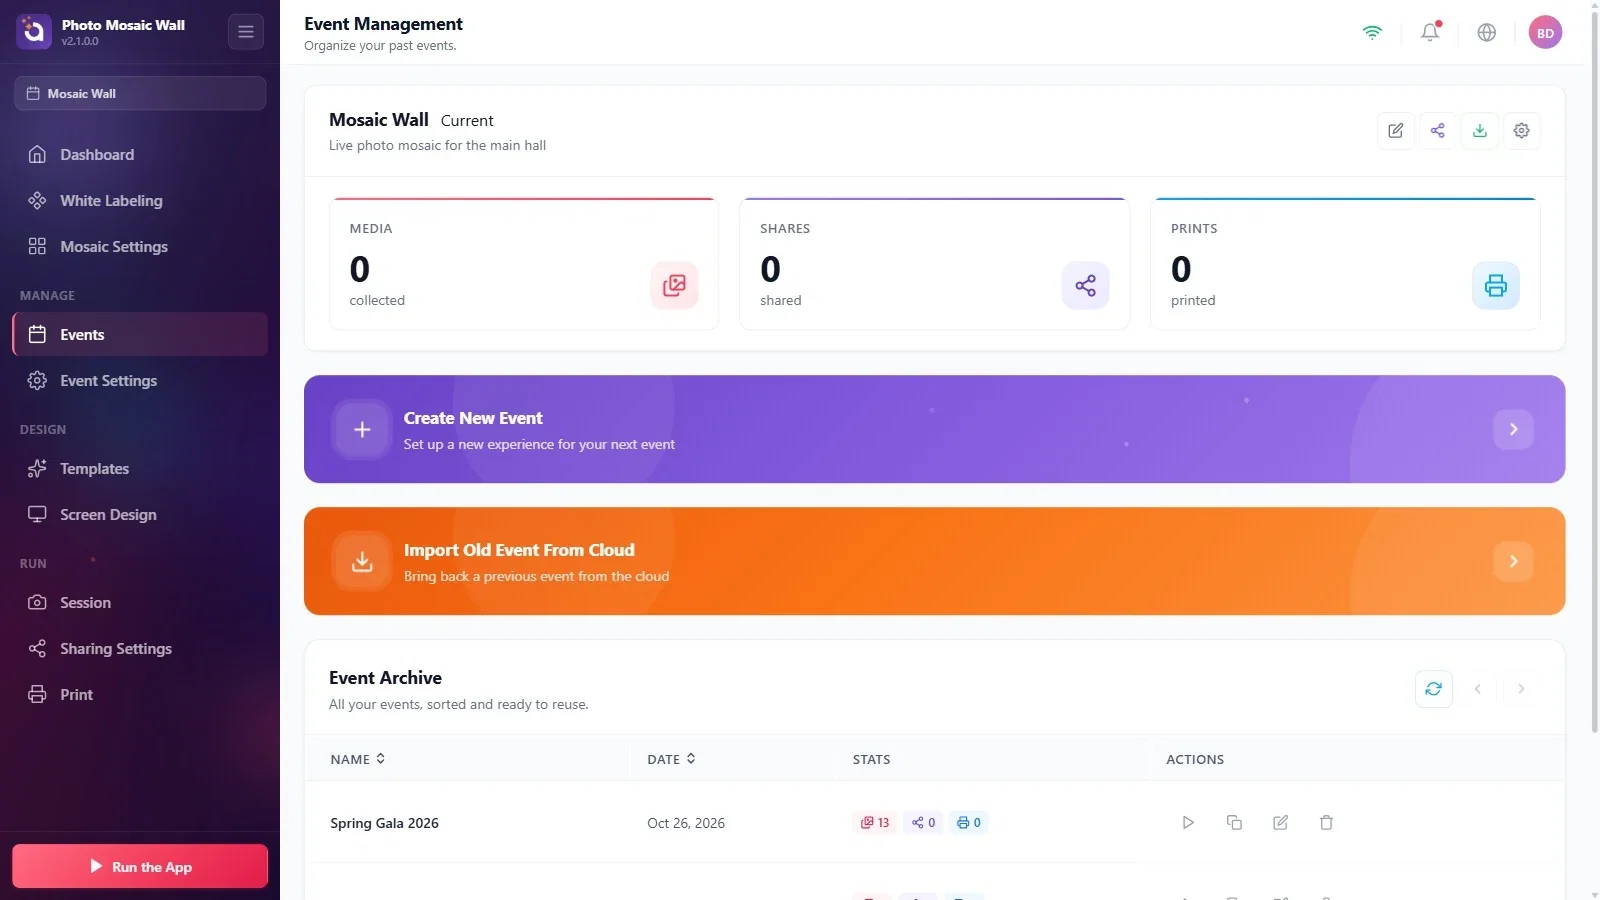
Step 2 · Name the event
Events → Create New Event
Click the Create New Event card. In the first step of the window that opens (Event Details), type the event's name in the Event Name box; the field is marked with an asterisk, so it is required. Description is optional and is only a note for you. As the text at the bottom of the window says, you can change these details later on the Event Settings page. Go to the second step with Continue.
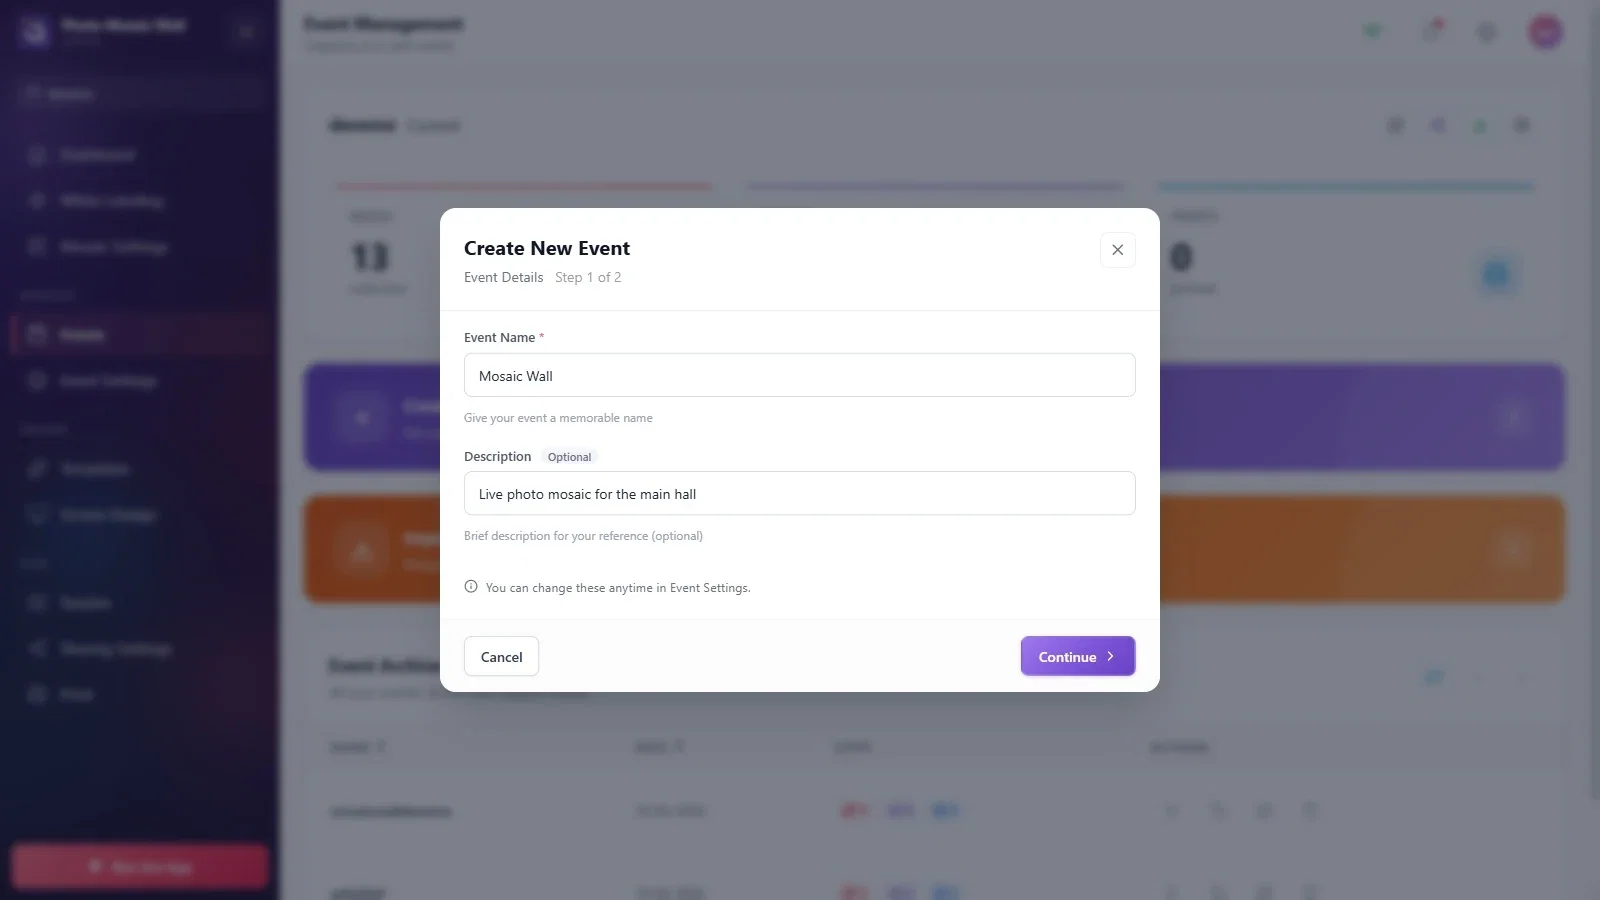
Step 3 · Start with an empty event
Events → Create New Event
In the second step the window asks How would you like to start?. The Create New Event option is already selected and opens an empty event; this is the right choice for your first mosaic event. Press the Create Event button.
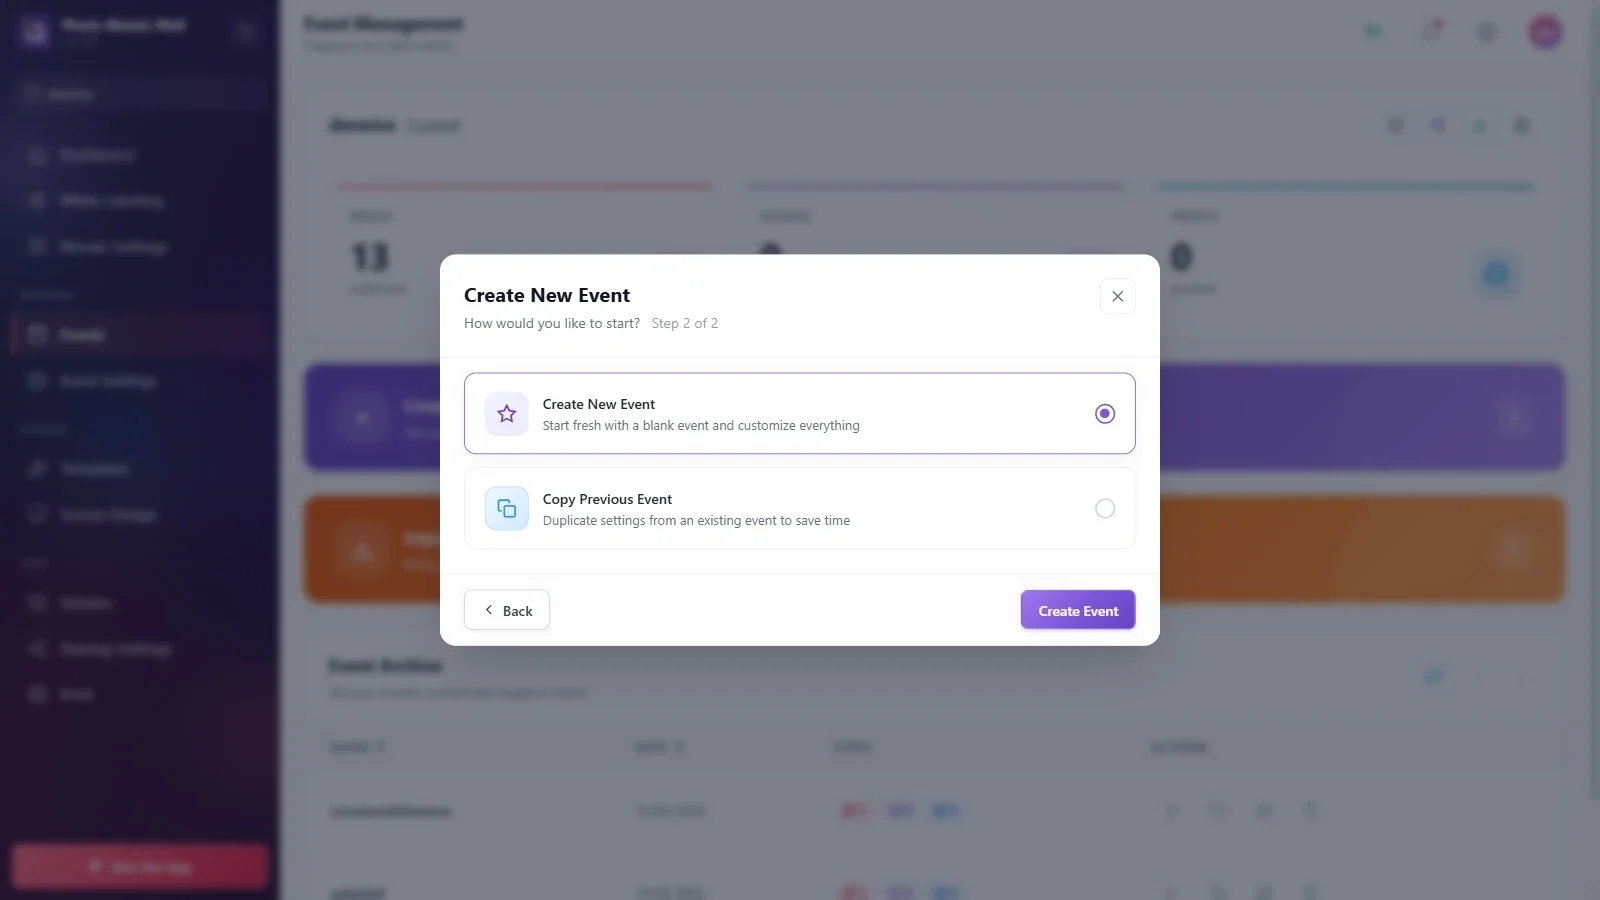
Step 4 · (Optional) Copy an earlier event
Events → Create New Event
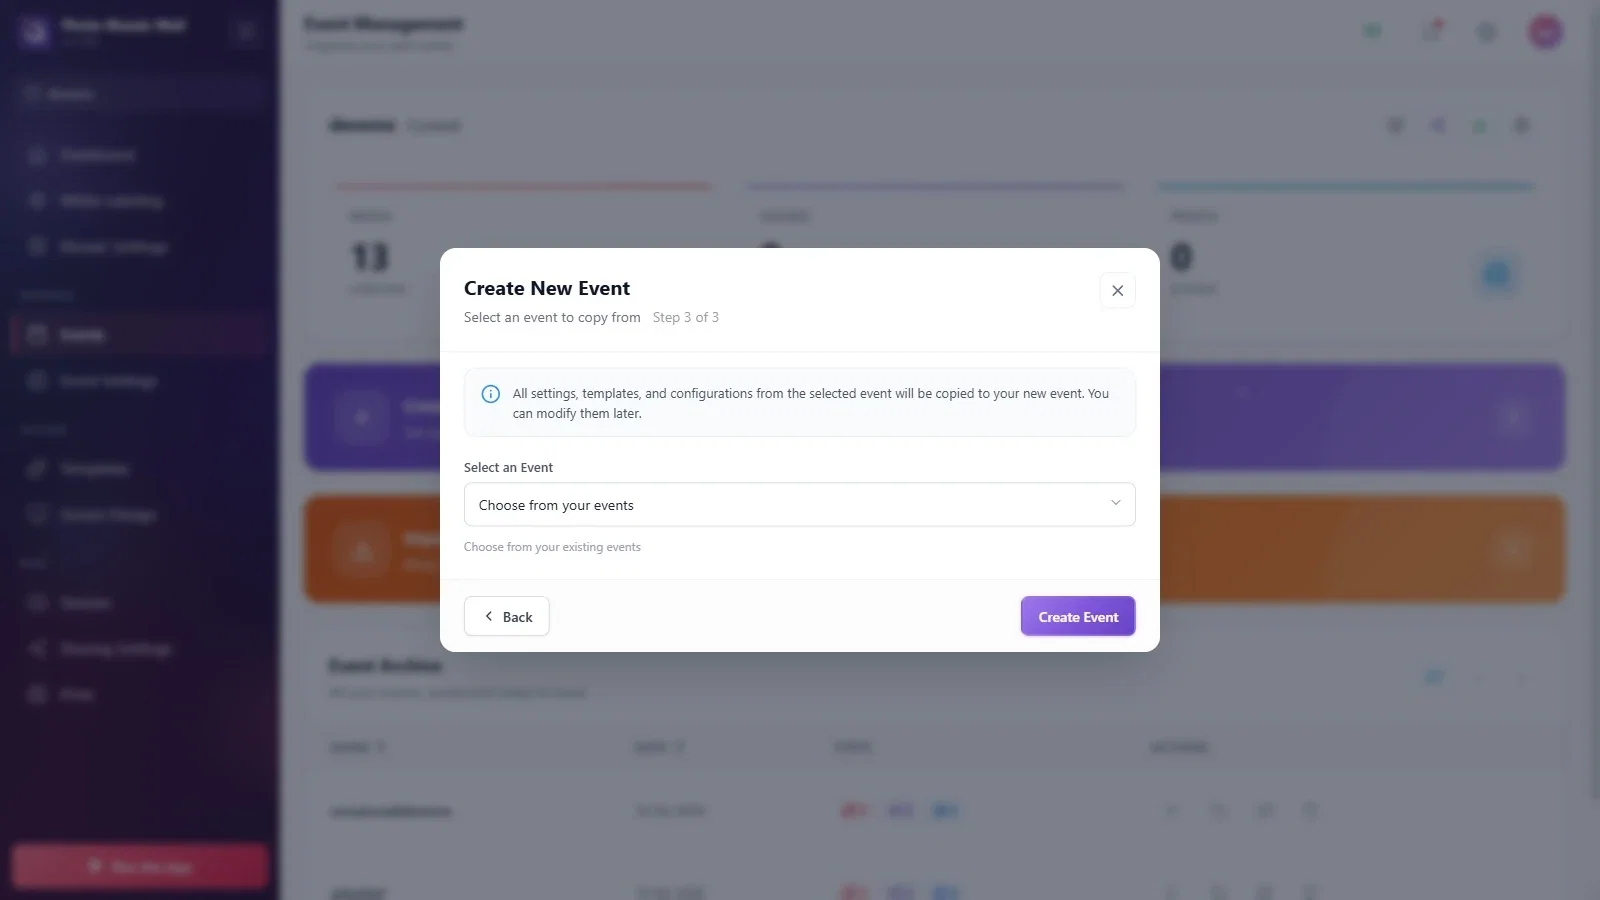
If you choose the Copy Previous Event card in the same step, the wizard grows to three steps and the button at the bottom becomes Continue. If you have set up a similar event before, this saves time.
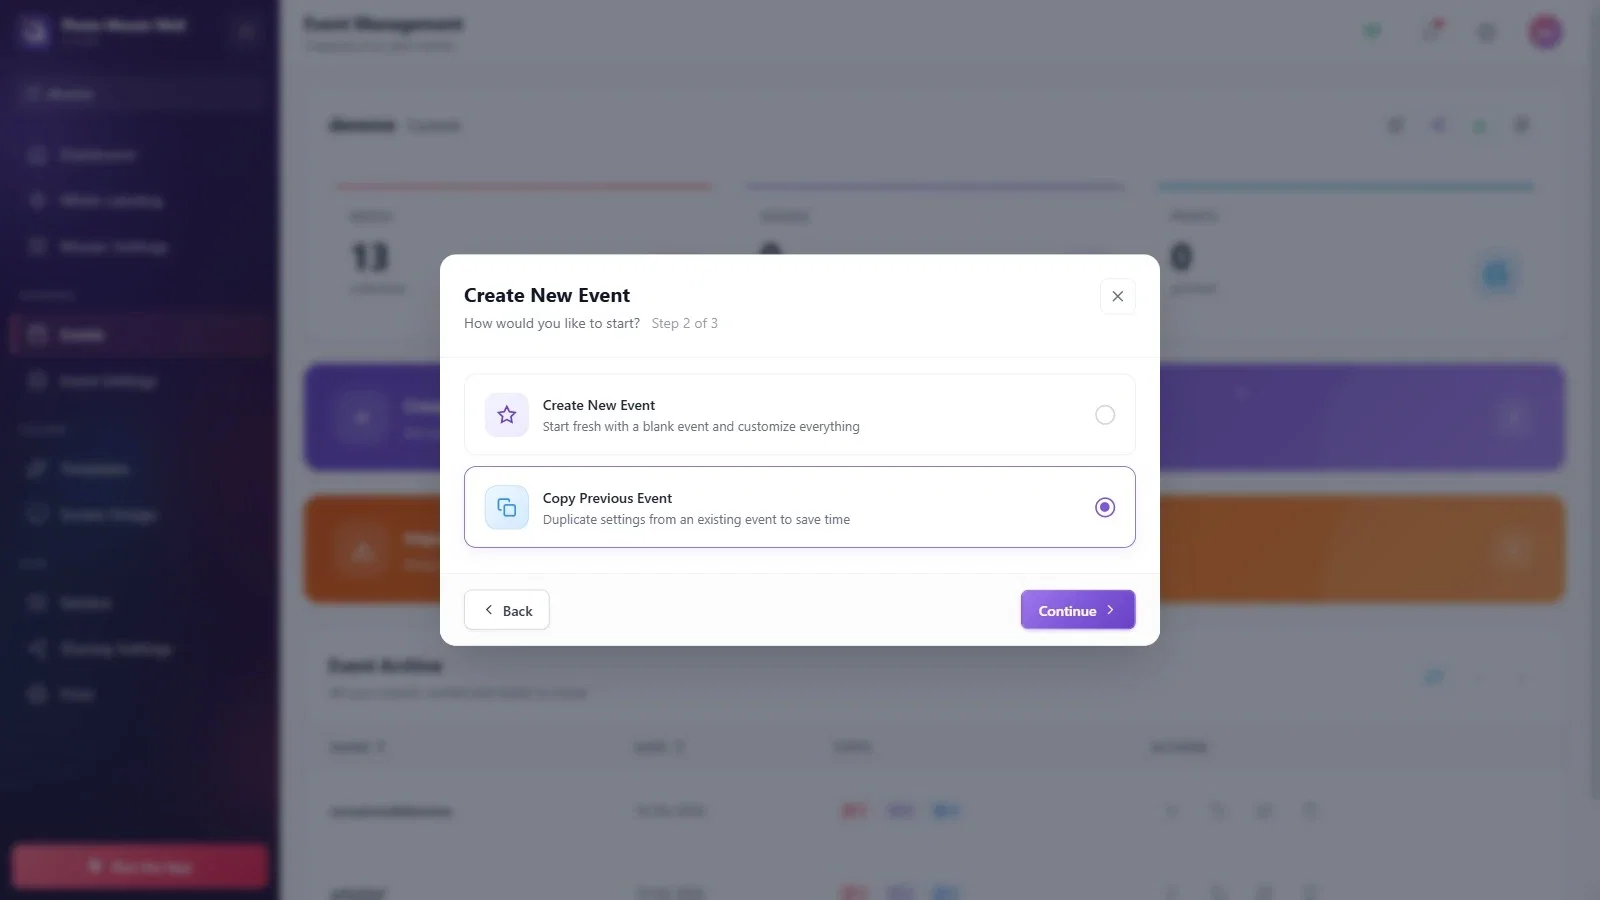
Step 5 · Choose the event to copy
Events → Create New Event → Copy Previous Event
In the third step, choose the event to copy from the Select an Event list and press the Create Event button. The note in the window says that all settings, templates and configuration of the chosen event will be copied to the new event, and that you can change them later.
Step 6 · Guided Setup: connect the camera or skip
Guided Setup
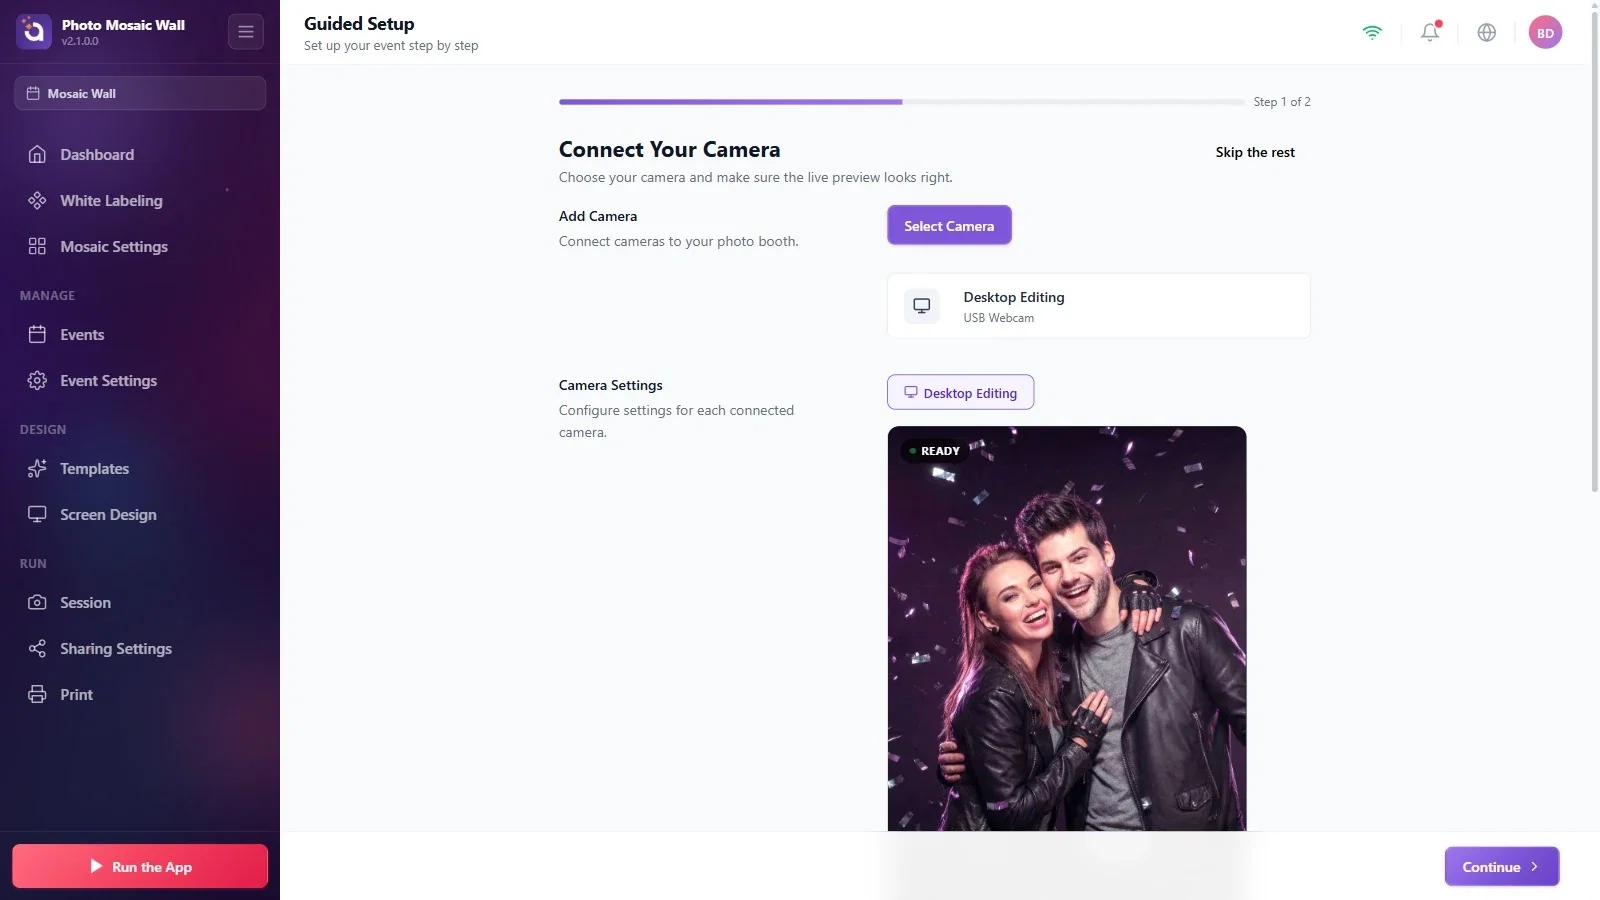
Once the event is created, Guided Setup opens. The first step is Connect Your Camera: choose the camera with Select Camera, check that the preview appears and press the Continue button at the bottom right.
If the photos will reach the wall from a folder where another program saves them, you don't need a camera; you can skip the setup with Skip the rest at the top right. The camera is only used in setups where guests take their photos in this app.
Step 7 · The event is ready
Guided Setup
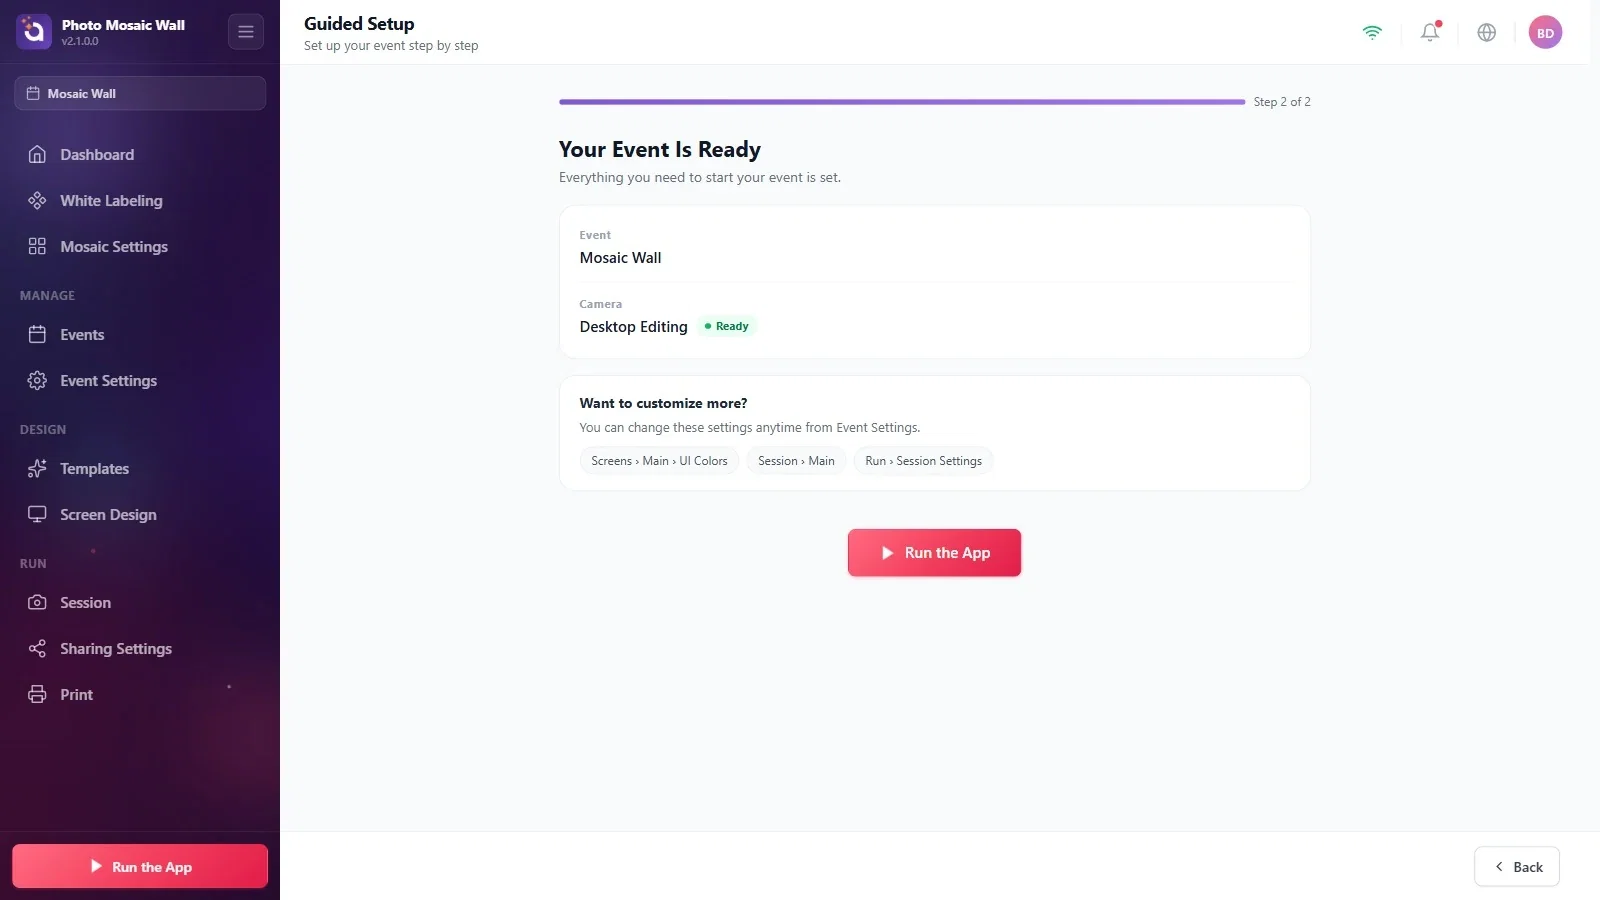
The second step is Your Event Is Ready: it sums up the event's name and the camera status. The shortcuts in the Want to customize more? box take you to the screen colors and the session settings; the mosaic-specific settings (wall, photos, outputs) are not here, they are on the Mosaic Settings page in the left menu. Run the App in the middle opens the wall right away; set up the mosaic first.
Step 8 · Use the Event Archive table
Events → Event Archive
The Event Archive table lists the events in your account with their name, date and counters; click the Name and Date headers to sort. Hover over the icons at the end of a row to see their names: Reuse, Duplicate, Edit and Delete. At the top right of the table there is a refresh icon (Sync Cloud Events) and page arrows.
Step 9 · Import an event from another device
Events → Import Old Event From Cloud
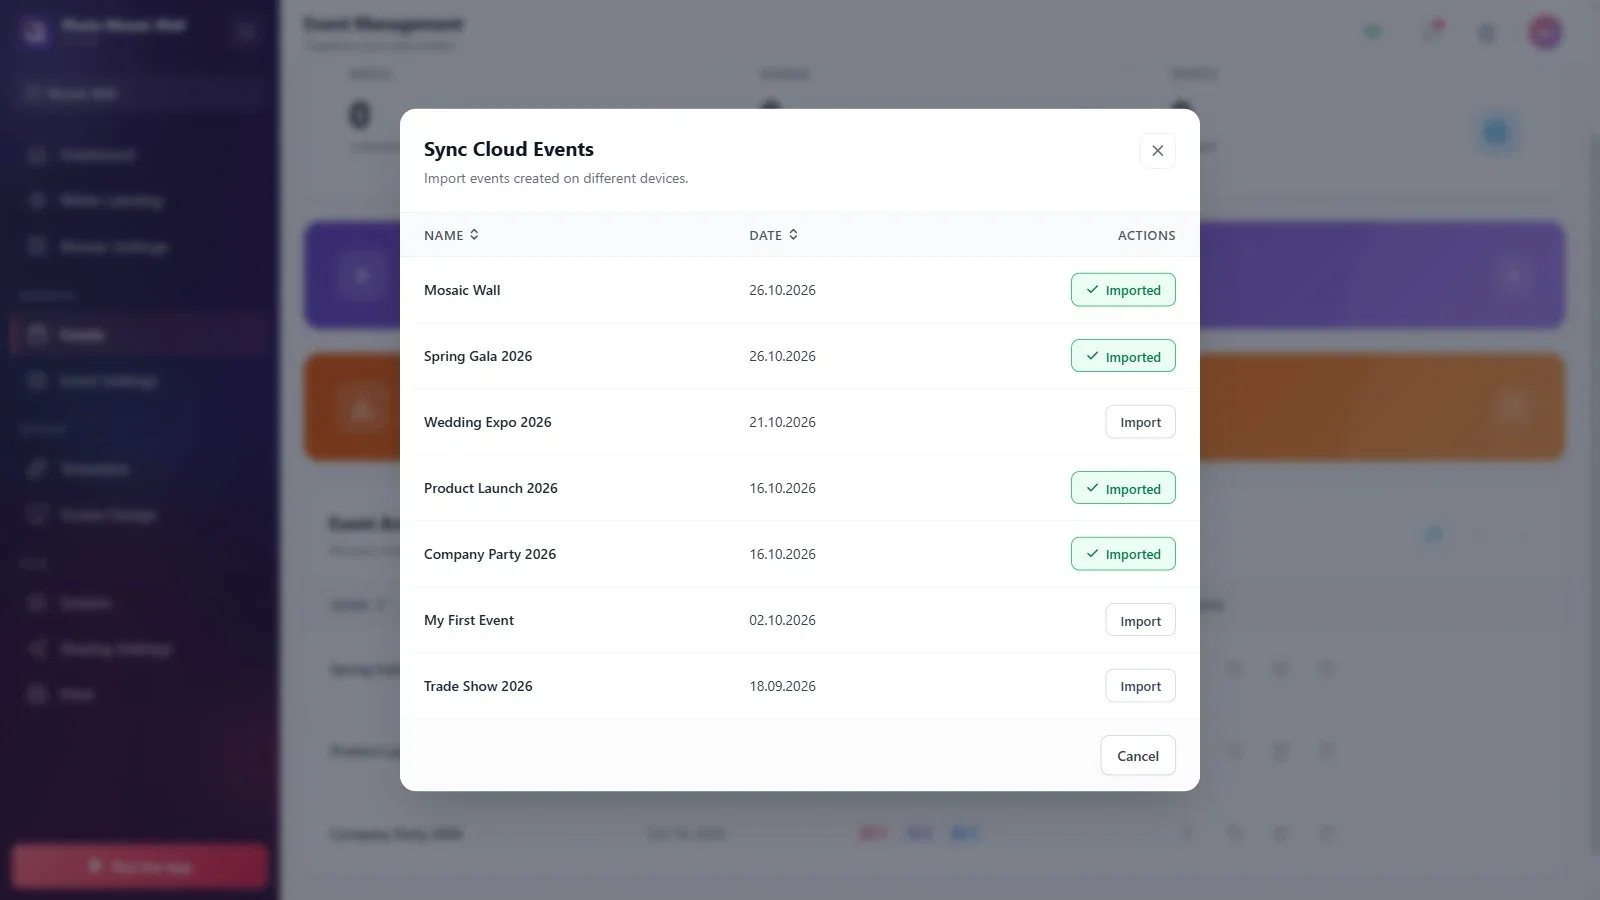
Click the Import Old Event From Cloud card. The Sync Cloud Events window lists the events in your account that were created on other devices, with their name and date. Events already on this device show Imported, the others show Import; press the Import button next to the event you want to import.
You can see which event is selected from the event name at the very top of the left menu; the mosaic settings and the photos on the wall belong to that event.
You can change the event's name and description later on the Event Settings → Main tab.
If the photos will come into a folder from another photo booth program, just skip the camera step of Guided Setup with Skip the rest.
Leaving the Event Name field empty: the field is marked with an asterisk and is required.
Assuming the mosaic is ready when you see the Your Event Is Ready screen: the wall mode, grid, target image and photo source are set up separately on the Mosaic Settings page.
Changing settings while the wrong event is selected: settings are written to the selected event. Before you start, check the event name at the top of the left menu.
