













When the settings are done, you start the wall with the Run the App button at the bottom left. The wall window opens full screen on the screen you chose; the operator screen opens on the main screen, and you handle incoming photos from there. To get back to the settings, press the lock icon at the bottom of the operator screen and enter the PIN you set on the Kiosk tab.
This guide describes Photo Mosaic Wall 2.1.0 on Windows. Screens and labels may differ in other versions.
- The wall mode, grid, target image and photo source must be set up.
- A 4-digit Dashboard PIN must be set on the Event Settings → Kiosk tab; you'll be asked for it when you exit the wall.
- The big screen for the wall must be connected and the Screens setting done.
Step by step
Step 1 · Press the Run the App button
Run the App
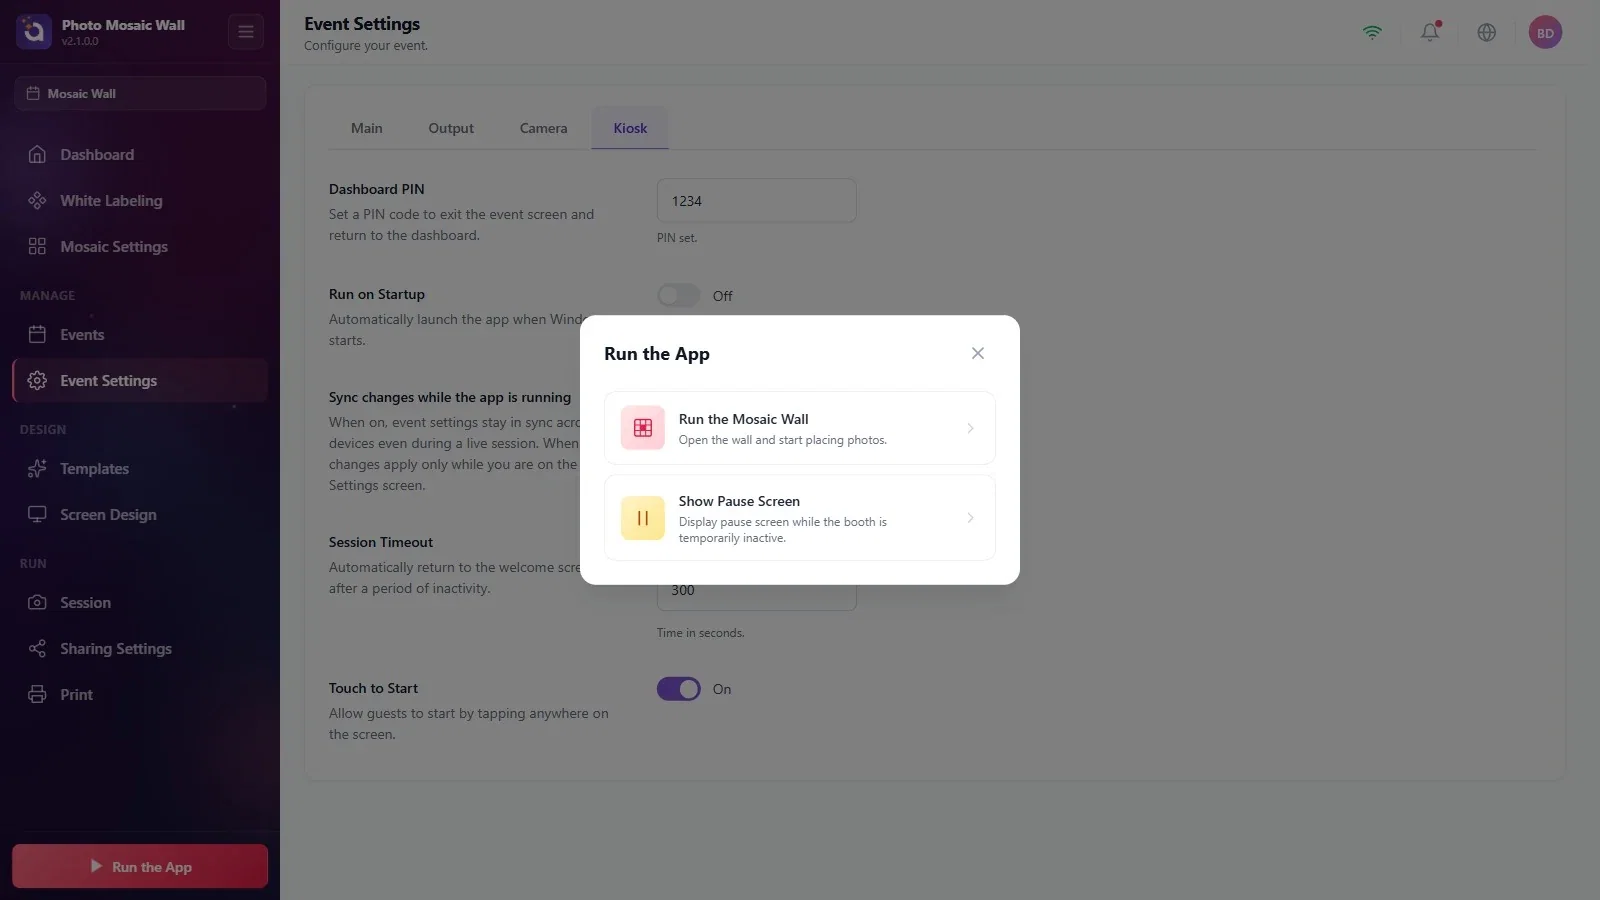
Whatever page you're on, press the Run the App button at the bottom of the left menu. In the window that opens, choose Run the Mosaic Wall.
Step 2 · Read the setup warning if it appears
Run the App → Run the Mosaic Wall
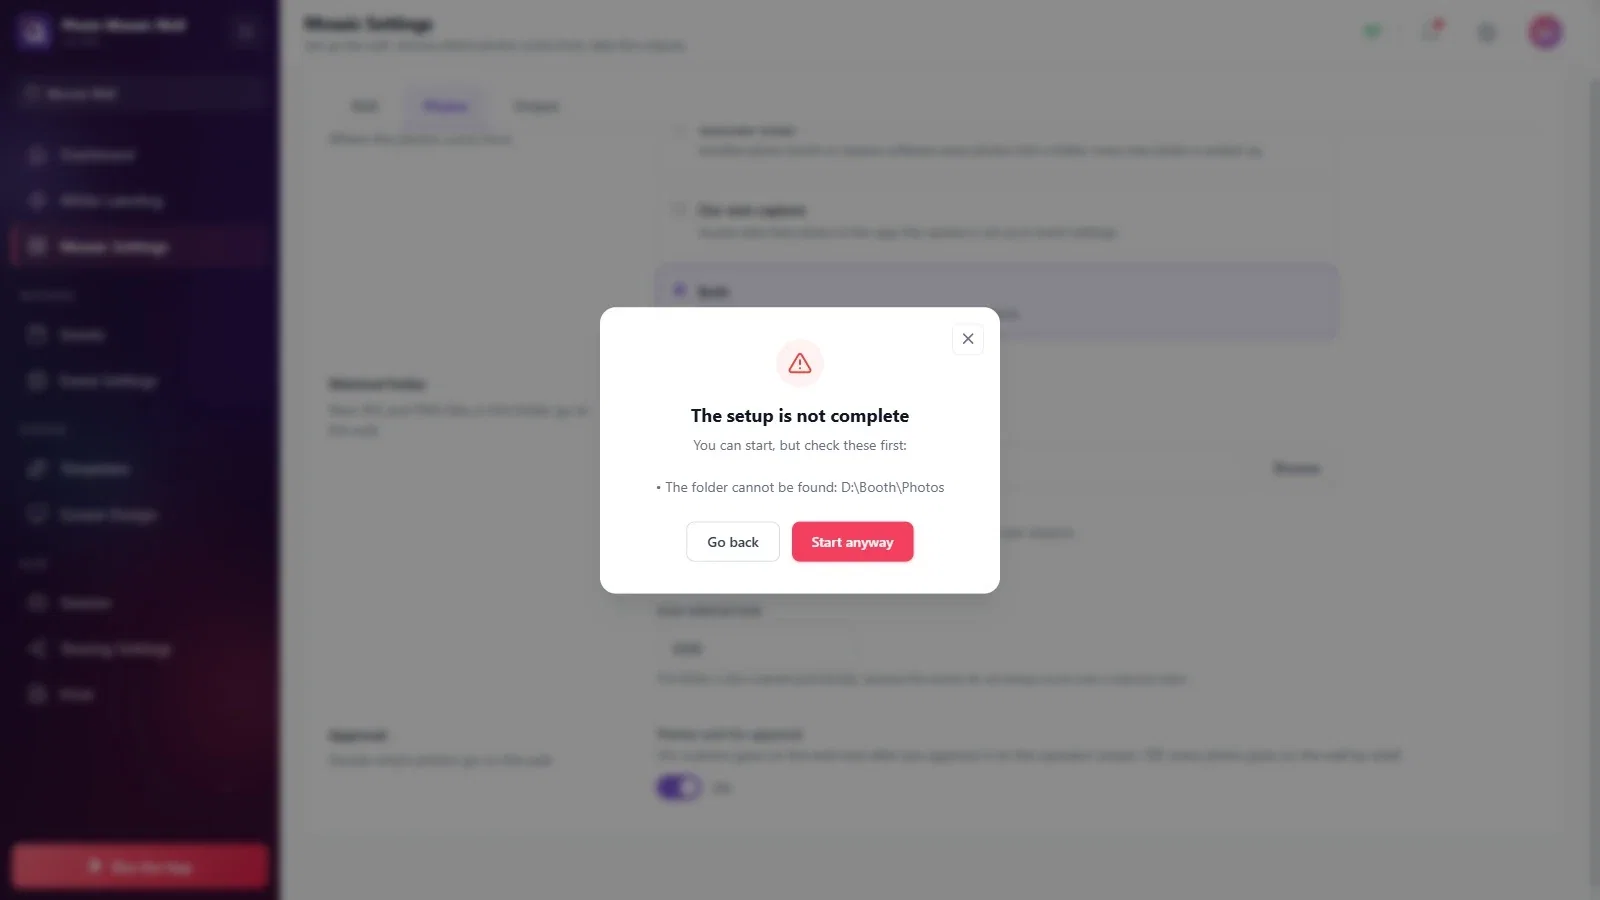
If a setting is missing or wrong, the The setup is not complete window appears before the wall opens and lists what you should check; in the example, the watched folder can't be found. Go back to the settings with Go back and fix it; if you want to start anyway, choose Start anyway.
Step 3 · The operator screen opens
Run the Mosaic Wall
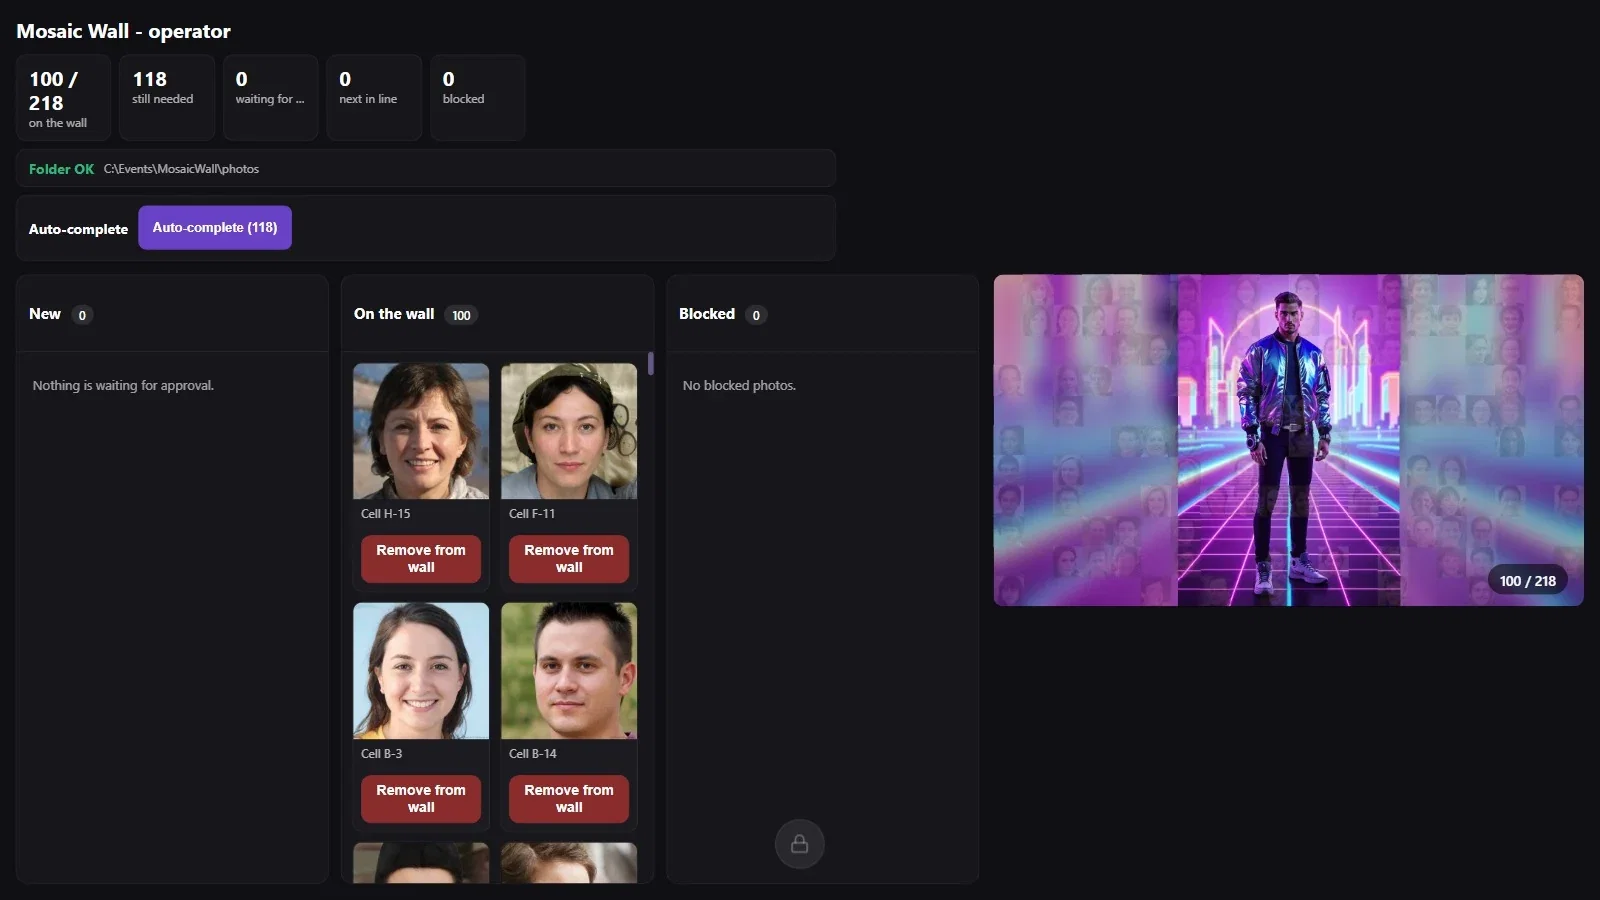
When the wall starts, the operator screen opens on the main screen: counters at the top (on the wall, still needed, waiting for approval, next in line, blocked), the folder status (Folder OK), the Auto-complete row and the New, On the wall and Blocked columns; on the right, a small copy of the wall. For details, see “How to Use the Operator Screen?”.
Step 4 · The wall screen
Run the Mosaic Wall
The wall window opens full screen on the screen you chose. Empty cells show the target image; photos are placed one by one at the Delay between photos (ms) interval.

Step 5 · A new photo is placed
Run the Mosaic Wall
A new photo first appears large in the middle of the wall, then settles into its cell (the Fly into place animation in the example).

Step 6 · Stop the wall and go back to the settings
Run the Mosaic Wall → lock icon
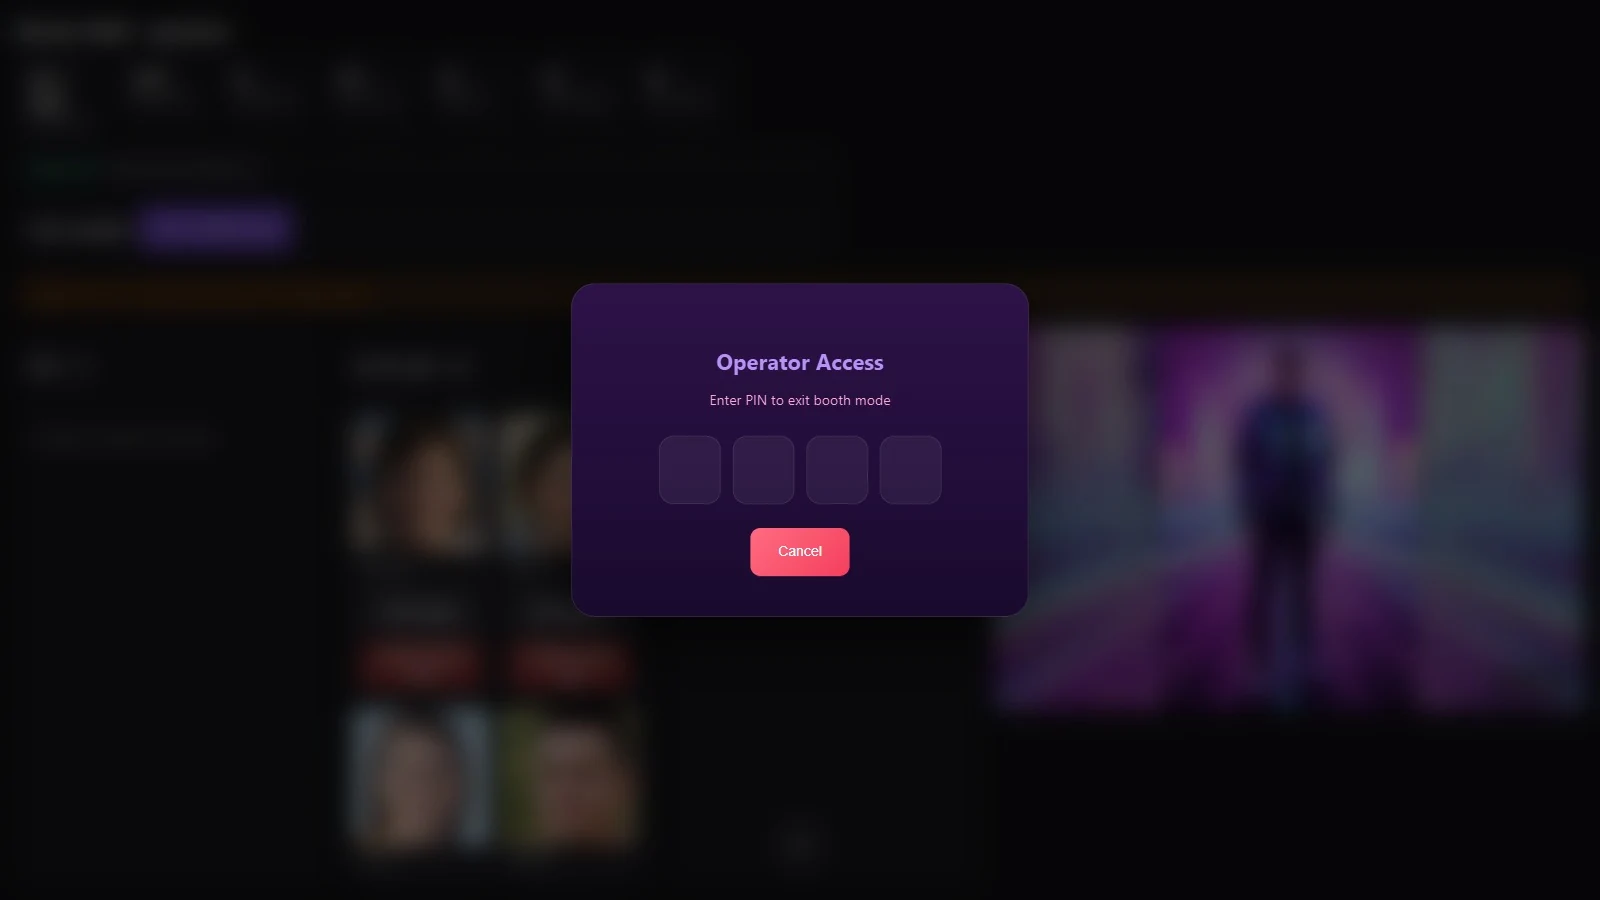
Press the lock icon at the bottom of the operator screen. In the Operator Access window, enter the 4-digit PIN you set on the Kiosk tab; the wall window closes and you're back in the settings. To back out, press Cancel.
If you need to change a setting during the event, stop the wall with the PIN, change the setting and start again with Run the App; the photos on the wall stay in place.
In this version, Show Pause Screen doesn't show a separate pause screen for the mosaic; the wall opens as usual.
Choosing Start anyway without reading the warning: for example, if the folder path is wrong, no photos reach the wall and the operator screen shows Folder problem.
Starting the wall without knowing the PIN: you need the PIN from the Kiosk tab to get back to the settings.
