Sharing Settings
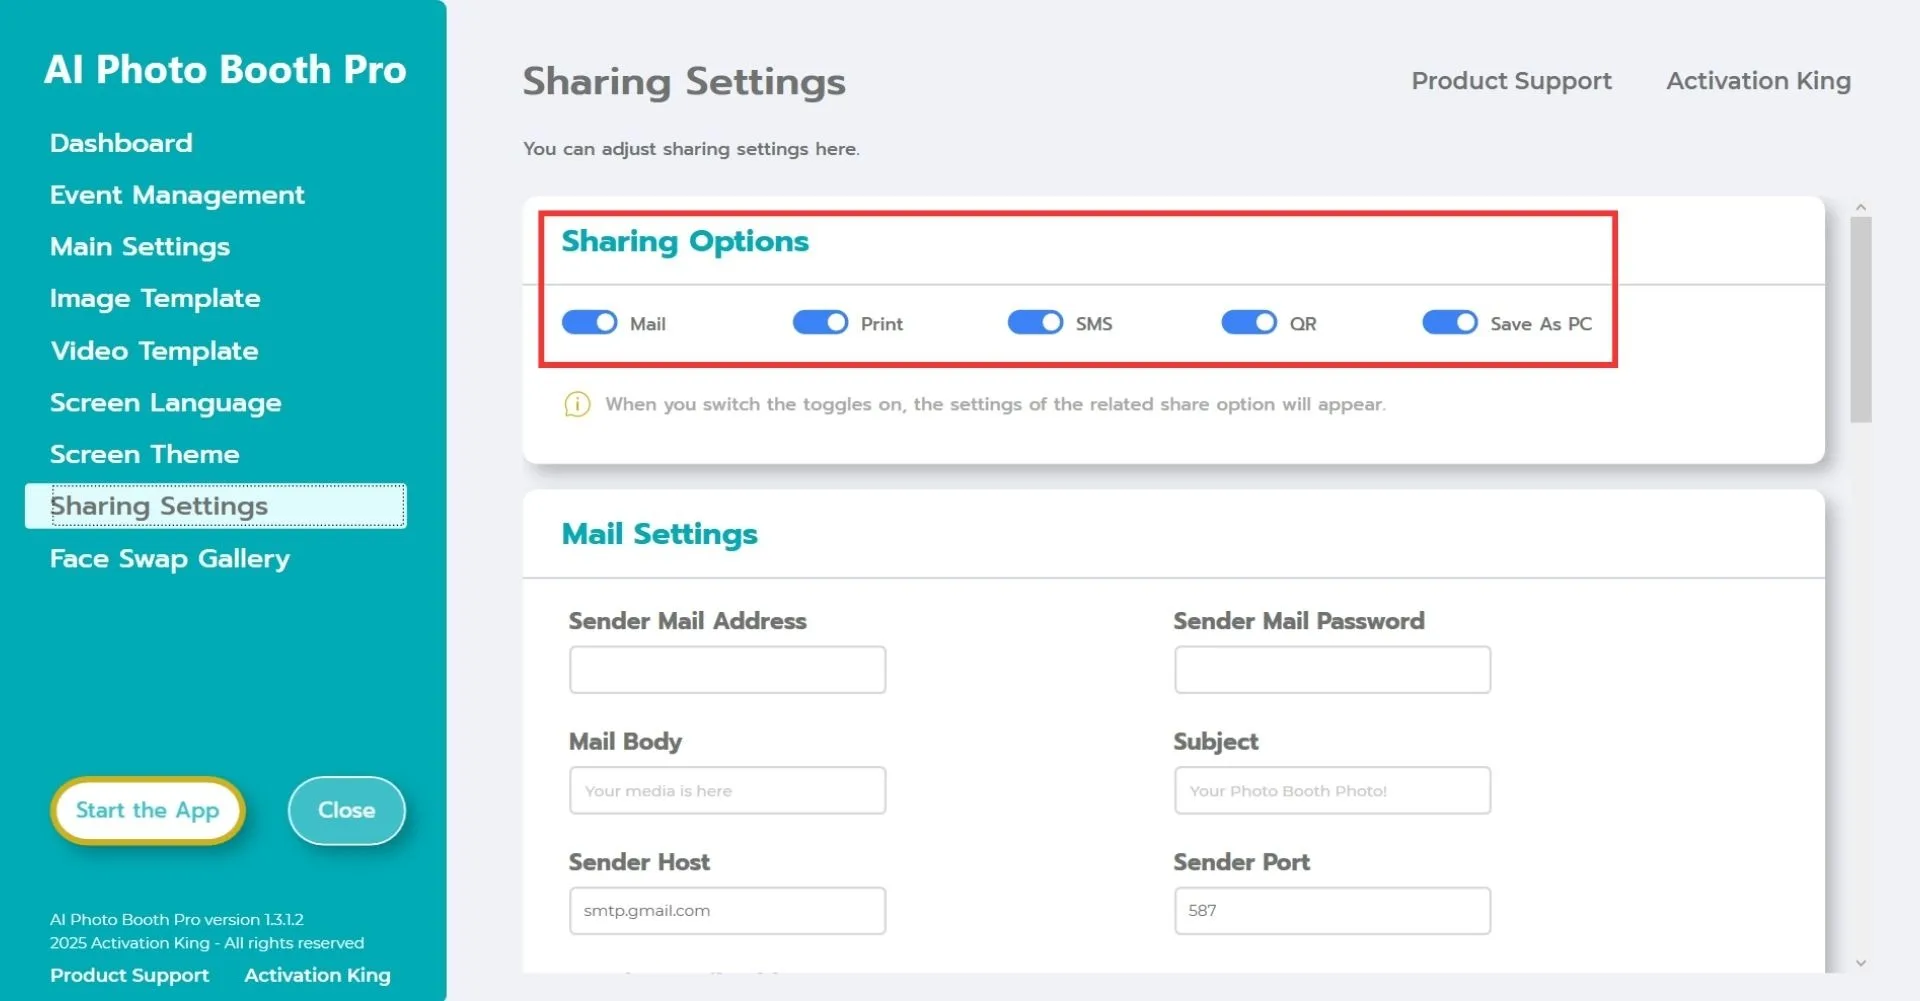
The "Sharing Settings" section is where you adjust and customize sharing options. In this section, you can enable or disable options such as Mail, Print, SMS, and QR.
Mail Settings

For the Mail system to function properly, you need to fill out the "Mail Settings" correctly.
Sender Mail Address: Enter the email address from which you want to send your work.
Sender Mail Password: Enter the application password of the email address entered in the "Sender Mail Address" field.
The software comes with default Gmail settings, so the email address you intend to use must be a Gmail address. If you wish to use Hotmail, Outlook, Yandex, or another provider, enter your provider's details in the "Sender Host and Sender Port" fields.
To use your preferred email address, visit the "Generate Google App Passwords" page in your web browser, follow the steps, and create an application password. Enter that application password into the "Sender Mail Password" field; do not use your Gmail password. If you are using Gmail, you do not need to modify the "Sender Host and Sender Port" fields.
The "Subject" field allows you to customize the subject line of the outgoing email.
The "Mail Body" section lets you customize the text content of the outgoing email.
After completing all these steps, enter your email address in the "Receiver Mail Address" field, click "Test Mail", and verify that your email settings are working correctly.
Print Settings
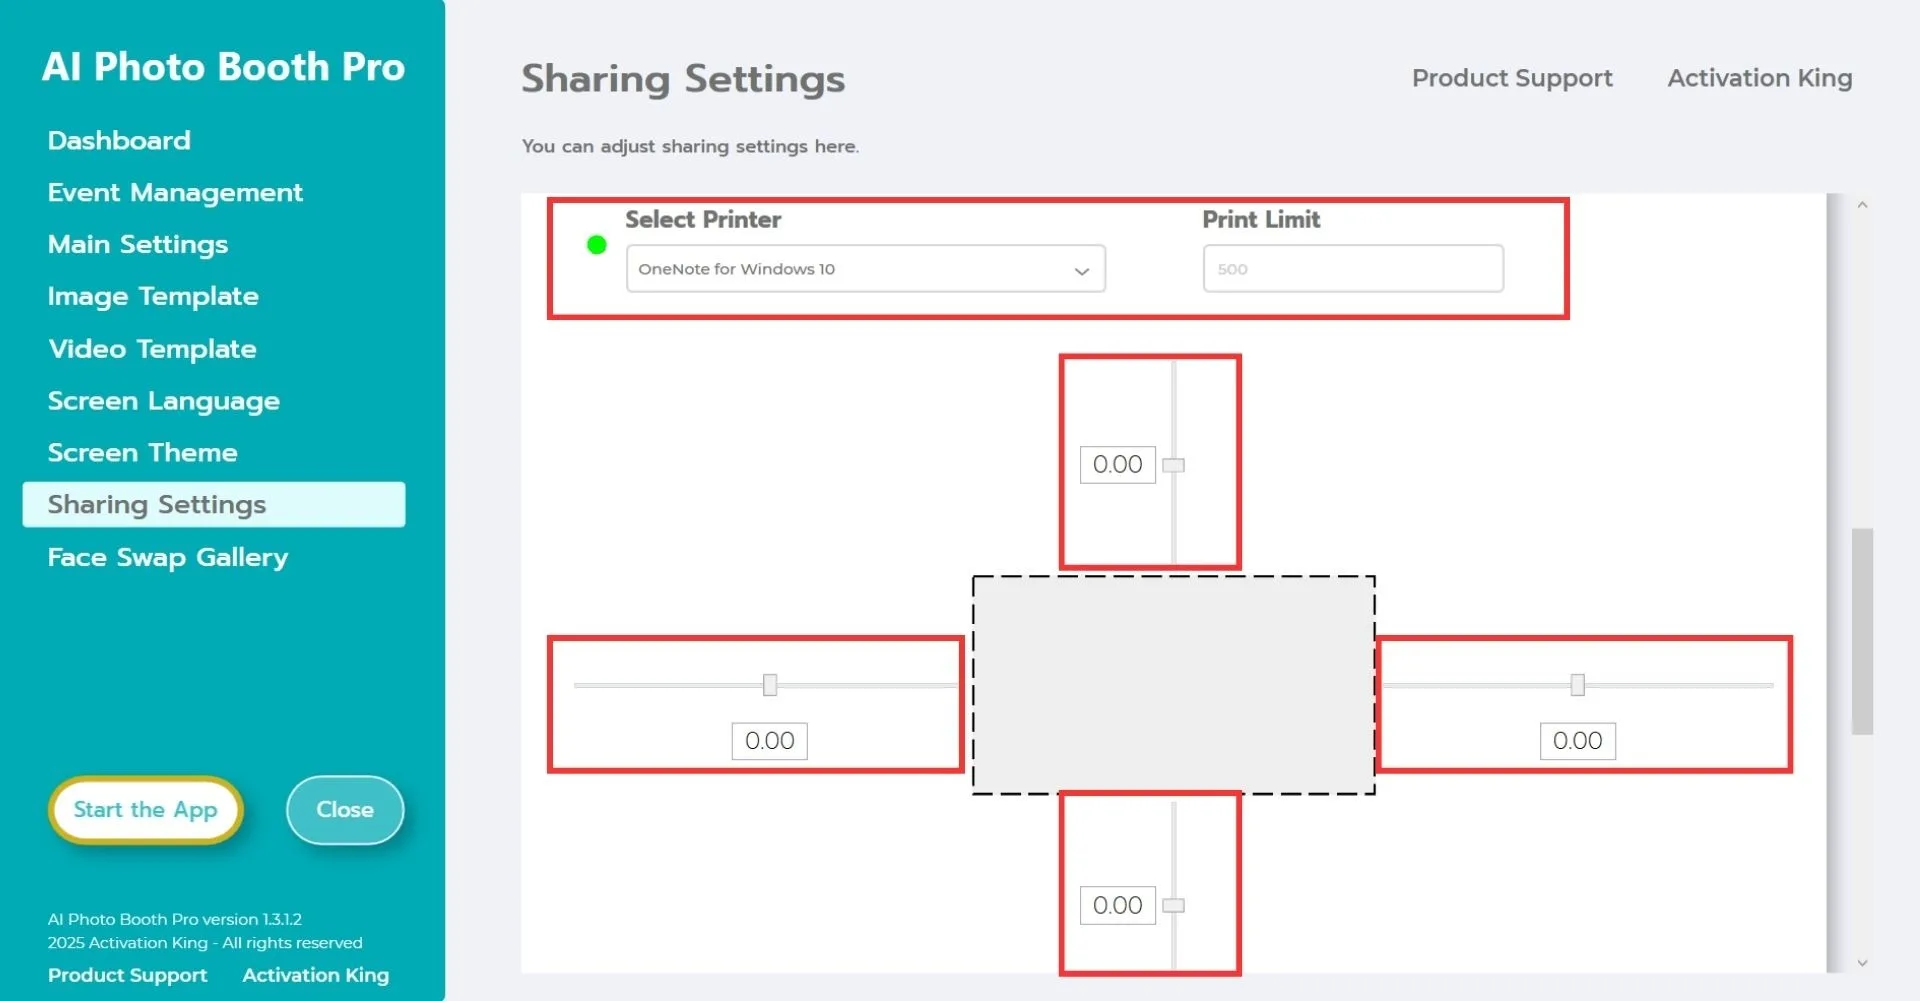
You can adjust your printer and photo print settings from this section. In the "Select Printer" section, choose the printer you want to use.
If you want to set a limit on photo prints, specify the number in the "Print Limit" section. When the specified limit is reached, the print icon will automatically disappear from the sharing screen.
The dashed line below represents your photo paper. You can adjust cropping and shifting for your photo prints horizontally or vertically using this section.
SMS Settings
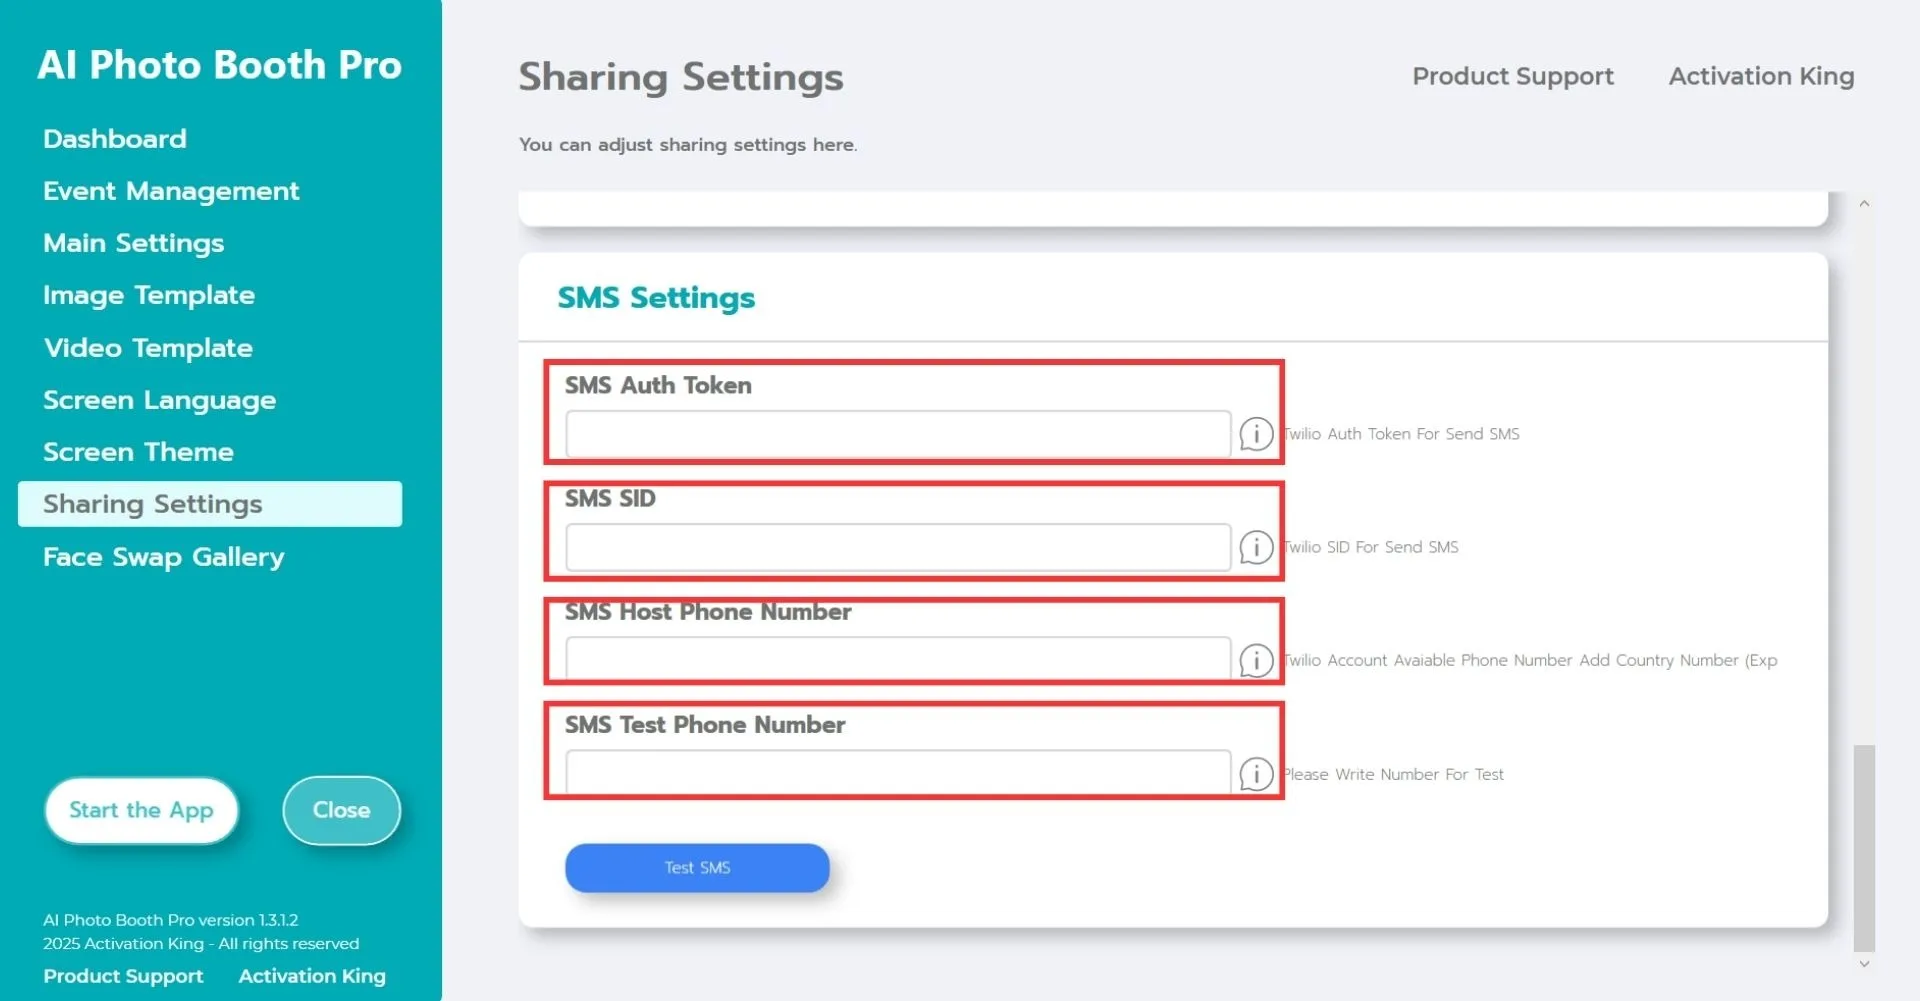
For SMS settings, you need to first sign up for free at twilio.com.
After completing your registration, follow the steps on the website to obtain the "SMS Auth Token, SMS SID, SMS Host Phone Number" information.
After entering your information into the specified fields, input your phone number in the "SMS Test Phone Number" section and press "Test SMS" to verify that everything is working correctly.