Ustawienia trybu
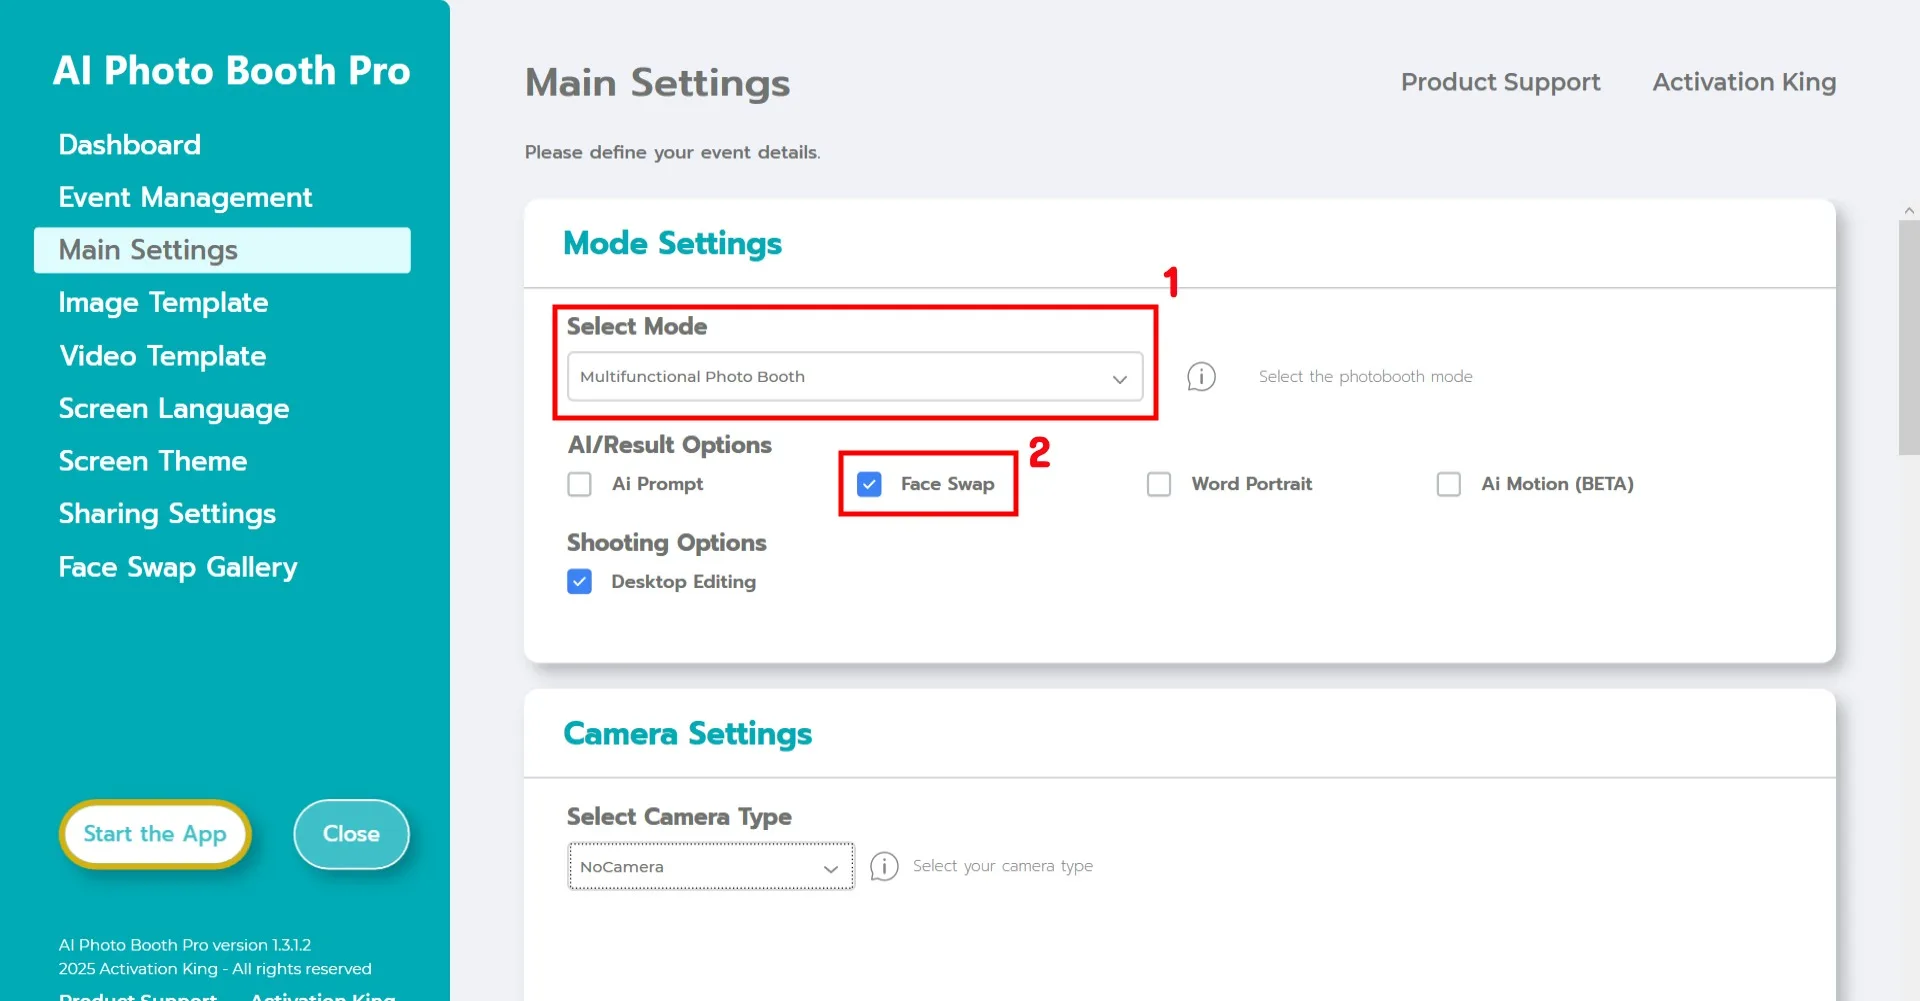
Wybierz Multifunctional Mode.
Po wybraniu trybu wybierz Face Swap z opcji poniżej.
Ustawienia kamery
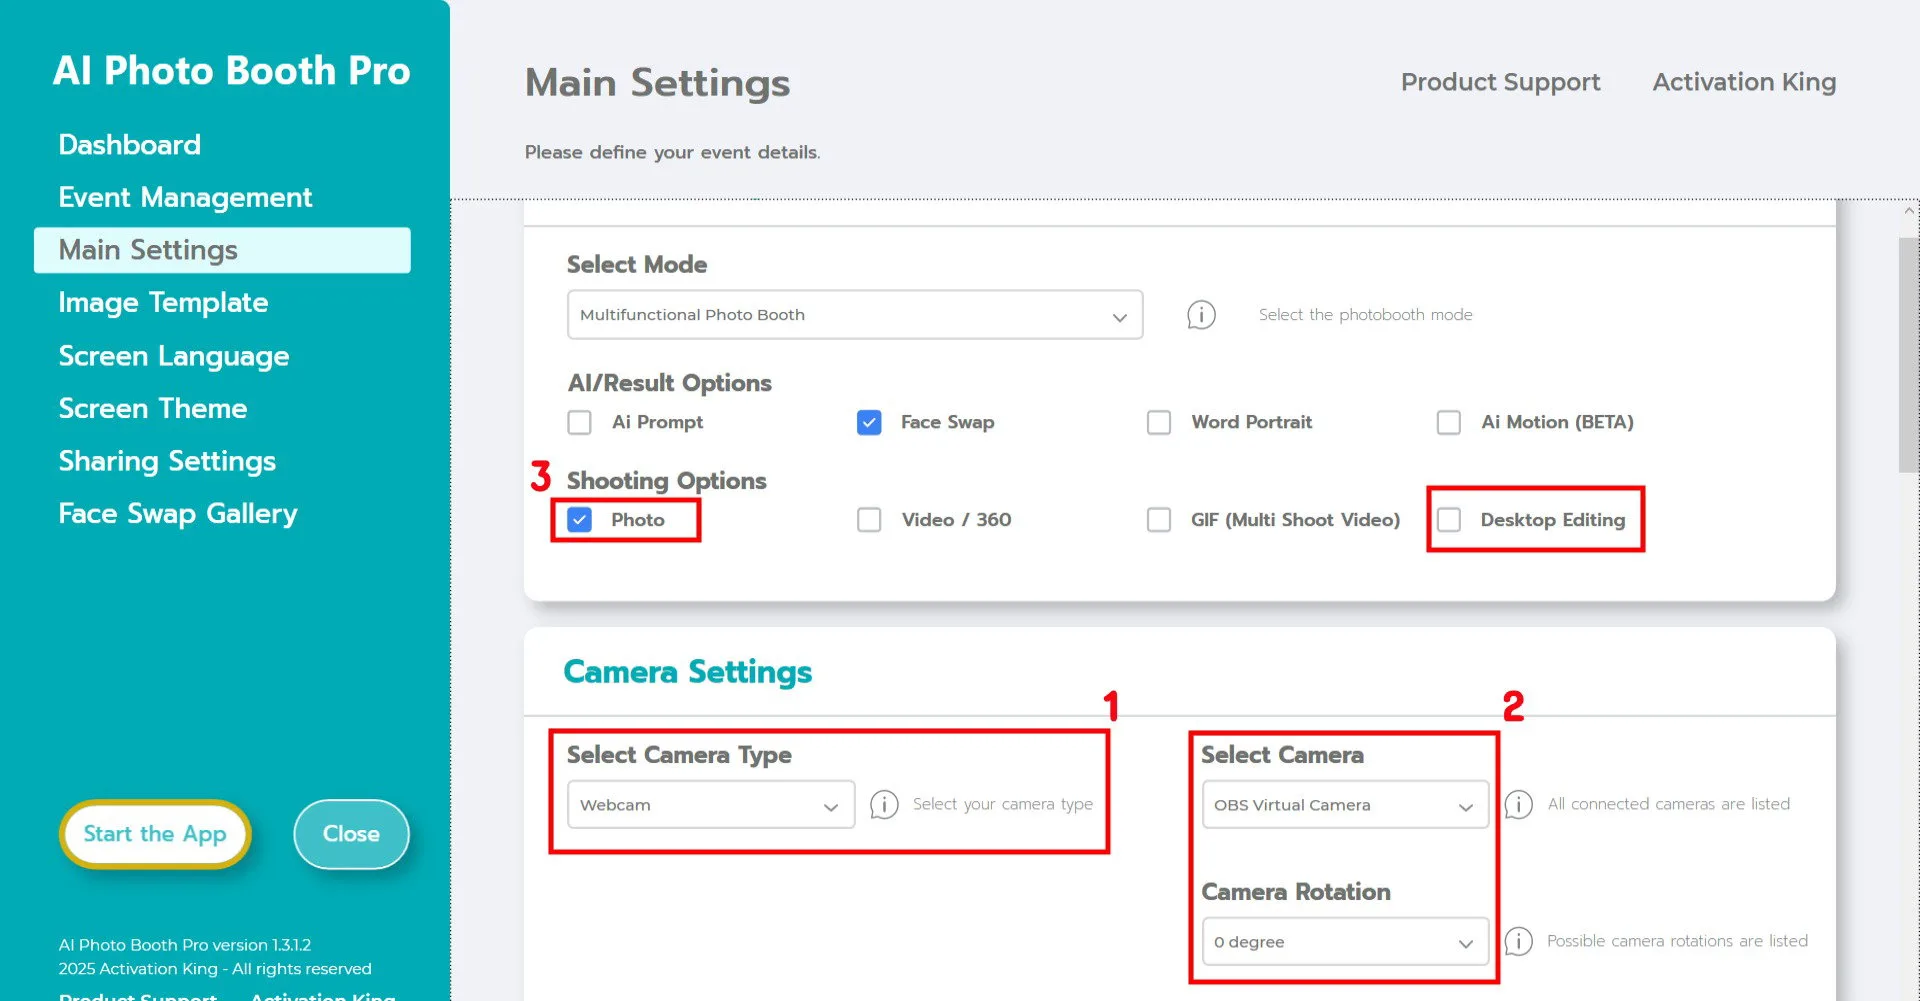
W sekcji Camera Settings użyj listy rozwijanej Select Camera Type, aby wybrać typ kamery, której chcesz użyć.
Po podłączeniu kamery do komputera pojawi się ona na liście rozwijanej Select Camera. (Jeśli się nie pojawi, upewnij się, że kamera jest włączona i prawidłowo podłączona, a następnie spróbuj ponownie.)
Po wybraniu kamery dostosuj Camera Rotation do swojej konfiguracji poziomej lub pionowej.
W sekcji Shooting Options włącz Photo.
Jeśli chcesz również pracować z istniejącymi zdjęciami na komputerze, włącz Desktop Editing.
Ustawienia robienia zdjęć
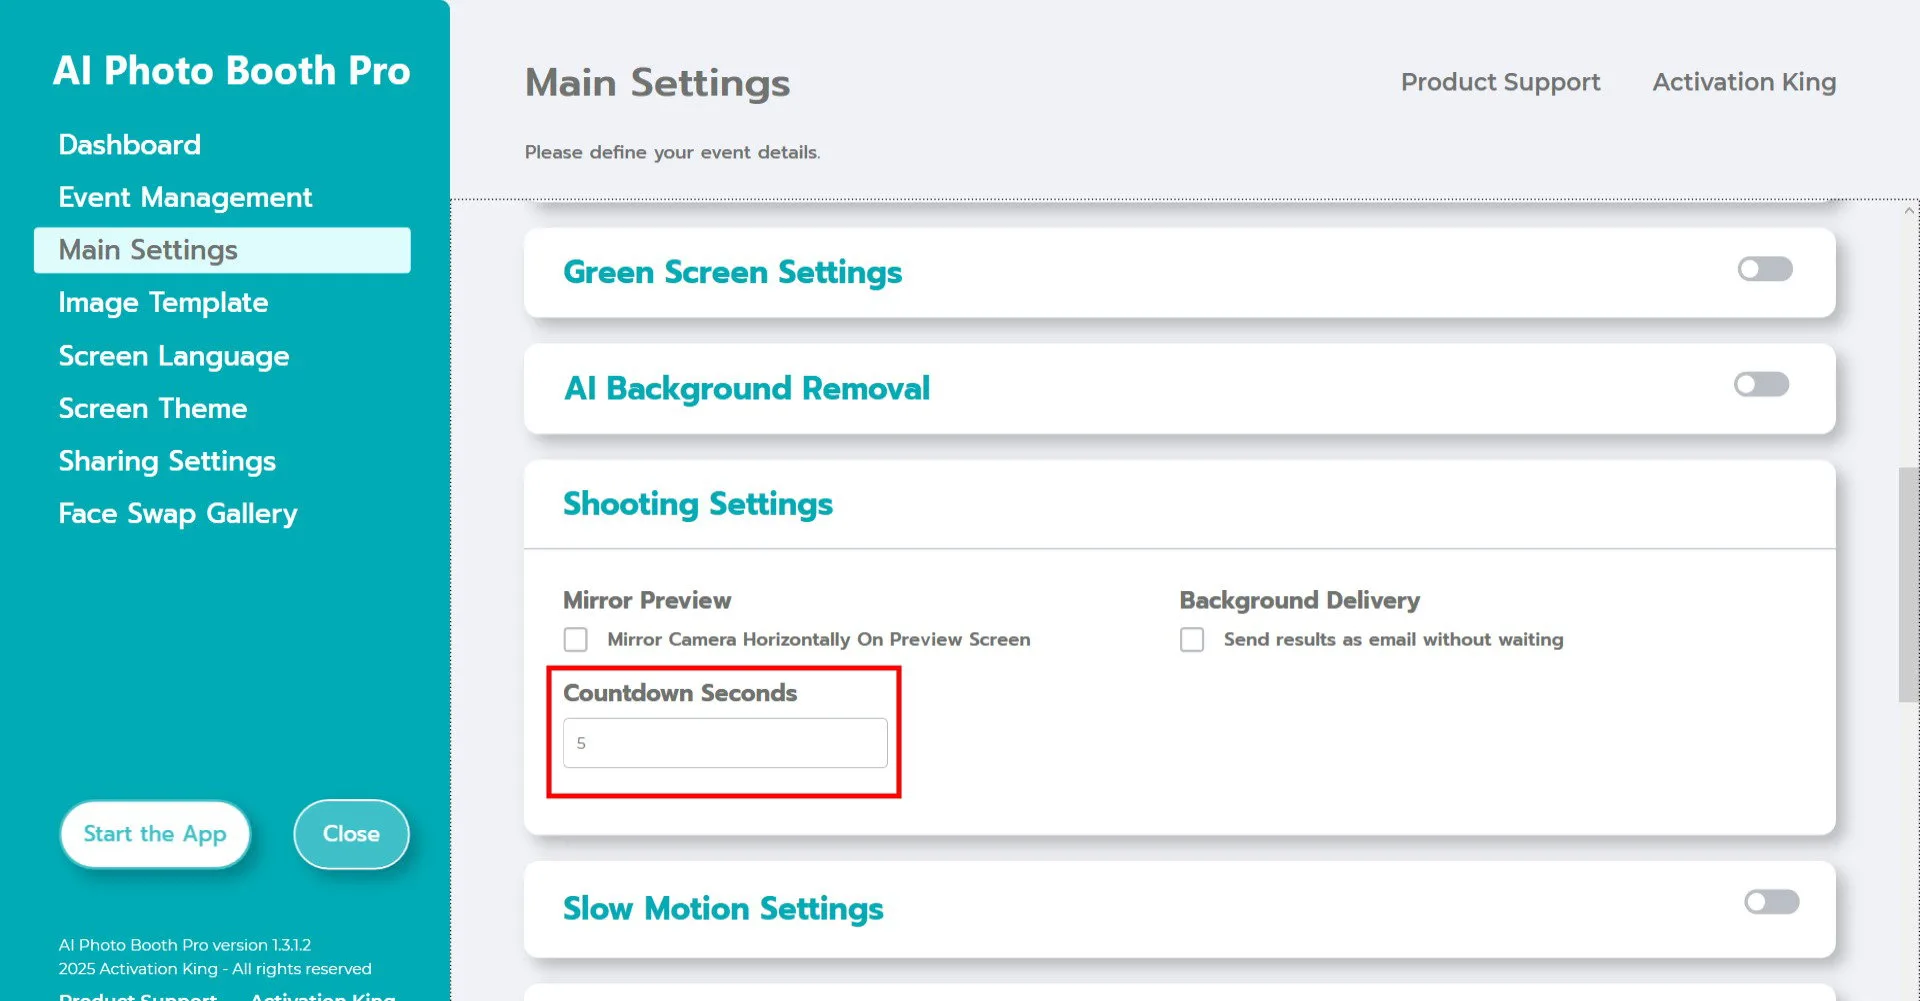
W sekcji Camera Settings opcja Countdown Seconds określa, jak długo działa odliczanie po naciśnięciu przycisku zdjęcia. Daje to gościom czas, aby zobaczyć siebie na ekranie i przygotować pozę przed wykonaniem zdjęcia.
Ustawienia szablonu obrazu
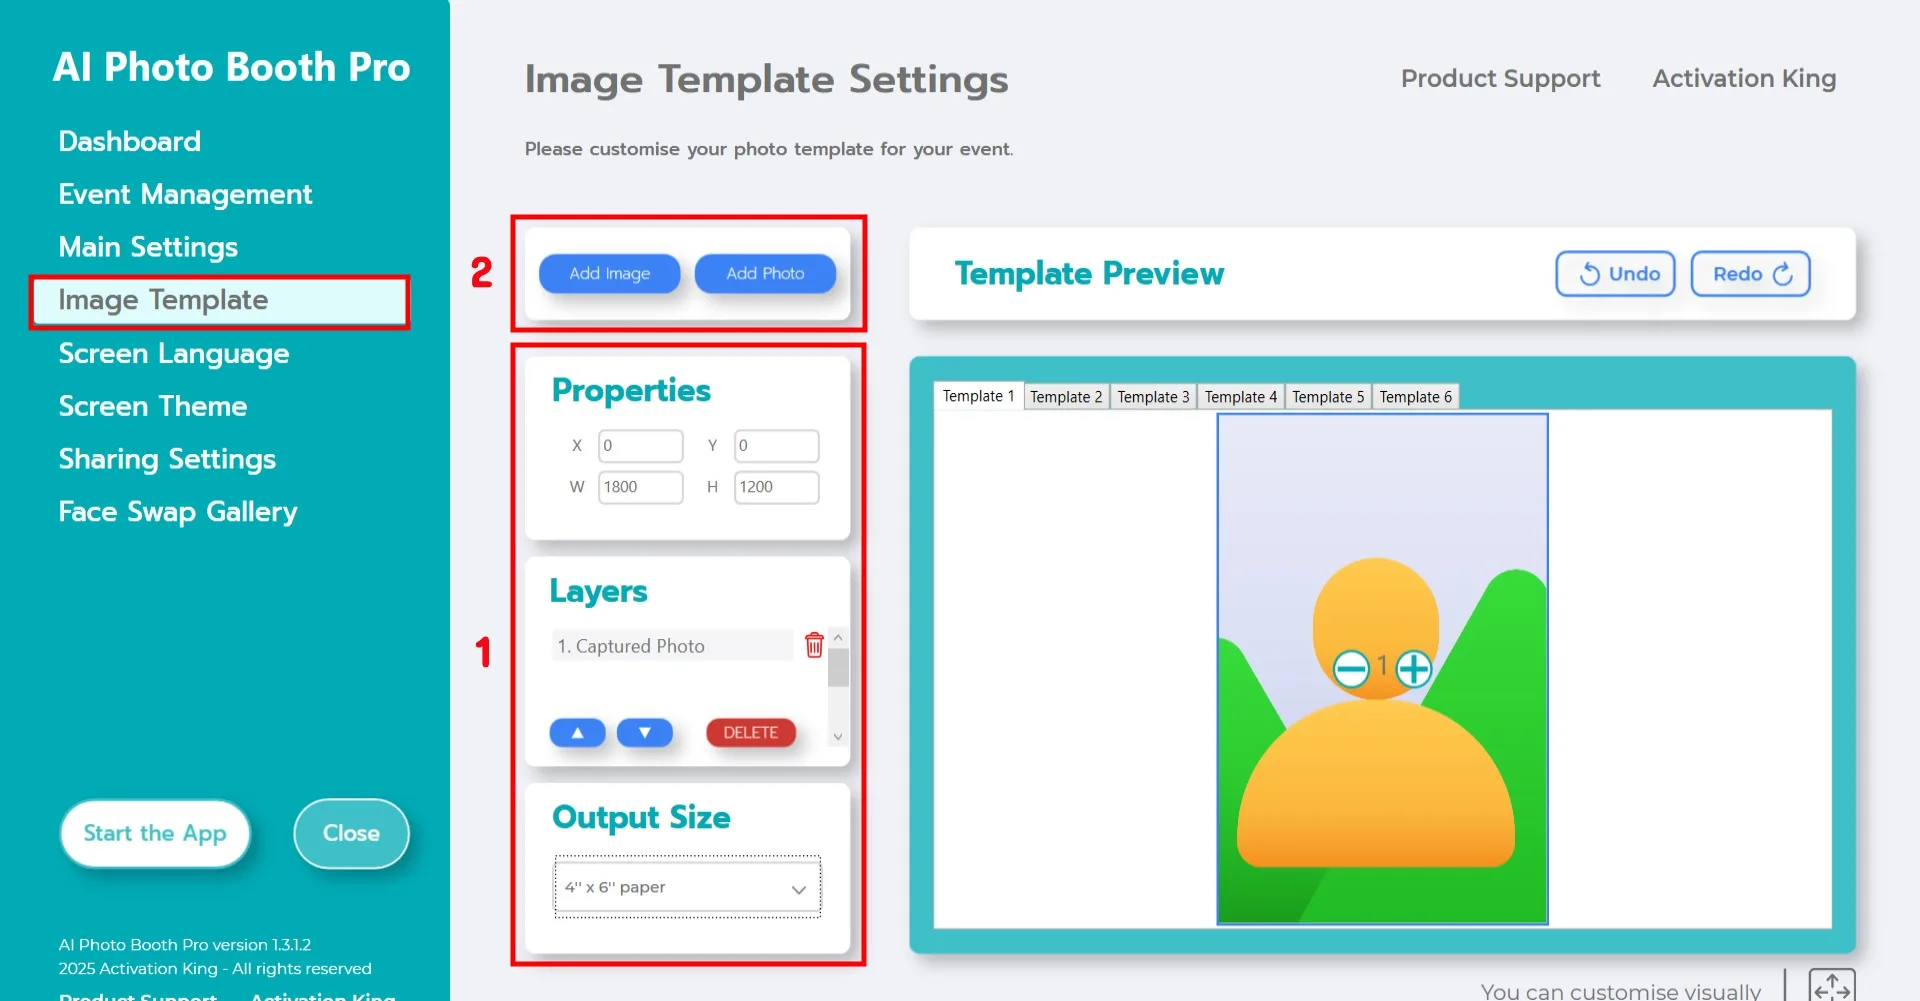
Sekcja Image Template Settings pozwala określić rozmiar i położenie zdjęcia oraz dodać cyfrowe ramki lub naklejki.
W sekcji Output Size wybierz wymiary swojego końcowego zdjęcia.
- Jeśli planujesz drukowanie, wybierz rozmiar odpowiadający Twojemu nośnikowi druku (np. 6x4 lub 6x8).
- W przypadku wyłącznie cyfrowego wyjścia możesz wybrać 1280×1280, 1080×1920 lub 1280×720.
Aby dodać cyfrową ramkę lub naklejkę, kliknij Add Image u góry.
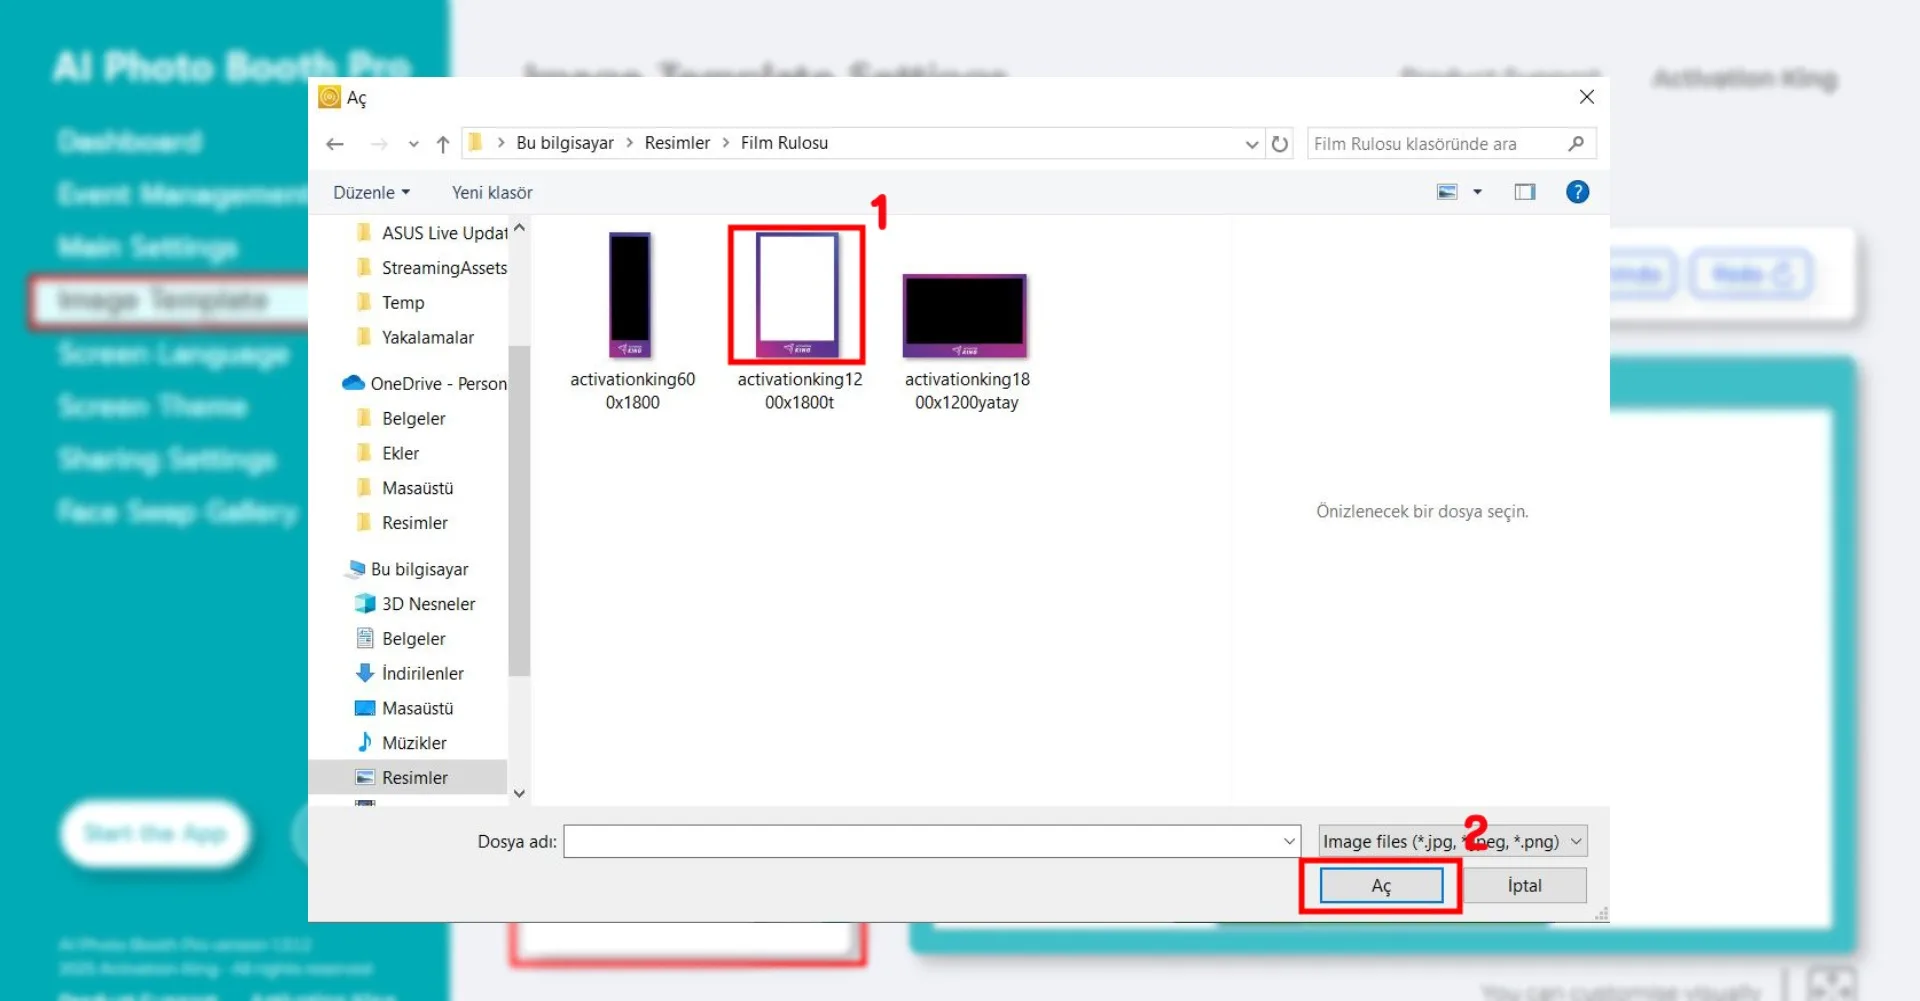
Wybierz poziomy lub pionowy plik ramki i kliknij Open.
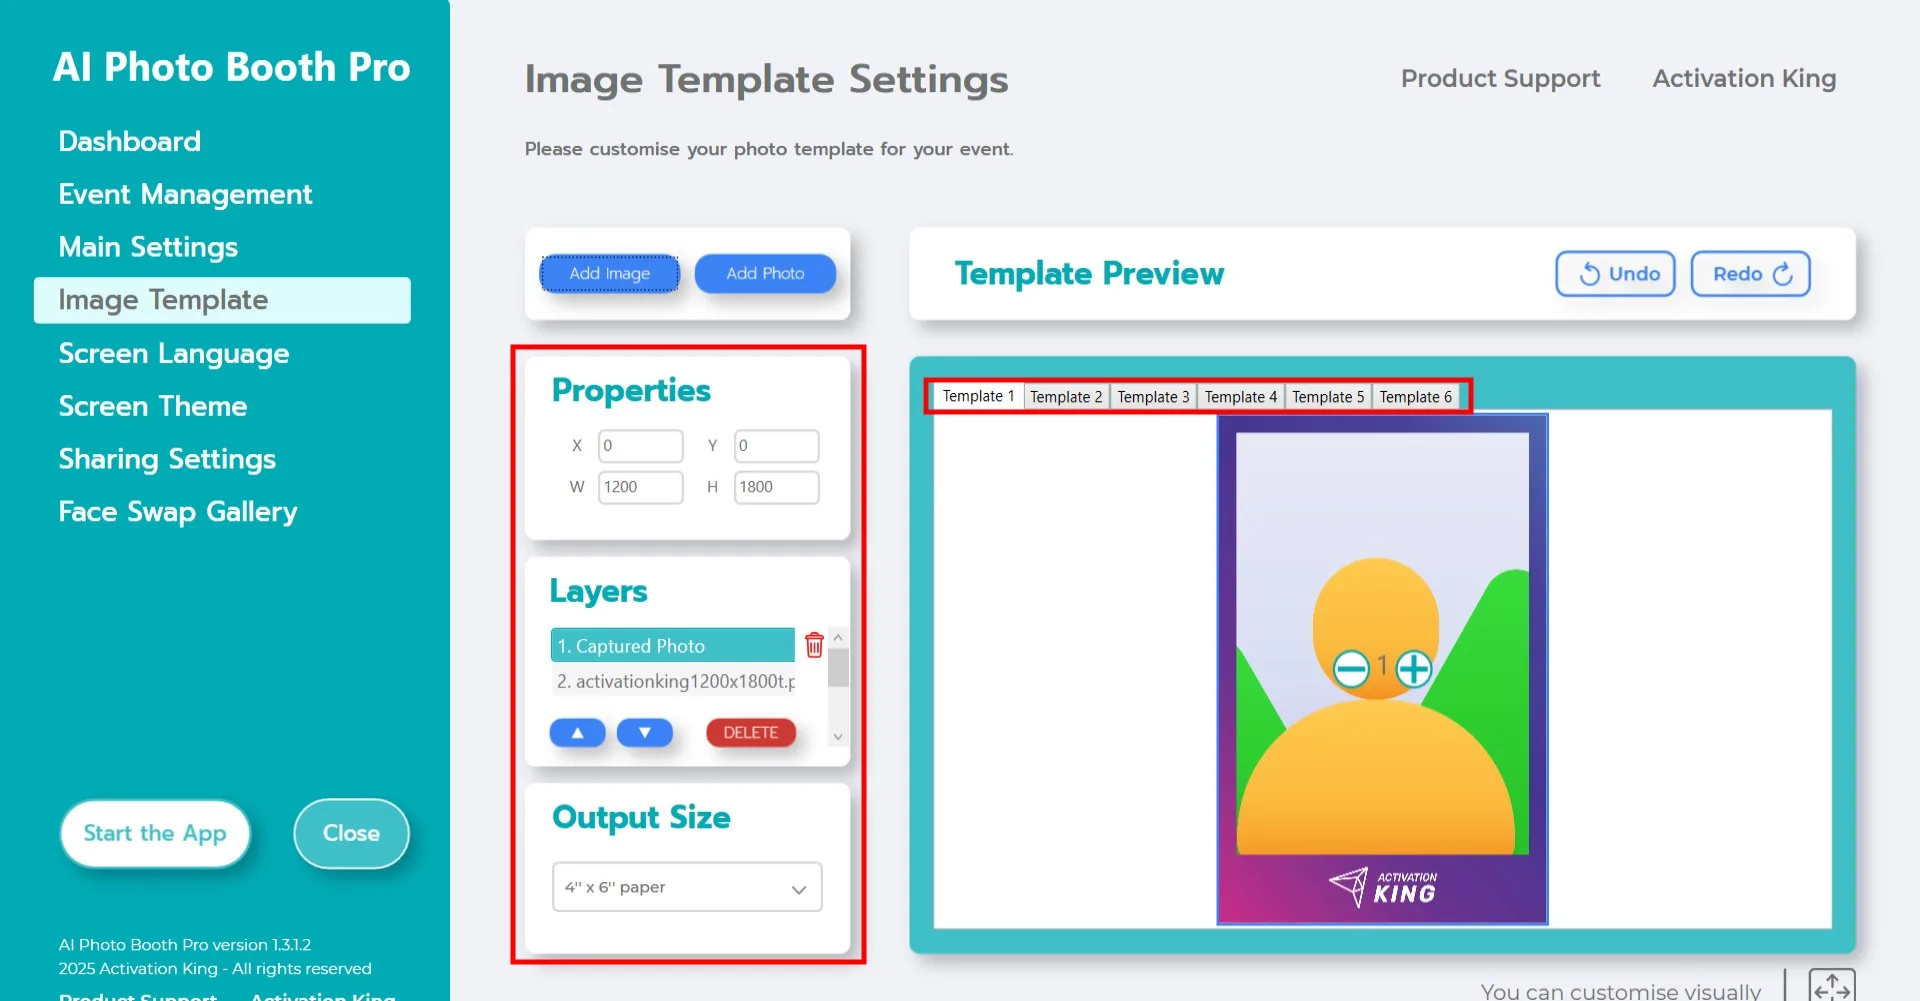
Jeśli Twoja ramka odpowiada Output Size, zostanie dopasowana automatycznie.
Możesz dokonać precyzyjnych korekt za pomocą narzędzi w wyróżnionym panelu.
Jeśli chcesz dodać wiele ramek, wstaw je do dodatkowych stron szablonu u góry.
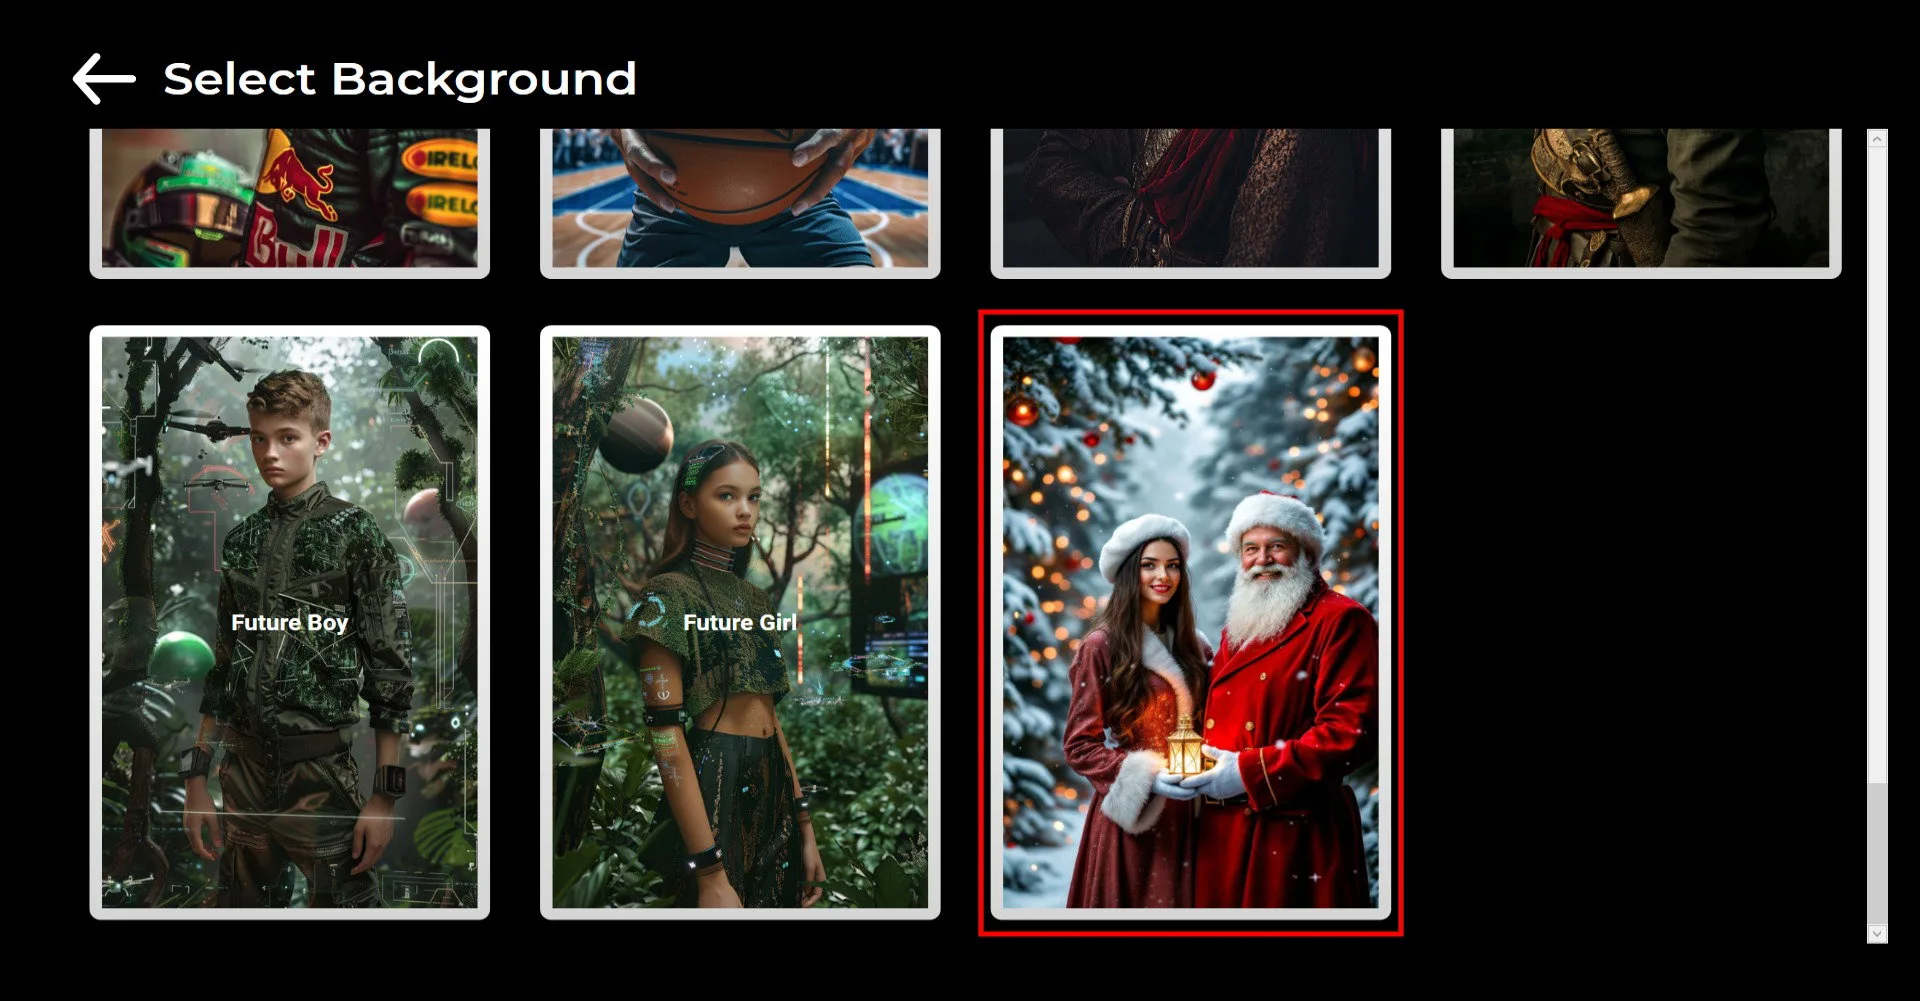
Galeria Face Swap
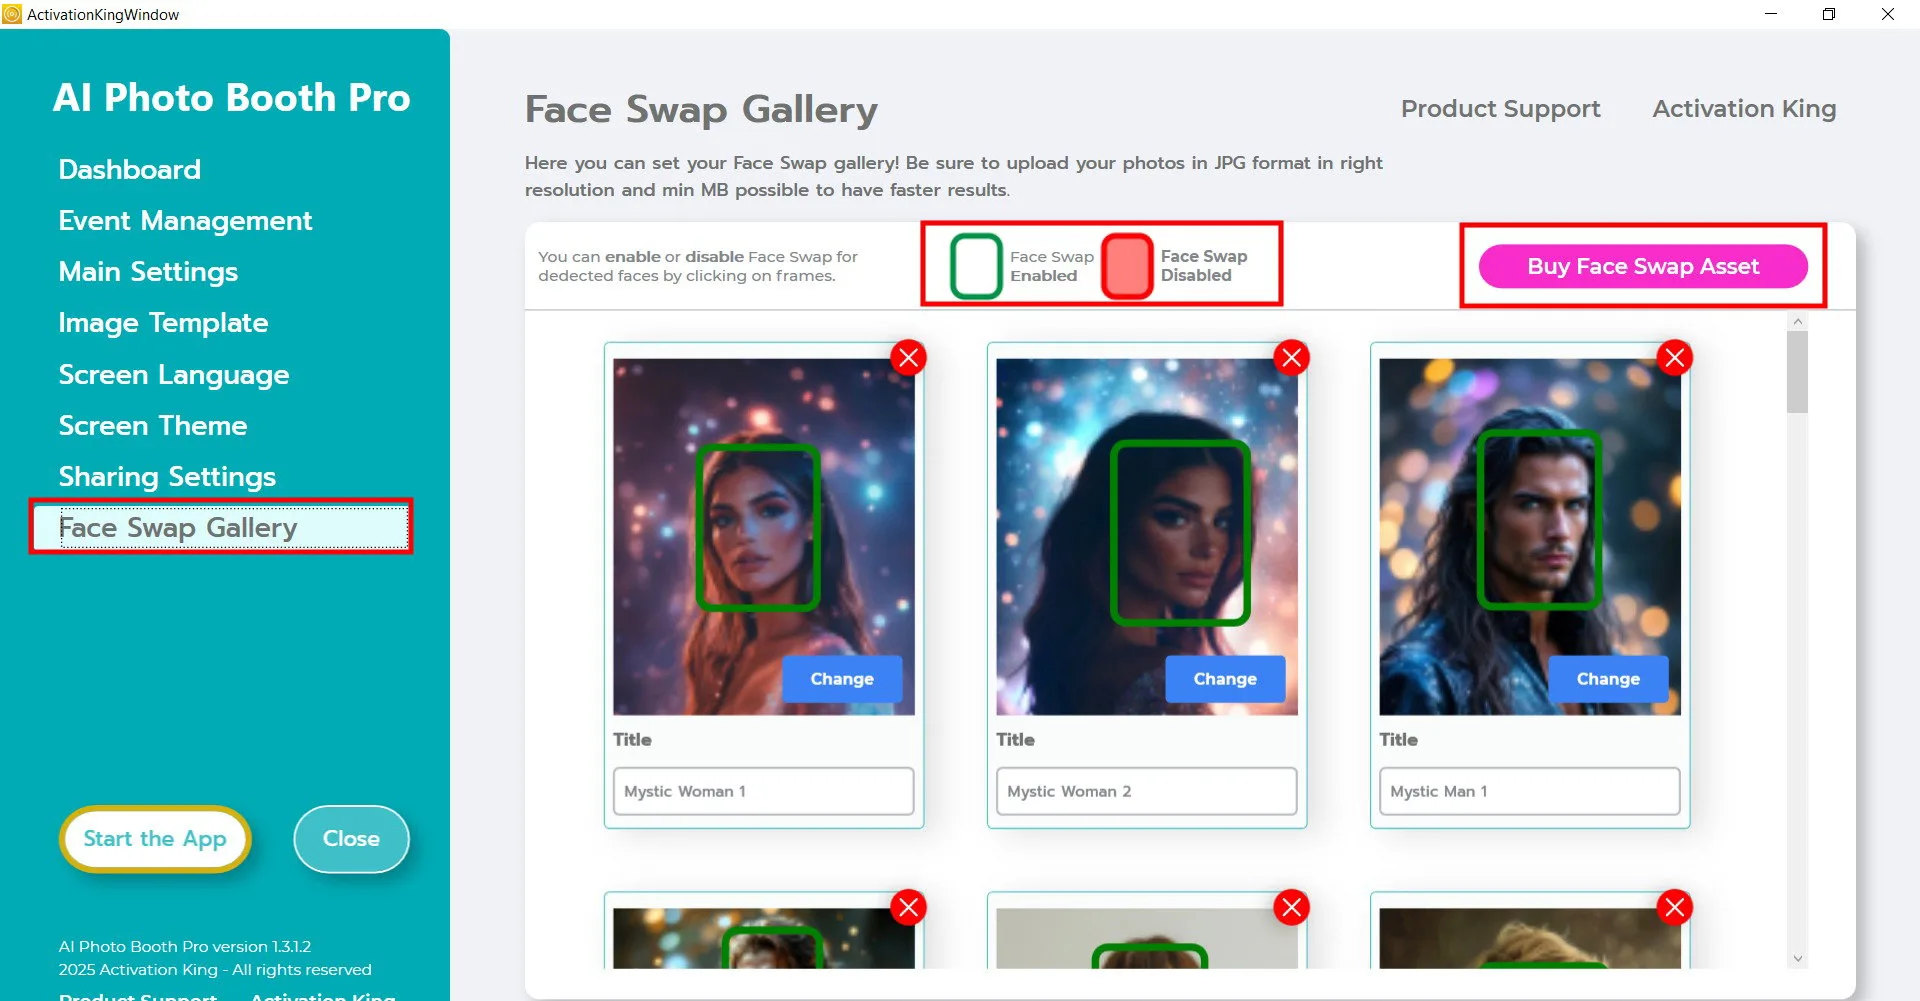
Face Swap Gallery zawiera wbudowane obrazy, których możesz użyć, lub możesz przesłać własne.
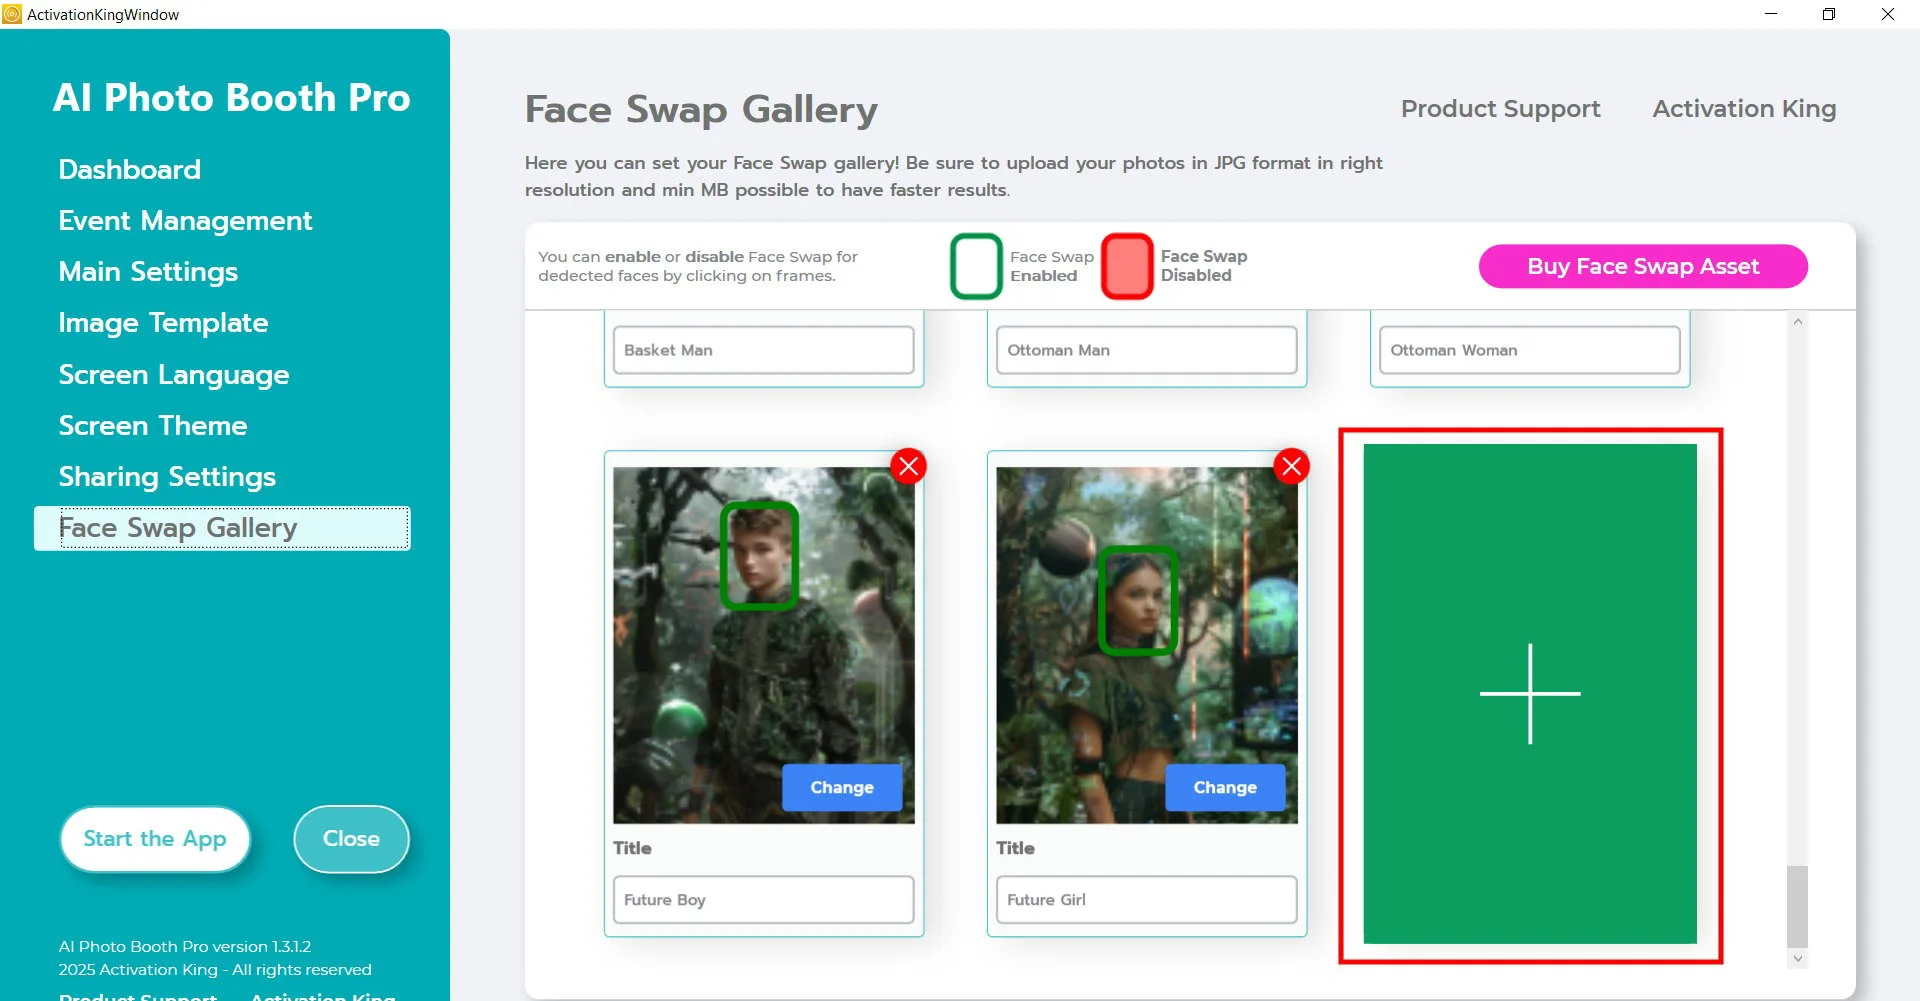
Przewiń na dół strony galerii i kliknij wyróżniony przycisk, aby dodać nowy obraz. Wybierz obraz, który chcesz przesłać.
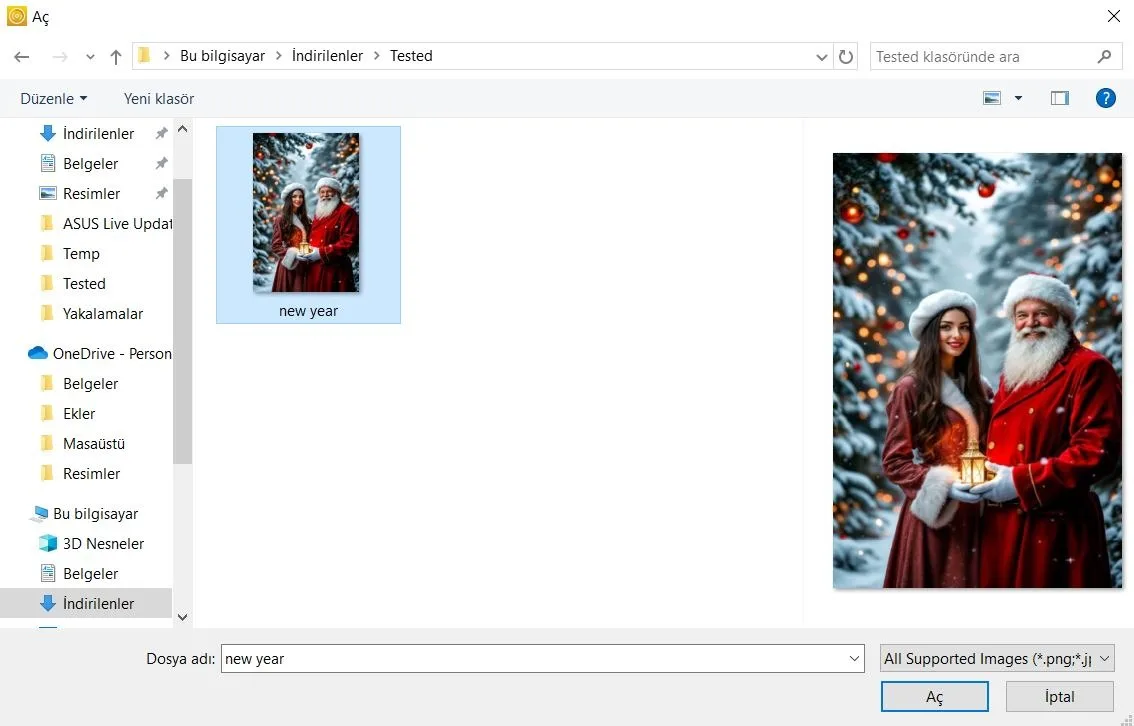
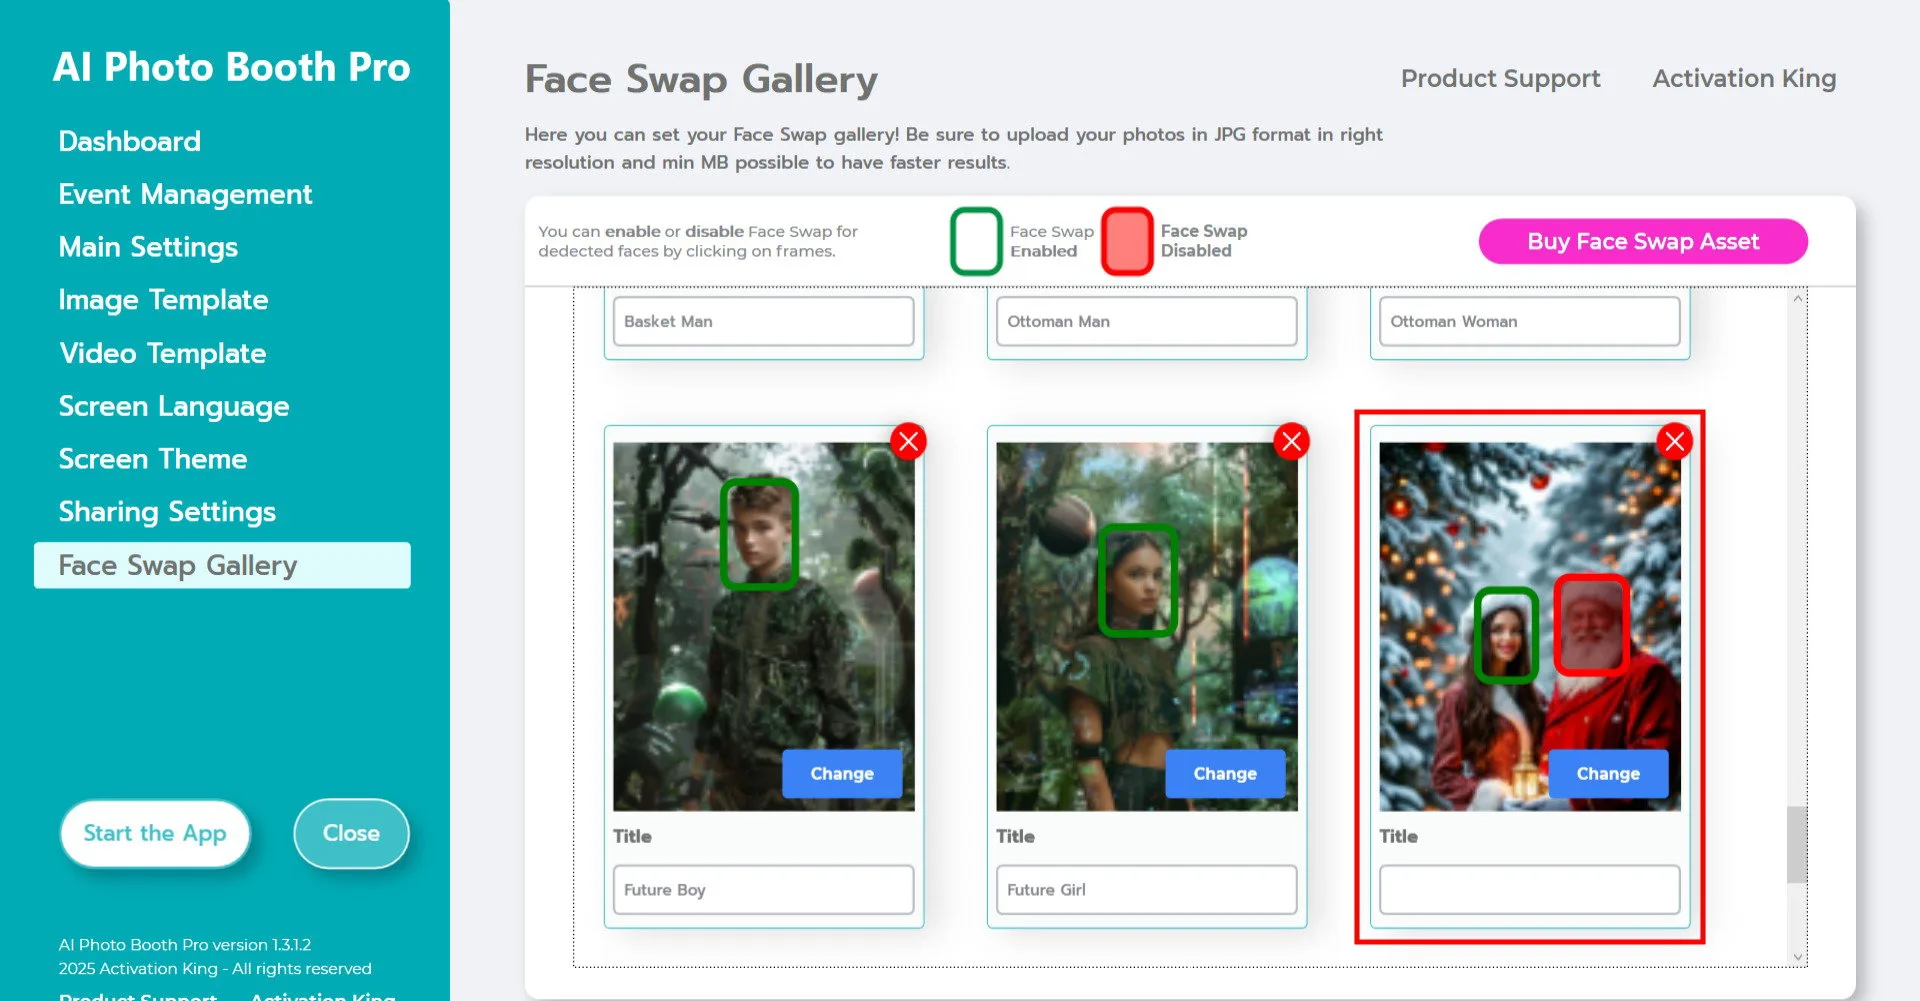
Oprogramowanie automatycznie wykryje i oznaczy twarze na obrazie.
Jeśli jest wiele twarzy, a niektórych nie chcesz zamieniać, kliknij na nie raz, aby je wyłączyć.
Wypełnij pole Title według uznania.
Po zakończeniu ustawień kliknij Start the App.
Uruchamianie aplikacji
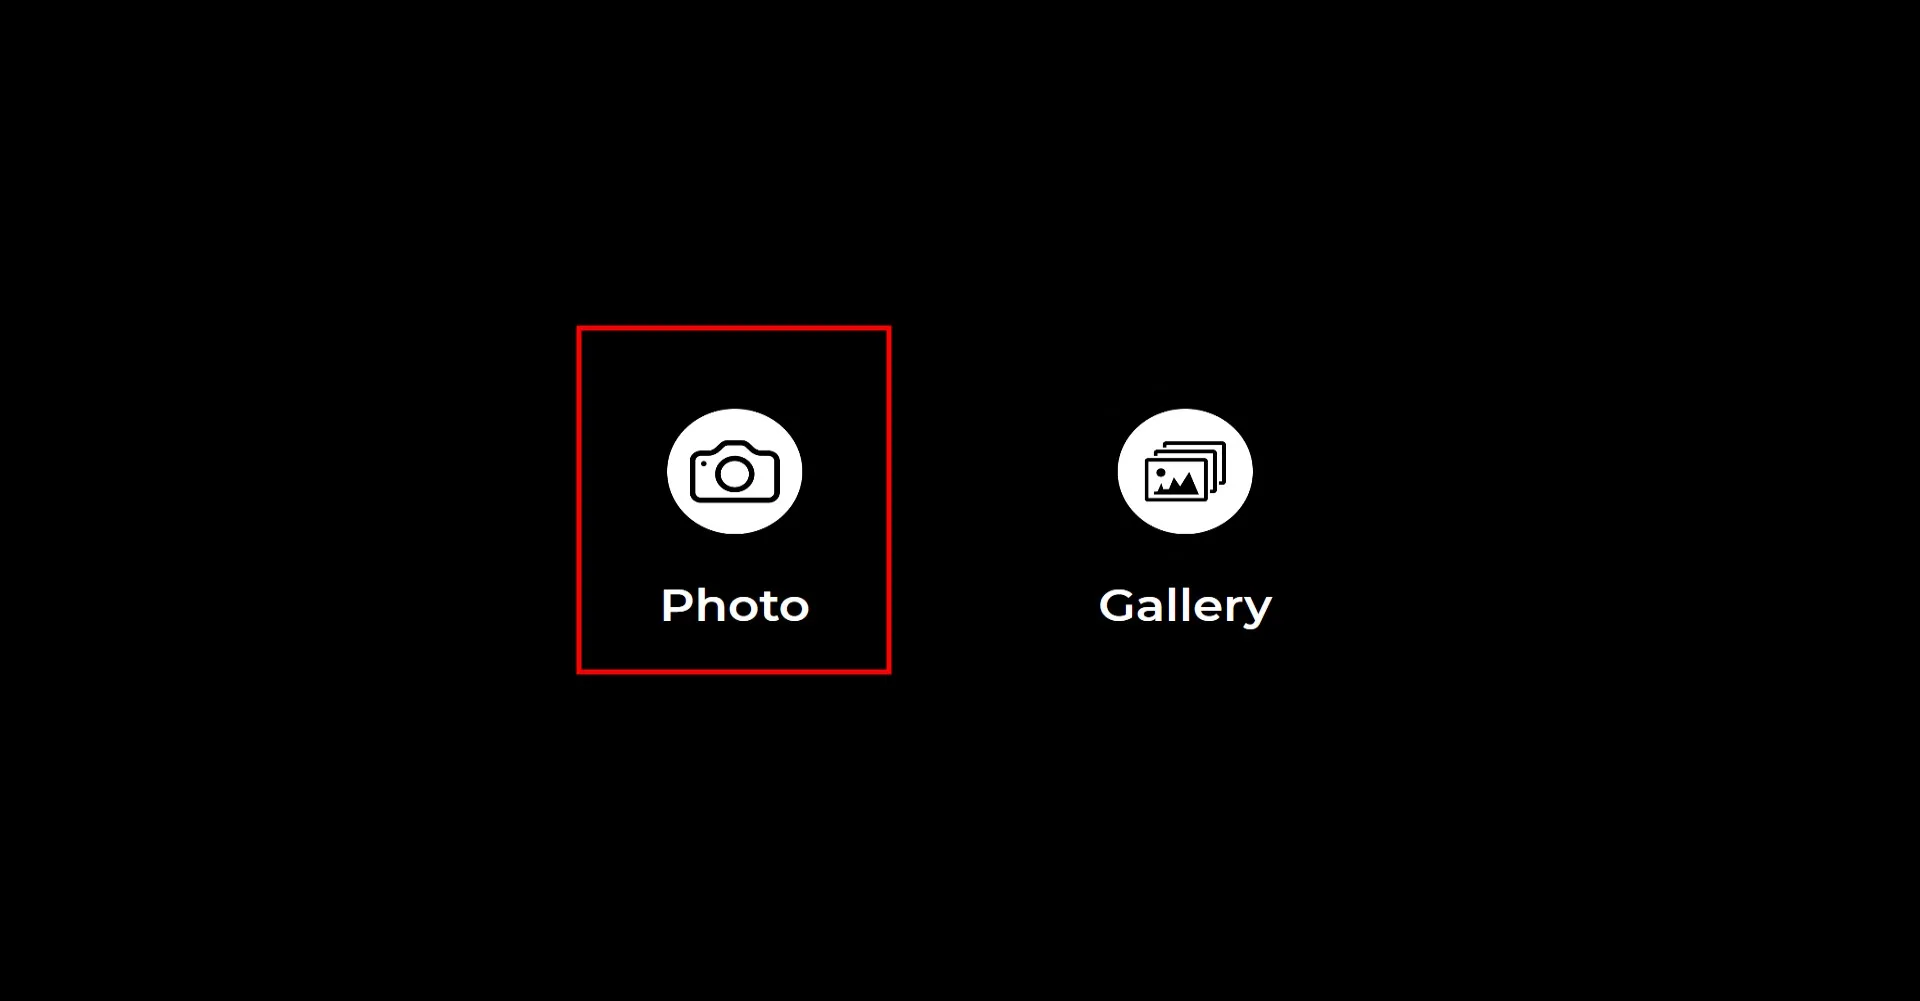
Po otwarciu Start the App pojawi się główny ekran robienia zdjęć. Kliknij ikonę Photo, aby zrobić zdjęcie.
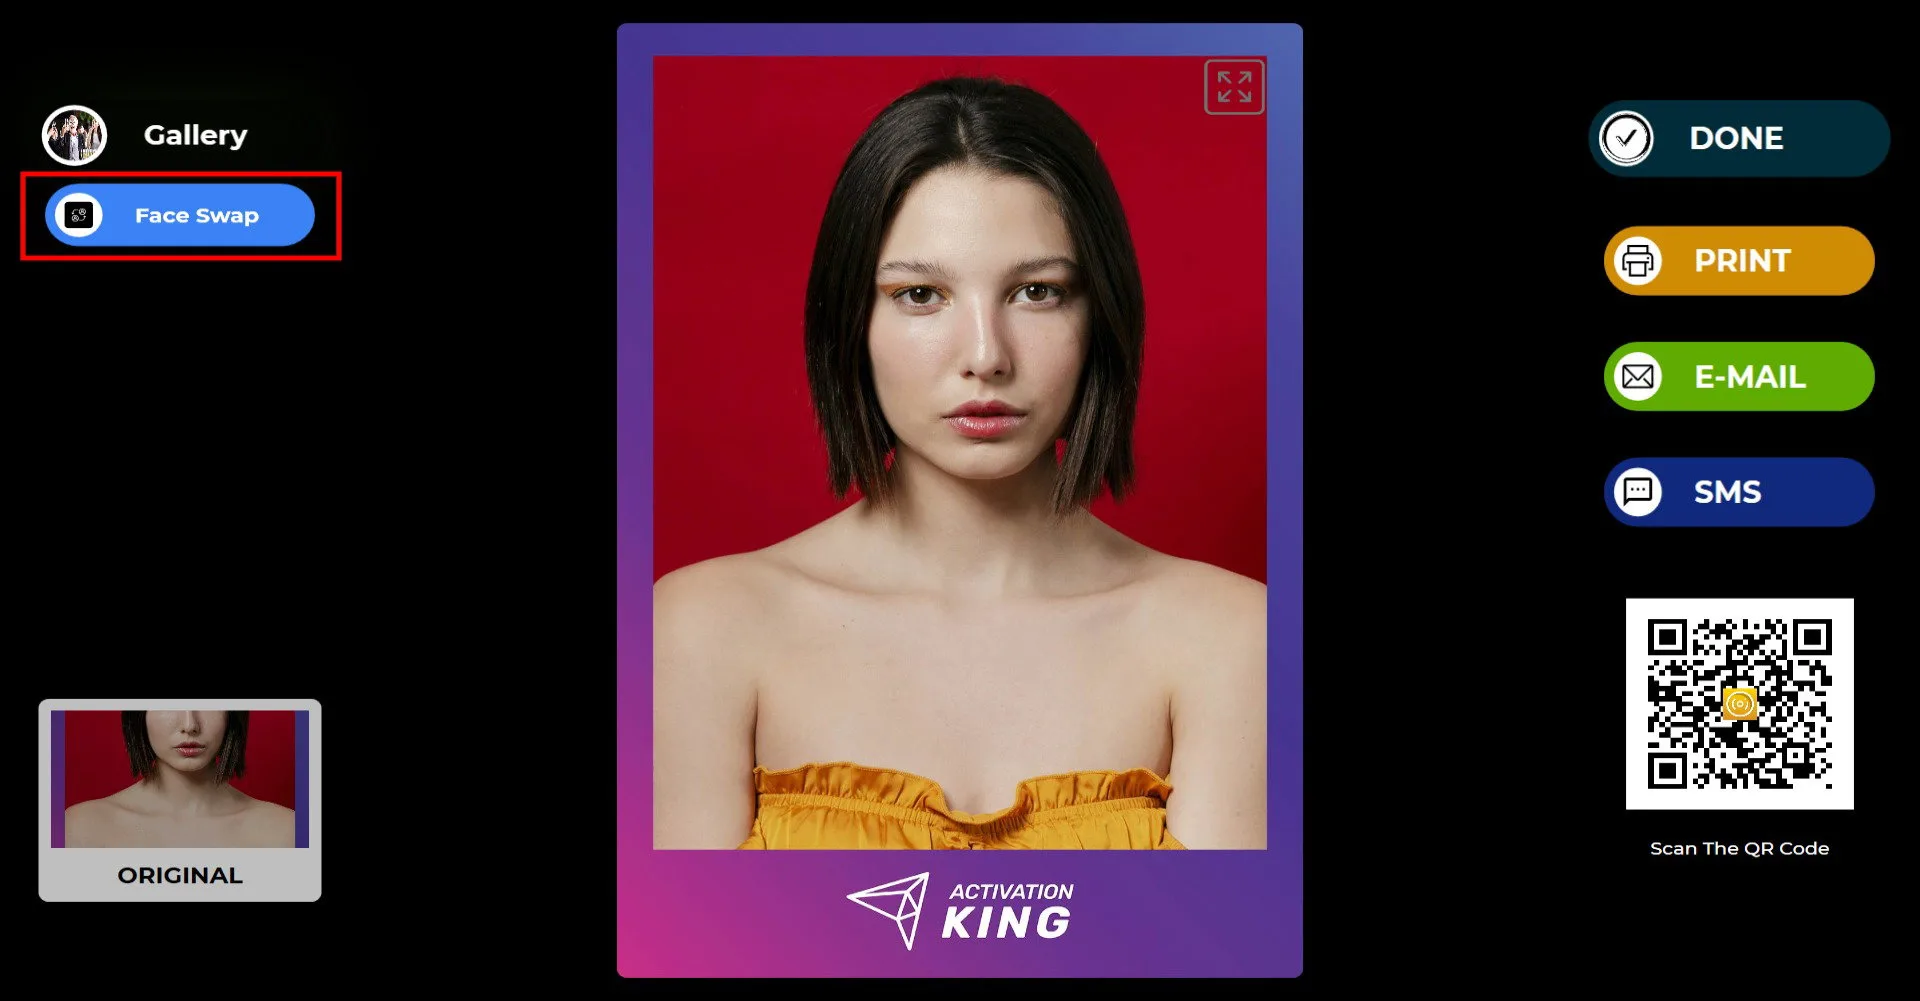
Po wykonaniu zdjęcia kliknij przycisk Face Swap w lewym górnym rogu.
Wybierz obraz, którego chcesz użyć do zamiany twarzy.
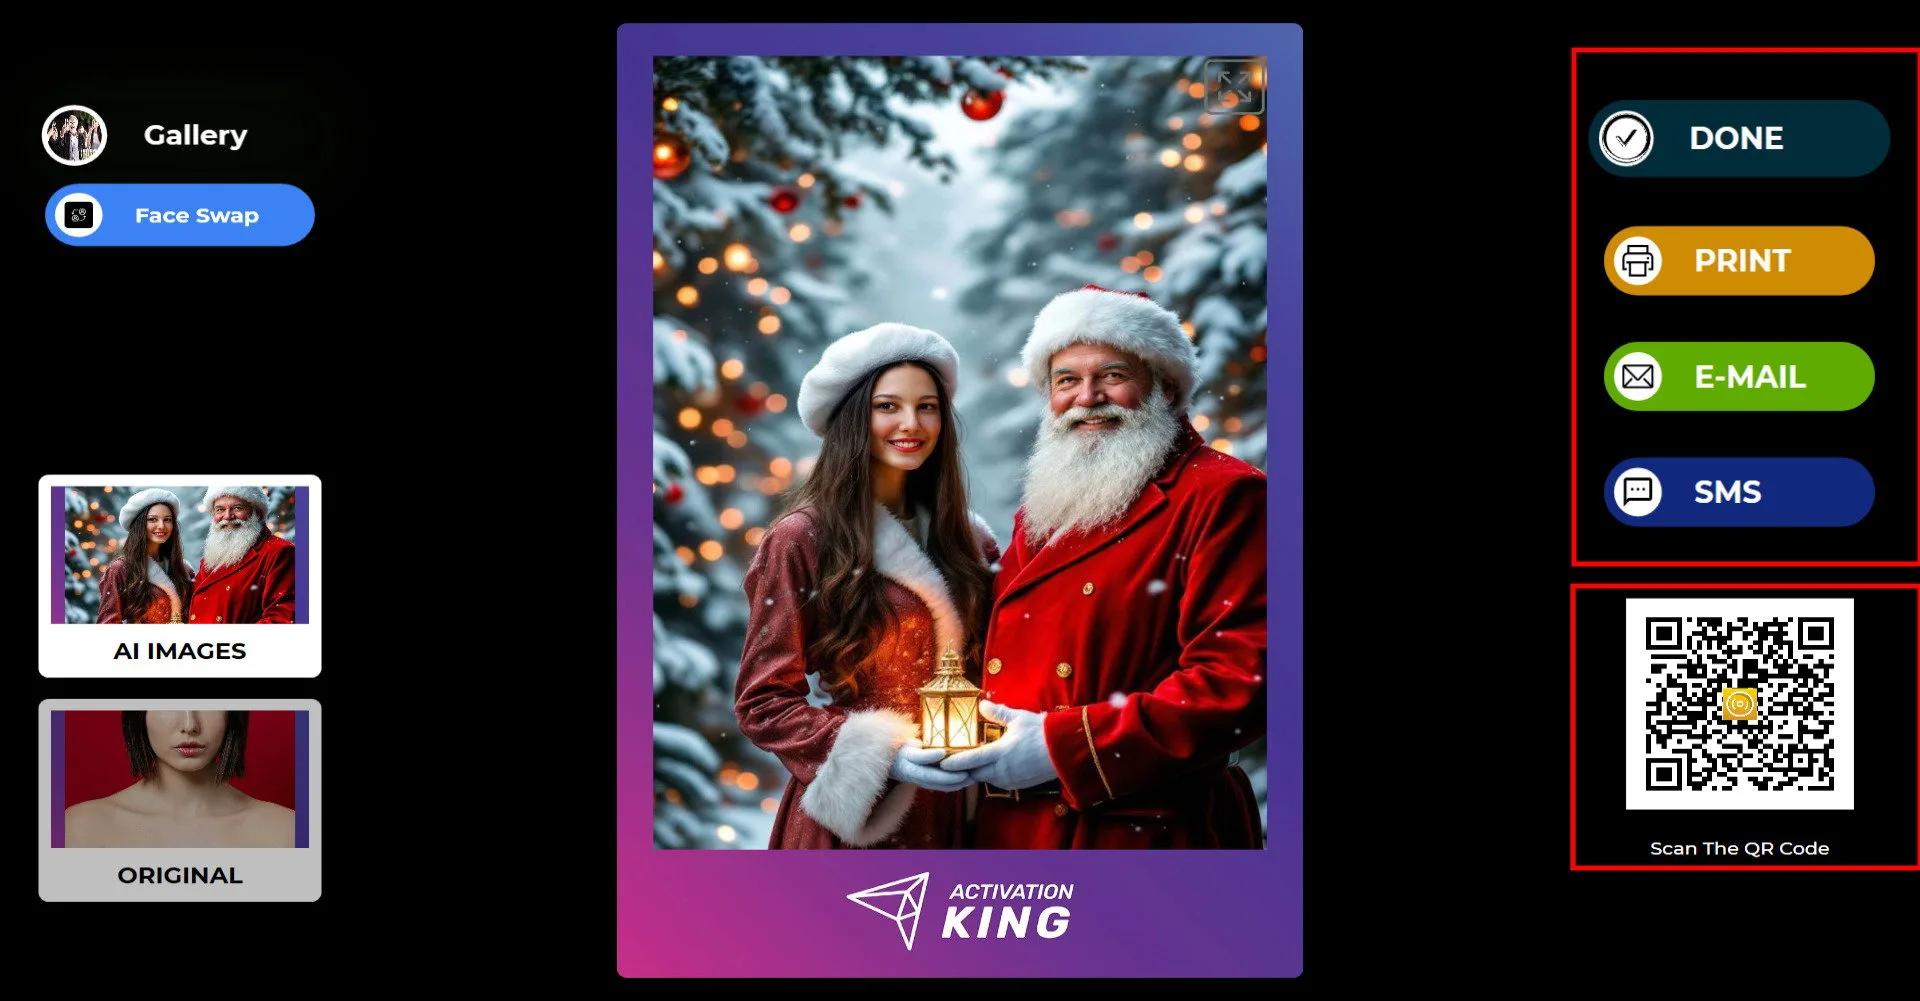
Po prawej stronie możesz wydrukować, wysłać e-mailem lub SMS-em albo udostępnić za pomocą kodu QR.
Kliknij DONE, aby wrócić do ekranu robienia zdjęć.
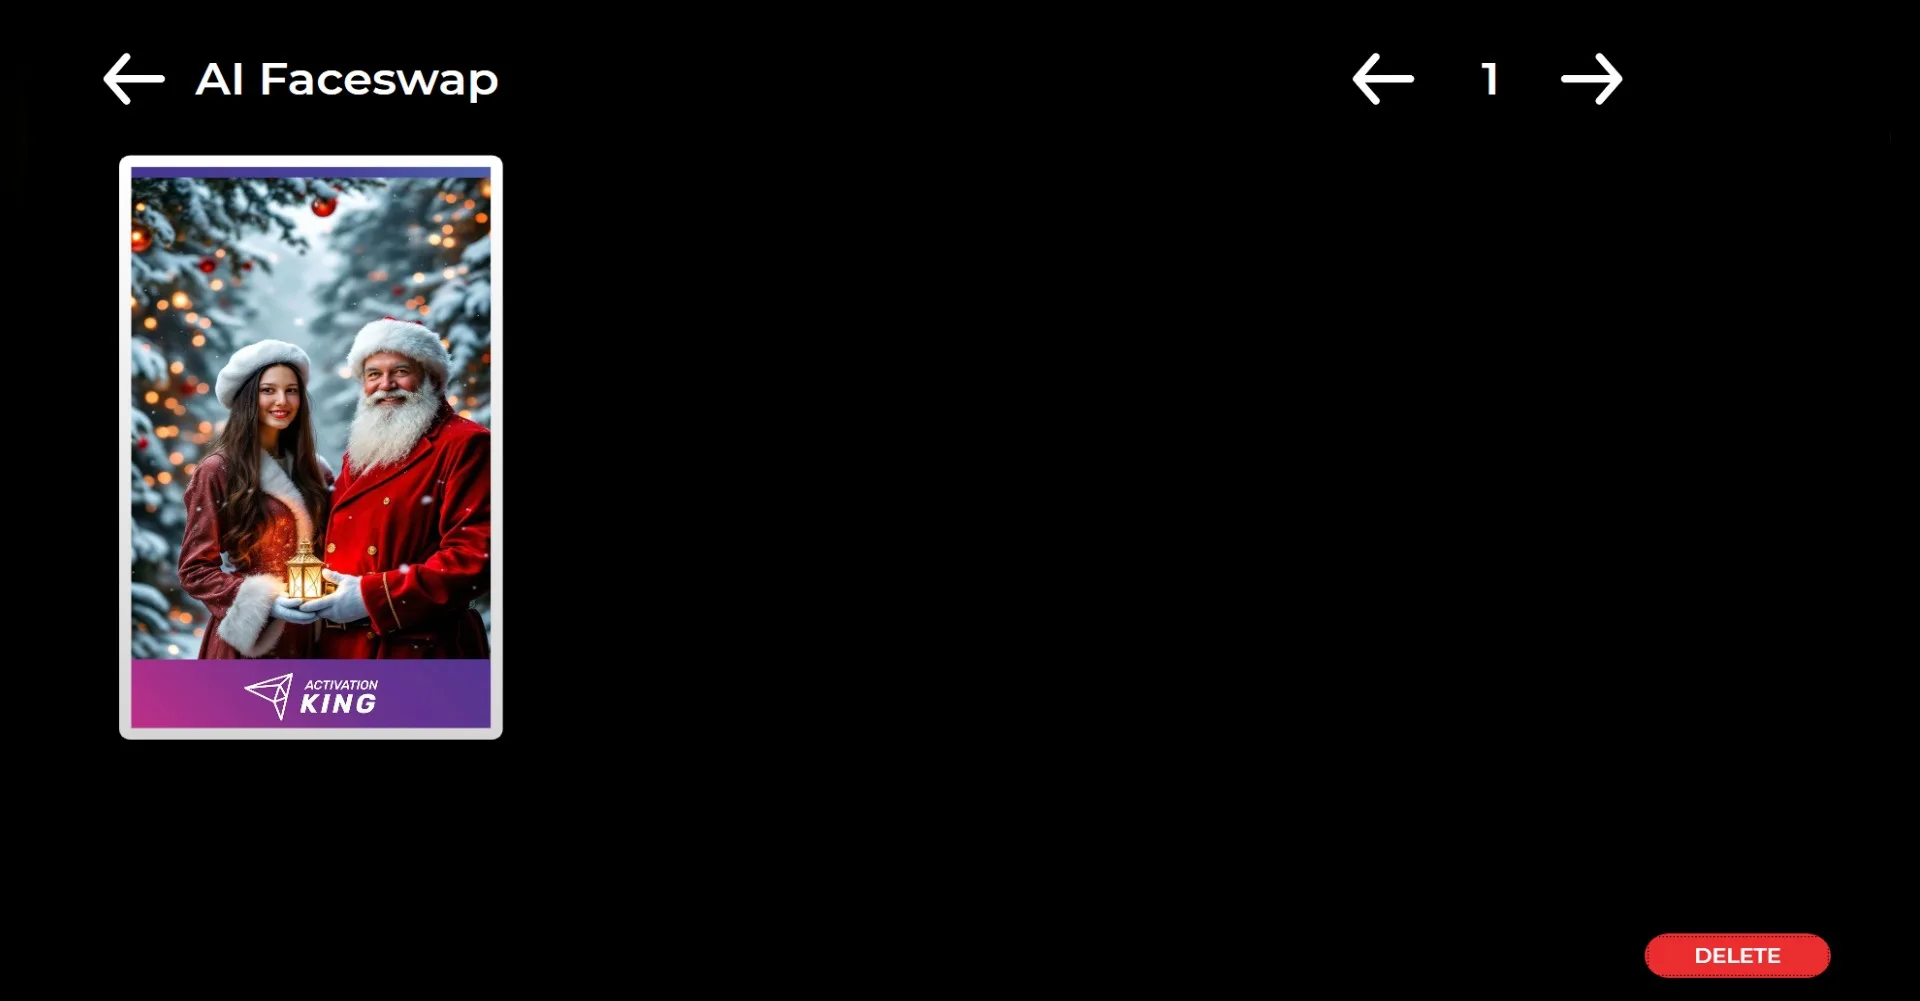
Po kliknięciu ikony Gallery możesz uzyskać dostęp do wszystkich wcześniej wykonanych zdjęć.