Управление мероприятиями
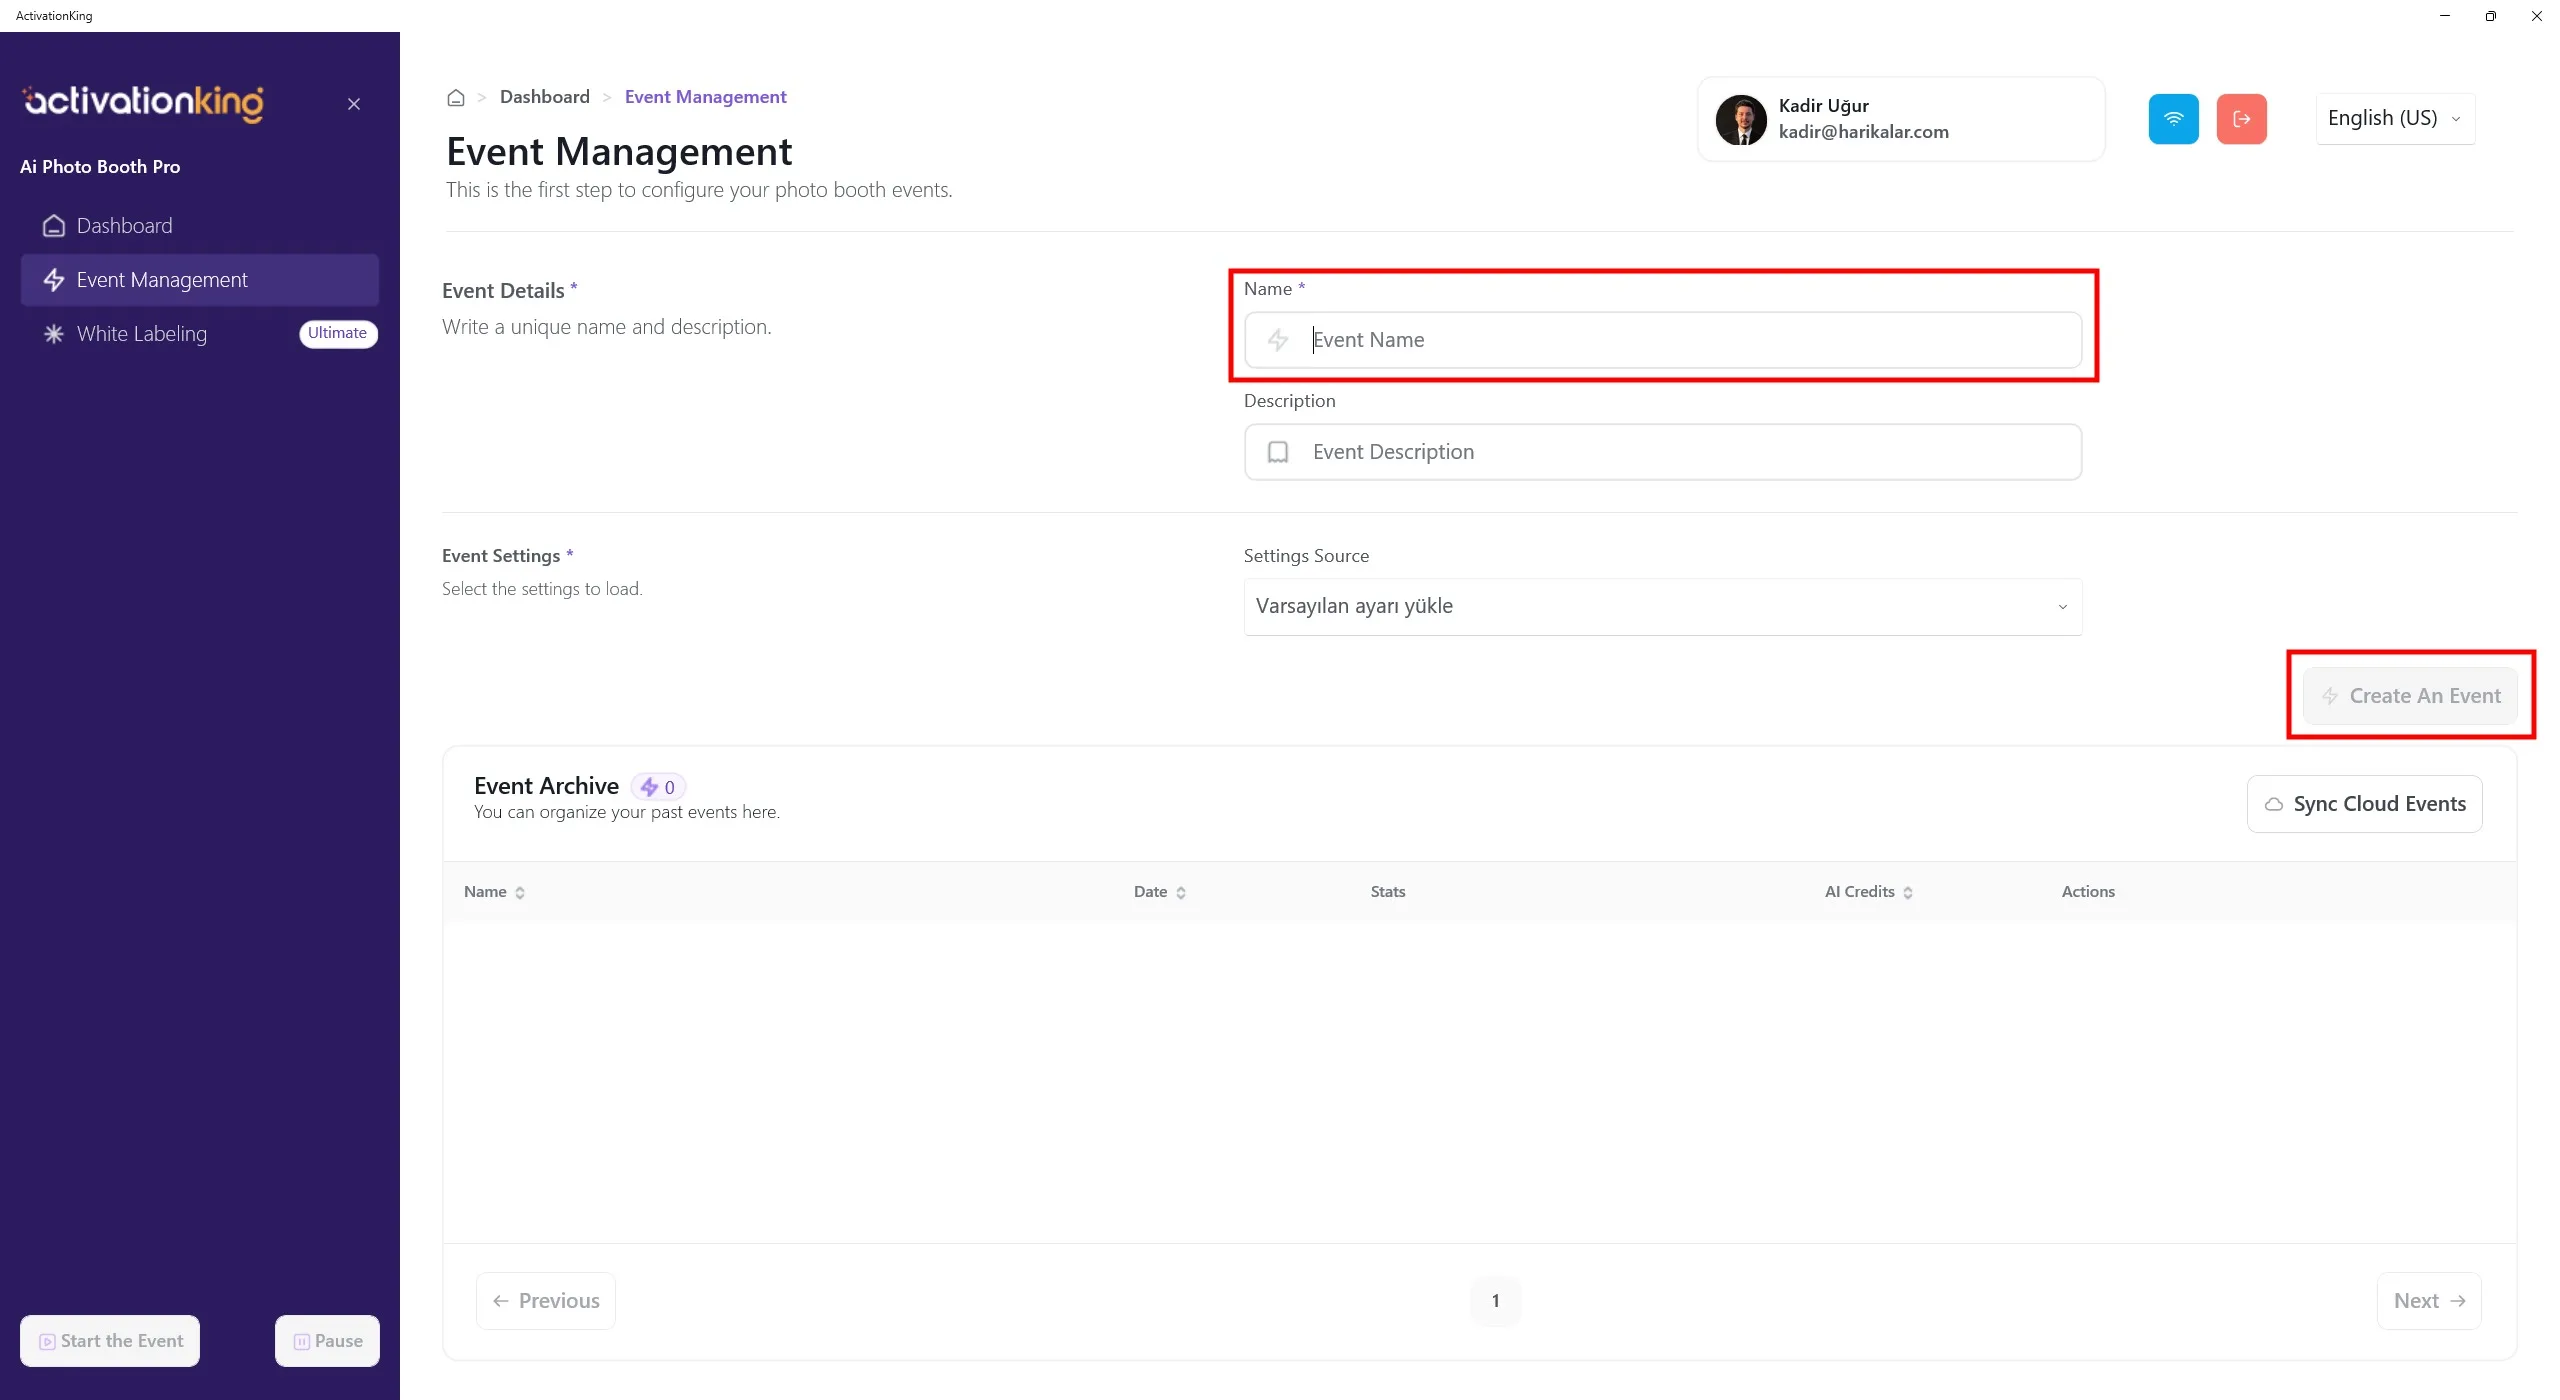
После входа в программу сначала необходимо создать мероприятие. Введите название мероприятия, а затем нажмите кнопку Create an Event.
Настройки мероприятия
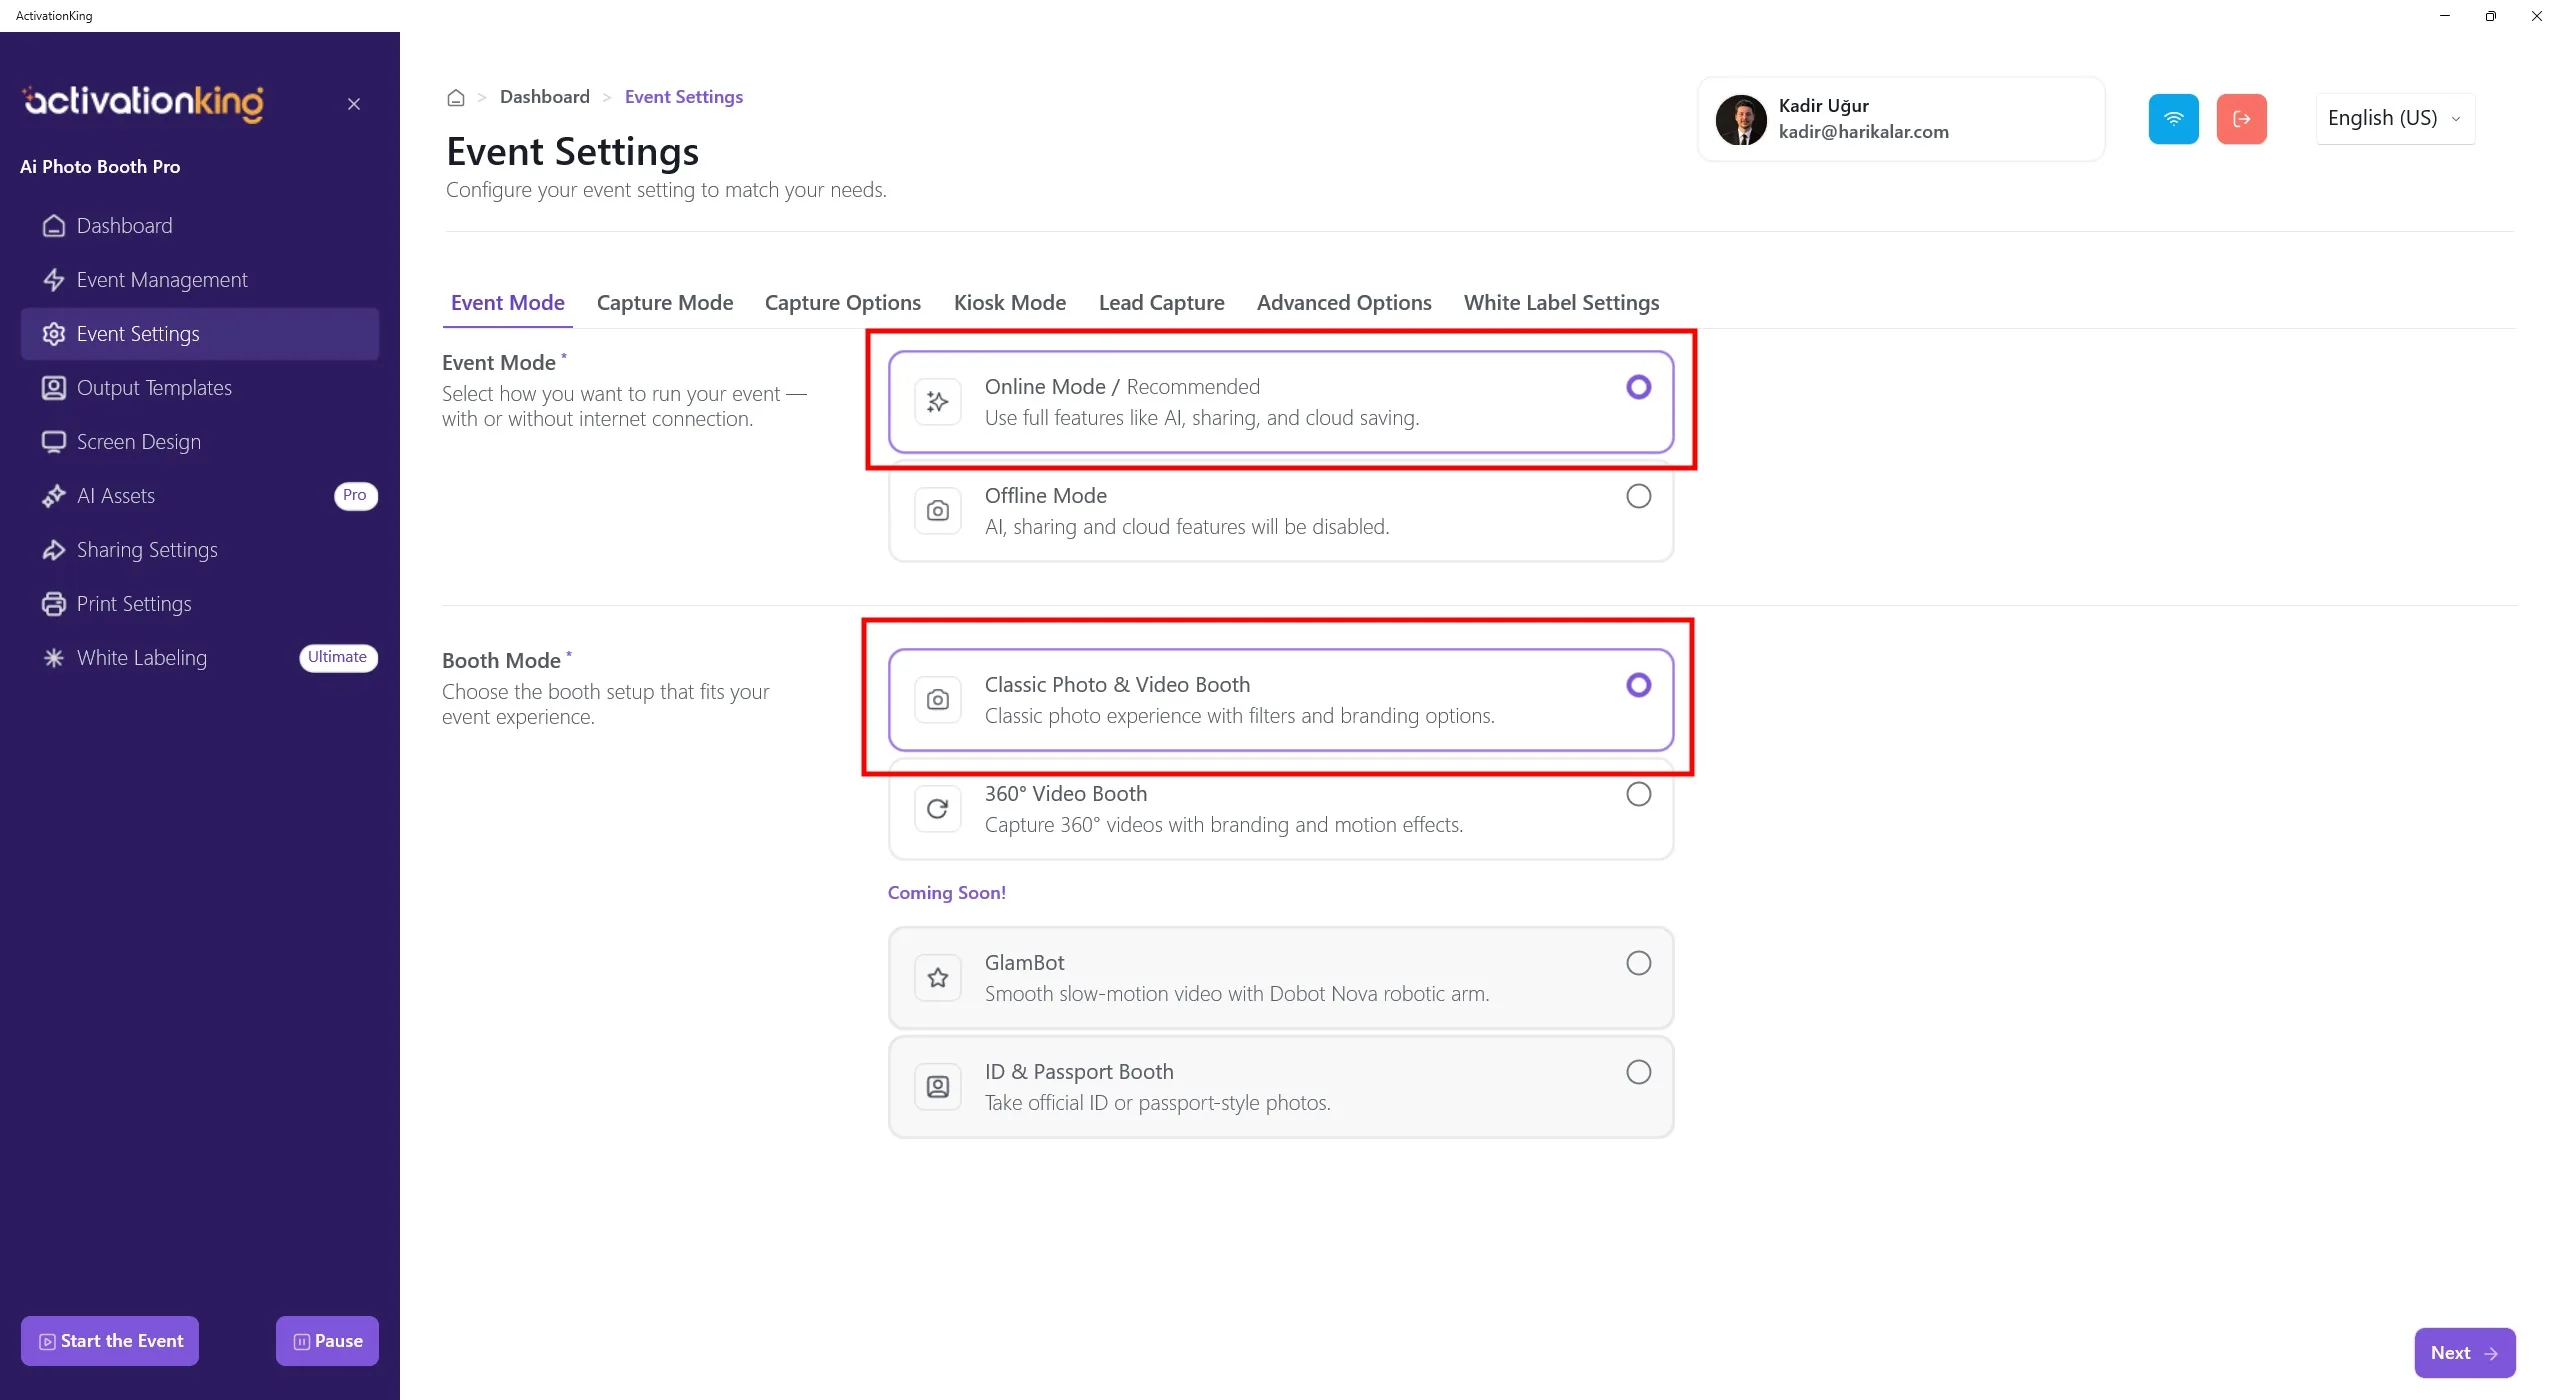
Сначала выберите режим, который вы будете использовать, а затем перейдите на страницу Capture Options.
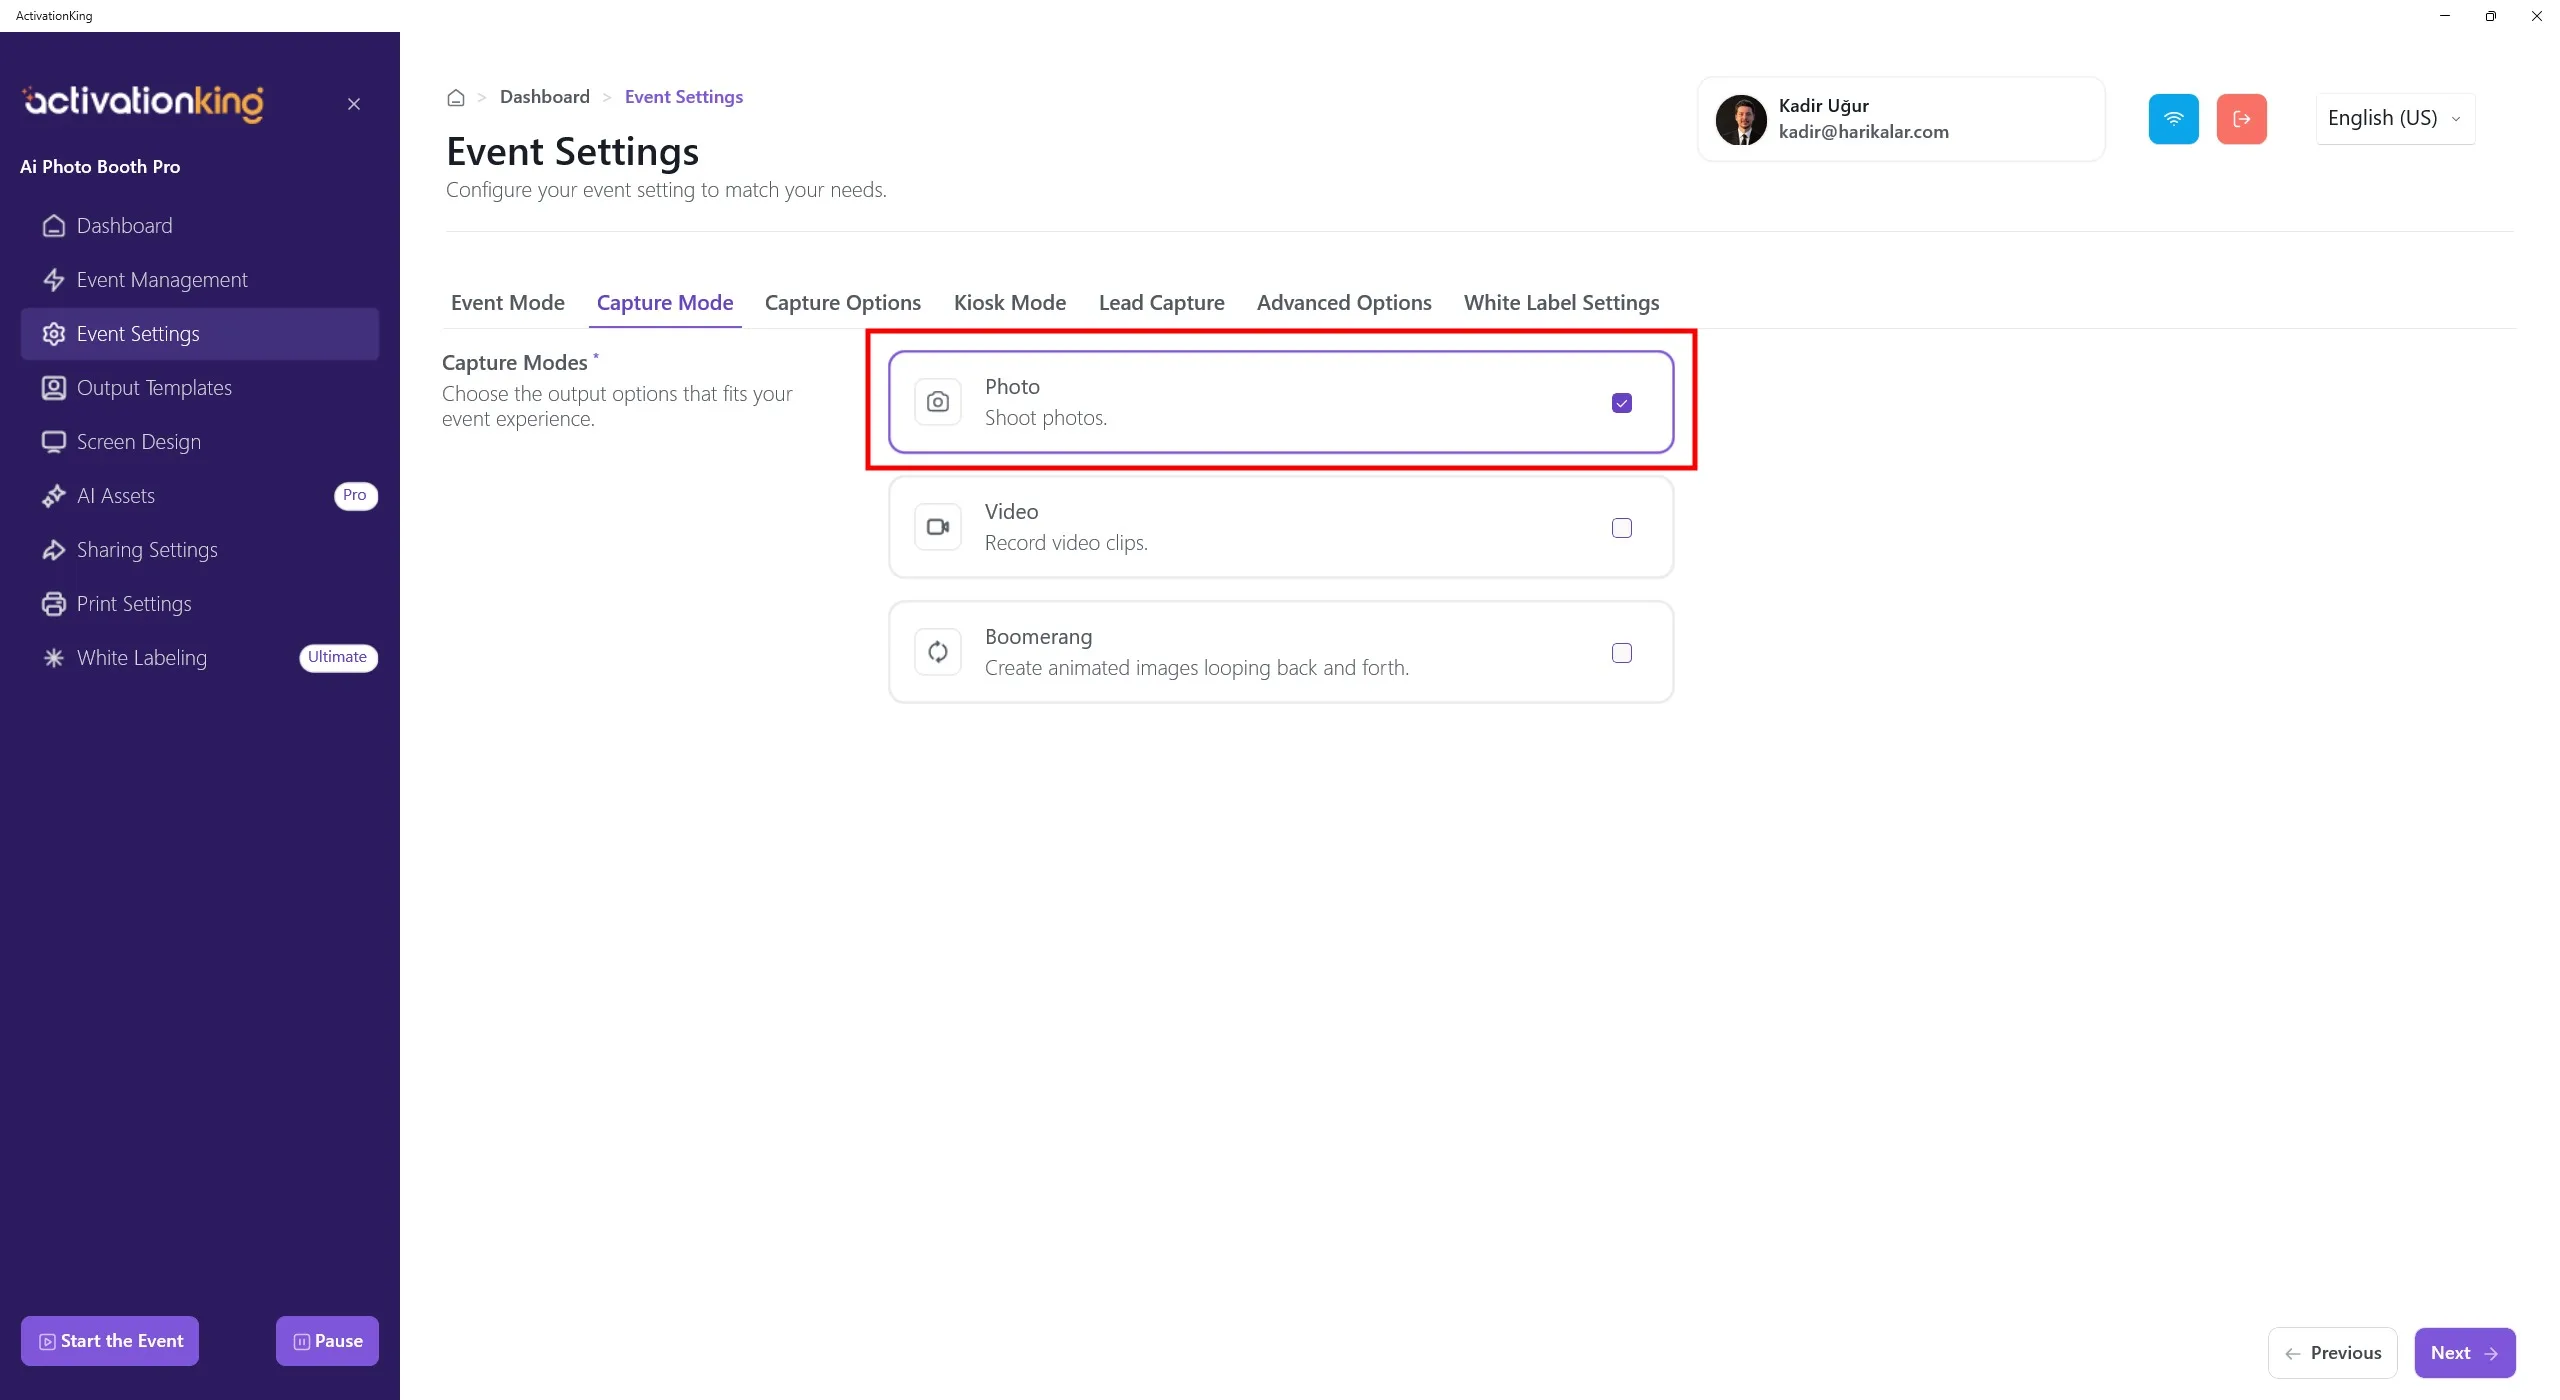
Параметры съёмки
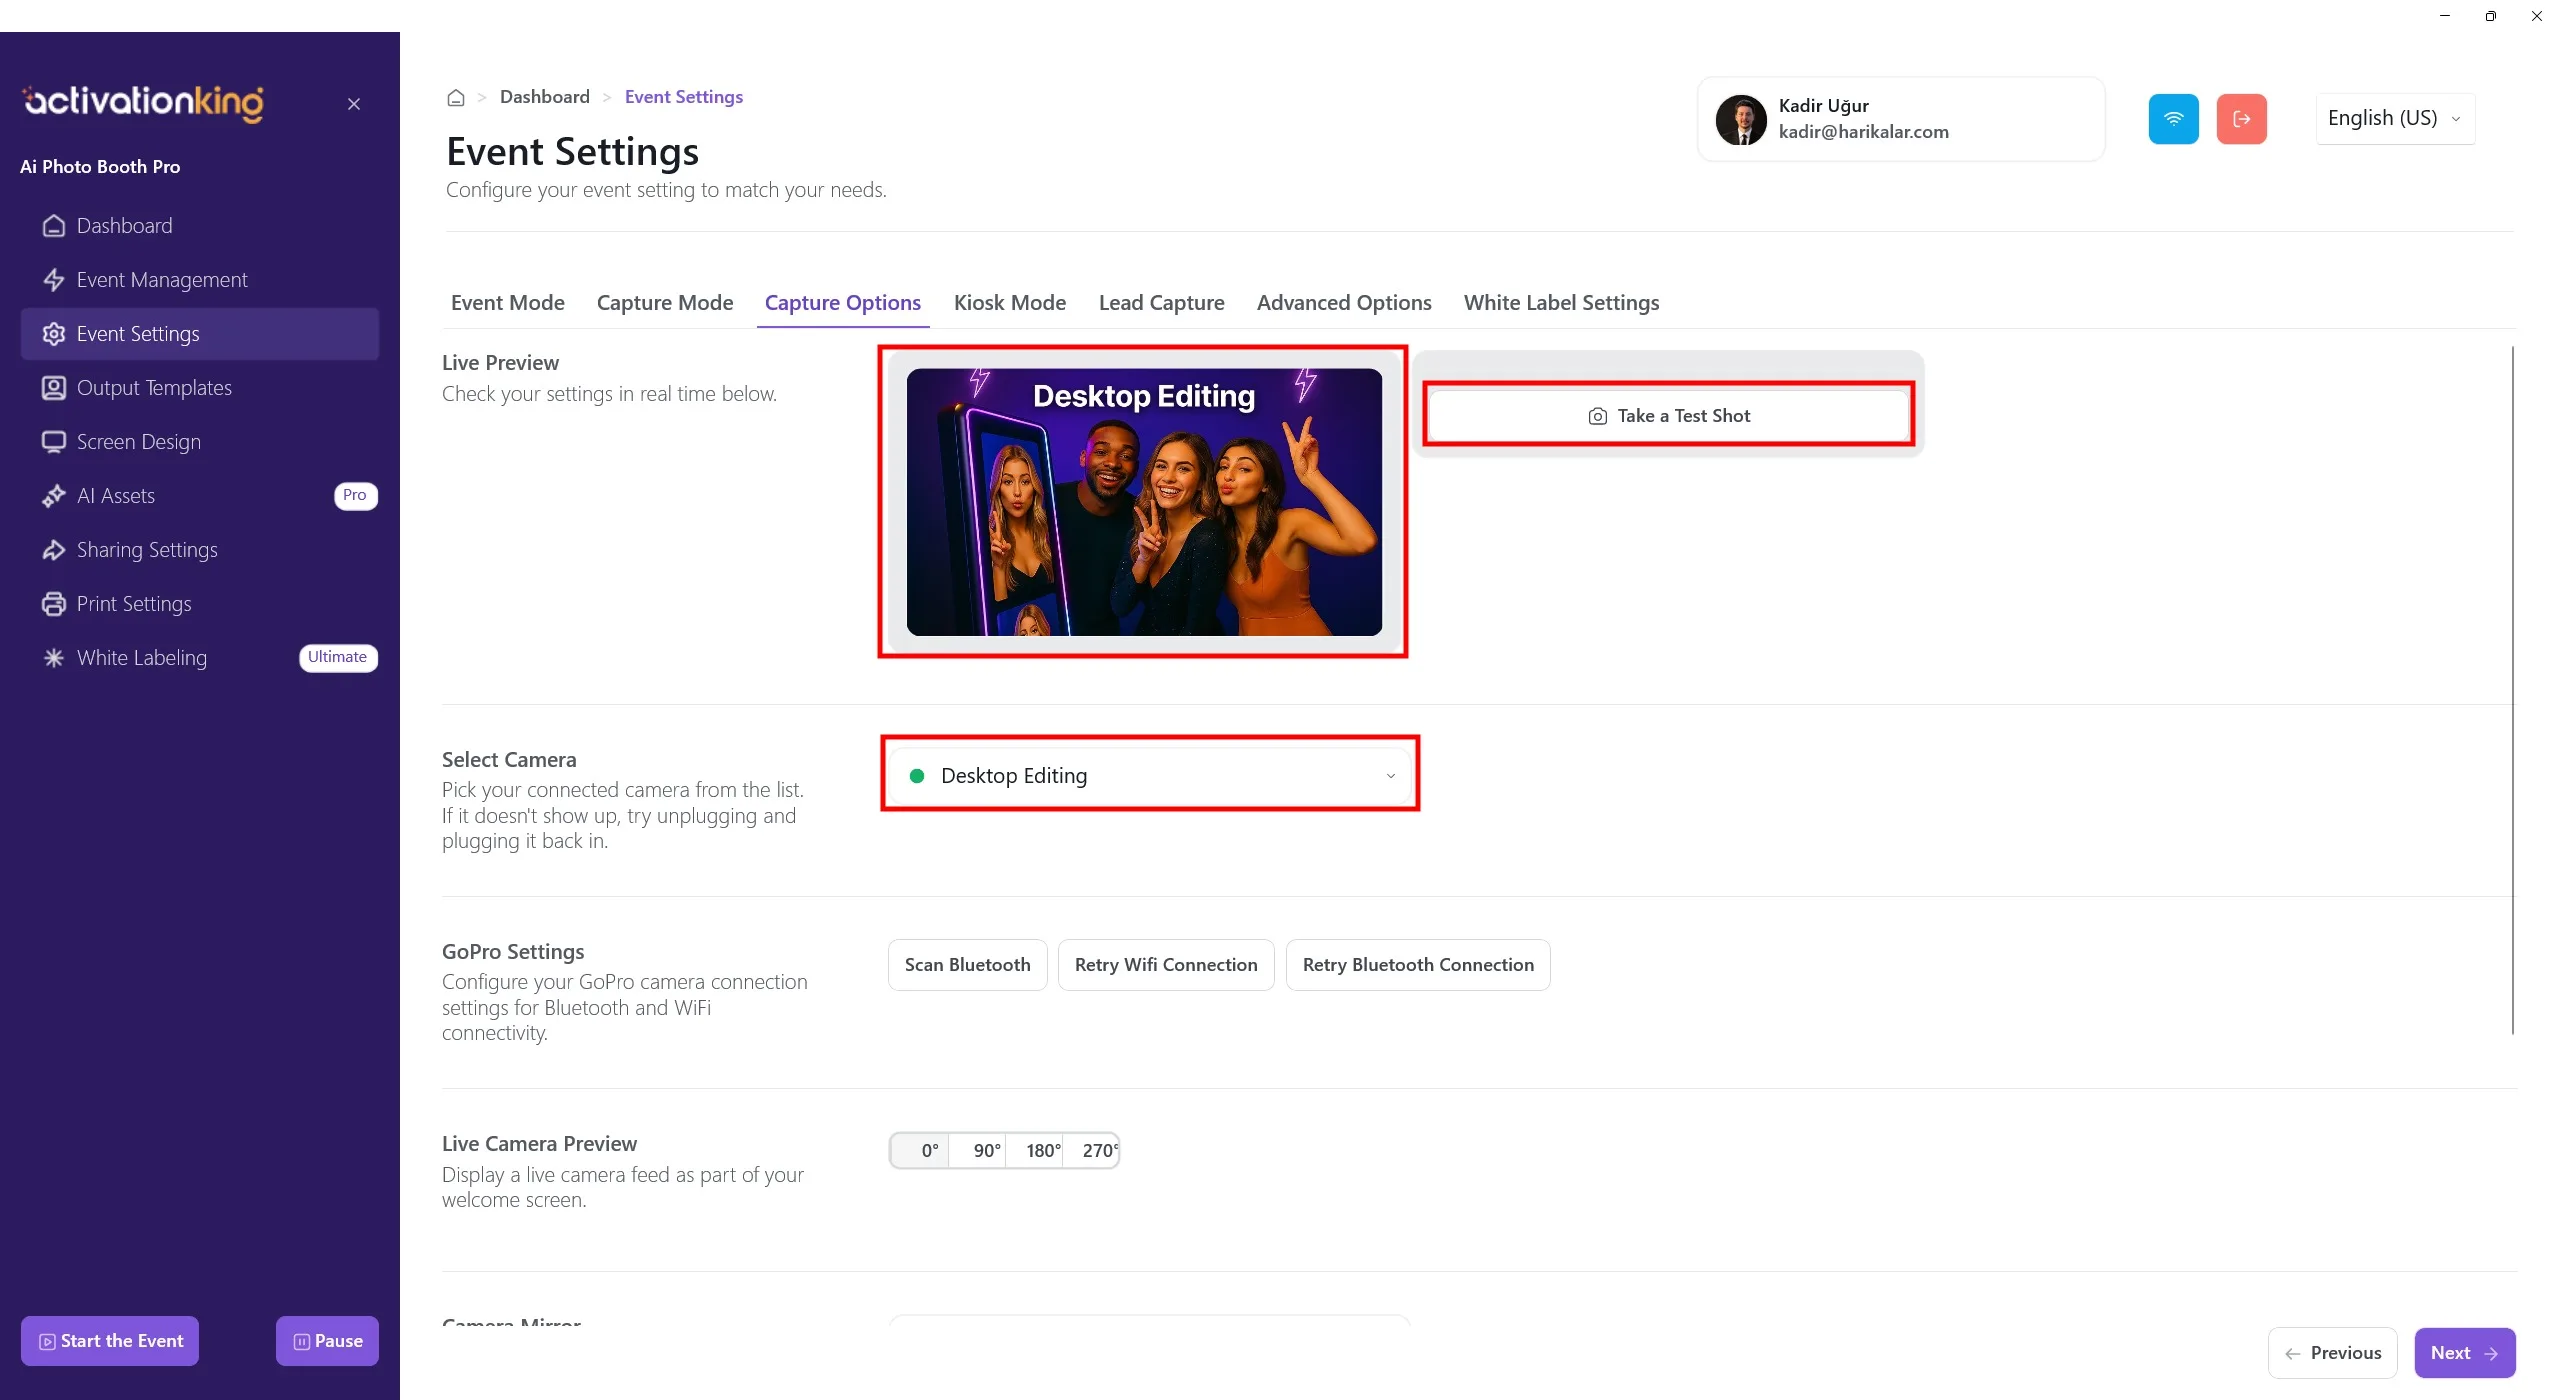
На этой странице вы можете настроить все параметры камеры. Если в разделе Select Camera вы выберете Desktop Editing, вы сможете работать с уже имеющимися на устройстве фотографиями без подключения камеры. В том же разделе вы также можете выбрать камеру, подключённую к устройству. После выбора камеры живое изображение появится в разделе Live Preview. Вы можете сделать пробные снимки, чтобы проверить условия освещения и текущие настройки камеры.
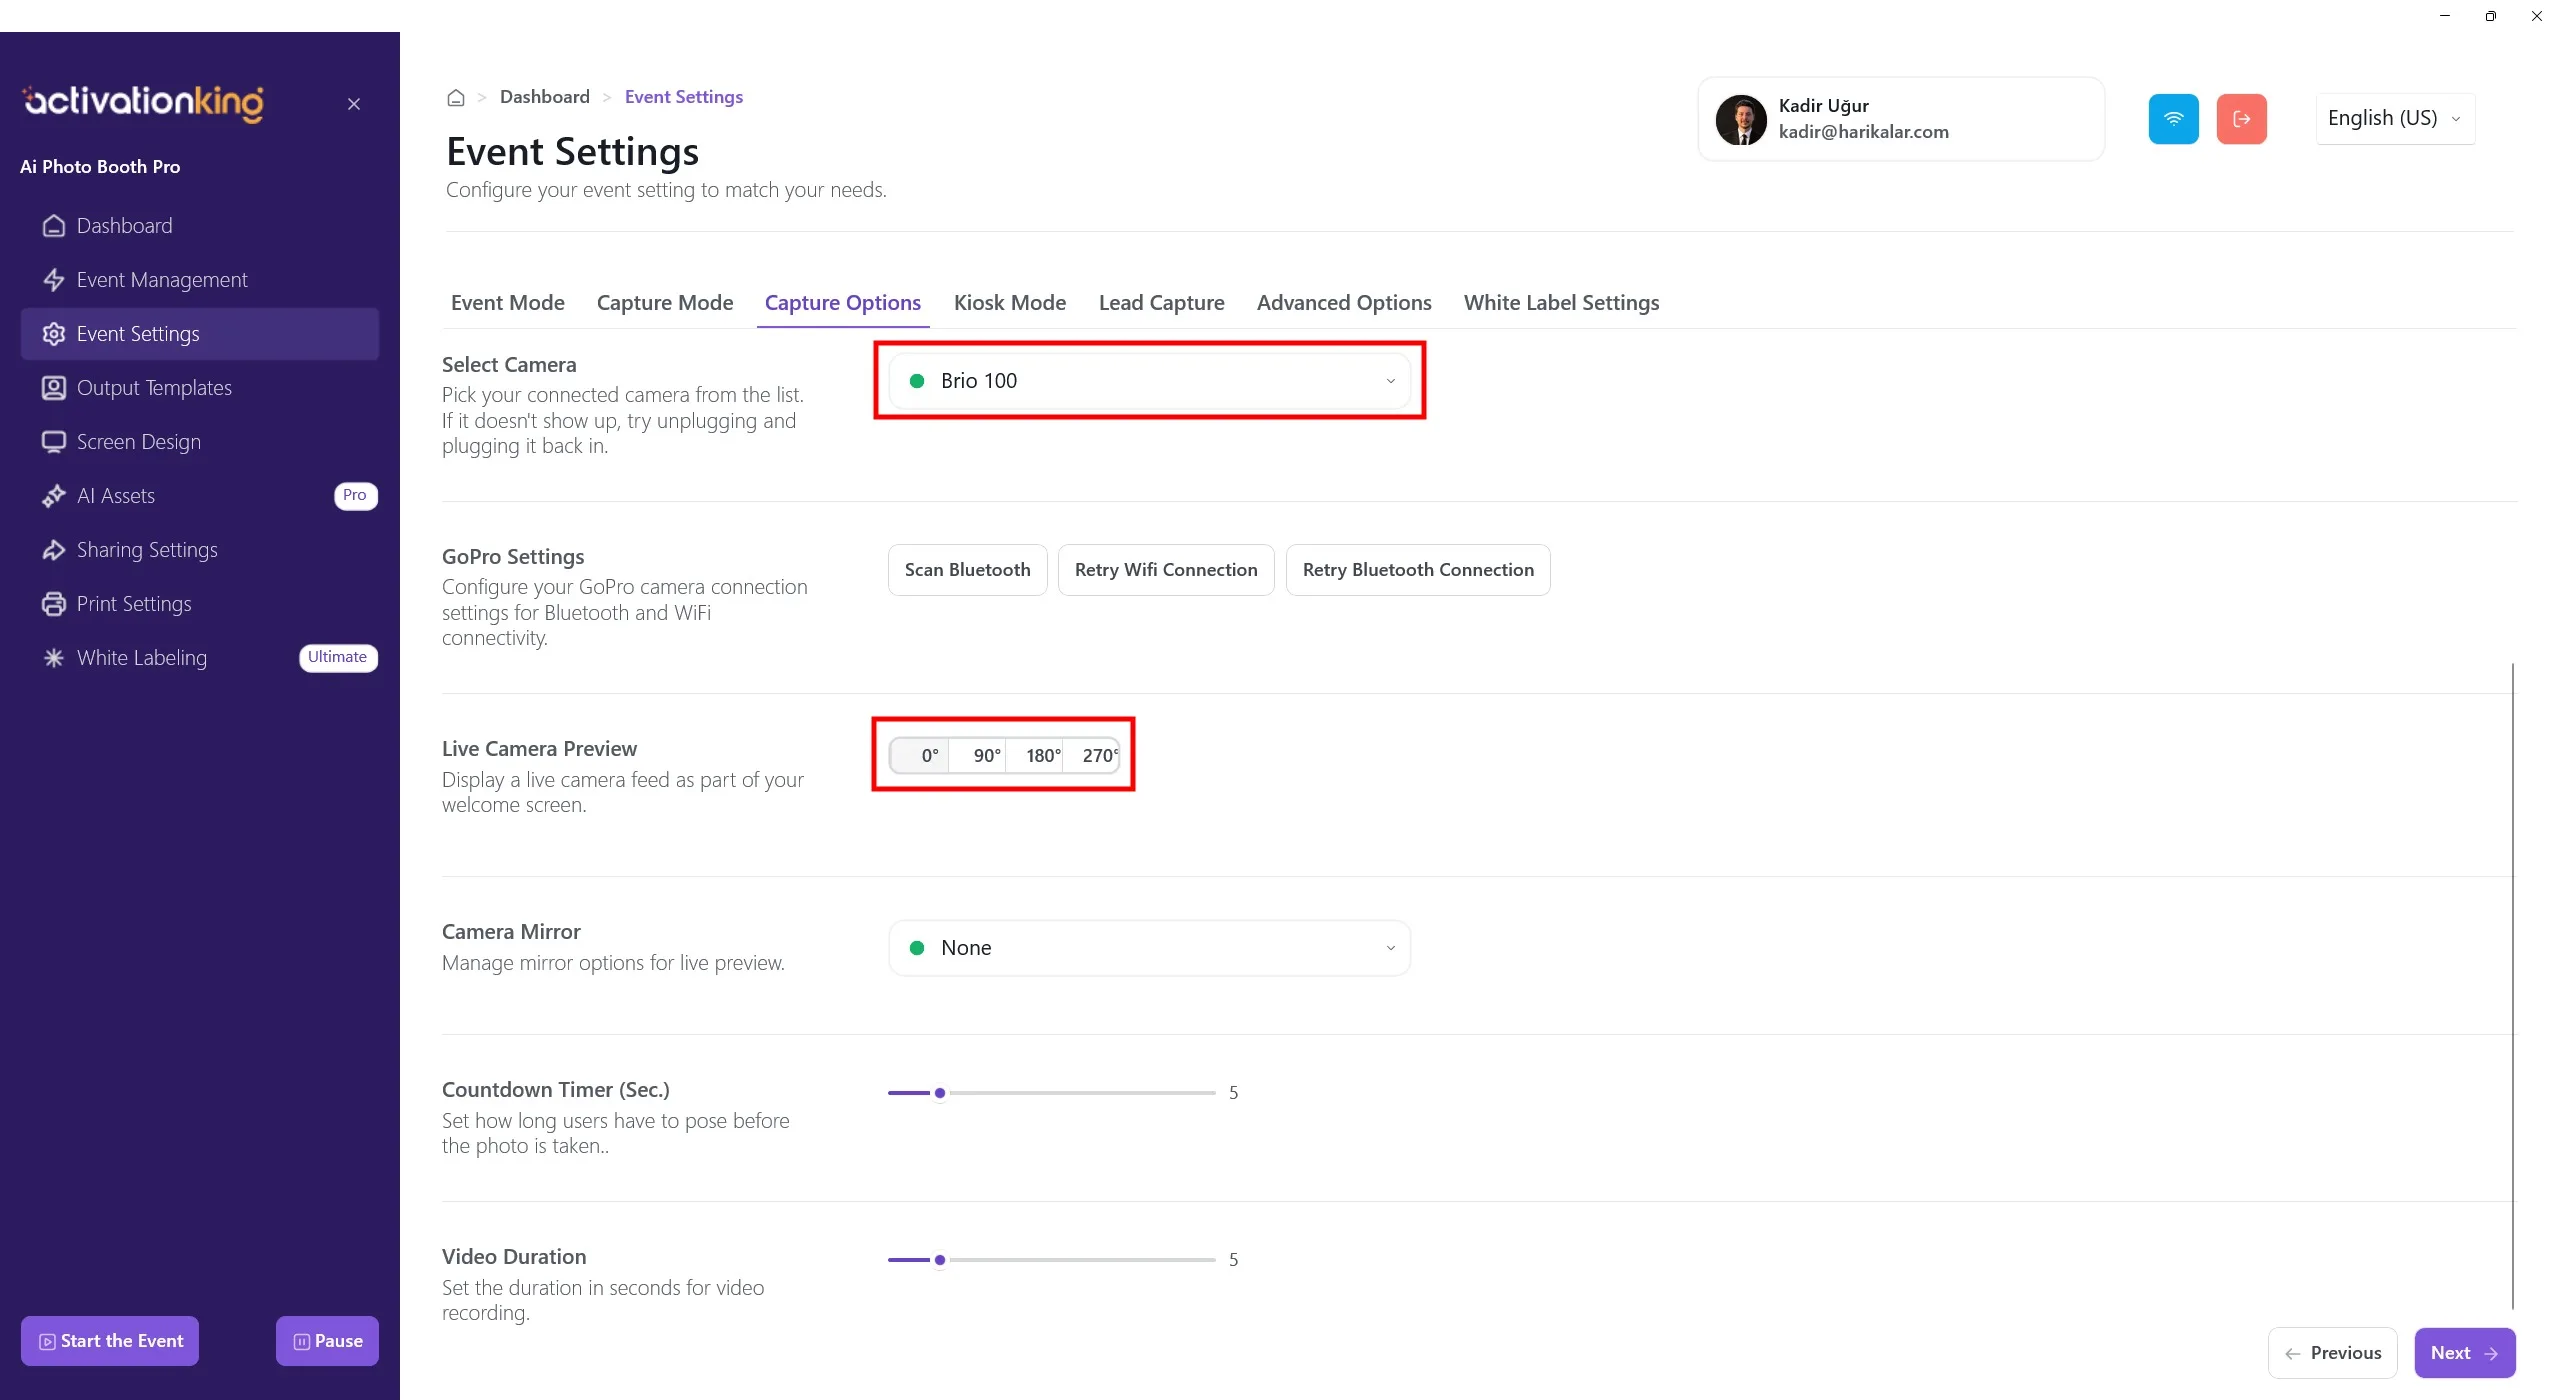
Прокрутив страницу вниз, вы можете отрегулировать угол камеры. Вы также можете настроить параметры mirror камеры и задать время обратного отсчёта перед съёмкой.
Выходные шаблоны
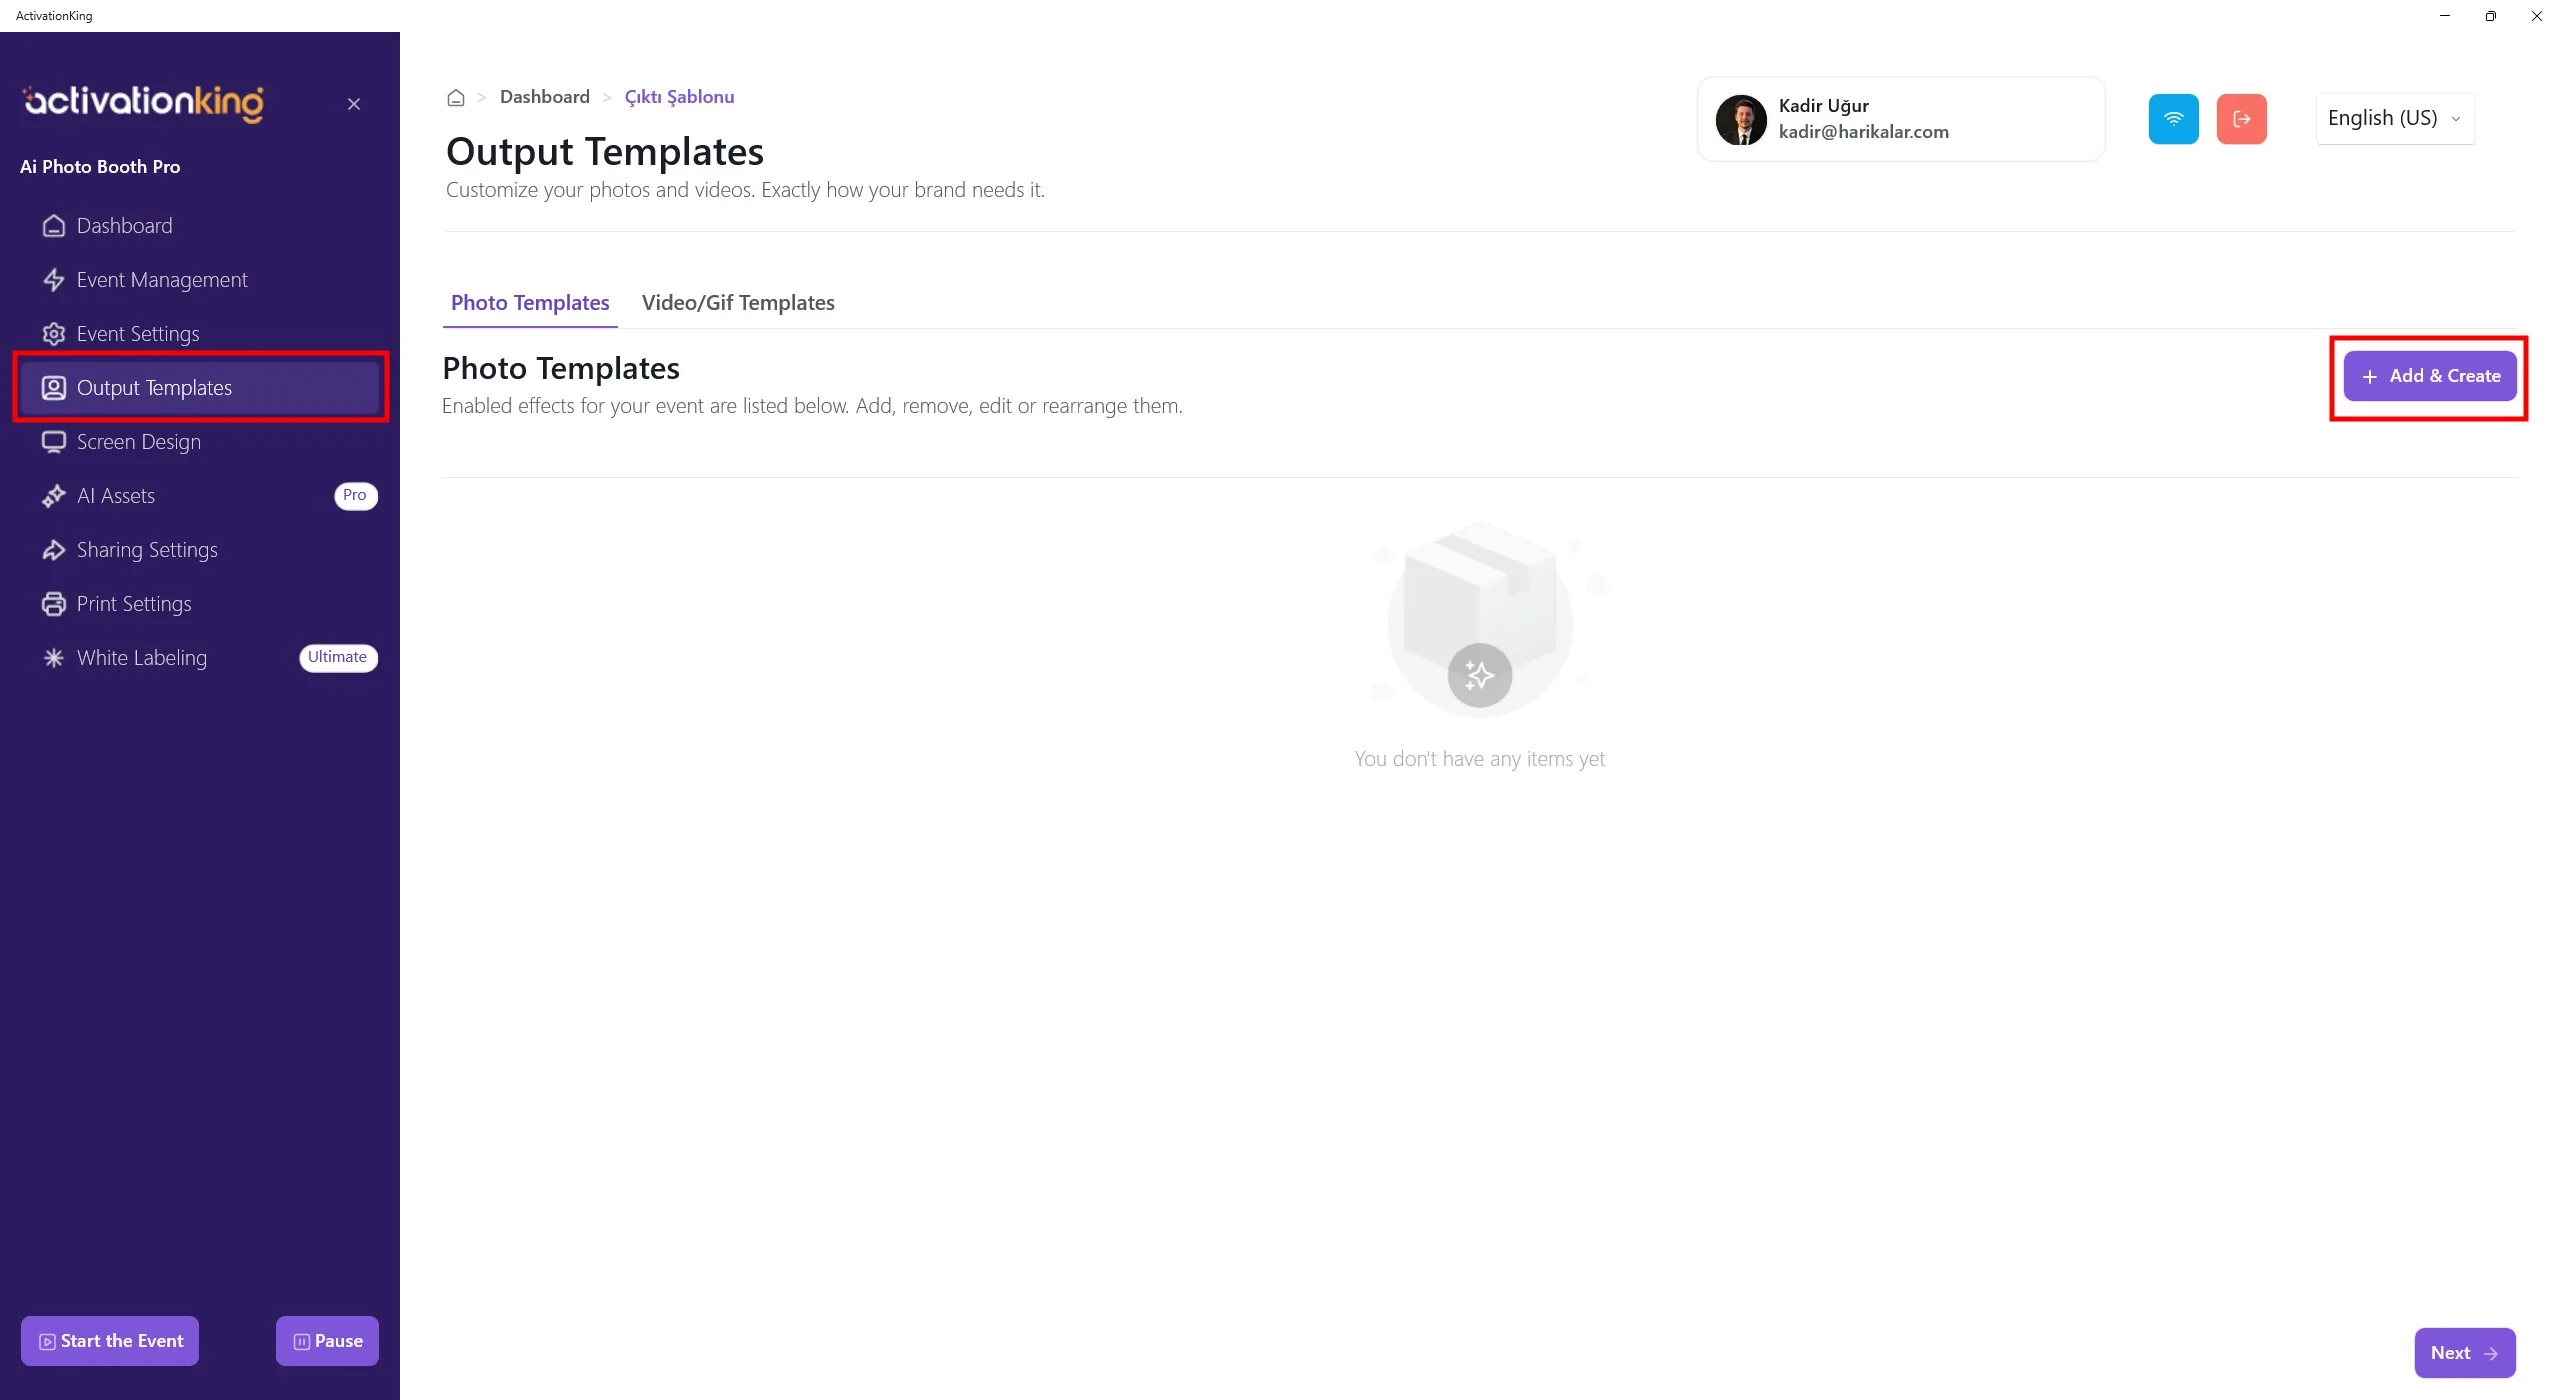
При открытии страницы вы увидите шаблоны по умолчанию. Вы можете использовать эти шаблоны при желании или удалить их все и создать новый шаблон только для нужного вам режима.
Наличие нескольких шаблонов в этом разделе требует выбора шаблона перед съёмкой. Если вы не используете несколько режимов AI или несколько рамок/шаблонов, это не обязательно. Вы можете в любой момент удалить все шаблоны и быстро восстановить их.
Чтобы создать шаблон для AI FaceSwap, нажмите кнопку +Add & Create.
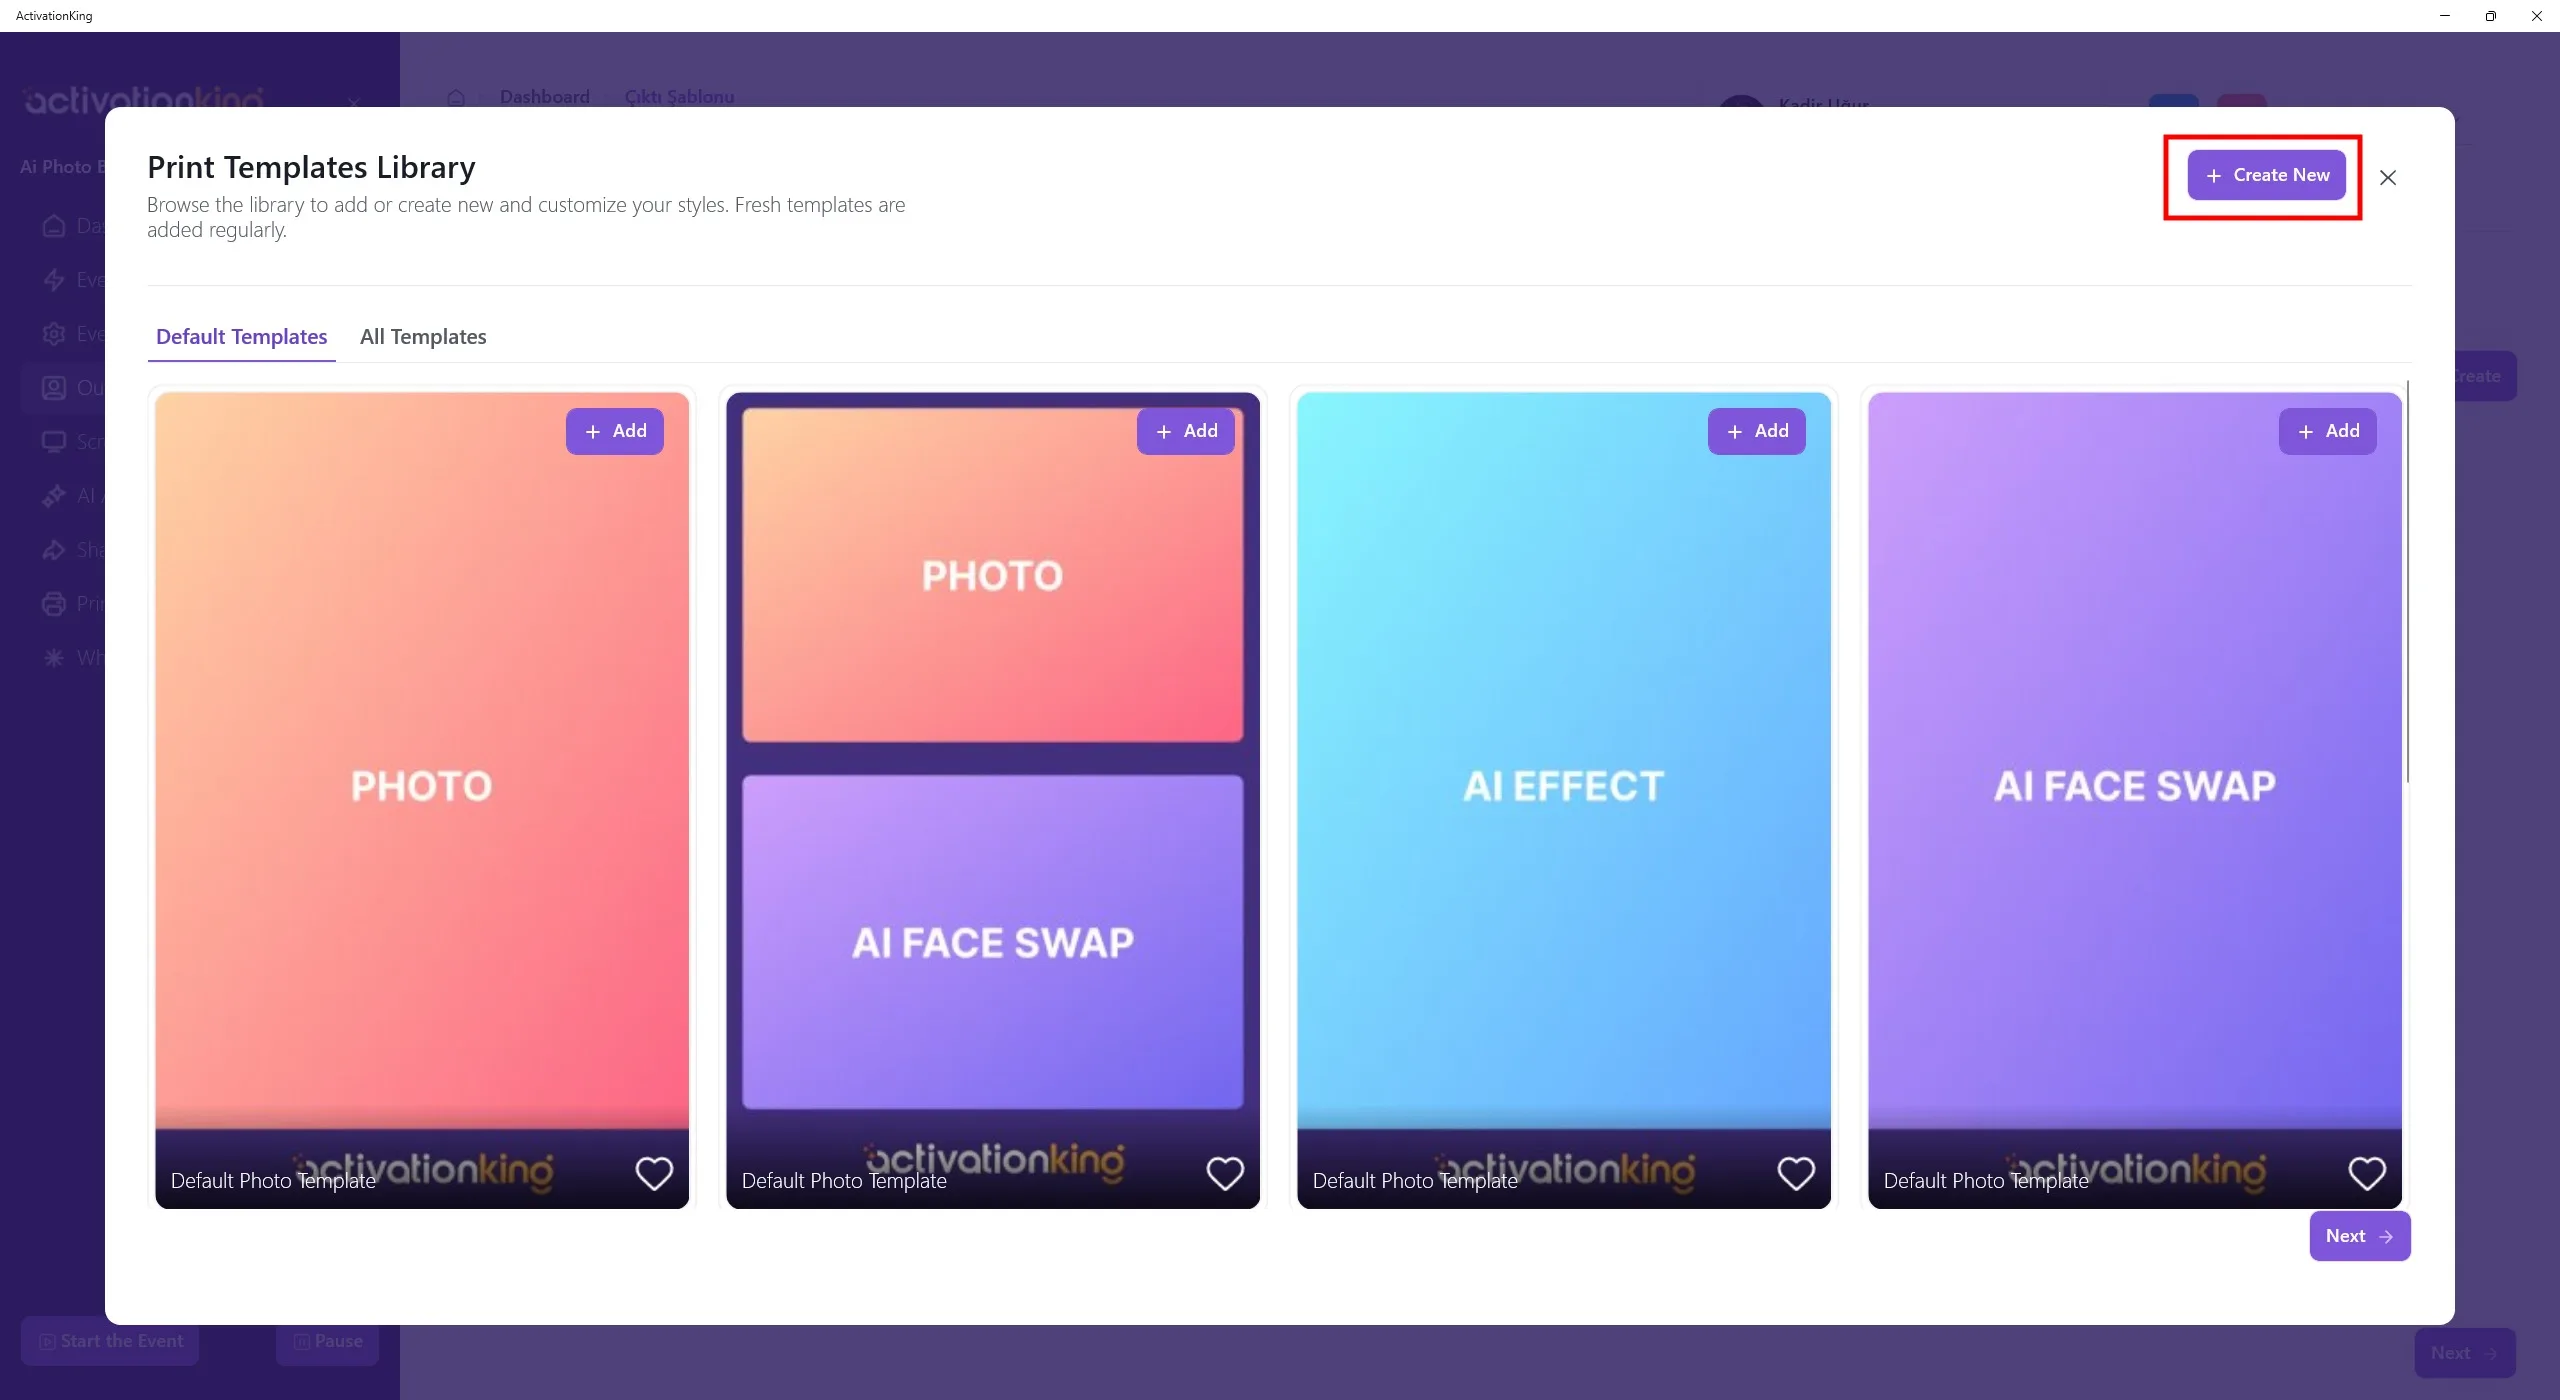
Даже если вы удалите шаблоны, вы сможете быстро добавить их снова в этом разделе. Пока что нажмите кнопку Create New.
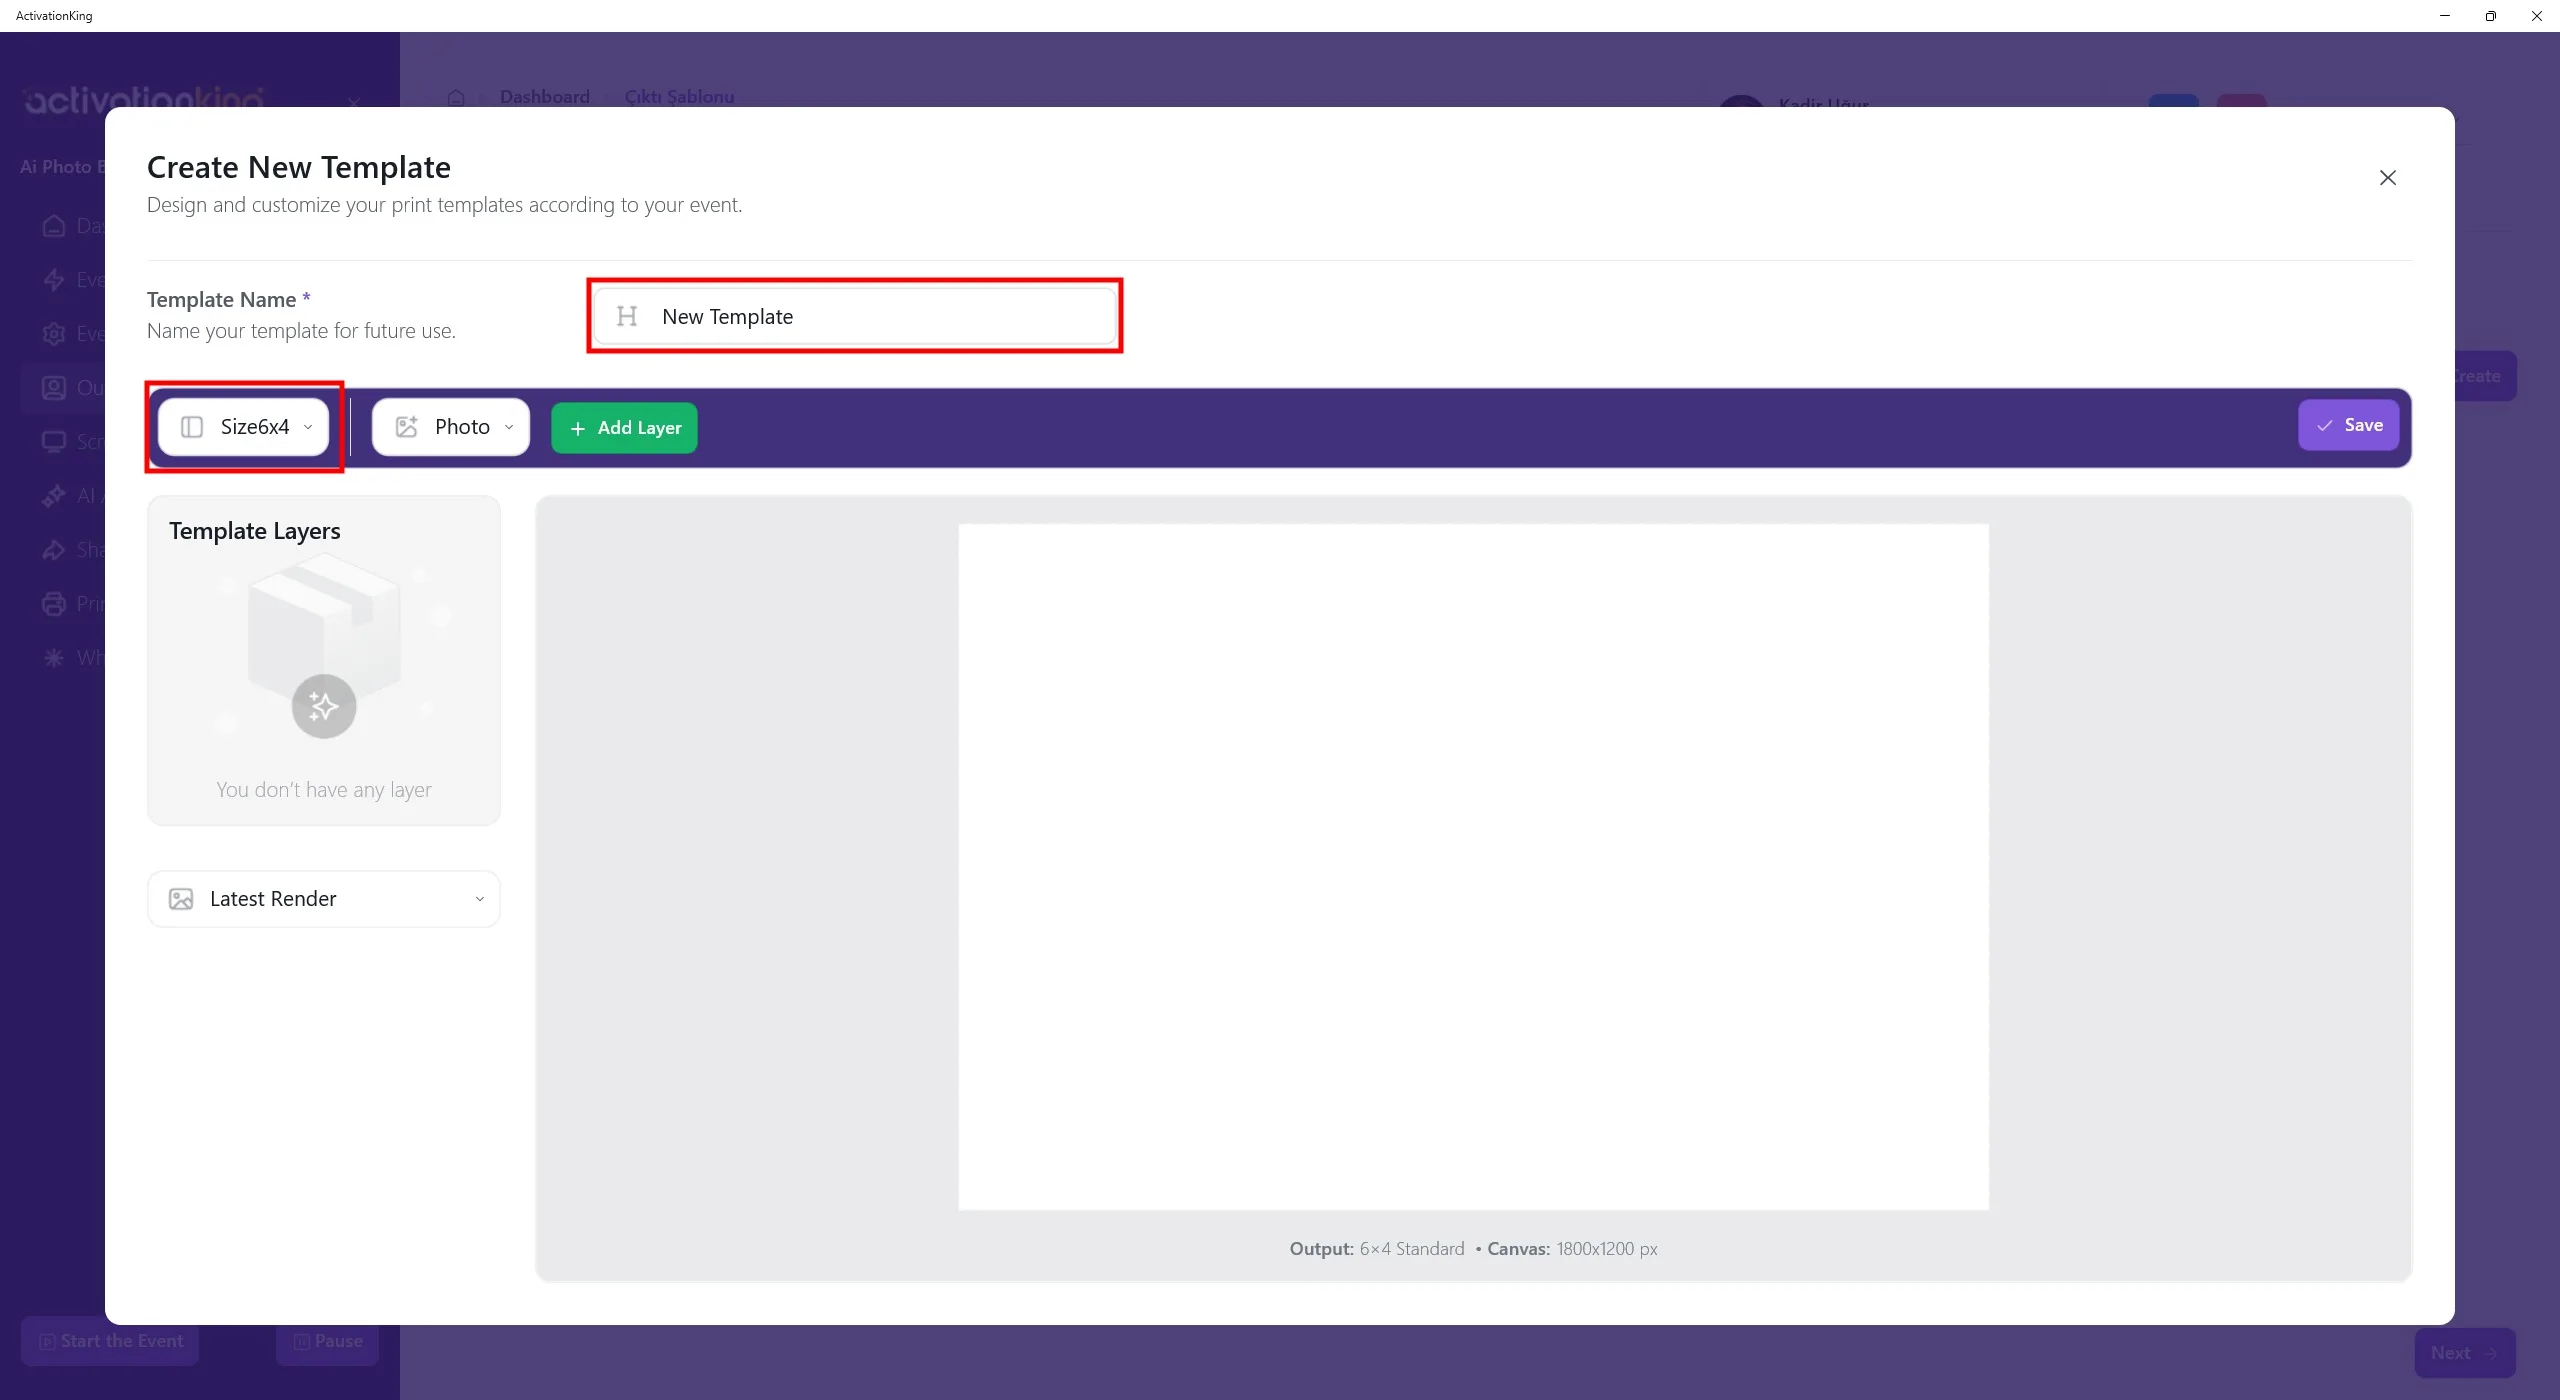
На открывшейся странице вы можете назвать свой шаблон, если планируете использовать более одного. Если вы будете использовать только один шаблон, это не обязательно. Отрегулируйте размер шаблона в разделе в левом верхнем углу.
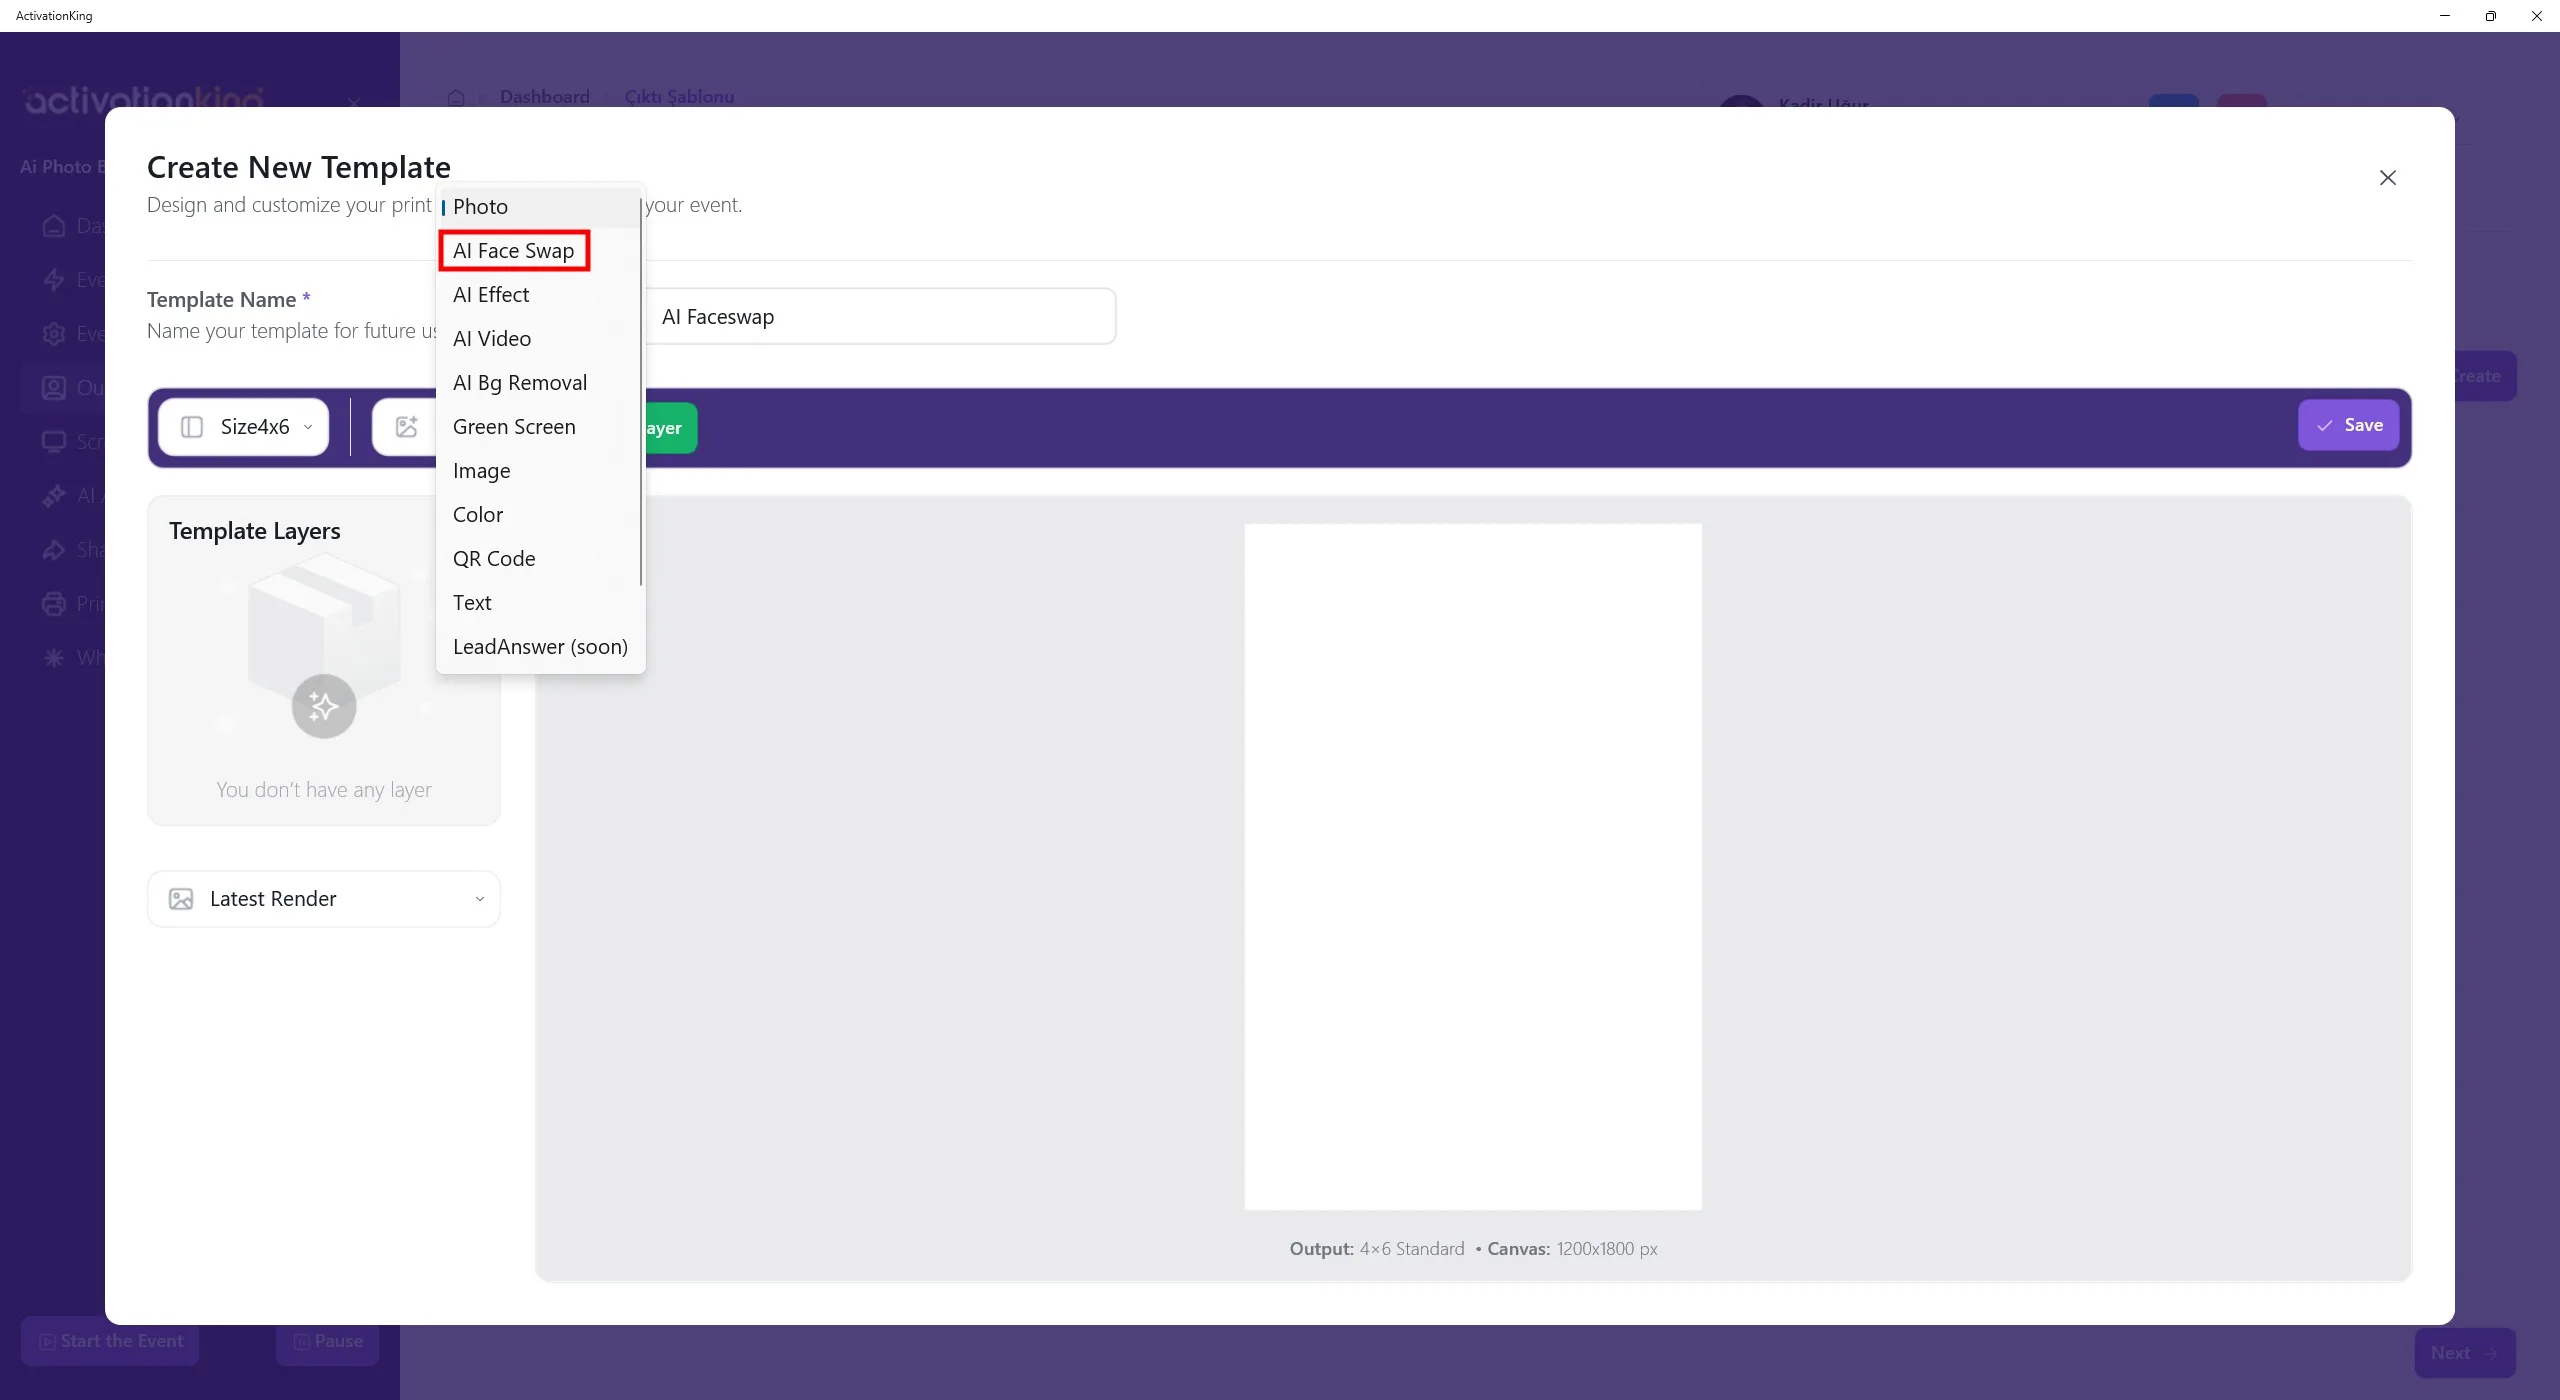
При нажатии кнопки рядом с элементами управления размером появится несколько вариантов режимов. Выберите AI FaceSwap, а затем нажмите кнопку Add Layer.
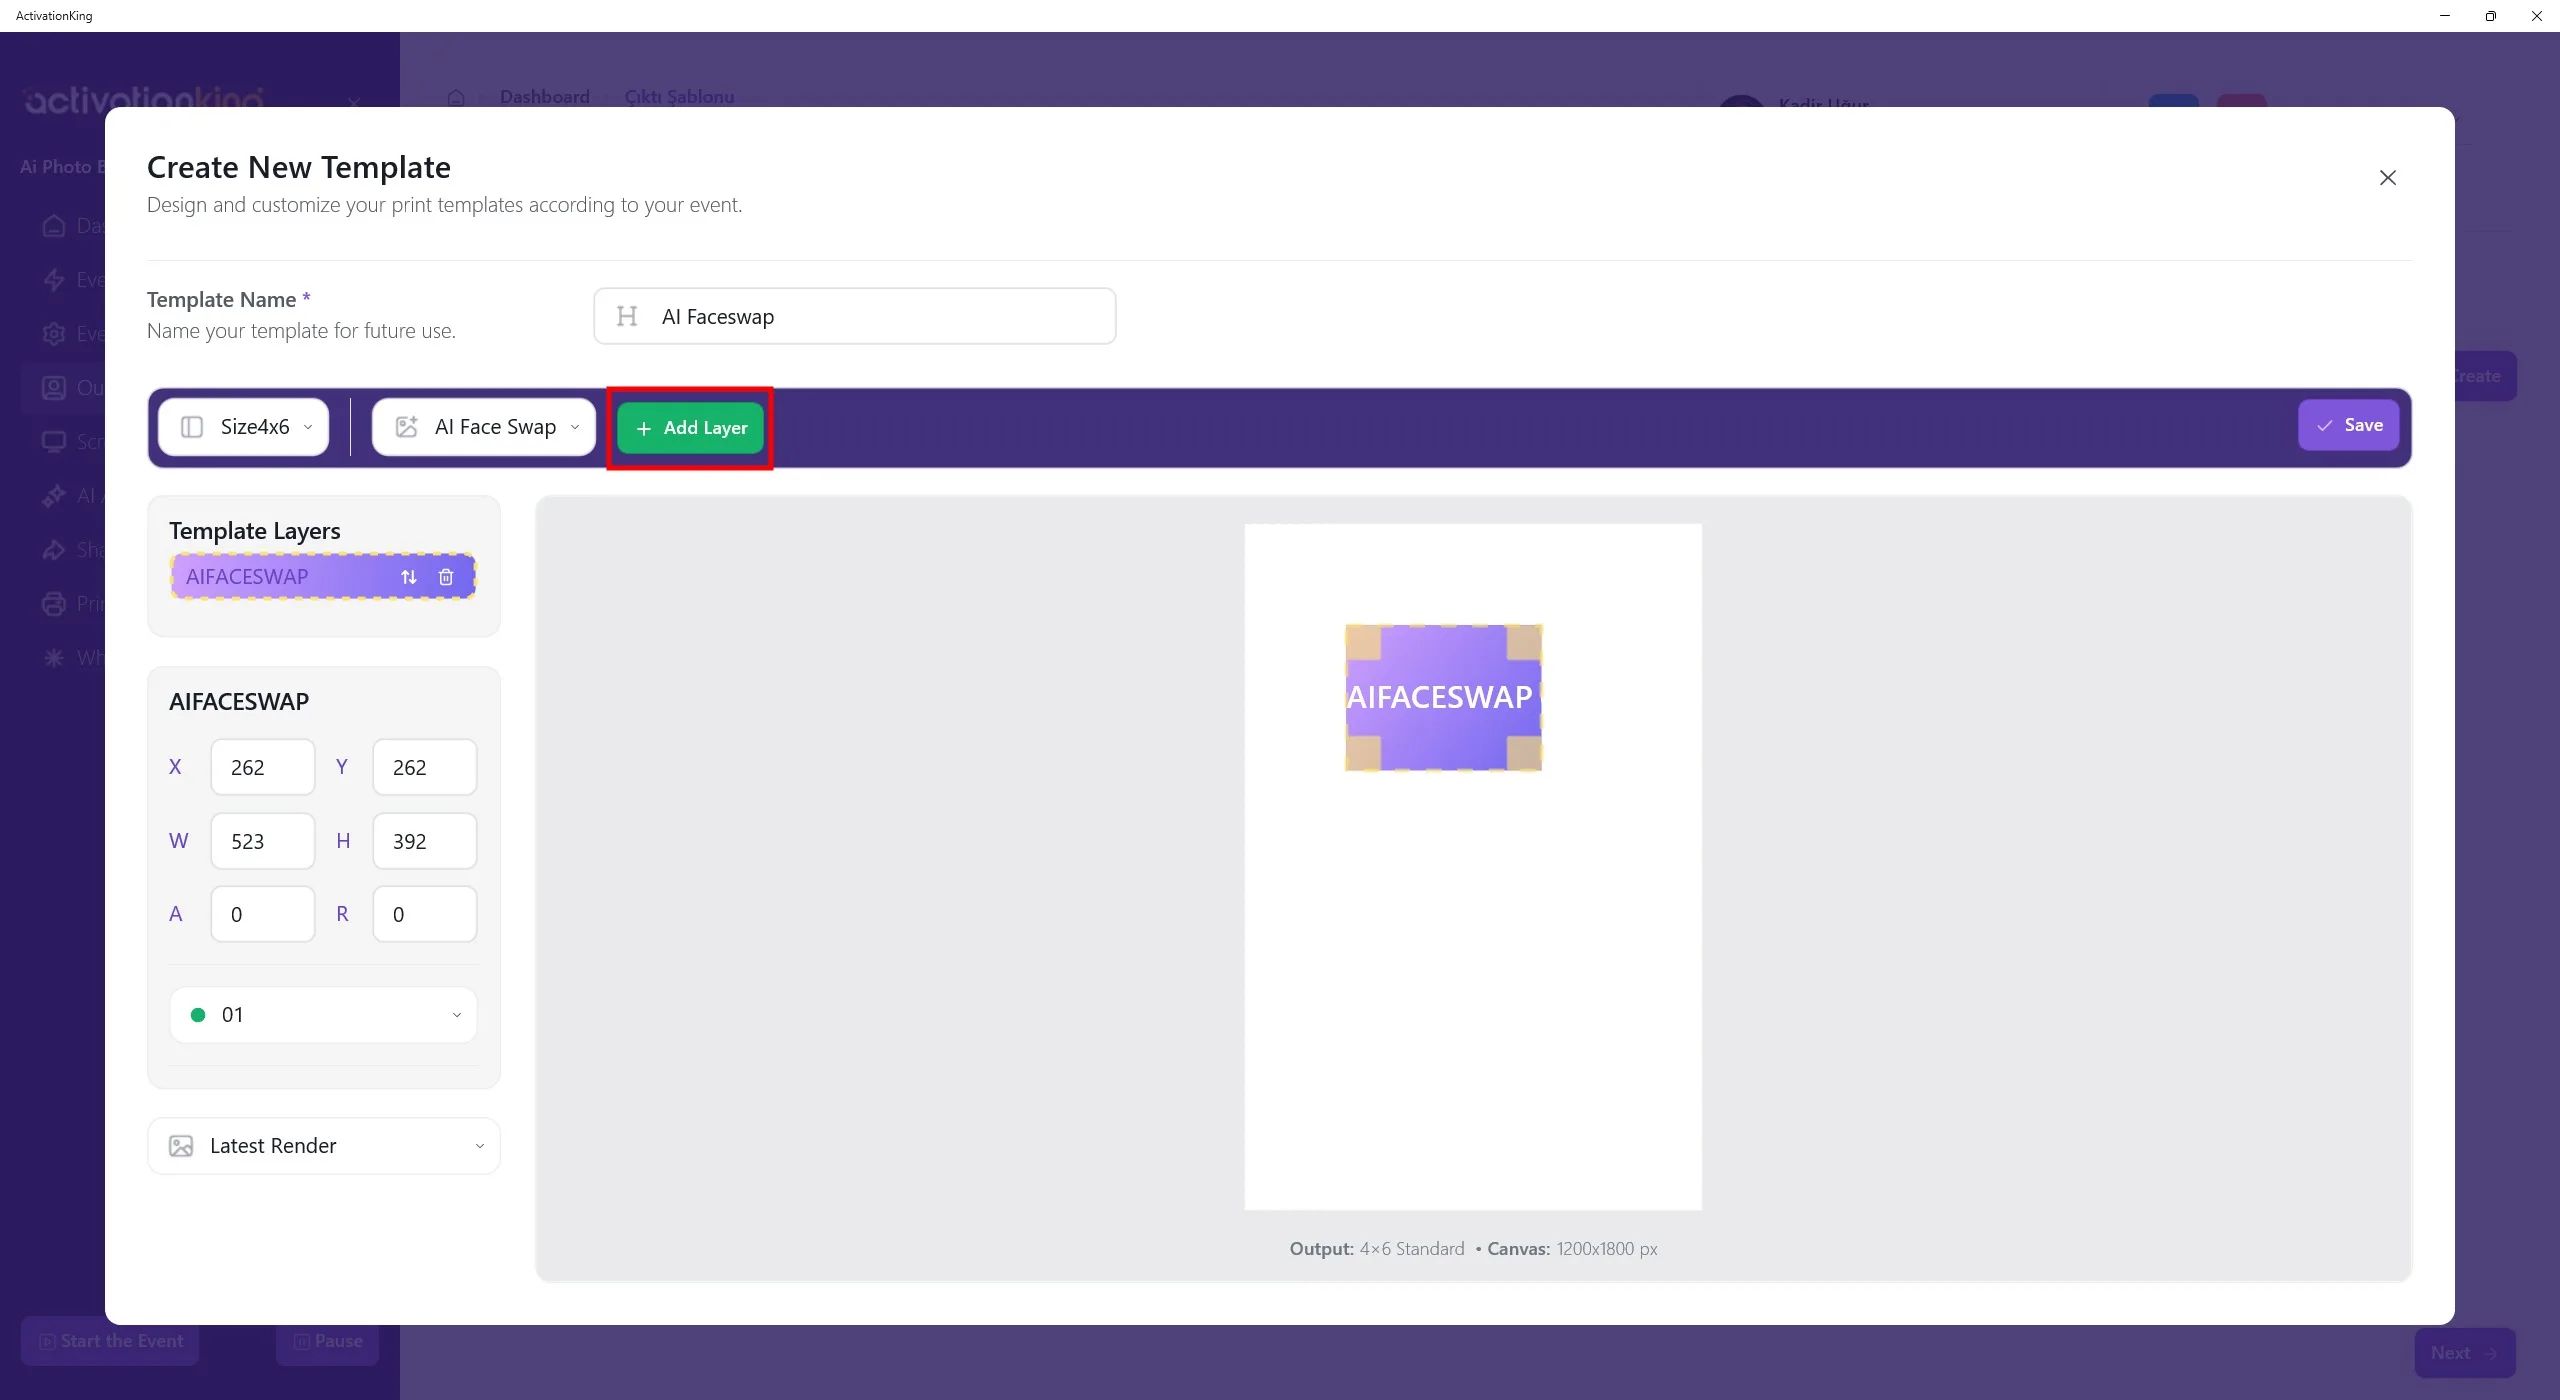
Нажмите кнопку Add Layer. Как только слой появится на экране, отрегулируйте его размер и пропорции.
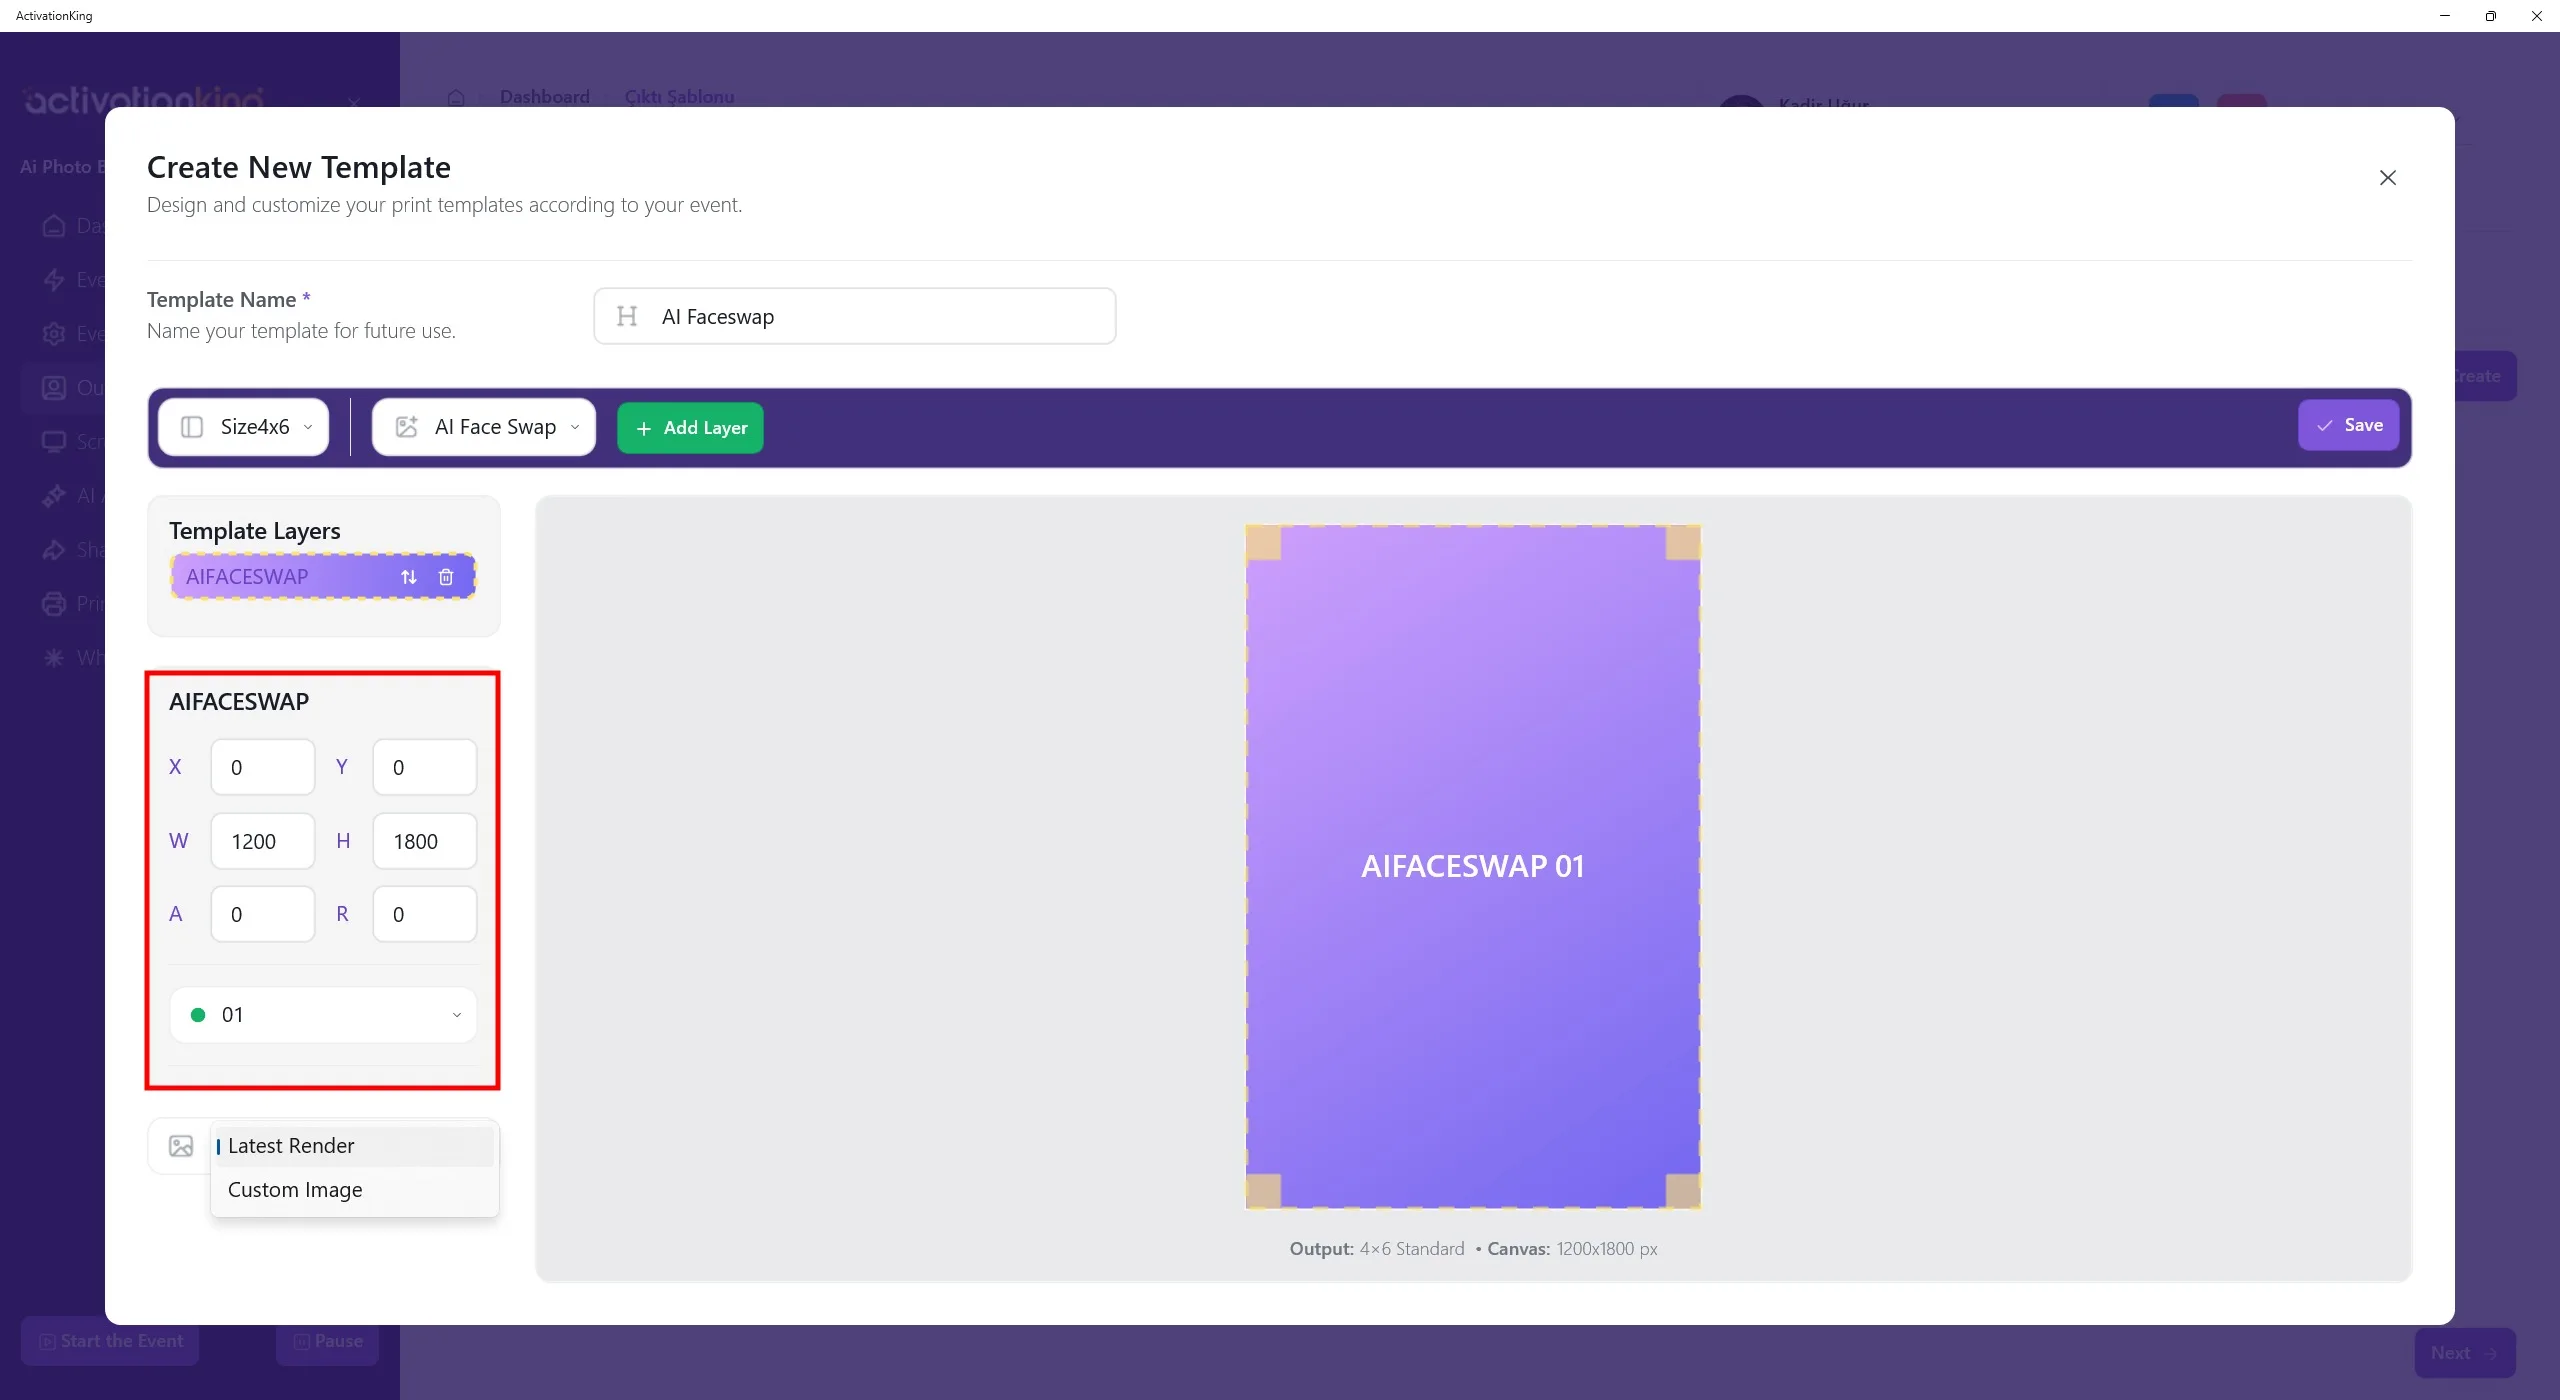
Размеры шаблона отображаются в нижней части шаблона. Введите размеры 1200 x 1800 в левой панели.
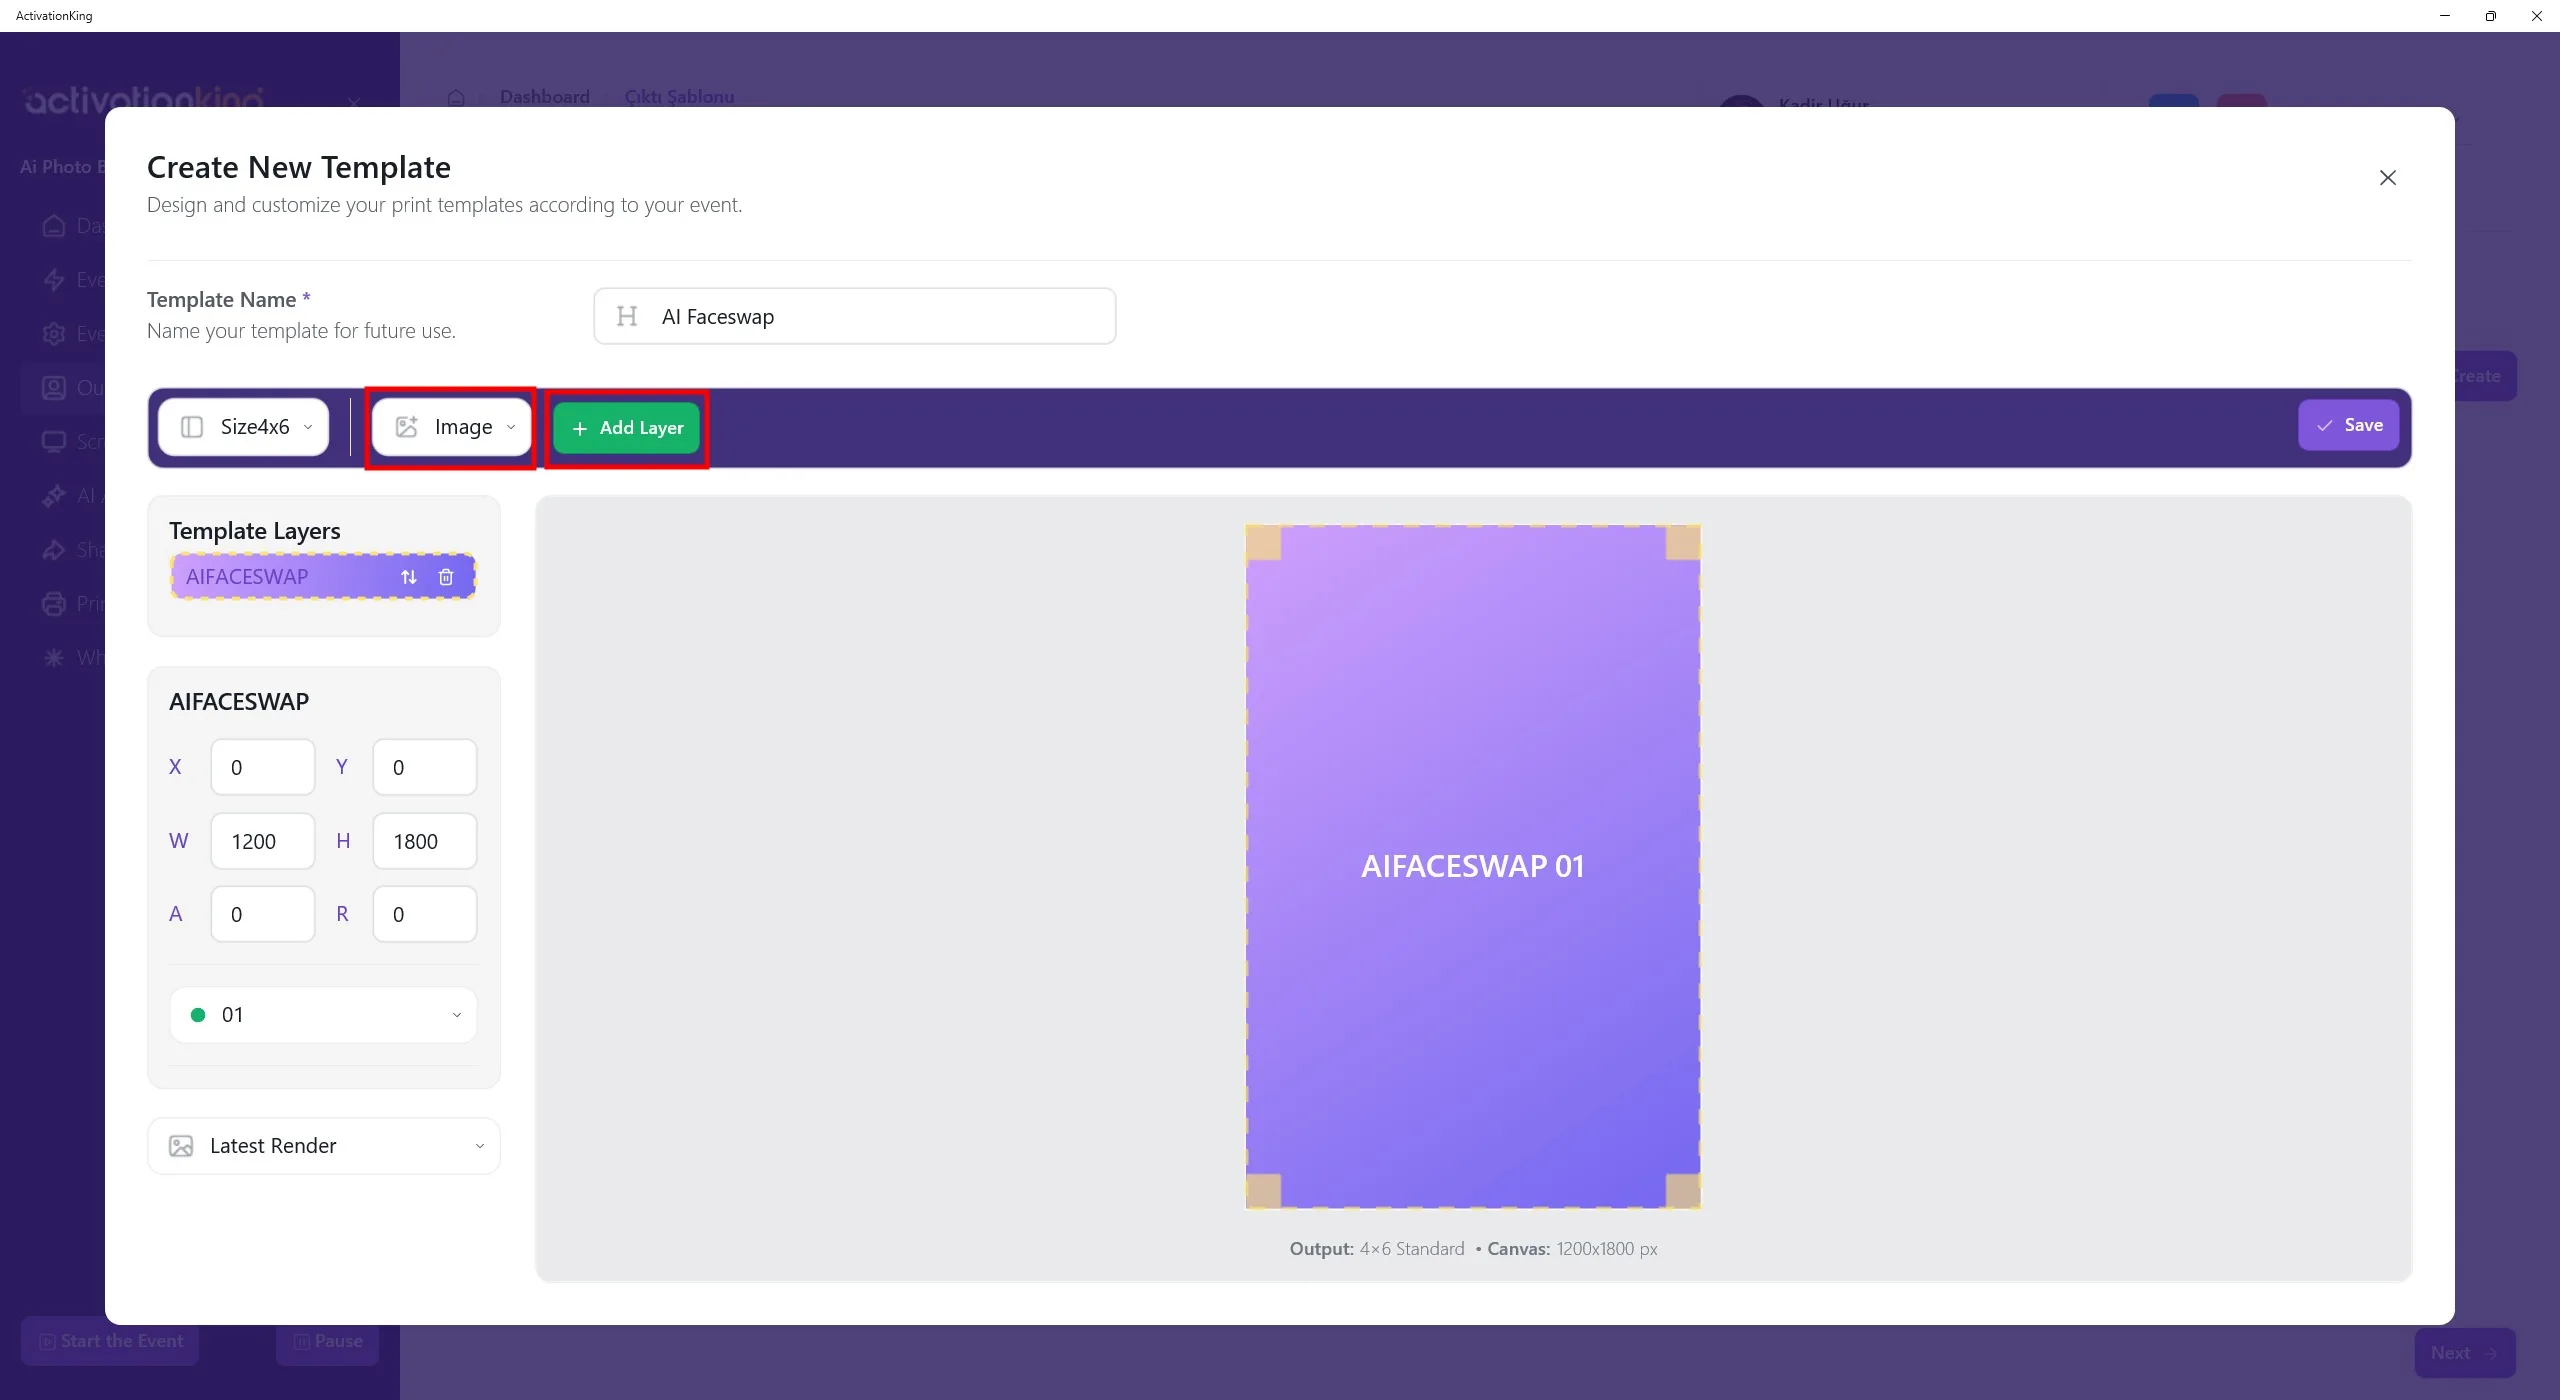
Чтобы добавить рамку поверх изображения, выберите Image в верхнем меню, а затем нажмите кнопку Add Layer.
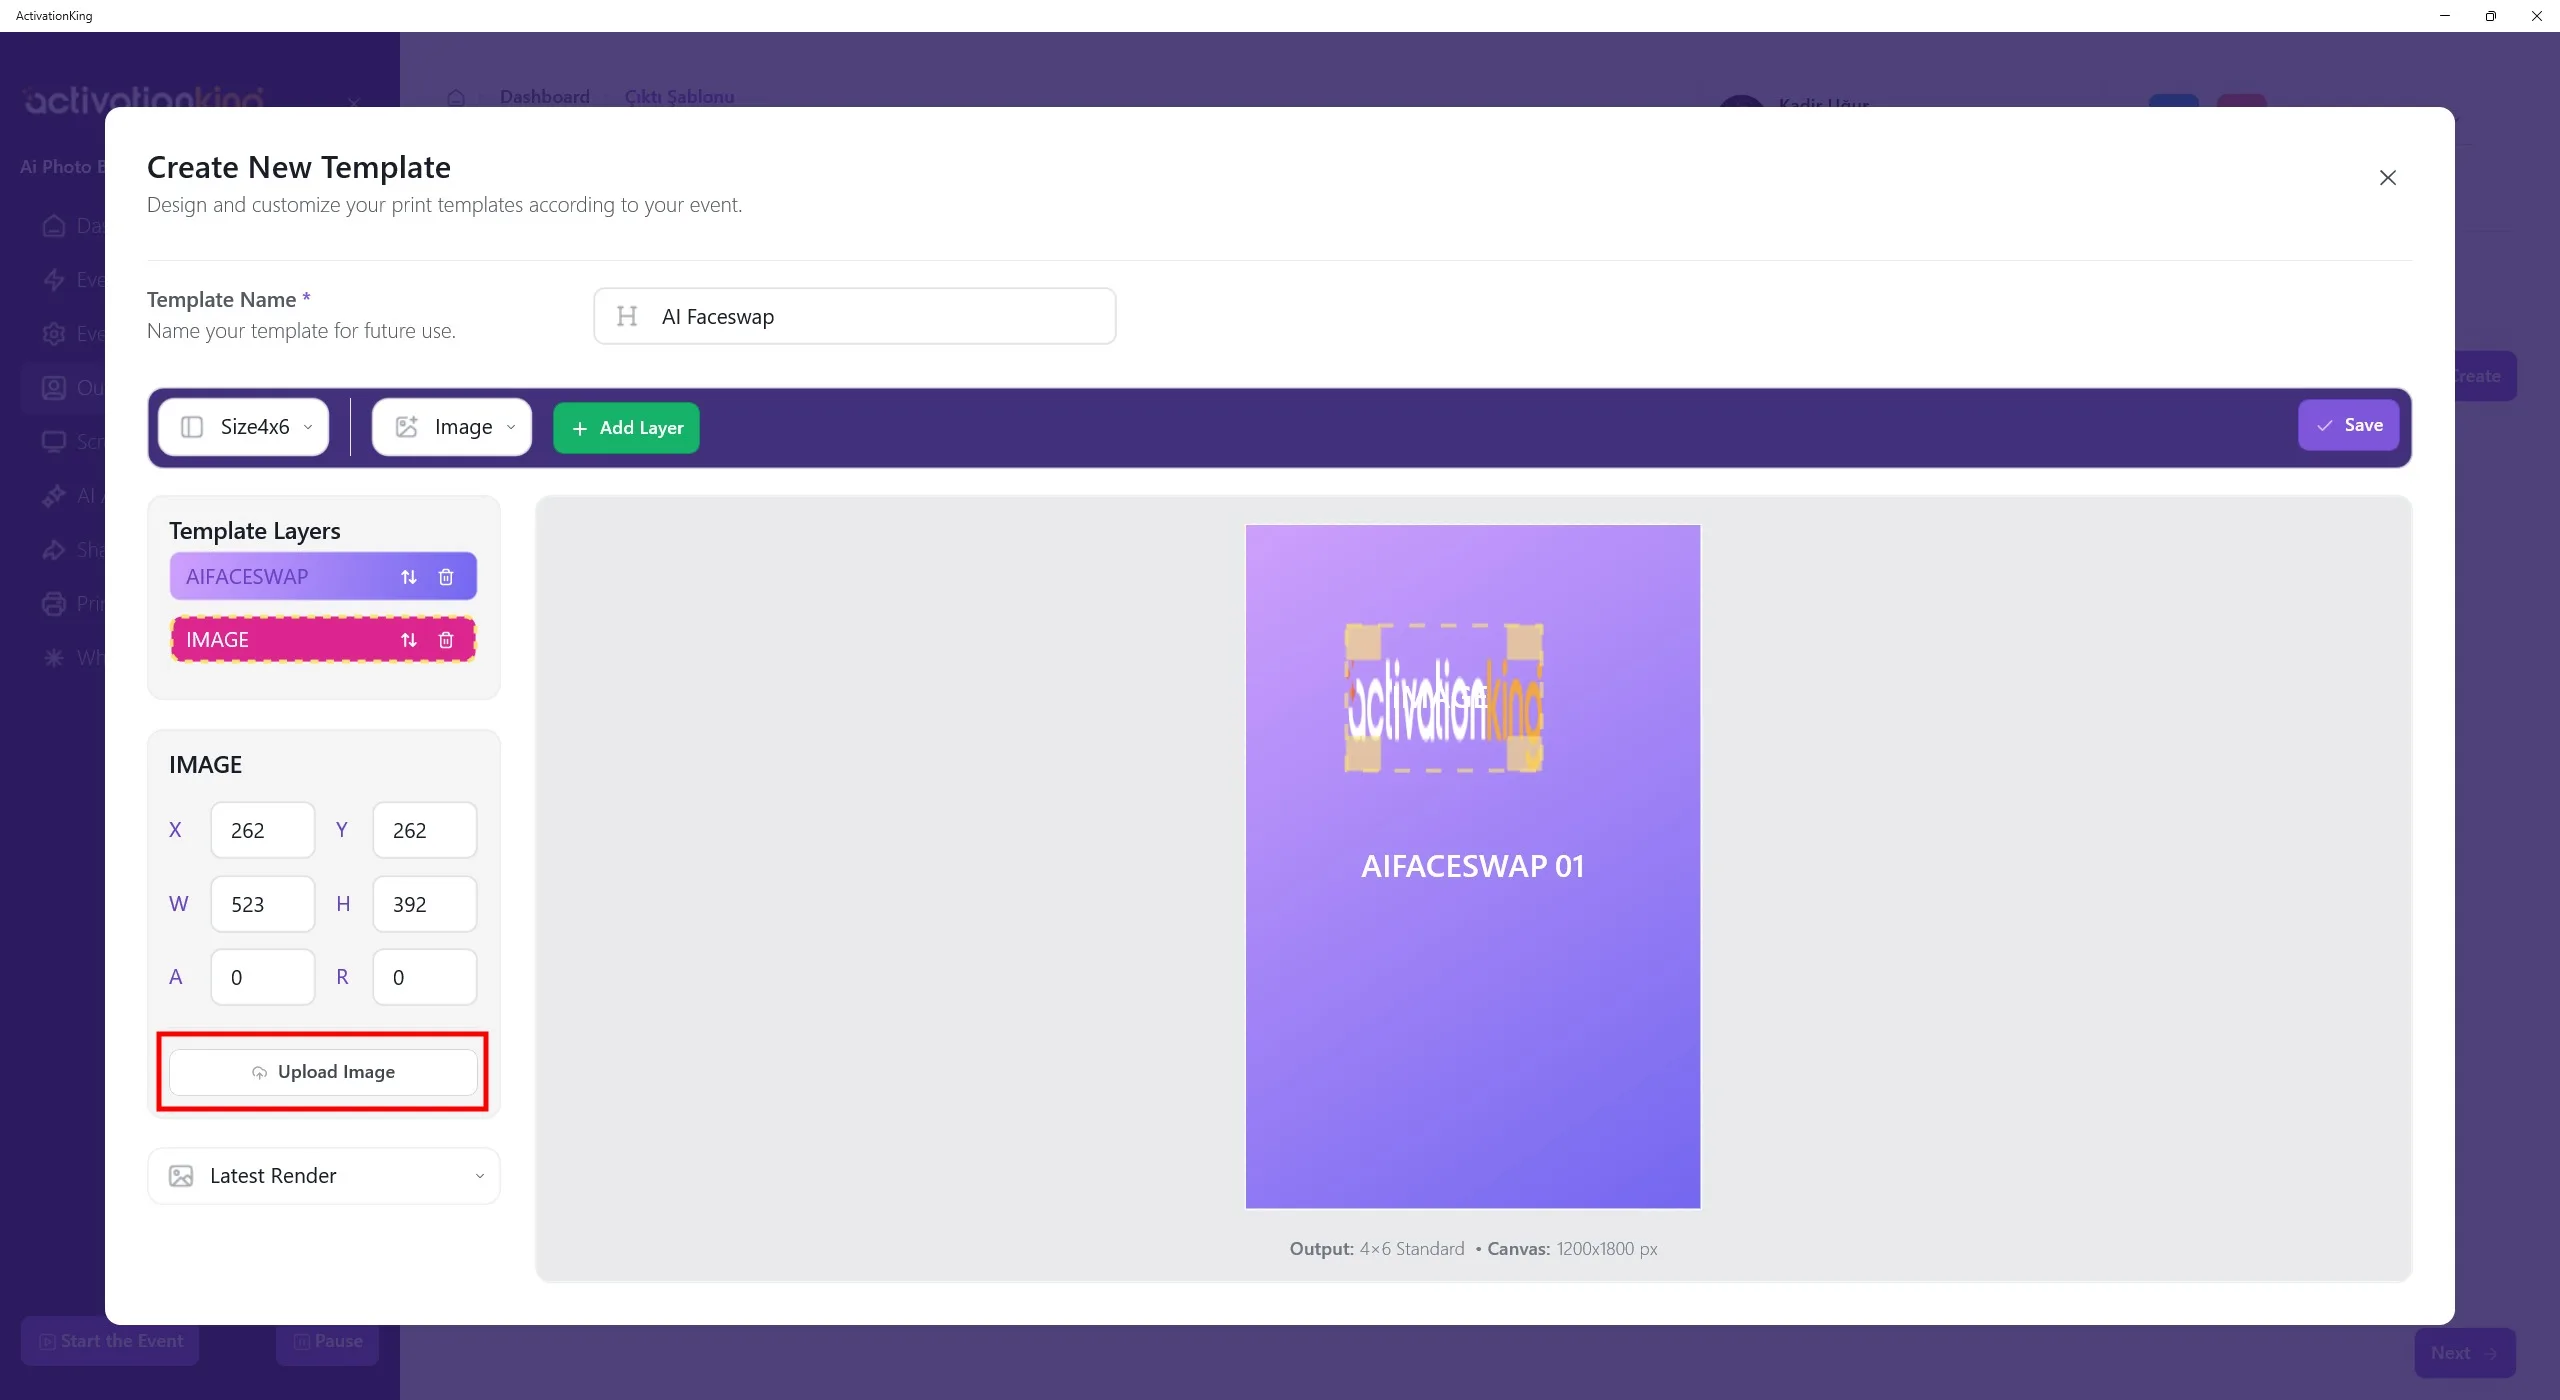
После добавления слоя Image поверх шаблона нажмите кнопку Upload Image слева. Отсюда вы можете загрузить либо рамку, либо логотип.
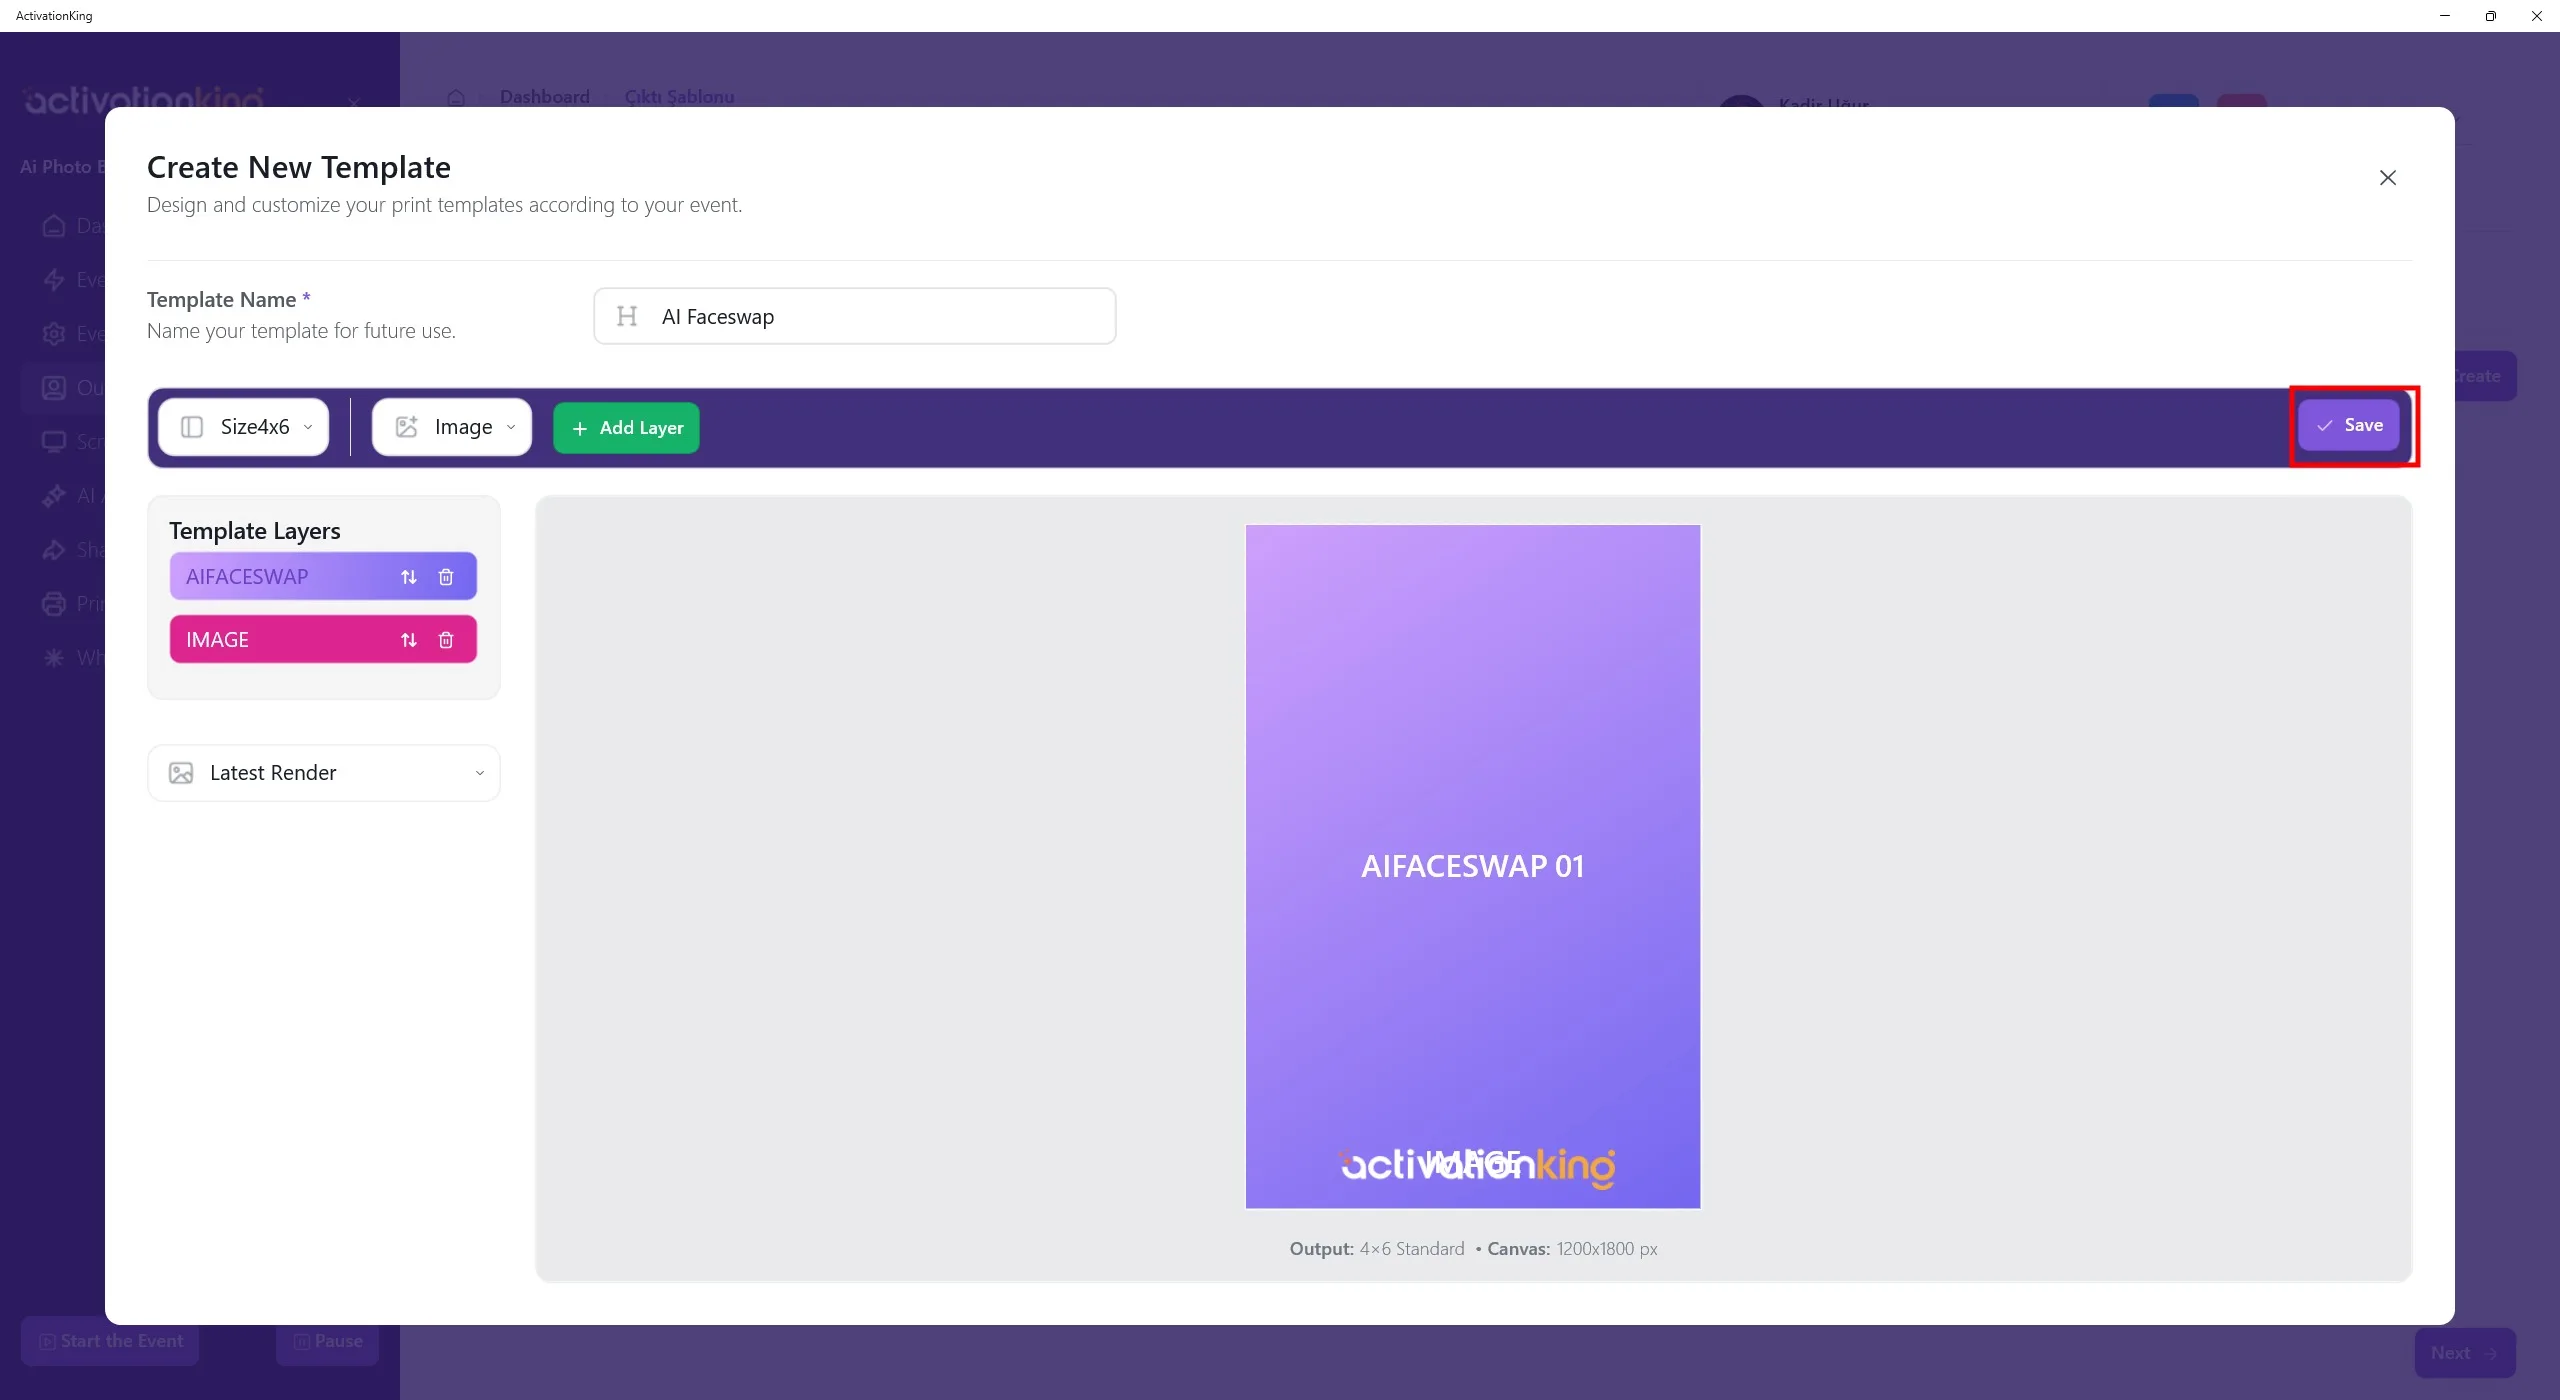
После добавления логотипа или рамки отрегулируйте их положение и масштаб, а затем нажмите кнопку Save.
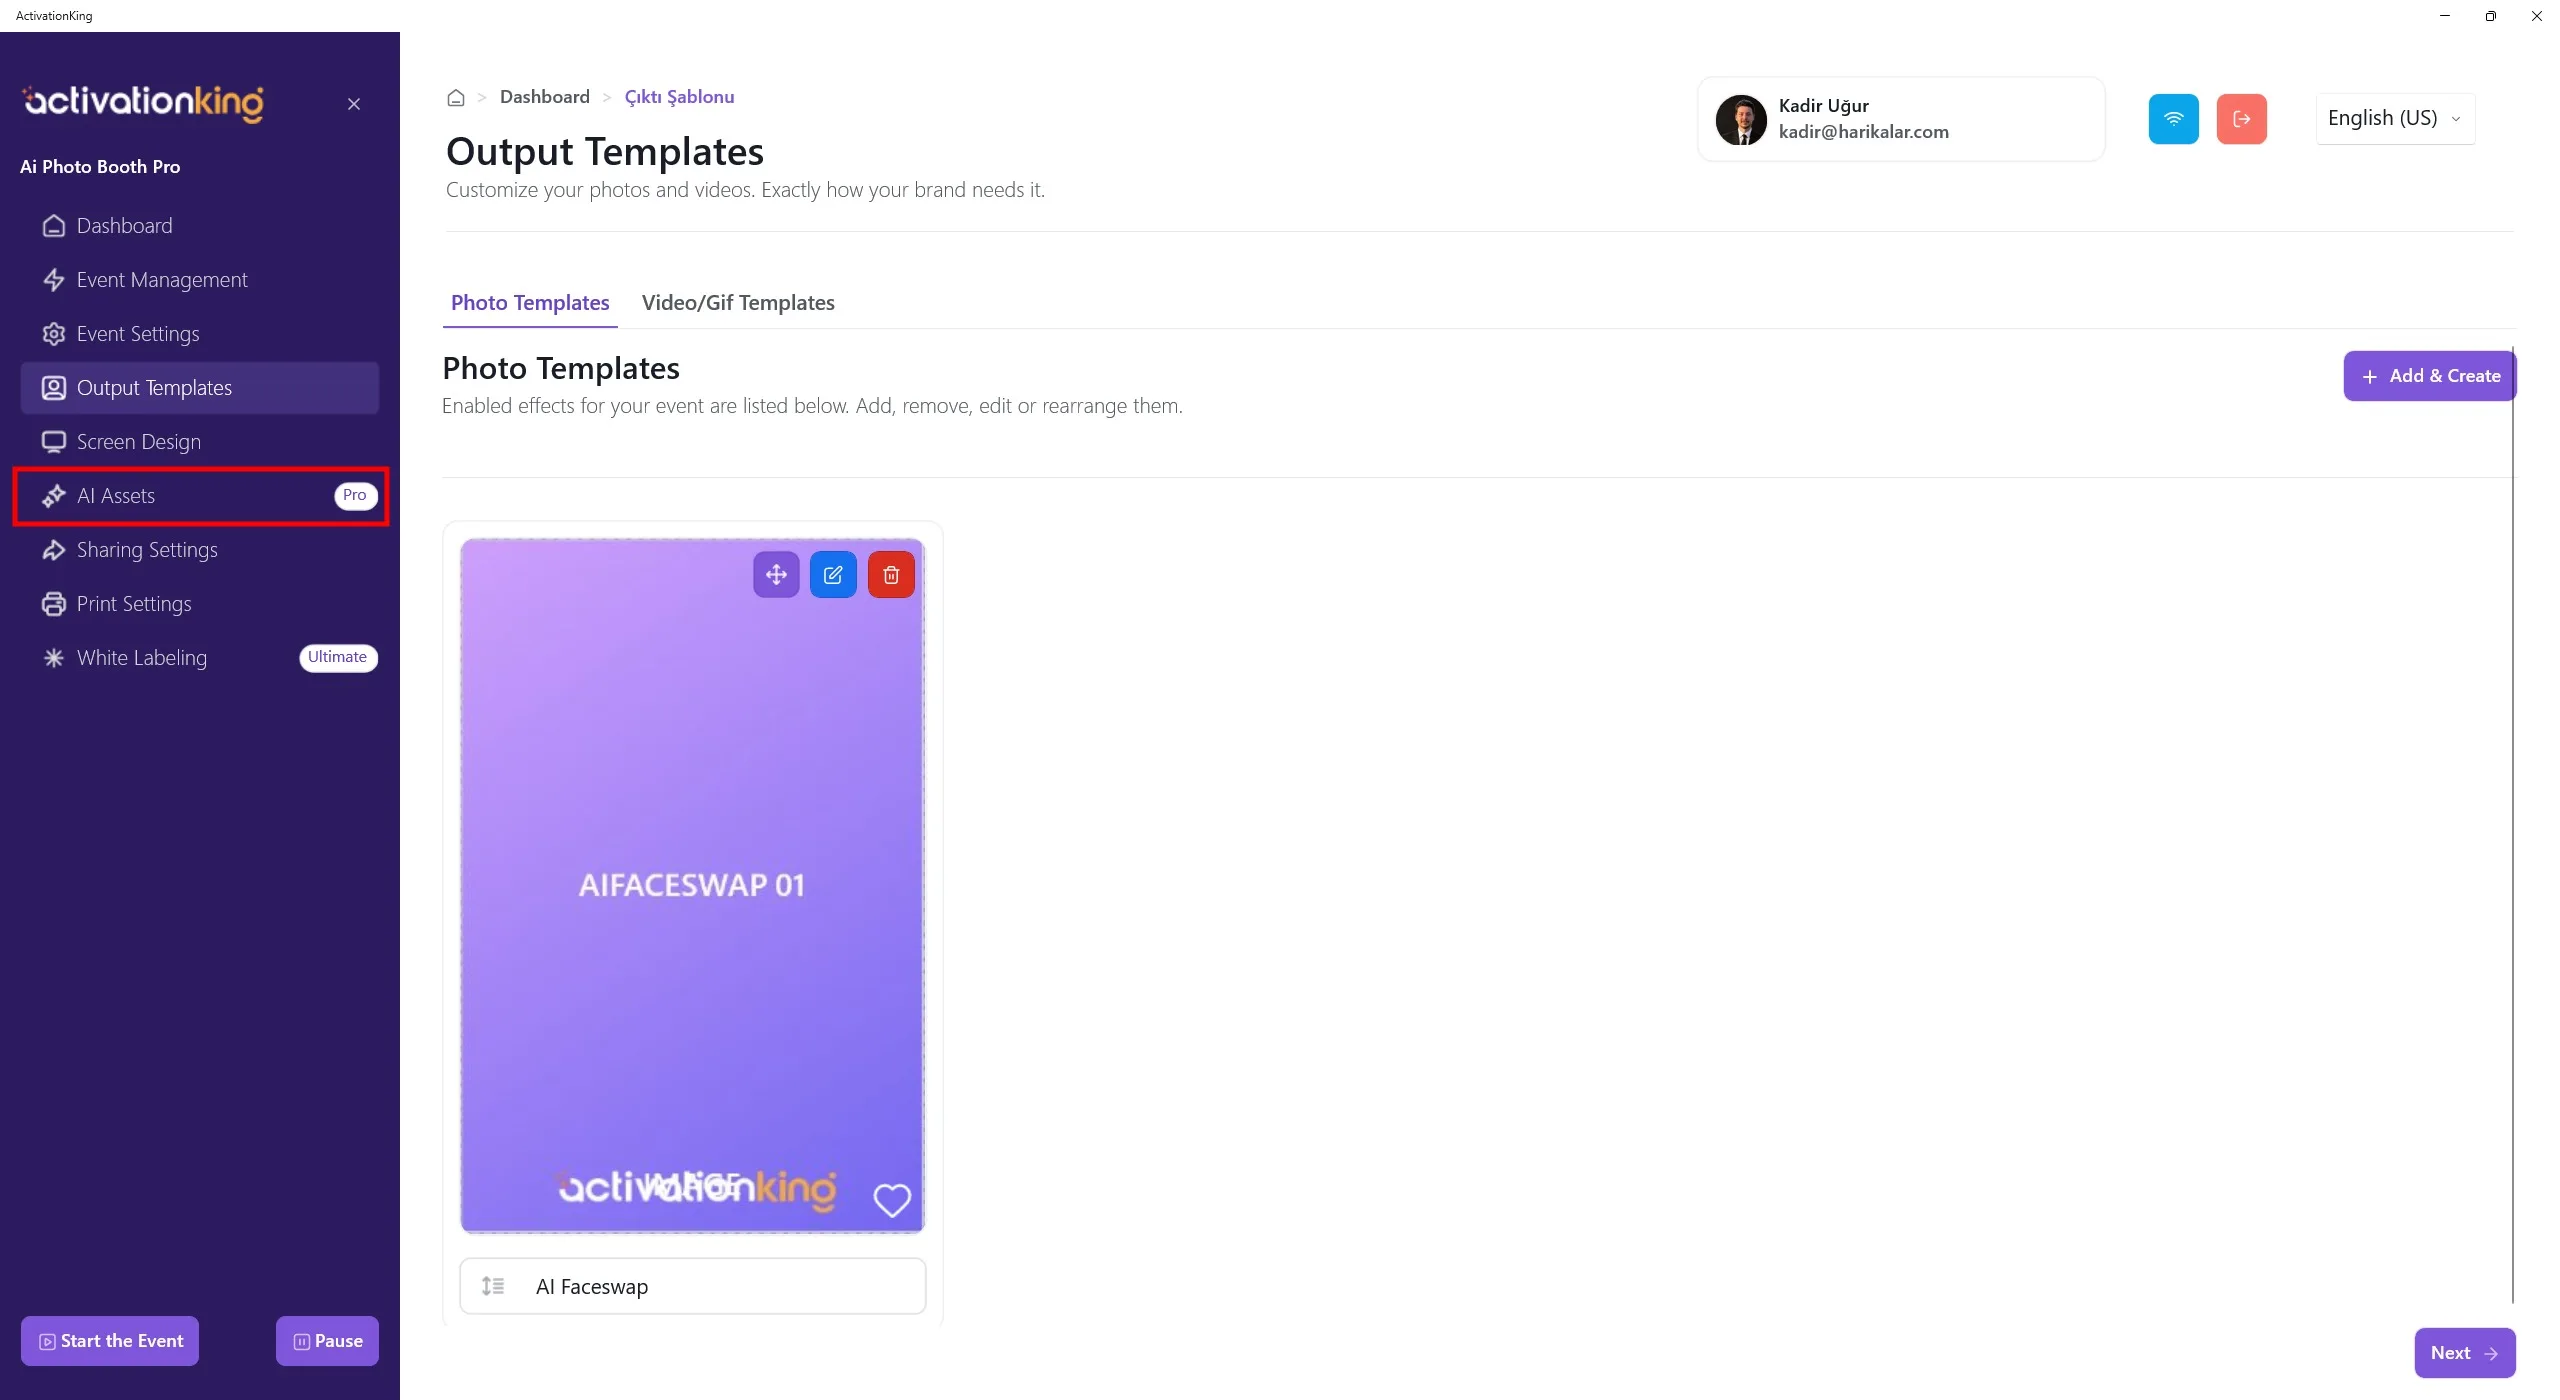
После завершения работы над шаблоном откройте страницу AI Assets.
AI Assets
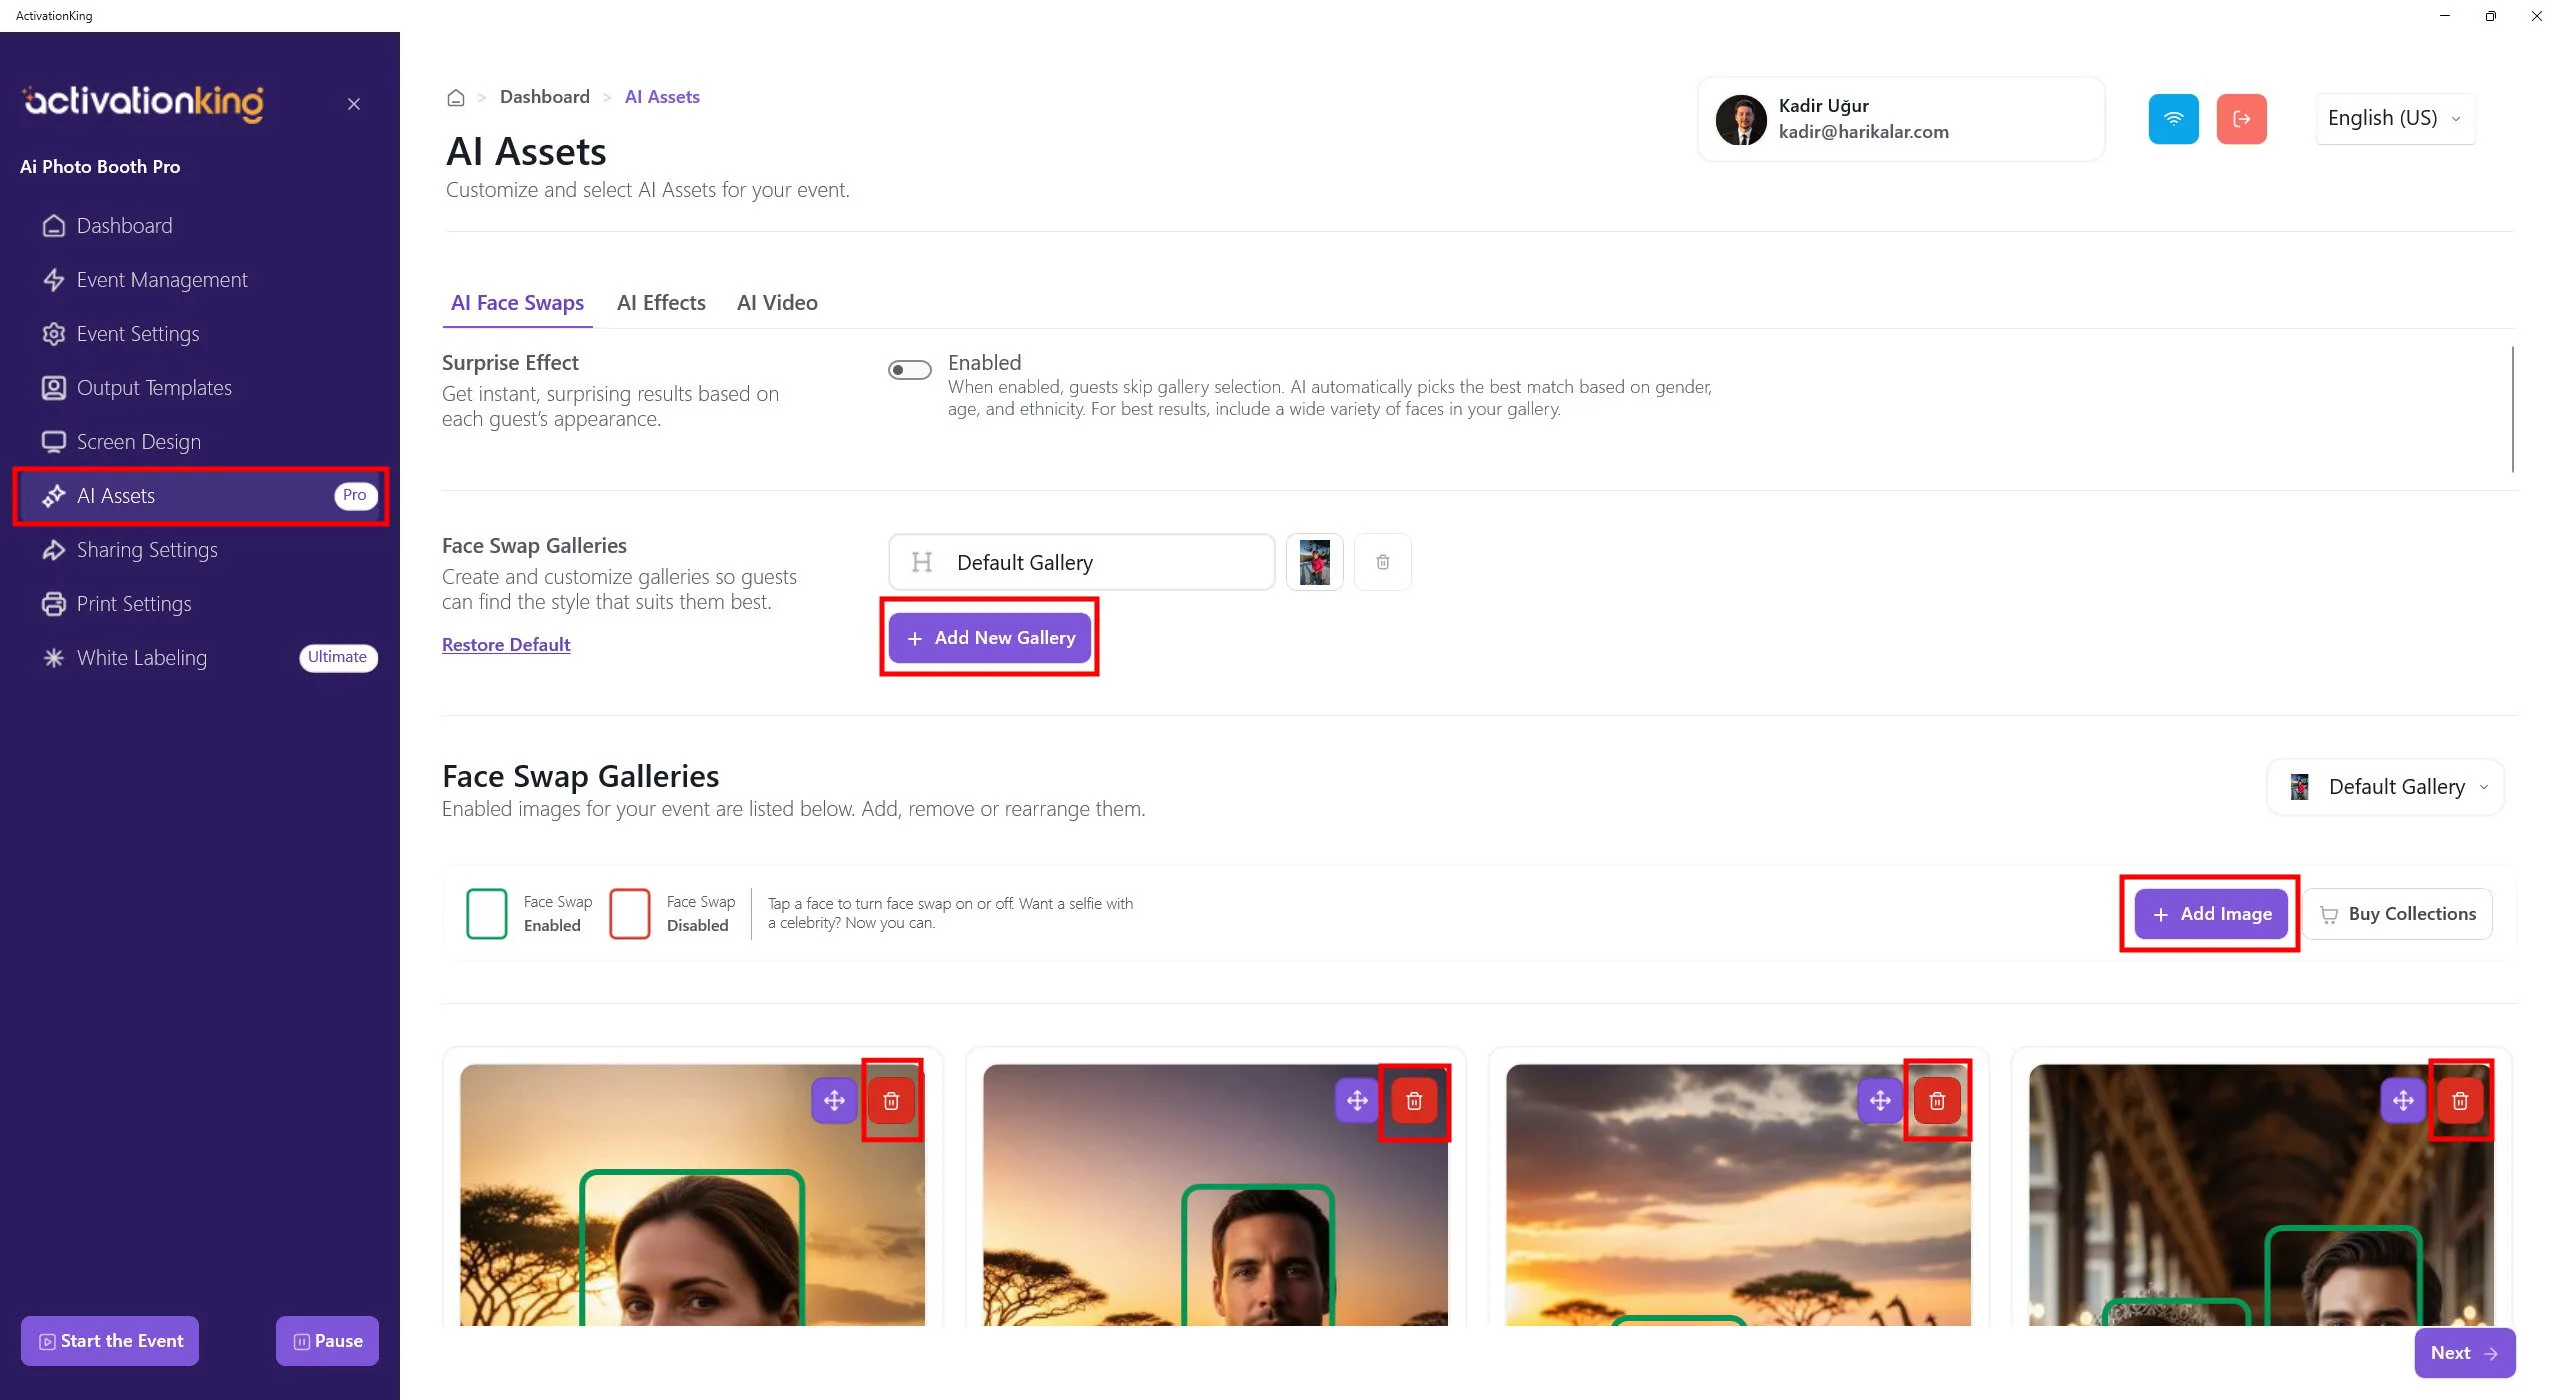
После открытия страницы вы увидите множество изображений по умолчанию, которые можно использовать для FaceSwap. Вы можете использовать эти изображения или добавить новые под ними. Вы можете создать новый альбом, удалить существующий альбом или все изображения внутри альбома, а затем добавить новые изображения, нажав кнопку Add Image.
Обратите внимание, что даже если вы удалите изображения по умолчанию, вы сможете восстановить их в любой момент. Вы также можете создать несколько альбомов с разными темами и предложить пользователям выбрать тематический альбом перед съёмкой. Для этого достаточно иметь более одного альбома.
Нажмите кнопку Add New Gallery, чтобы создать новый альбом.
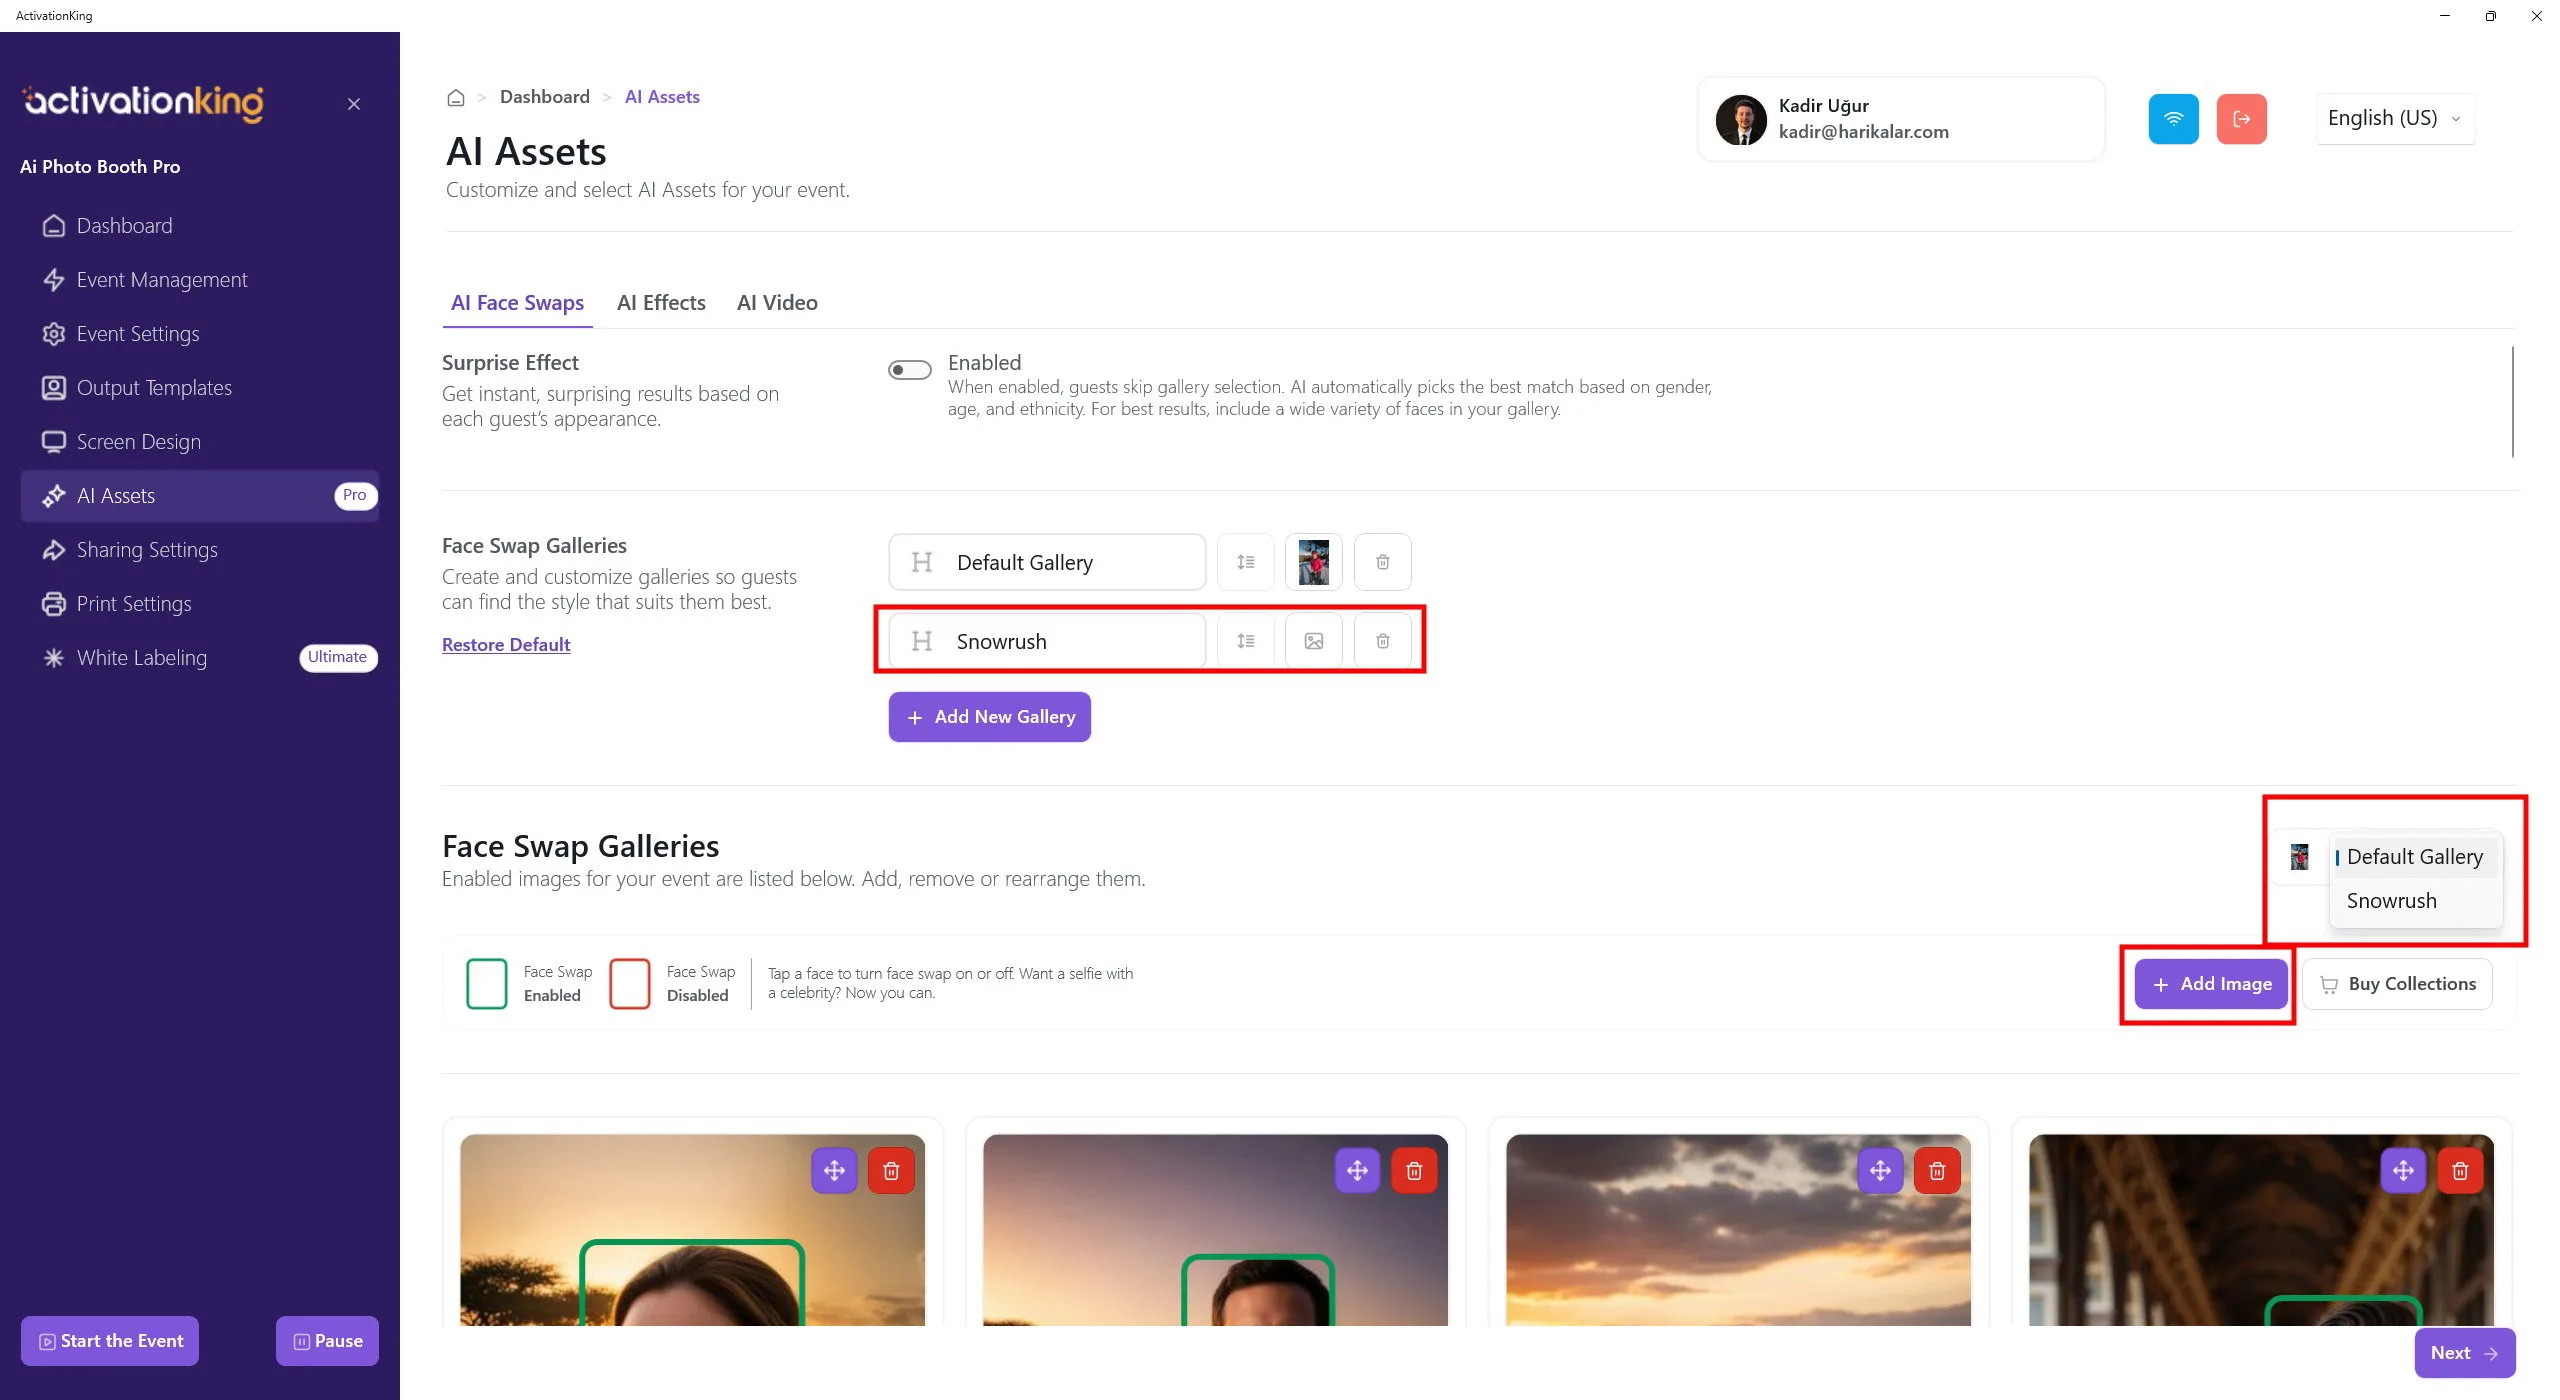
Введите название альбома, а затем переключитесь с Default Gallery на вновь созданную галерею с помощью панели справа.
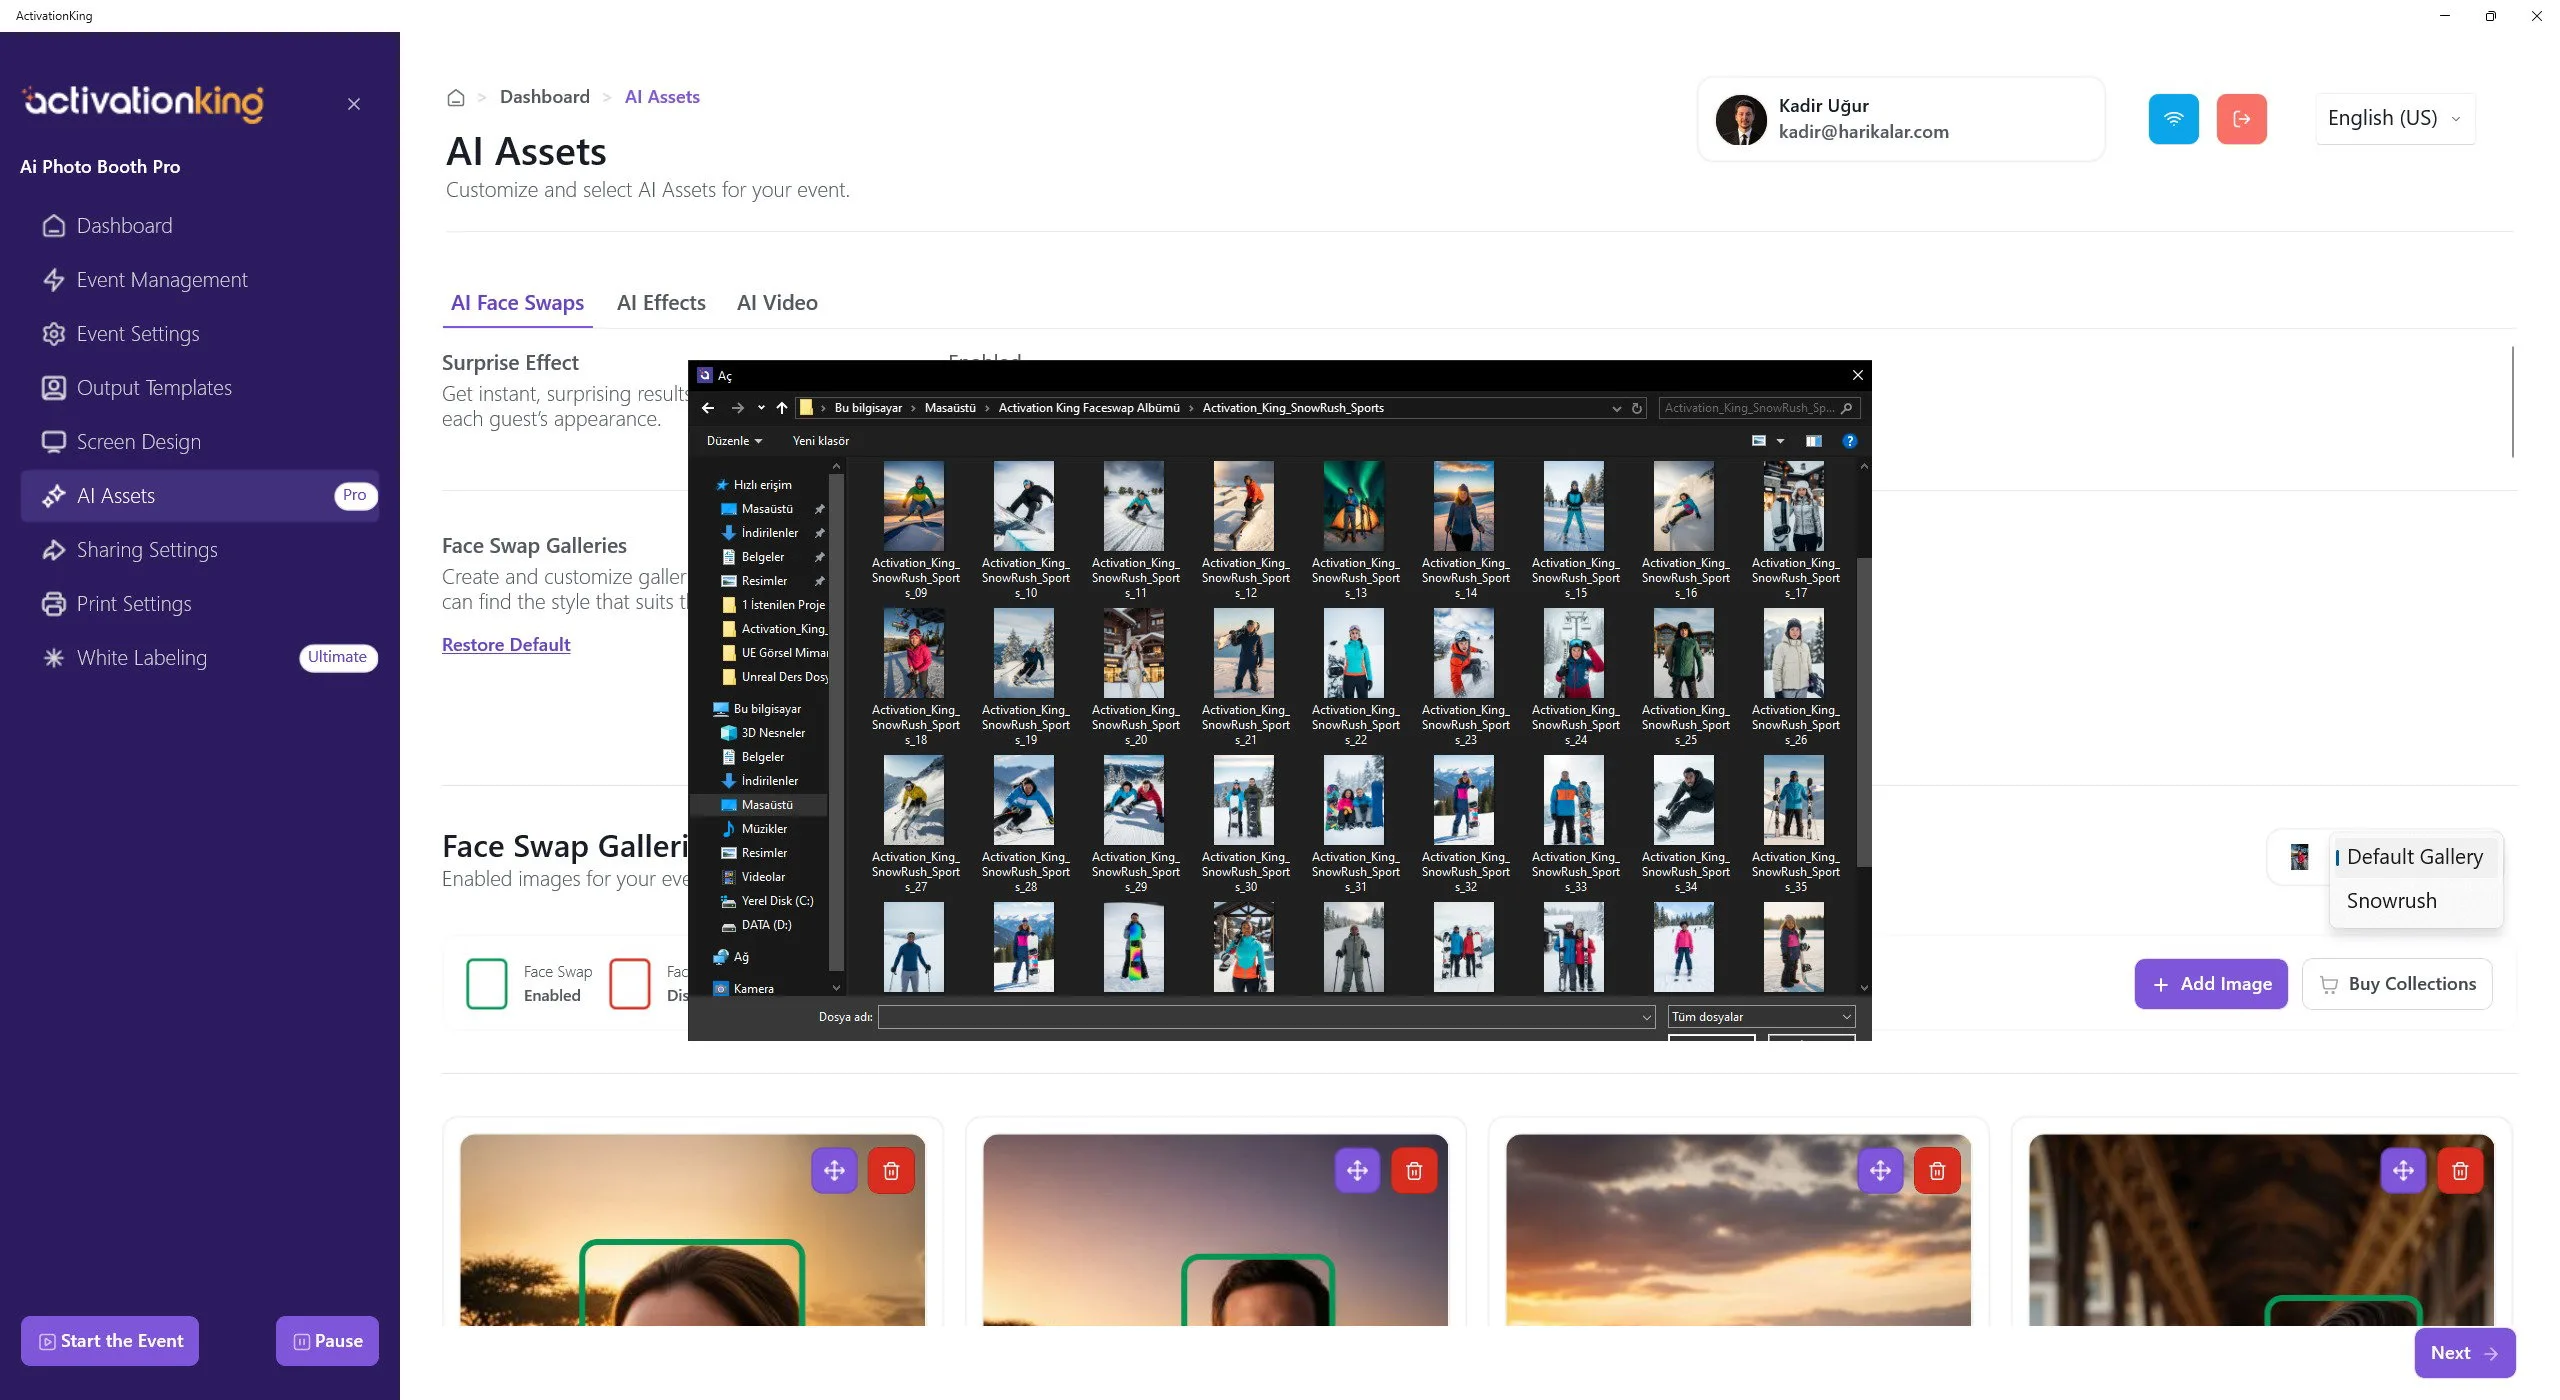
Нажмите кнопку Add Image и массово выберите альбом, загруженный с сайта ActivationKing, чтобы добавить его в программу.
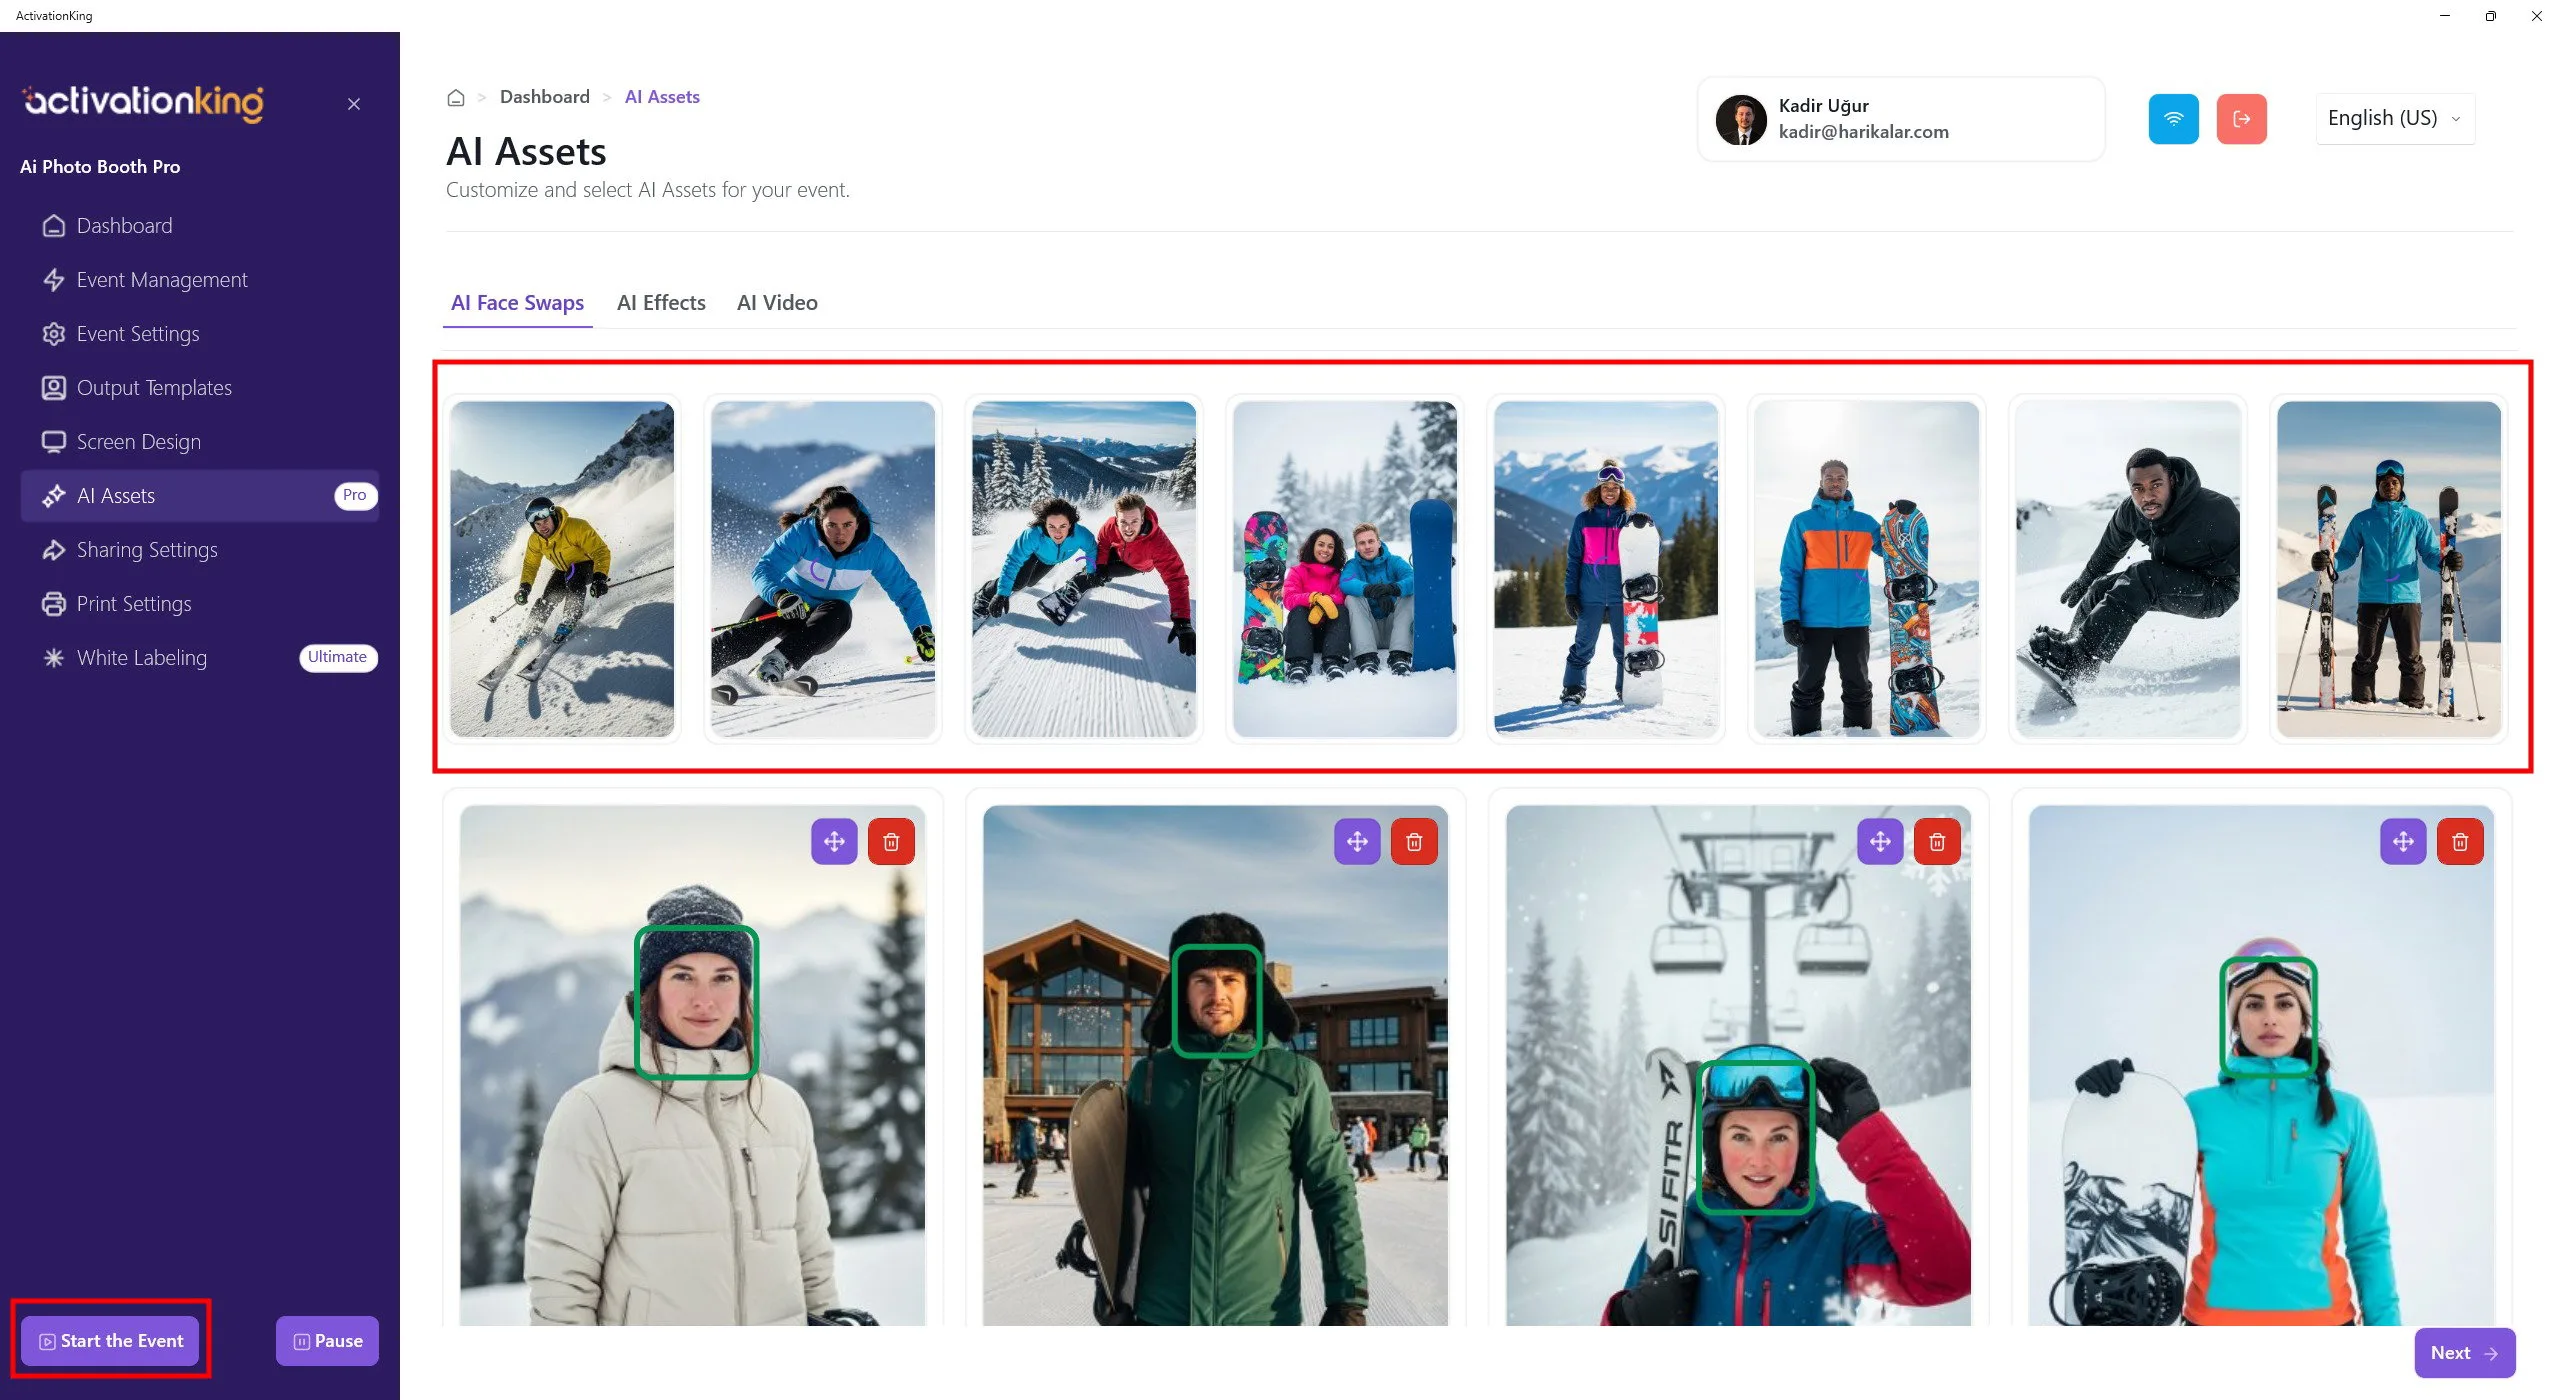
Дождитесь завершения загрузки изображений. Небольшие миниатюры предварительного просмотра, показанные сверху, означают, что загрузка выполняется. После загрузки всех изображений нажмите кнопку Start the Event, чтобы запустить мероприятие.
Запуск мероприятия
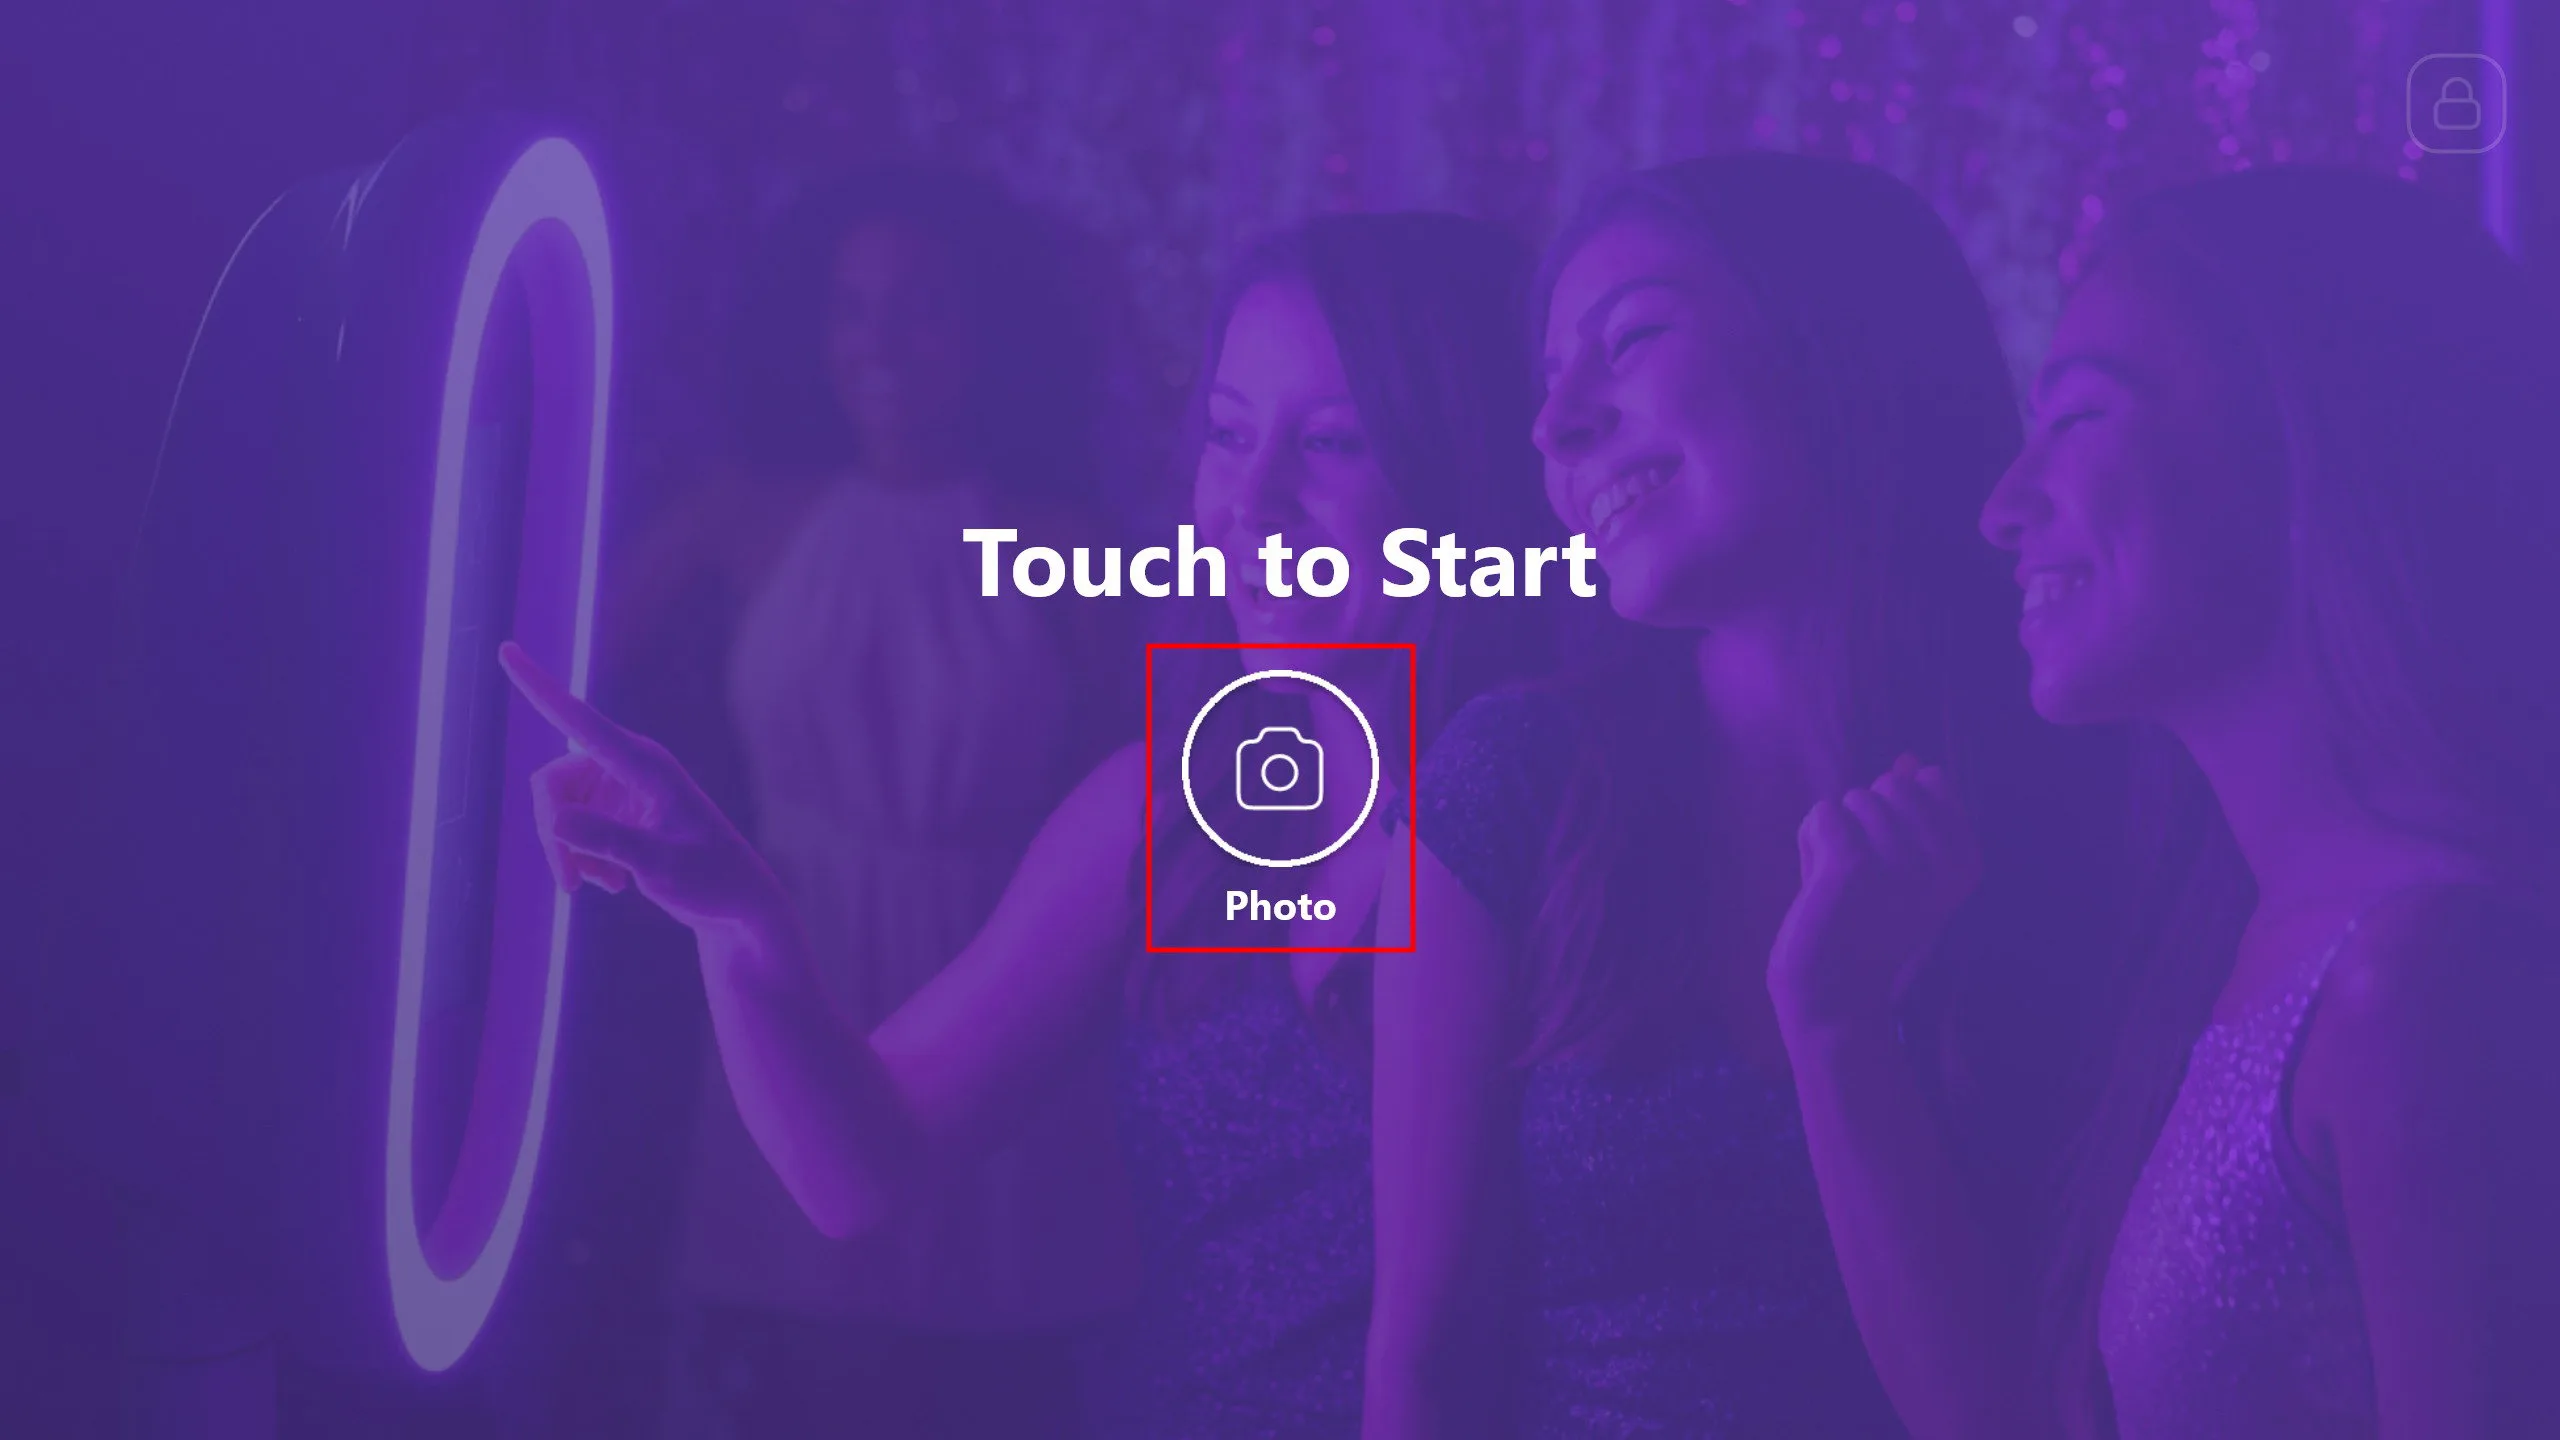
Этот экран вы можете настроить в программе по своему усмотрению. Затем нажмите кнопку Photo.
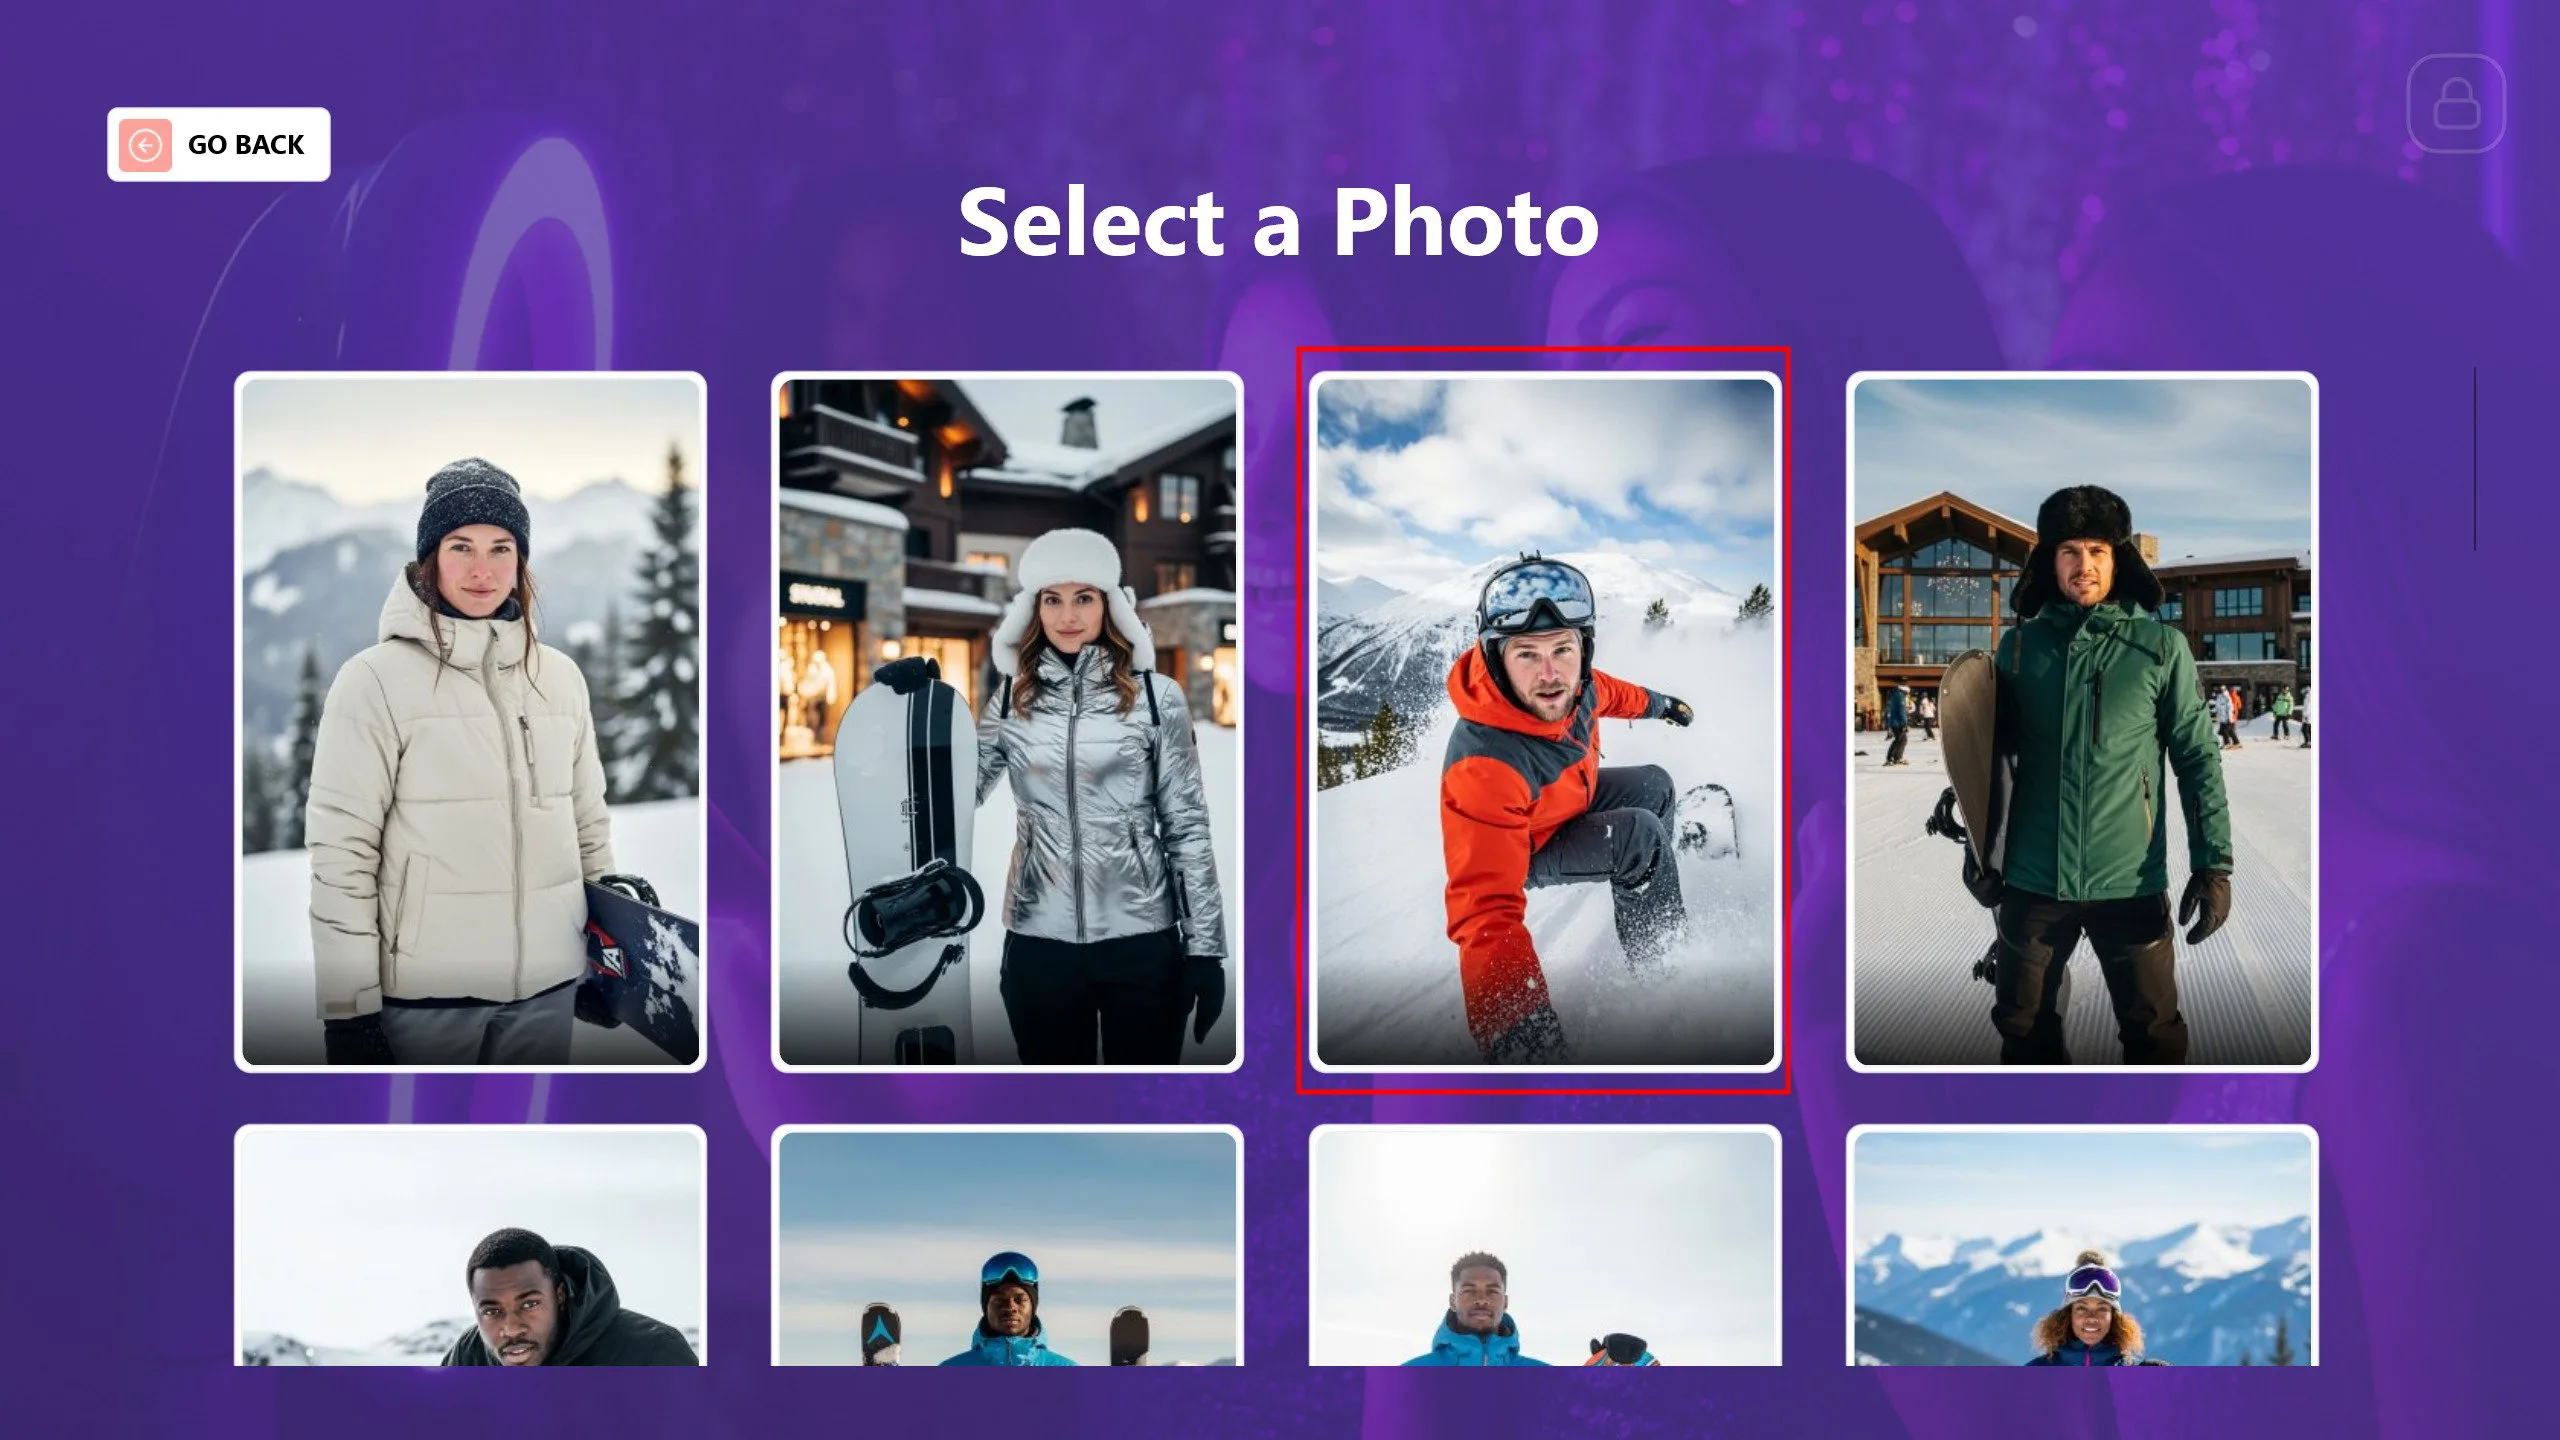
Выберите фотографию, которую хотите использовать. После выбора фотографии начнётся процесс съёмки.
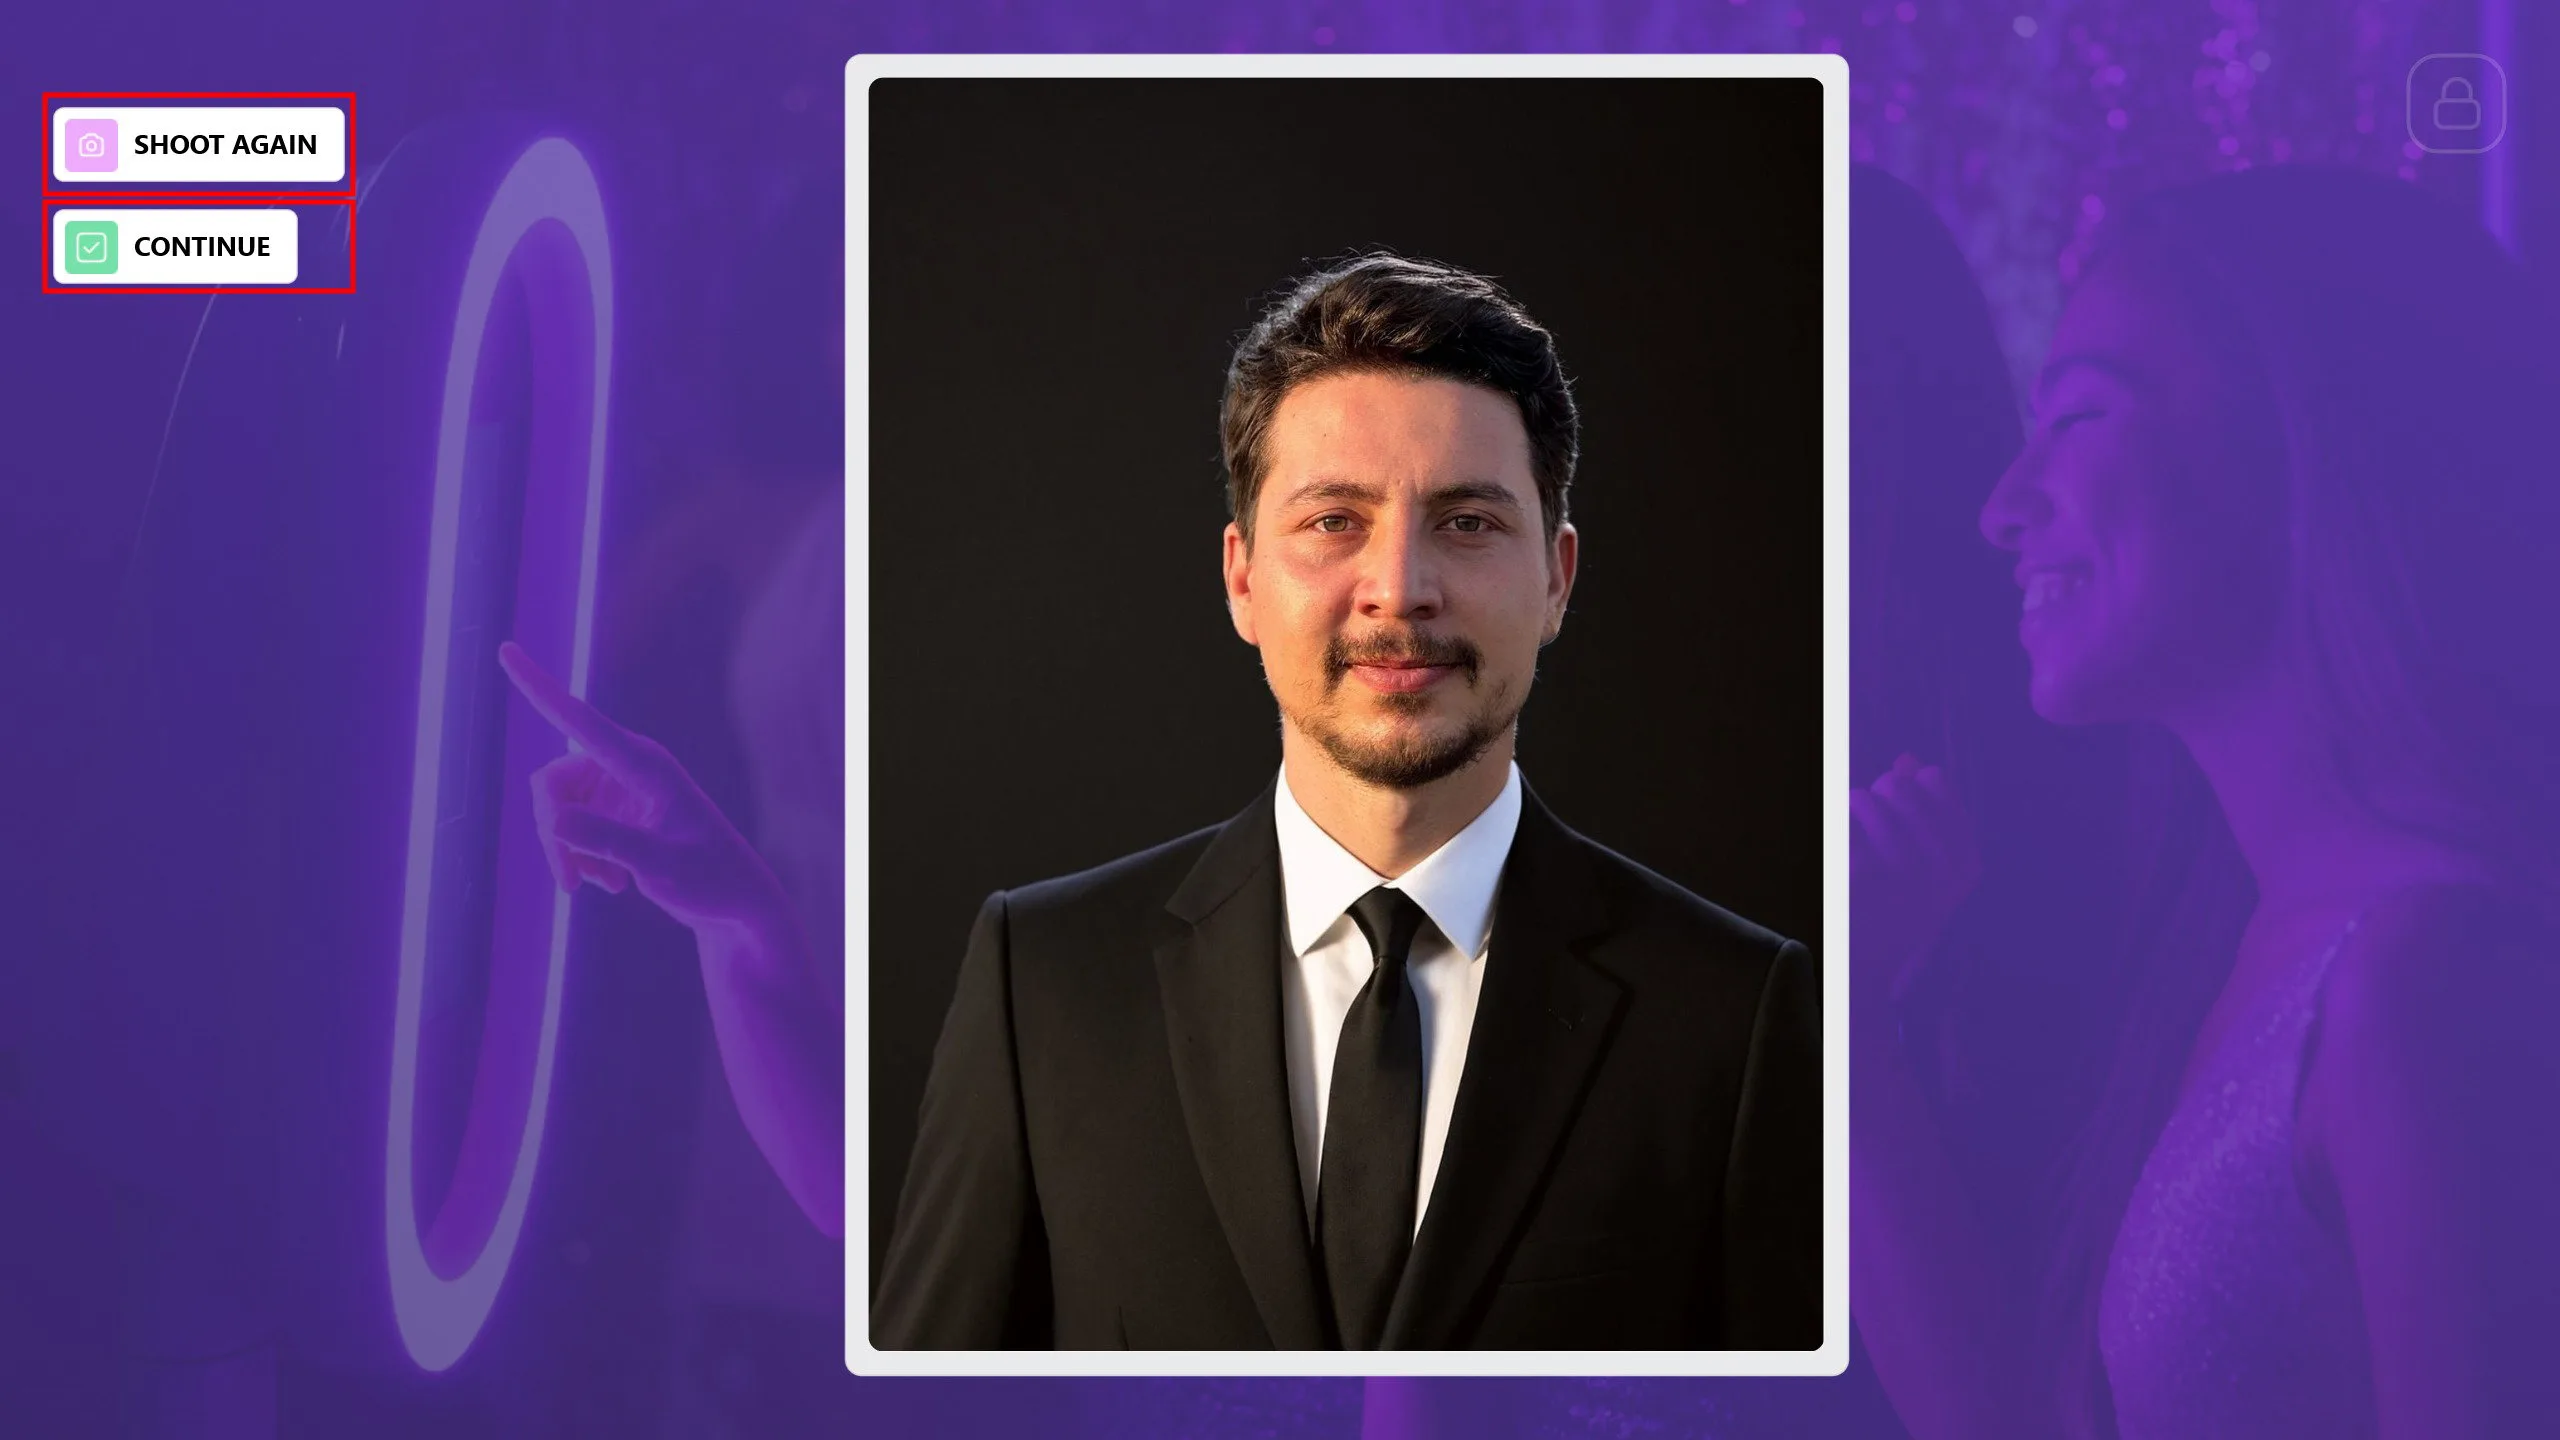
После съёмки, если человеку не нравится результат или сделан нежелательный снимок, вы можете переснять его, нажав кнопку Shoot Again. После завершения съёмки нажмите кнопку Continue.

Ваша фотография будет готова в течение короткого времени. Вы можете поделиться ею с гостями через Email, Print или путём сканирования кода QR. Если вы хотите выполнить дополнительные операции FaceSwap с той же фотографией, нажмите кнопку Use Again. Нажмите кнопку Done, чтобы вернуться на главный экран и подготовиться к следующему гостю.
Что следует учитывать в режиме AI Face Swap
1) Проблемы с видимостью лица и кадрированием
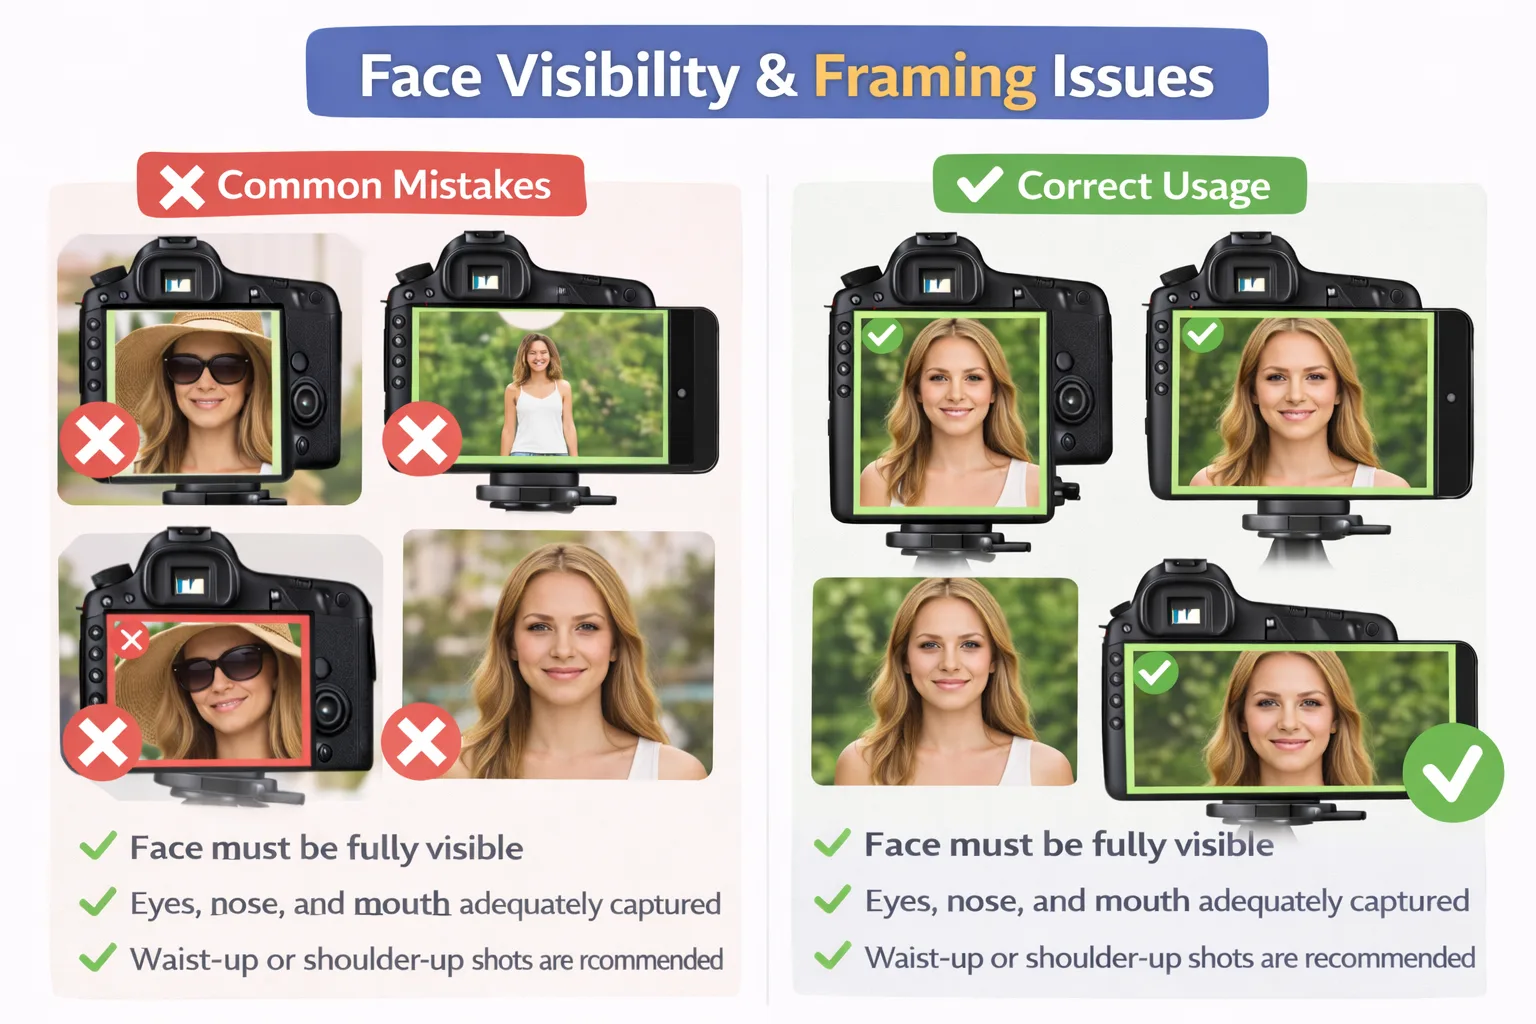
Распространённые ошибки
- Части лица закрыты волосами, головным убором, очками или руками.
- Лицо выглядит слишком маленьким или слишком далёким в кадре.
- Лицо частично выходит за пределы кадра.
Правильное использование
- Лицо должно быть полностью видимым.
- Глаза, нос и рот должны быть чётко зафиксированы.
- Рекомендуются кадры по пояс или по плечи.
2) Проблемы с освещением и качеством изображения
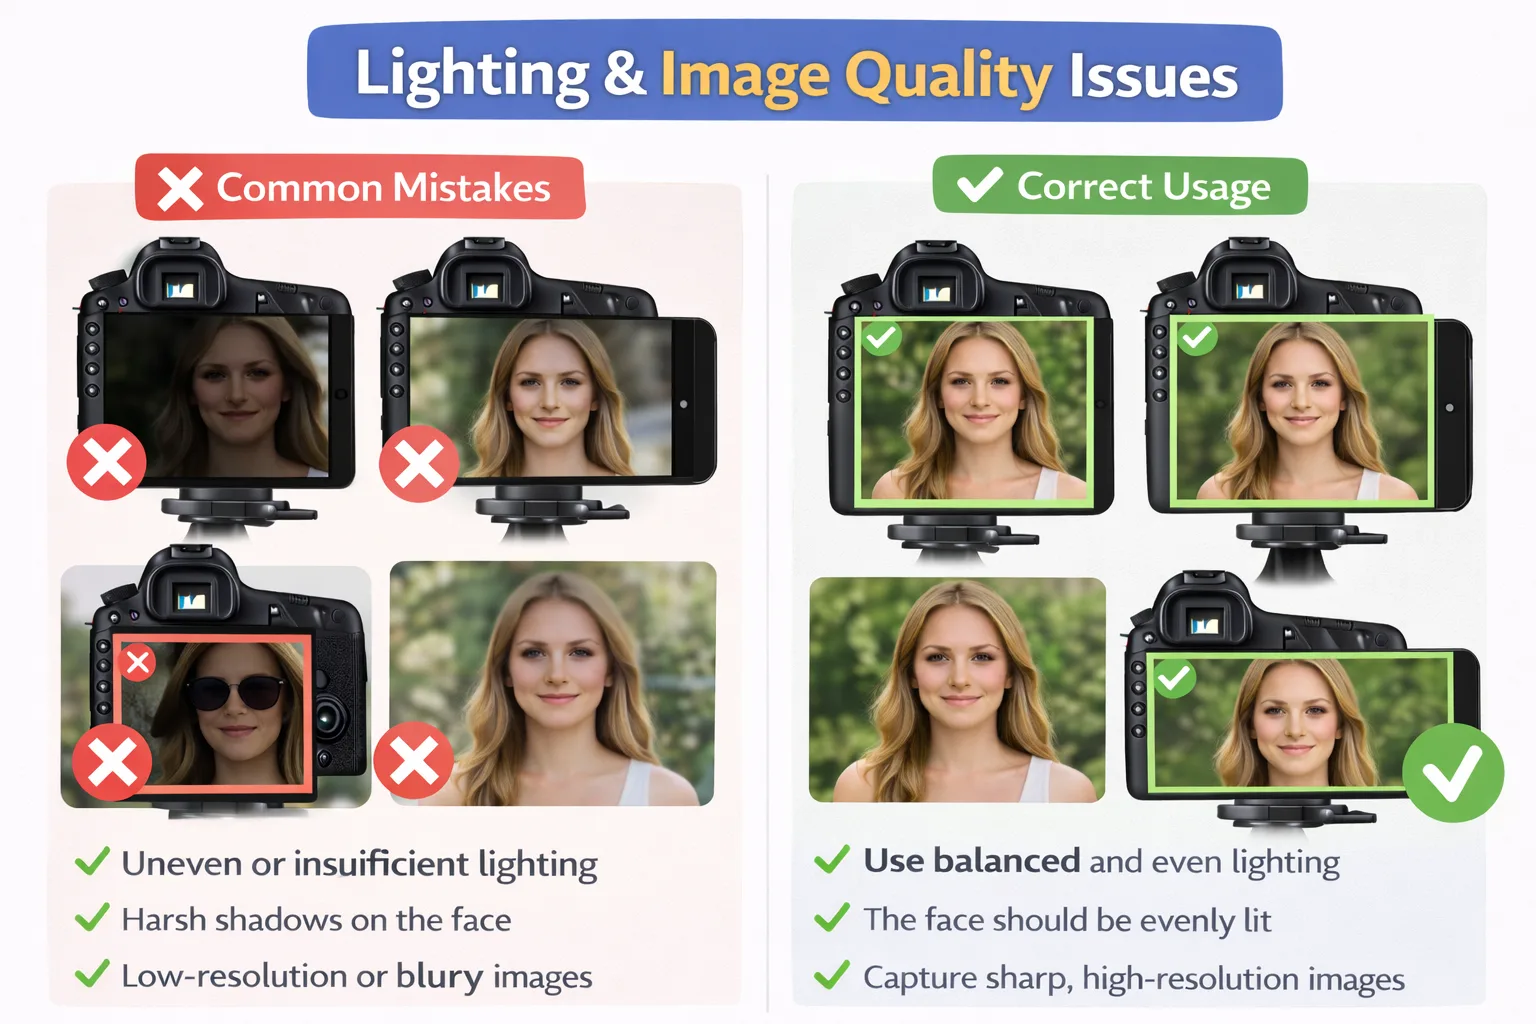
Распространённые ошибки
- Неравномерное или недостаточное освещение.
- Резкие тени на лице.
- Изображения с низким разрешением или размытые.
Правильное использование
- Используйте сбалансированное и равномерное освещение.
- Лицо должно быть равномерно освещено.
- Делайте чёткие изображения с высоким разрешением.
3) Проблемы с углом камеры и ориентацией лица
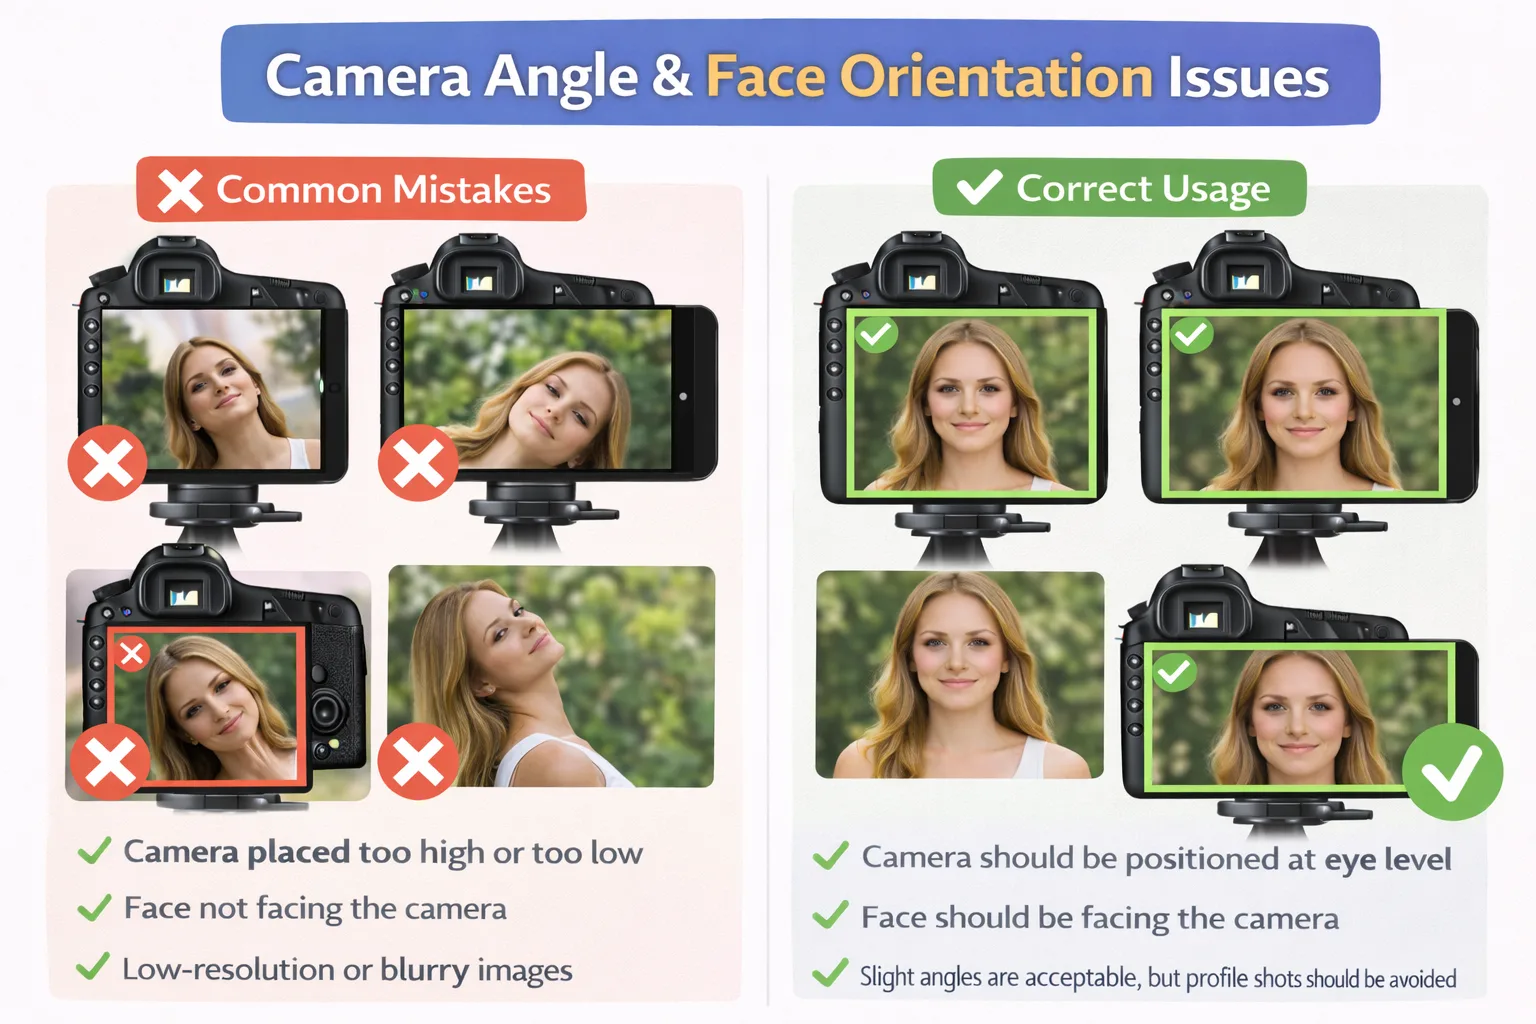
Распространённые ошибки
- Камера расположена слишком высоко или слишком низко.
- Лицо не обращено к камере.
- Чрезмерный наклон головы или съёмка в профиль.
Правильное использование
- Камера должна быть расположена на уровне глаз.
- Лицо должно быть обращено к камере.
- Небольшие углы допустимы, но съёмки в профиль следует избегать.
4) Проблемы с несколькими лицами и расстоянием
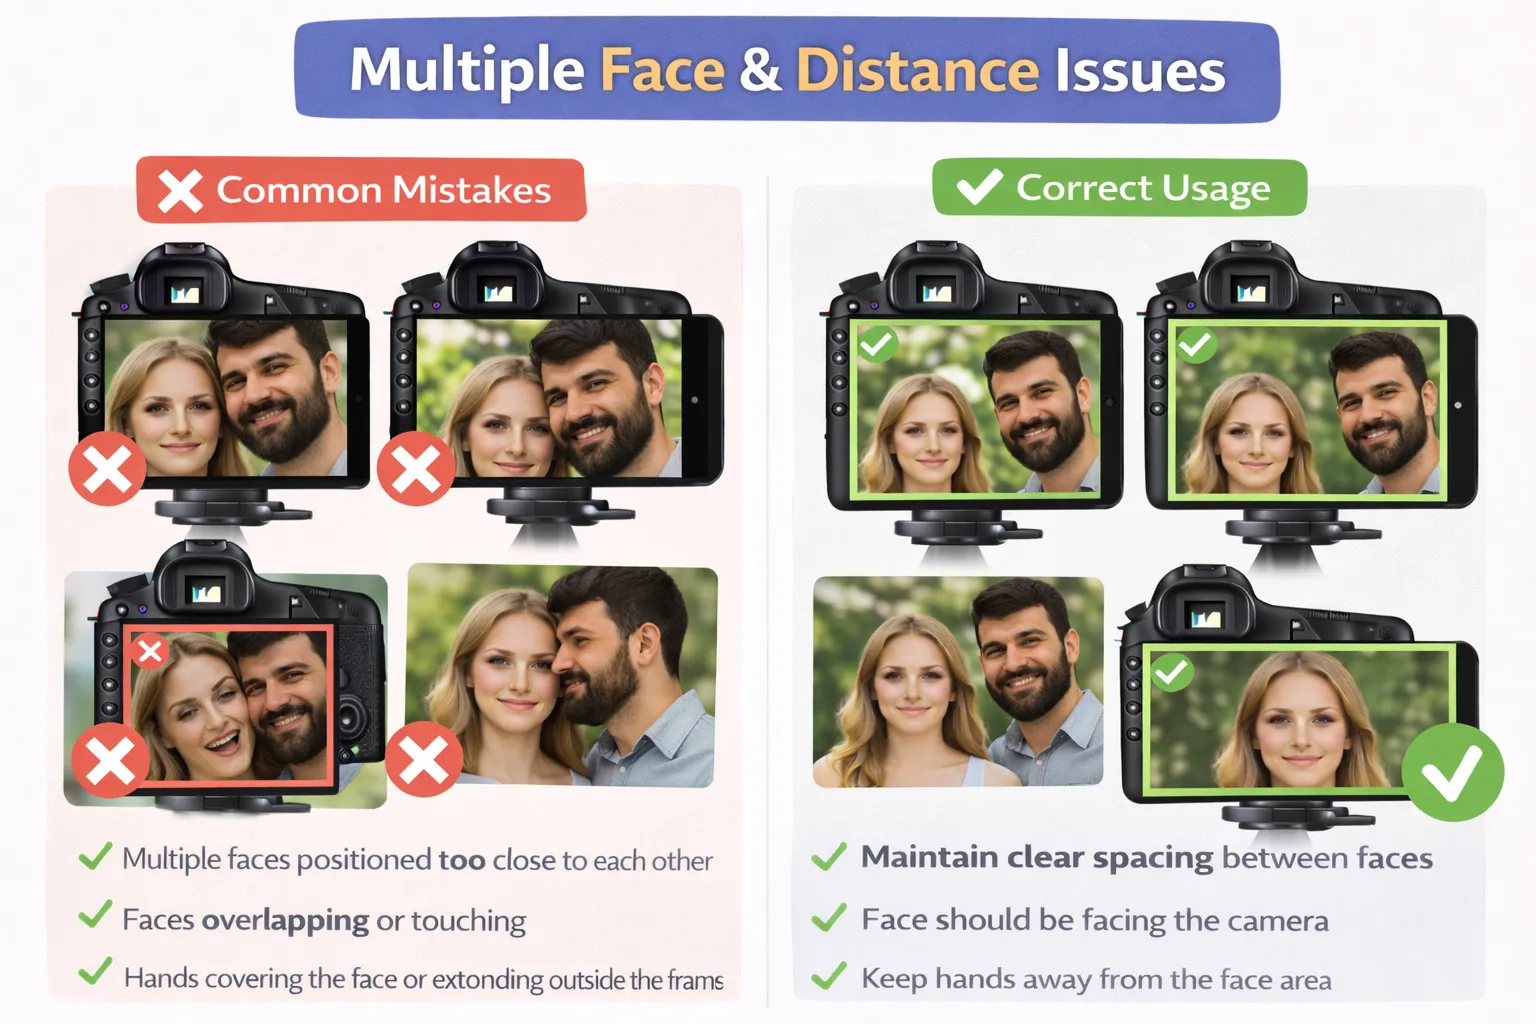
Распространённые ошибки
- Несколько лиц расположены слишком близко друг к другу.
- Лица перекрываются или соприкасаются.
Правильное использование
- Сохраняйте чёткое расстояние между лицами.
- Люди могут стоять плечом к плечу, но лица должны оставаться раздельными.
Шаблоны Face Swap со взрослыми и детьми: предупреждение о распознавании возраста
AI не определяет возраст человека с точностью. Вместо этого он выполняет вероятностную оценку возраста на основе пропорций лица, текстуры кожи, выражения лица, размера лица в кадре, расстояния от камеры и визуальной доминанты в группе. Округлые черты лица, более крупная пропорция глаз и гладкая кожа могут восприниматься как более молодые, тогда как более выраженные черты и морщины могут выглядеть более зрелыми. Лица ближе к камере могут интерпретироваться как более крупные и получать приоритет, а одежда, аксессуары и выражение лица могут косвенно влиять на восприятие возраста. По этой причине в шаблонах Face Swap, включающих как взрослых, так и детей, AI может быть введён в заблуждение, и может произойти частично некорректное сопоставление возраста или лица.