Creating an Event with AI Prompt Theme & AI Face Swap
Step 1: Mode Settings
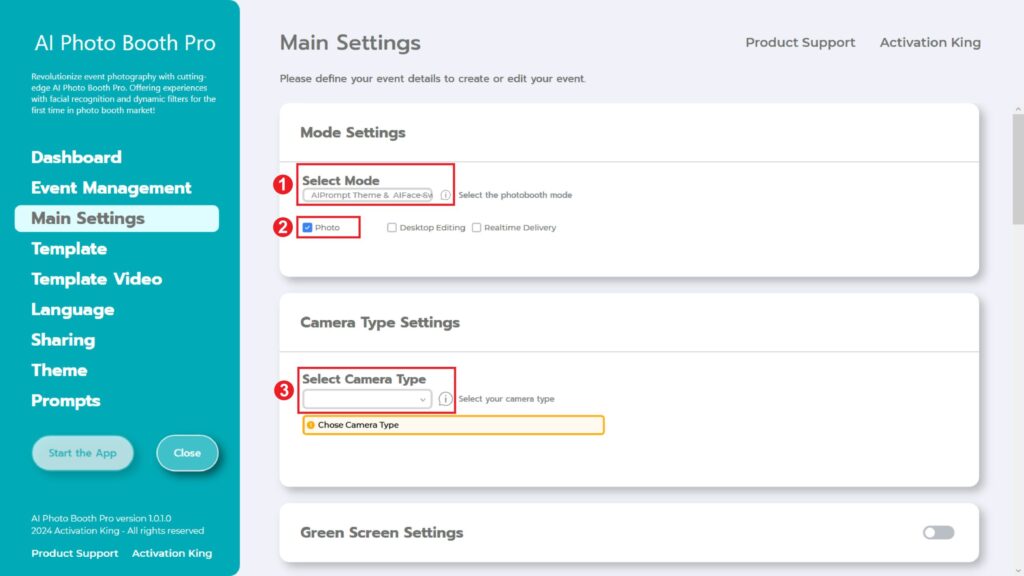
After selecting “AI Prompt Theme & AI Face Swap,” we mark the “Photo” option from the following choices.
Step 2: Camera Type Settings
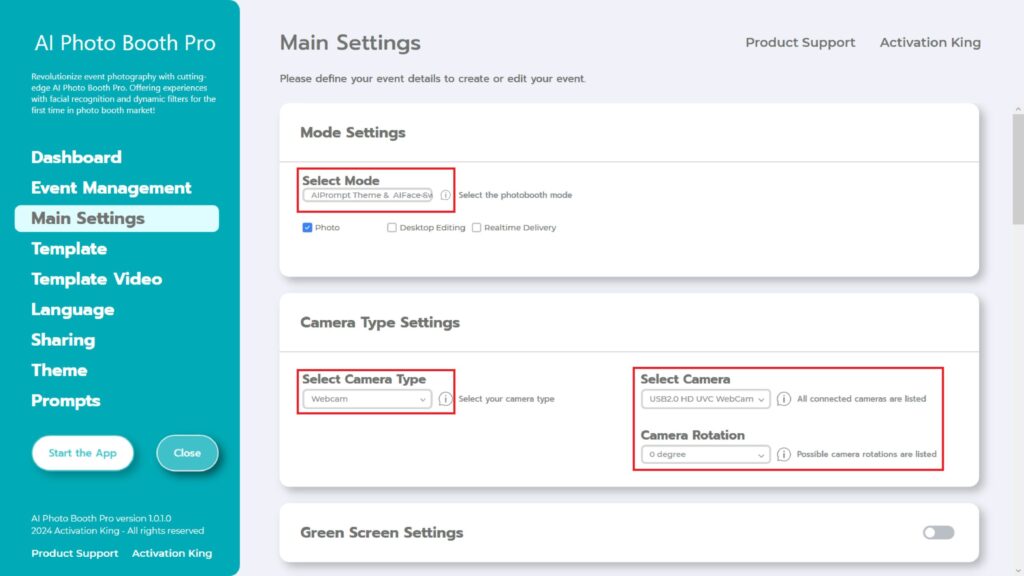
In the “Camera Type Settings” section, we select the desired camera type from the dropdown menu under “Select Camera Type.” When you connect your camera to your computer, it will appear in the dropdown menu under “Select Camera.” (If it doesn’t appear, please ensure that your camera is turned on and connected to your computer, then try again.) After selecting your camera, you can adjust the orientation (horizontal or vertical) in the “Camera Rotation” section based on your preference.”
Step 3: Camera Settings
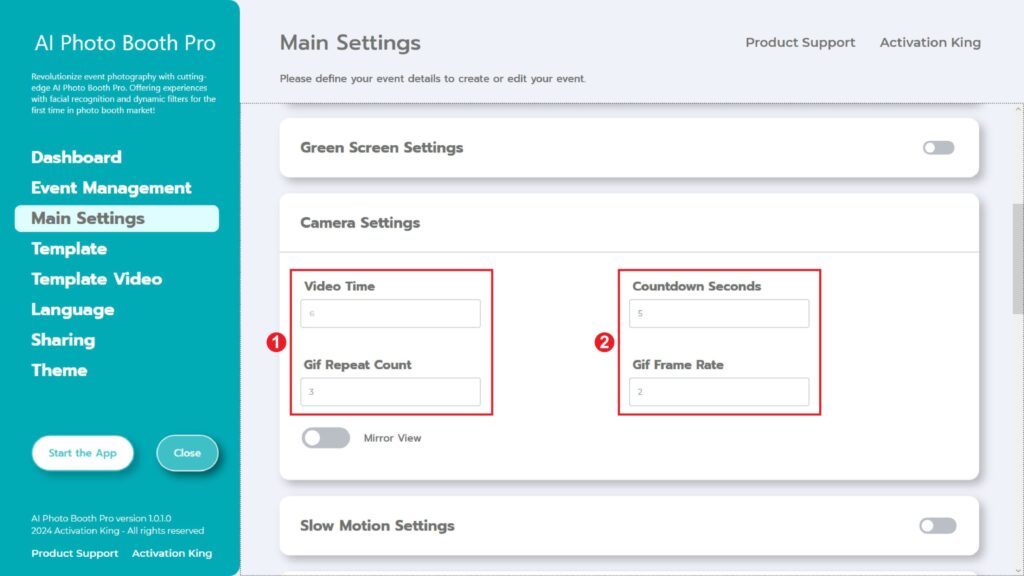
In the “Camera Settings,” the “Countdown Seconds” section displays the time elapsed on screen after you give the command to take a photo, allowing you to see yourself and adjust your pose. In short, you can adjust your photo timer from this section.
Step 4: Template
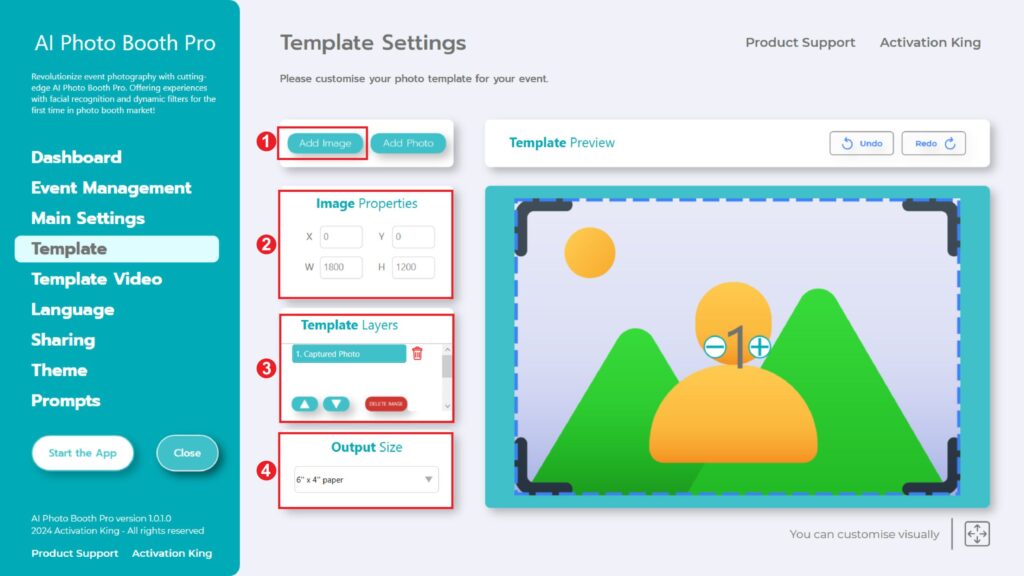
The “Template Settings” section is the interface where we can adjust the dimensions and positions of the photos we take, and where we can add digital frames and stickers.
In the “Output Size” section, you can determine the dimensions of your photo. If you’re going to print it, we recommend entering the dimensions of your print paper, such as 6×4 or 6×8. If you’re only doing a digital work, you can also consider the other options: 1280×1280, 1080×1920, or 1280×720.”
To add digital frames and stickers to your photos, simply press the “Add Image” section located above.”
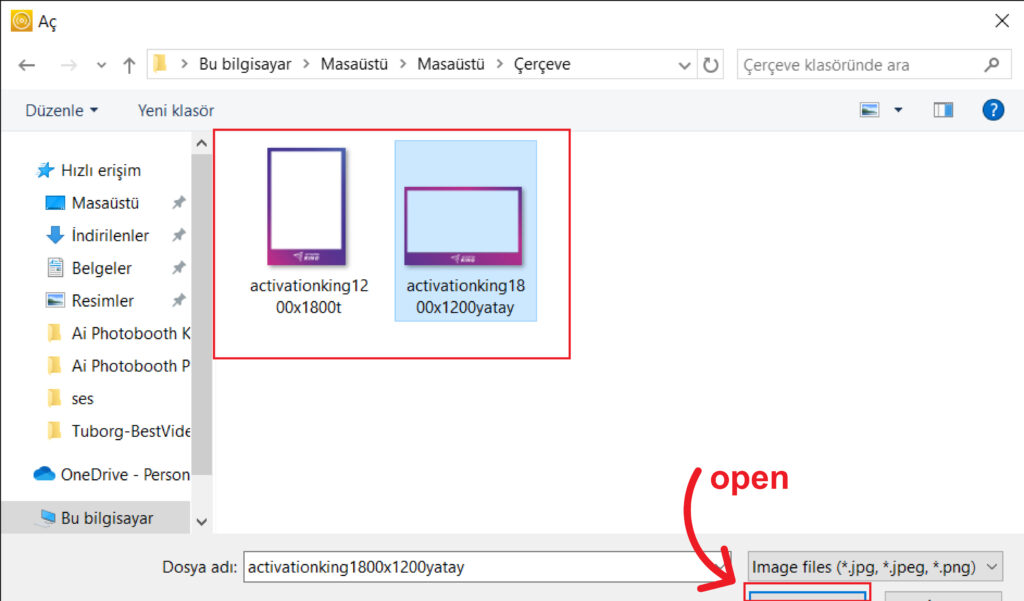
In this section, choose the horizontal or vertical frame you want to use and click “open.”
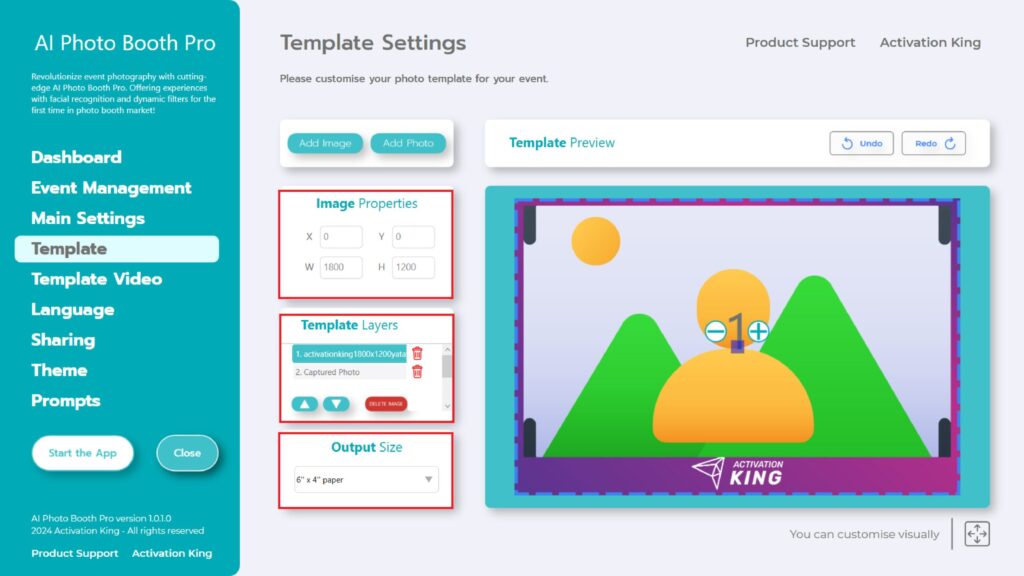
If the dimensions of the frame you added match your “Output Size” dimensions, it will automatically fit.”
Step 5: Prompts Settings
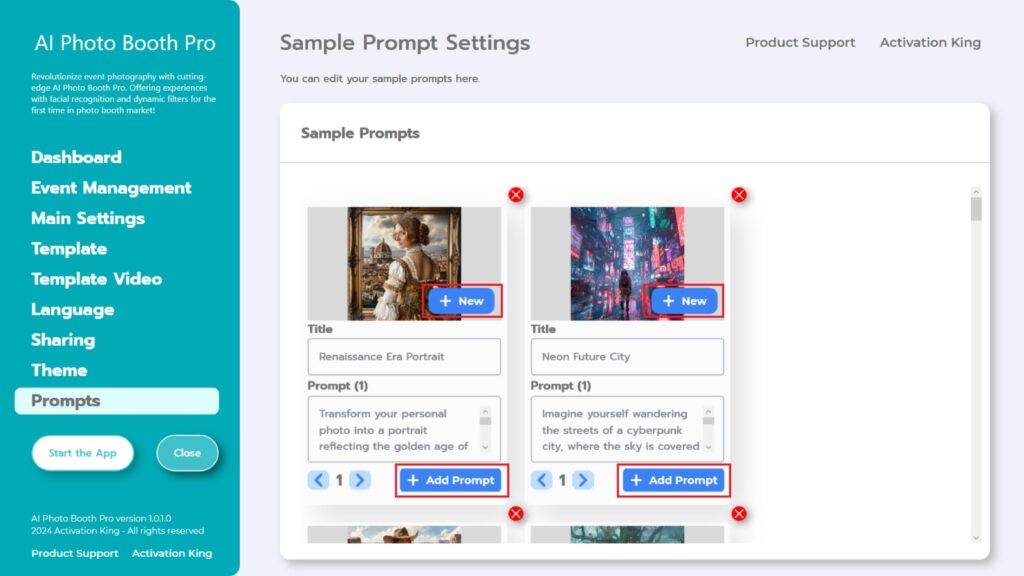
In the “Sample Prompts” section, you’ll find pre-existing prompts provided by the software. You can choose to remove these prompts or add new ones.
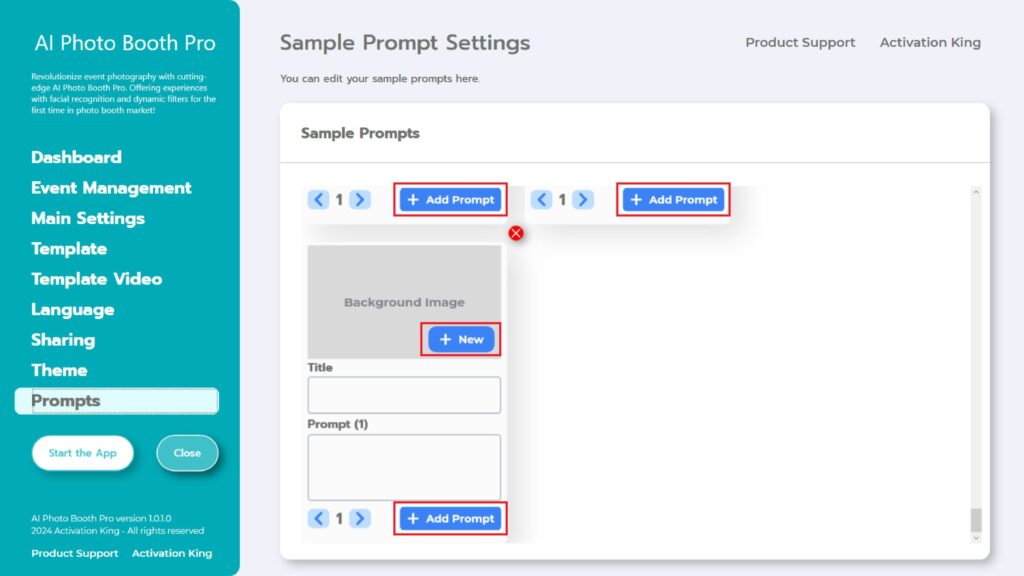
Scrolling to the bottom of the “Sample Prompts” section, you can fill in the “Title” and “Prompt” fields as desired. Additionally, you can add a “Background Image” by clicking on the “+New” button. After completing all these steps, press the “+Add Prompt” button to add the prompt to the “Sample Prompts” section.
After making all the adjustments, I press the “Start the Apps” button

Upon entering the “Start the Apps” section, I’m greeted with this screen. I tap once on the “Photo” icon. After the countdown screen you’ve set up, your photo is taken.
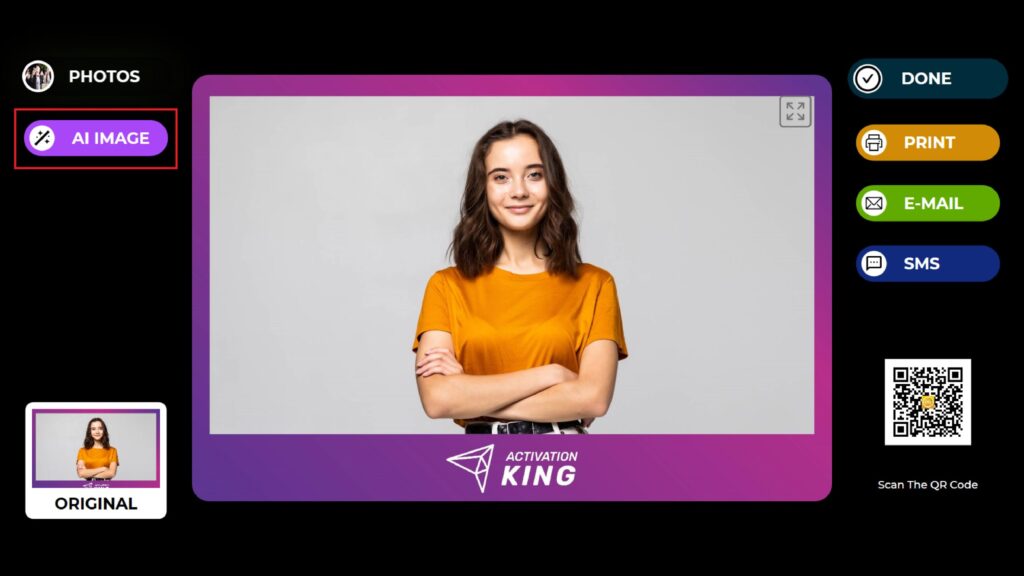
After taking our photo, we press the “AI IMAGE” button.
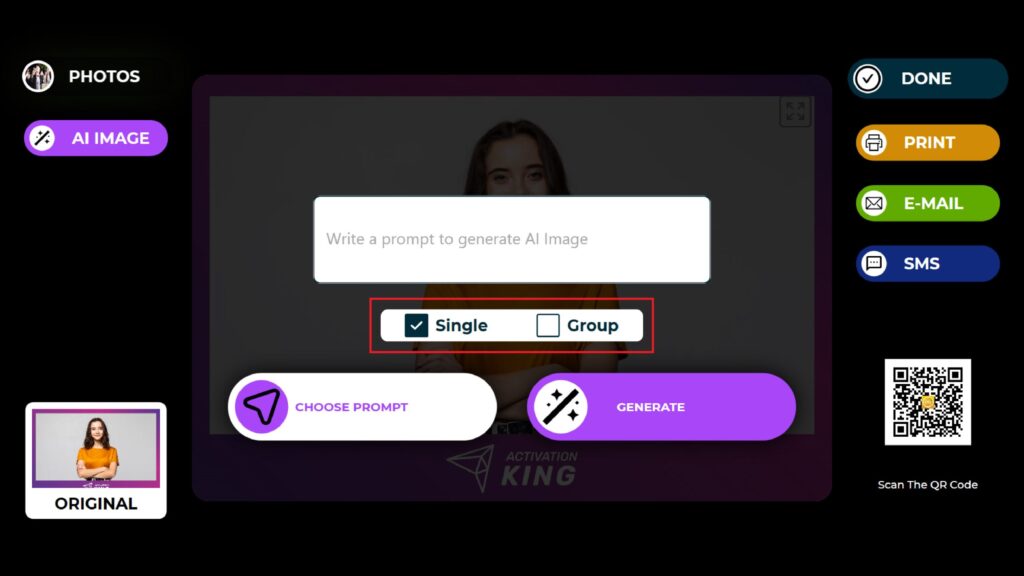
First, if there’s only one person in the image, select “Single”; if there are multiple people, choose “Group.” (You can achieve better results with photos containing a single person.)
You can enter a desired prompt or click on “Choose Prompt” to access prompts you’ve added to the “Sample Prompts” section.
I tap once on “Choose Prompt.”
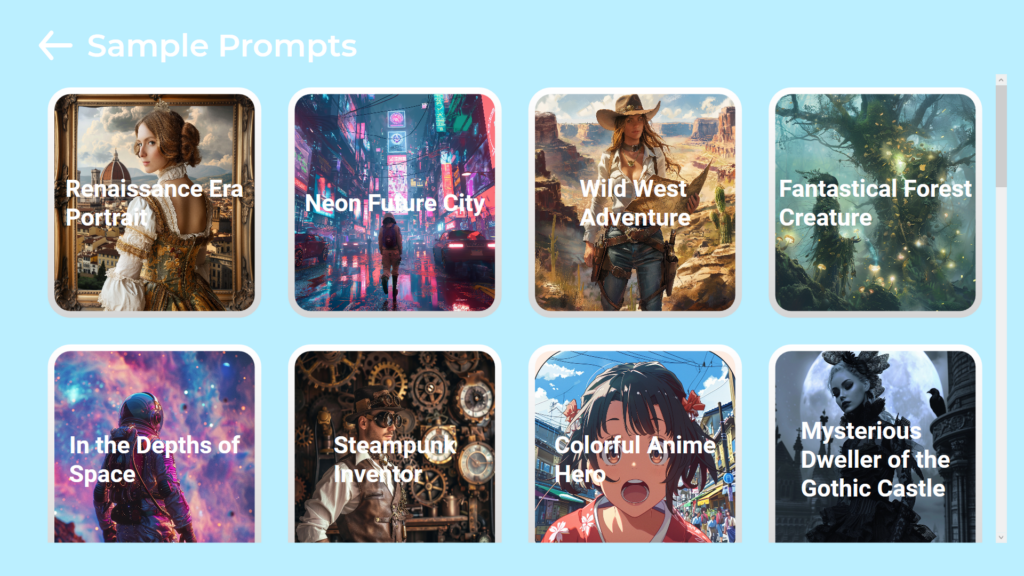
On the opened page, I tap once on the desired prompt.
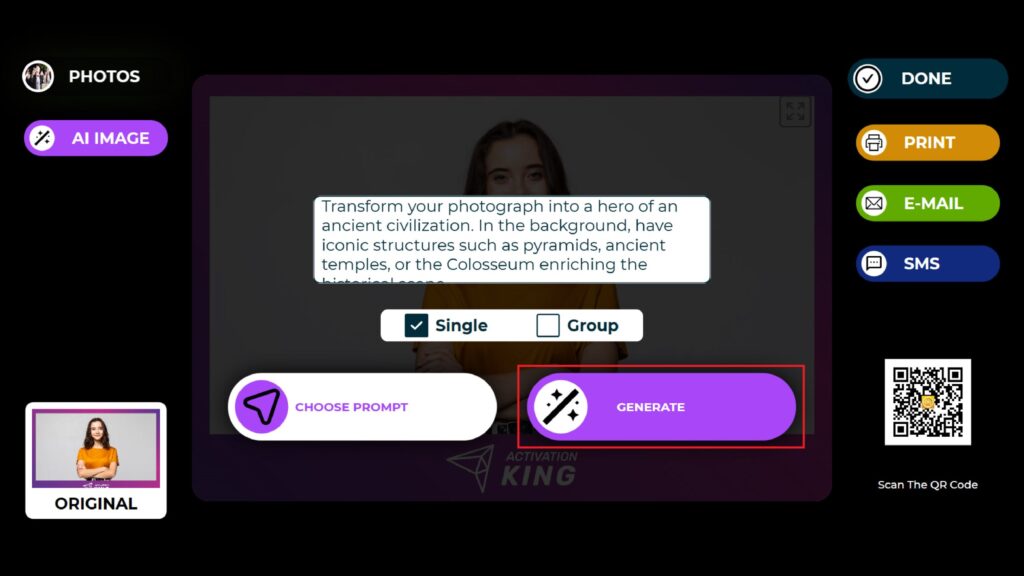
After selecting the prompt, I press the “Generate” button and wait for the process to finish.
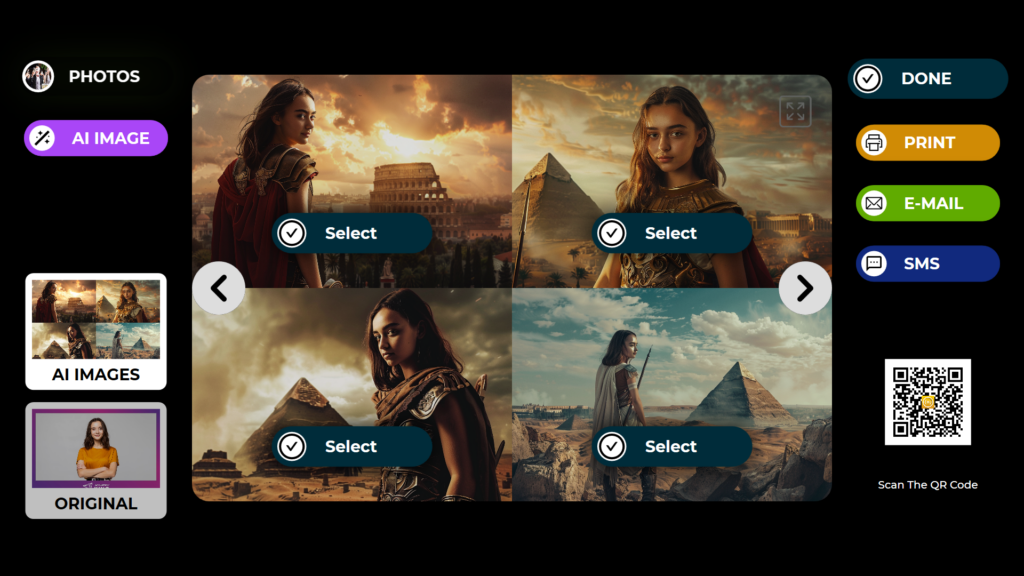
Once the process is complete, you’ll see 4 images related to your prompt.
We select the desired image by pressing the “Select” button. In the selected image, a “Face Swap” operation will take place, lasting approximately 10 seconds, to capture good facial details.”
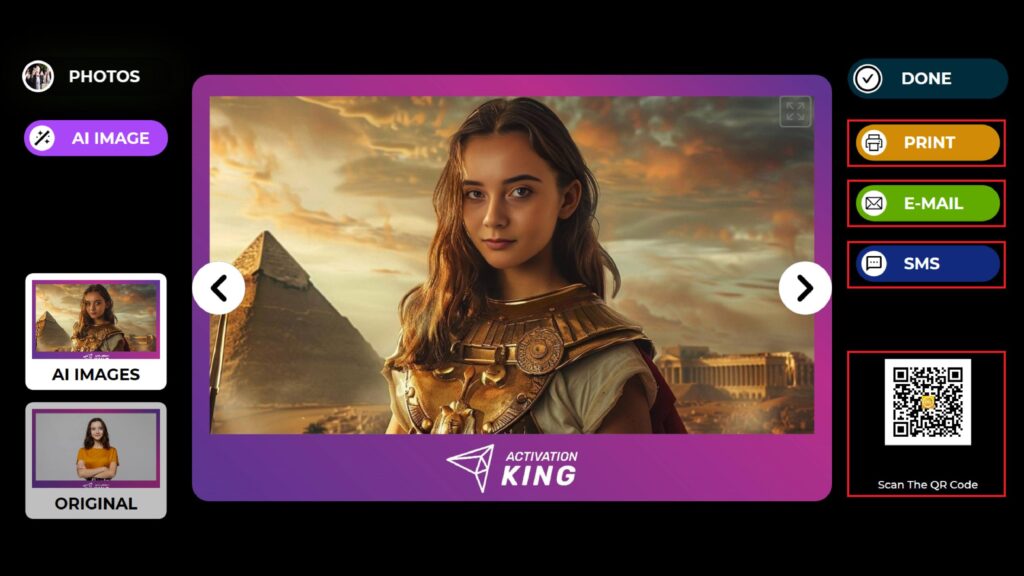
After the “Face Swap,” your image is prepared.
On the right side, you can obtain the image through Print, E-Mail, SMS, or by scanning the QR code.
If you want to perform another operation on the same image, you can press the “AI Image” button and repeat the process. This AI operation will continue to be stored in your gallery. You can access it anytime from the “Gallery” section.
To return to the capture screen, press the “DONE” icon.
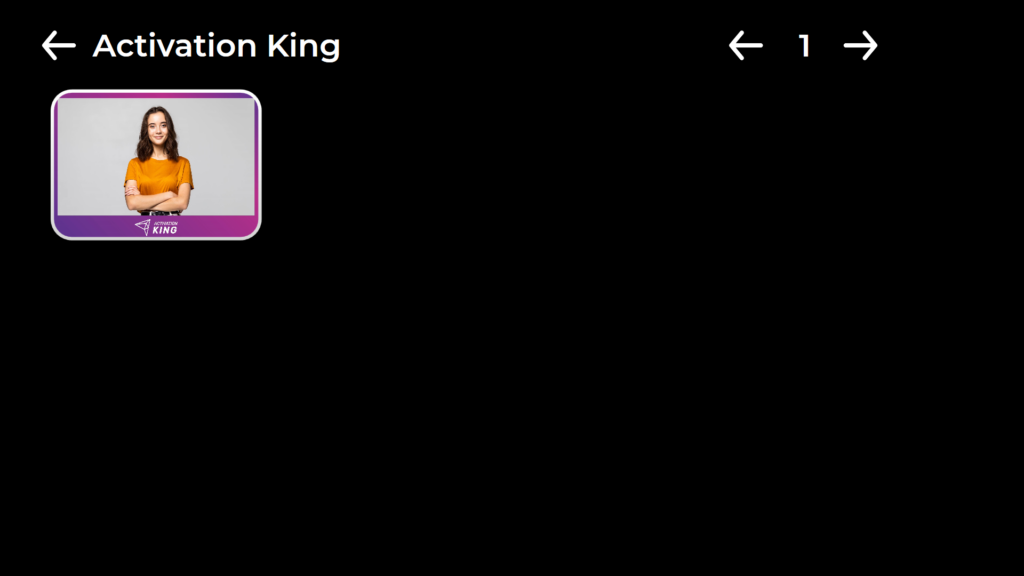
When you press the “Gallery” icon, you’ll access the images you’ve previously taken.
To return to the “Settings Menu,” simply press the “F11” key, or for users with a touchscreen interface, tap five times in a row on the top-right corner.
