Creating an Event with Mirror Booth
Step 1: Mode Settings
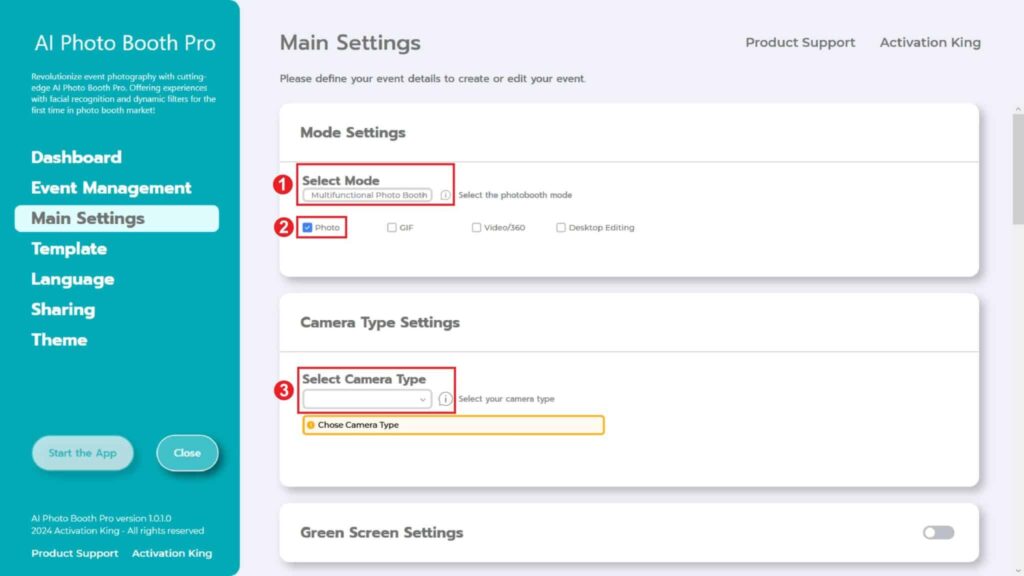
“Select Multifunctional Mode.” After making the selection, mark the “Photo” option from the choices below.
Step 2: Camera Type Settings
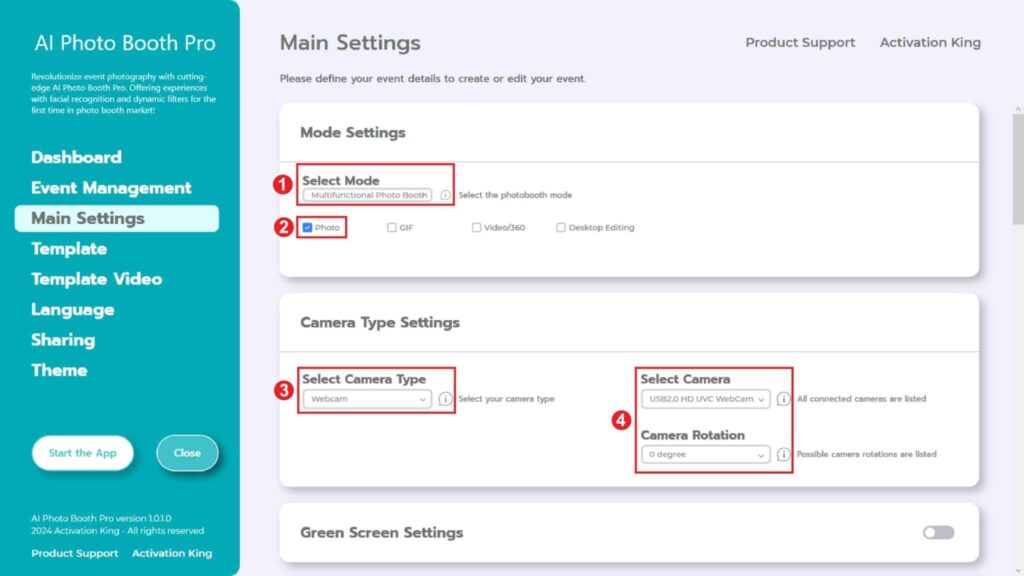
In the “Camera Type Settings” section, choose the type of camera you want to use from the checkbox labeled “Select Camera Type.” When you connect your camera to your computer, it will appear in the checkbox labeled “Select Camera.” (If it doesn’t appear, check that your camera is on and connected to your computer, then try again.) After selecting your camera, you can adjust the orientation “Camera Rotation” according to your horizontal or vertical usage.
Step 3: Camera Settings
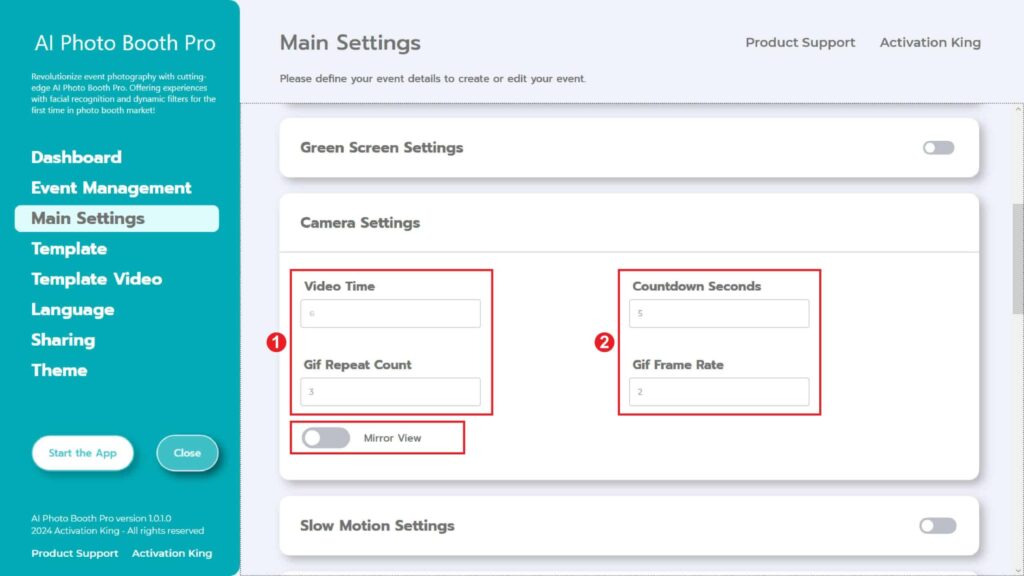
In the “Camera Settings” section, the “Countdown Seconds” part displays the time interval after giving the command to take a photo, during which you can see yourself on the screen and adjust your pose. In short, you can set your photo timer from this section.
If you want to mirror your photos, activate the “Mirror View” button.
Step 4: Template
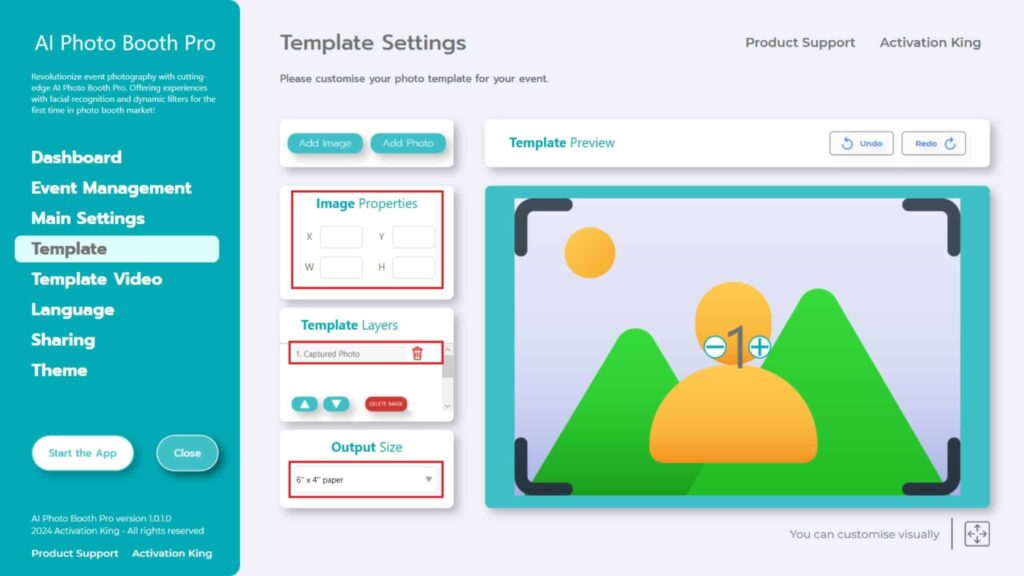
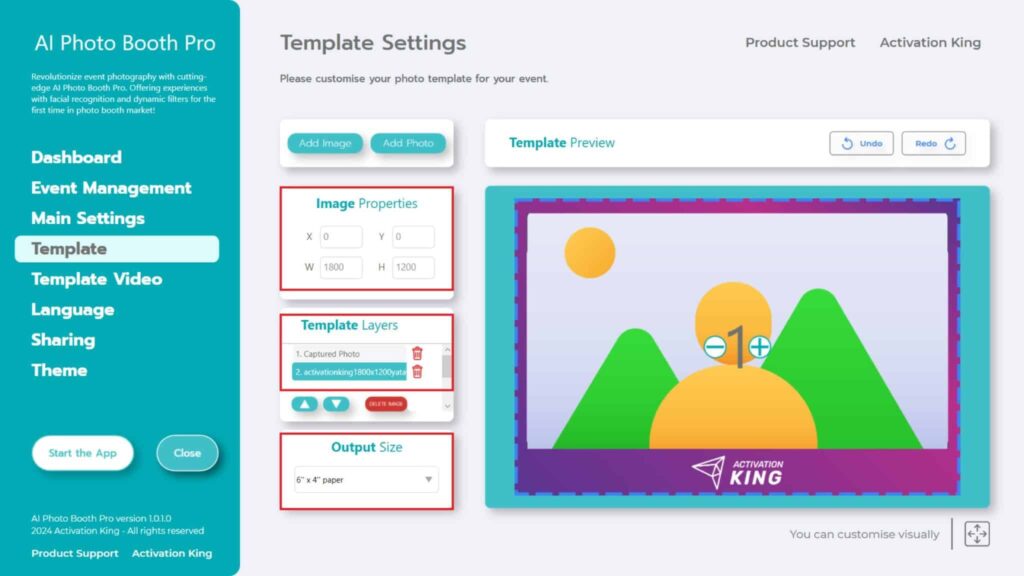
The “Template Settings” section is where we adjust the dimensions and positions of the photos we take, and where we add digital frames and stickers.
In the “Output Size” section, you can determine the dimensions of your photo. If you’re going to print, we recommend entering the dimensions of your print paper, such as 6×4 or 6×8. If you’re only doing digital work, you can also consider the other options, such as 1280×1280, 1080×1920, or 1280×720.
To add digital frames and stickers to your photos, press the “Add Image” section located above.
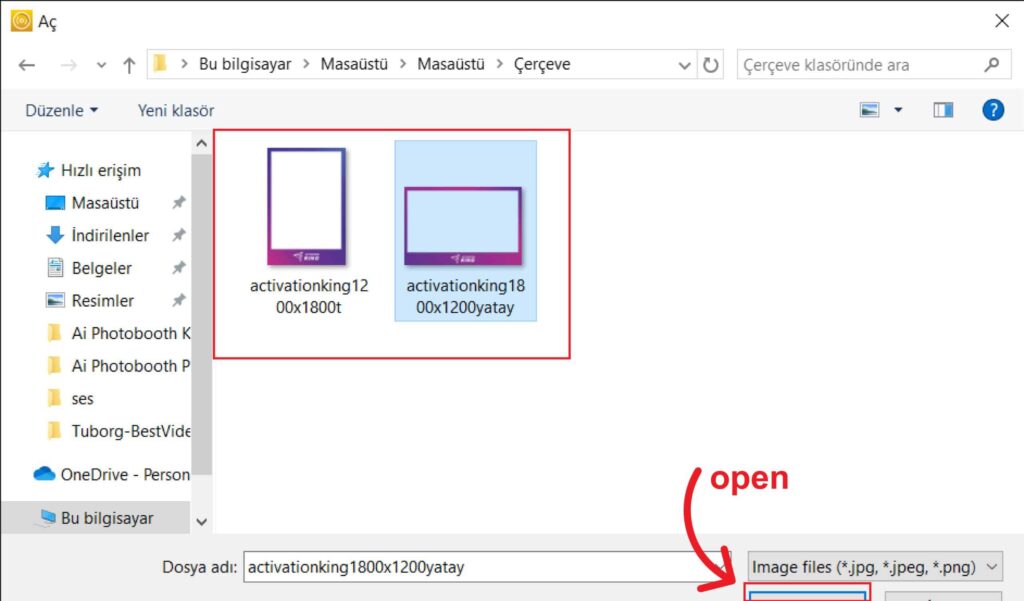
In this section, you select the horizontal or vertical frame you want to use and click on “open.”
If the frame you added has the same dimensions as your “Output Size,” it will automatically fit.
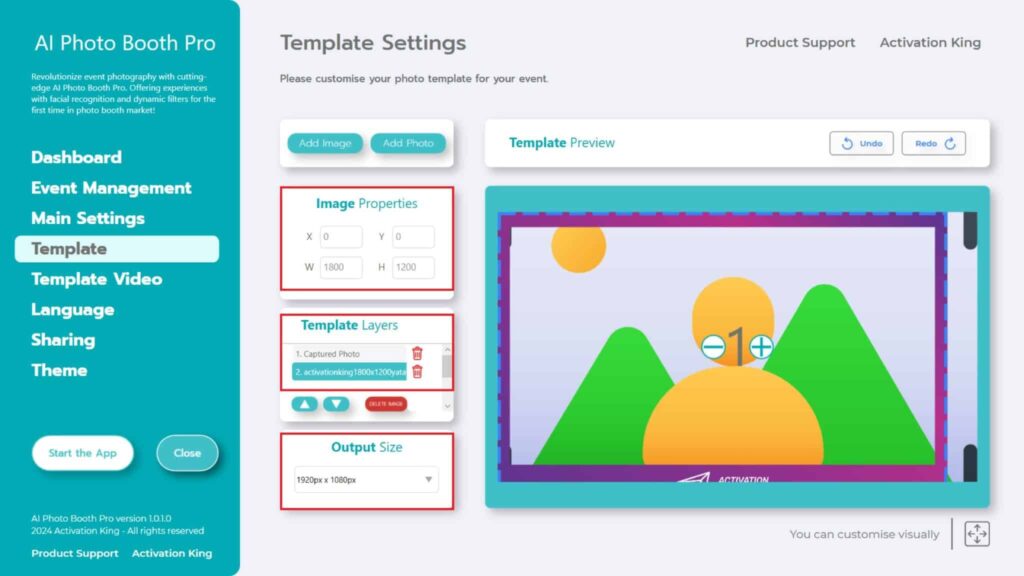
If the frame has different dimensions, click once on the frame in the “Template Layers” section. Enter the “Output Size” dimensions in the “Image Properties” section, and ensure that the frame fits perfectly onto the image.
Step 5: Theme Settings

“Theme Settings” is the section where you can customize the main screen settings.
Step 6: Wait Video Settings
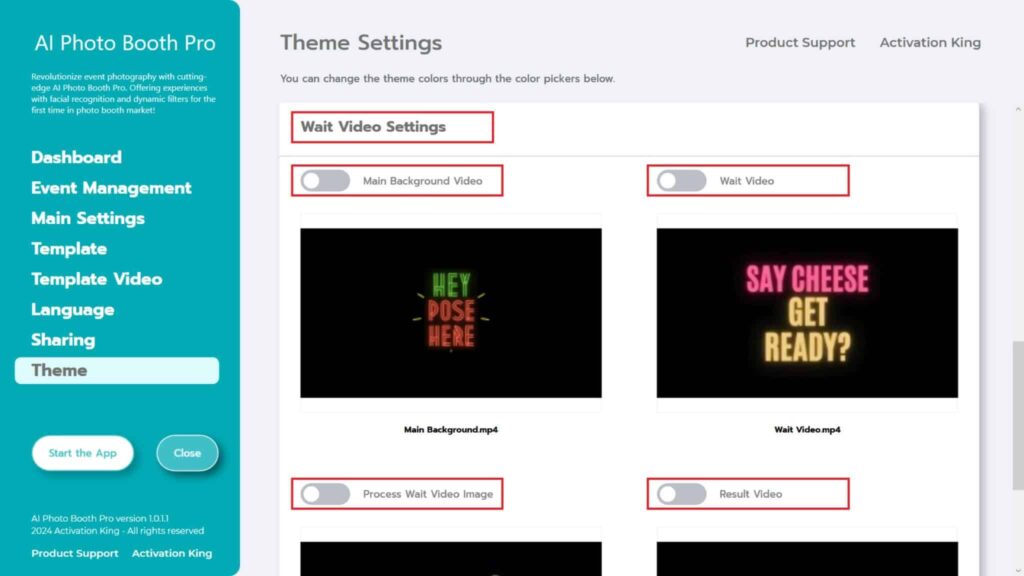
In the “Wait Video Settings” section, you can enhance the waiting periods during the photo shooting process by adding various videos, creating an enjoyable experience.
If you activate “Main Background Video,” the video you’ve added will play on your main screen.
Activating “Wait Video” will play the video you’ve added during the countdown screen.
Enabling “Process Wait Video Image” will display the video you’ve added after taking the photo.
Step 7: Start the Apps
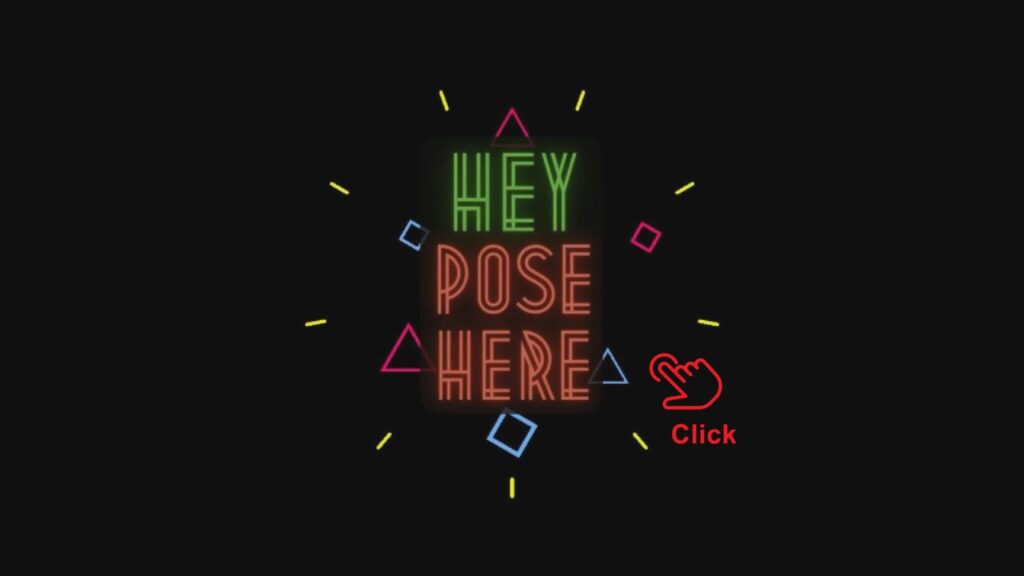
When you enter the “Start the Apps” section, you’ll be greeted with an animated screen.
Tap once on the screen.
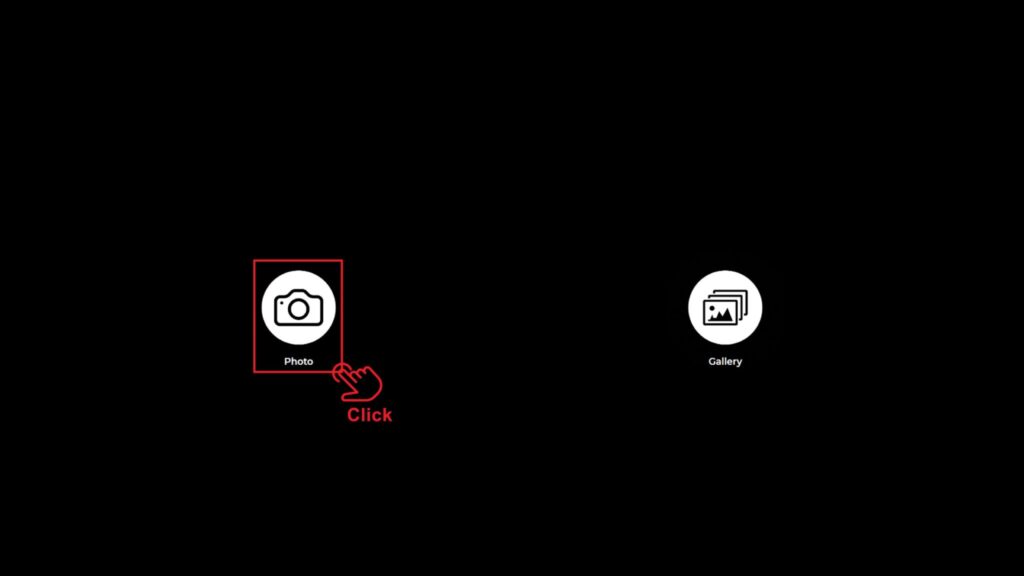
Click once on the “Photo” icon.
After the countdown screen you’ve set, your photo will be taken.
The photo capturing process will be accompanied by the videos you’ve added in the “Wait Video Settings” section.
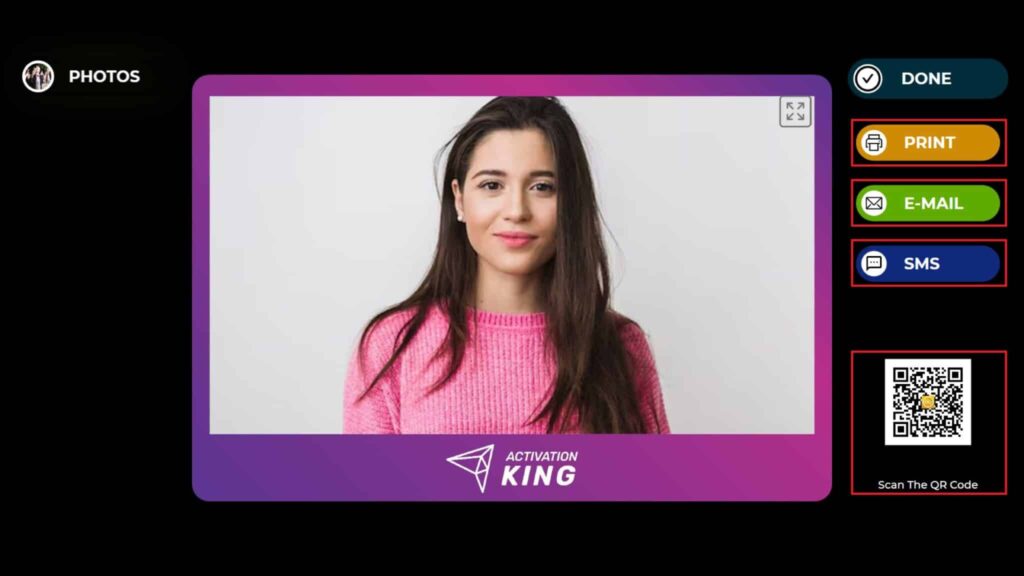
After taking the photo, your image will appear with the added frame.
On the right side, you can find options to Print, E-Mail, send via SMS, or obtain a QR code.
To return to the shooting screen, click on the “DONE” icon.
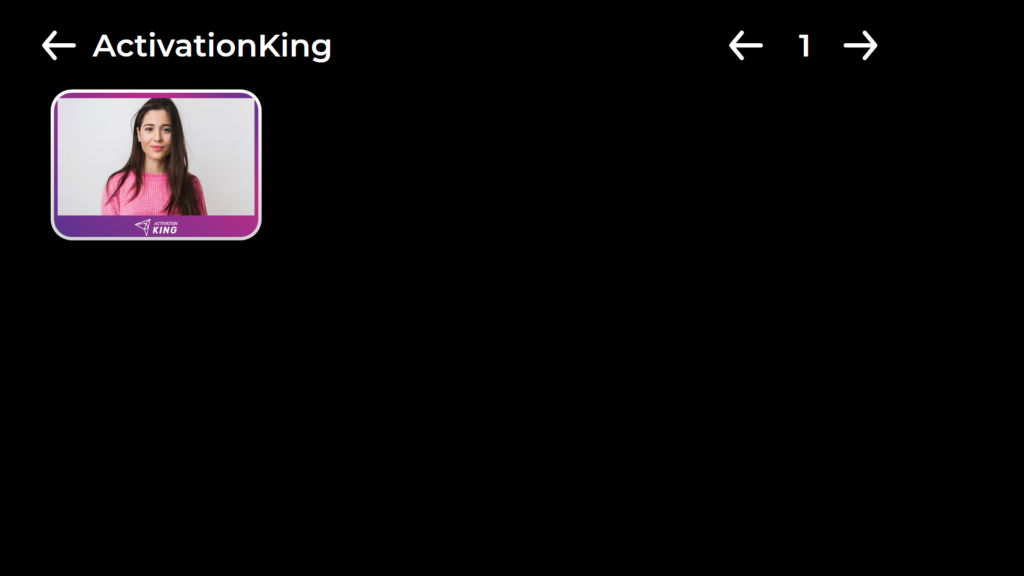
When you press the “Gallery” icon, you access the images you have previously taken.
To return to the “Settings Menu,” press the “F11” key, or for users with touchscreen devices, simply tap the top-right corner five times in a row.